Последние

What is Glazing? The technical answer is 1.) multiple thin layers of transparent oil paint (applied at the end of a painting)....but what I want YOU to remember is 2.) Glazing is pure magic 3.) Knowing how to glaze will take your painting abilities to the next level.
1.) Why glazing is an important painting strategy
2.) (We will touch a little bit on) The science of refracted light
3.) Which paints to use. (How can you tell if a paint is a glazing color?)
4.) Which brushes to use for glazing
5.) How to do it! (The technique of glazing oil paint)
Glaze layers happen at the final stages of a painting, so lets take you to the end of the painting that you just saw right now. I am going to keep things concise and to the point. Give me your full attention for the next few minutes and you will acquire a solid understanding of glazing.
1- Why is glazing an important painting strategy?
Think about the last time that you had a sunburn. When sunburns heal, a layer of skin usually peels off your body. Take a second to remember what that skin looks like. The peel of skin is very thin, smooth and it is possible to see light through it.
Our outermost layers of skin, the epidermis, is comprised of multiple layers of skin similar to the peeled layer of skin that you just imagined. Glazing, the application of multiple, thin, transparent to translucent layers, is like the epidermis of a painting and it is important for an artist to know how to glaze so that he or she can get a more life like effect to their work.
2- The Science of Refracted Light
Light refracts through the transparent and translucent layers of a painting. In other words, it penetrates these layers and picks up any color that these layers contain. A good analogy for this concept is a seashell on the beach. Think of how the color of a seashell seems to change when it is covered with ocean water. The shell seems to change color, but in actuality, all physical characteristics of the shell remain the same. The sunlight refracting through the water alters the shells appearance just as glaze layers affect the final appearance of a painting.
3- Which paints to use
Paint colors have different characteristics. For instance, red, is not just red when it comes to painting. Cadmium red, the color on the left, is extremely opaque and has a great covering power. The color on the right, alizarin crimson is extremely transparent with a lesser covering power. Notice how you can see the blue line through the alizarin crimson, but not the cadmium red.
Most paint companies label the outside of their paint tubes to communicate these differences. Usually a box or circle is used to say if a paint is transparent, translucent or opaque. A filled box or circle is a symbol stating that a color is opaque while the opposite is true if a paint is transparent.
When you glaze, you would add painting medium such as liquin to the paint. It is easy to glaze with transparent colors such as alizarin crimson but it is also possible to glaze with the cadmium red. In order to glaze with an opaque color, use a little bit of paint and a lot of painting medium. I would advise any beginner or novice painter to stick with transparent and translucent paints.
4.) Which brushes to use
When you glaze, have multiple soft tipped brushes within reach. A variety of sizes and shapes including round tip and fan brushes are ideal. Now we are ready for the demonstration
I did the glazing in three sittings over 21 days. It is important to let the paint thoroughly dry between glazes. If it doesnt, you will start picing up some of the previous layer. Notice that I am starting off by using two brushes. One to apply paint and the other to move the paint around. This is called dry brush technique and it is your most important glazing strategy. Dry brush gives you a smooth untextured finish......
I wouldnt recommend this for anyone trying glazing for the first time, but I am actually using titanium white when I create a highlight.....that is a white with extreme covering power....equal to what you saw with cadmium red. I use that only in the brighter highlight areas and when I use it, I use a ton of painting medium with it. ........
The shadows get a little tricky, I try to look at my reference photo to match the shape but I am very aware of their edges as well. If there is a soft edge, I soften it with another dry brush....This is VERY IMPORTANT....Do not clean your brush in mineral spirits or turpenoid. Instead, just wipe your brush on a paper towel because those paint thinners will dissolve the entire glaze.....If a brush becomes unworkable, put it aside and use another soft tipped brush.

Today, I am going to demonstrate a new artistic technique. I am going to merge the best qualities of two artistic mediums; oil painting and color pencil. What you are now watching is a time lapse of me building up layers of illustration marker and color pencil over a pencil drawing. In about a minute, I will slow the video down to show you that color pencils can be blended by using mineral spirits and a paint brush. I am doing this artwork on 110 lb. bond paper and please note that this method will not work as well on simple 20 lb. printer paper. This drawing was done as a tribute to Manhattanville Colleges iconic History Professor- Mr. Lawson Bowling. Professor Bowling is a mentor and friend of mine. He just completed his 25th year of service at Manhattanville College. It is an honor to give him this drawing and possibly turn him in to an internet celebrity.
The best quality of oil painting is that you can 1.) Blend while the paint is wet and 2.) Add multiple layers of new paint after the previous layer dries. The greatest nuance of color pencil drawing is the accuracy that is attained by using the very fine point at the tip of the pencil. I dip the paintbrush in to the mineral spirits and then dab it on a paper towel; then I drag the brush over my drawing. The mineral spirits quickly break down the thick cake of color pencil. The soft tip of the paint brush allows me to move and blend the pigment from the color pencil in a manner that is similar to the process of painting. It takes only a few minutes for the mineral spirits and pencil to dryAfter the mineral spirits dry, you can add more layers of color pencil. I have actually finished an oil painting with color pencil and an oil paint medium called liquin before, but to save time, I built up the flesh tones today with markers and color pencil.
by Merrill Kazanjian http://merrillk.com

Learn to draw Yoda step by Step
Subscribe to kazanjianm (Don't miss any new videos that I make)- http://www.youtube.com/subscri....ption_center?add_use
Facebook: Like me on Facebook to find out about live hangouts or to post your work!- http://facebook.com/kazanjianm
Twitter: I tweet! Do you? http://twitter.com/kazanjianm
My Website: http://merrillk.com
Art Supplies I Use in my Art Work- http://merrillk.com/?sid=135&idpage=supplies_i_use
YouTube Visual Arts Category Petition: http://www.change.org/petition....s/create-a-visual-ar
Step by Step Drawing Playlist: http://www.youtube.com/playlis....t?list=PLD6E34C7CD58

Try to notice that the shape around an angry eye is much more compressed than a calm eye. When a person is enraged, the muscles around the eye tighten and pull the eyelids inward. This creates deeper shadows and uncovers more of the white of the eye. In the angry eye there is a separation between the top of the iris and the eyelid.
Step 1- Draw a circle with a rainbow shape above it. Remember to leave a space about half of the size of the iris in between the upper lid and upper iris.
Step 2- Draw in the shape of the eyebrow. Make sure that it is angled downwards towards the inner corner of the eye. It should actually connect with the eye lashes on the upper eye lid
Step 3- Draw in the pupil and the lower eyelid. Leave a black space in the pupil for a reflection. The lower eyelid should graze the bottom of the iris.
Step 4- The bottom eyelid is literally wrapped around the eyeball. Make a bowl like shape below the eye and add a squiggly line on the inner corner of the eye to hint at the side of the nose.
Step 5- Shade the pupil and iris and the upper eye lashes. Please note that the upper eyelashes are thicker and fuller than the bottom ones.
Step 6- Shade in the eyebrow. Please notice that it is not evenly shaded throughout.
Step 7- Darken the area around the eye but do not touch the white area. The eyes seem to sink in more when a person is angry, creating deeper shadows. Merrill Kazanjian
Trate de notar que la forma alrededor de un ojo enojado comprimido es mucho más tranquilo que un ojo. Cuando una persona se enfureció, los músculos alrededor de los ojos y apretar los párpados tire hacia adentro. Esto crea las sombras más profundas y descubre más de la sustancia blanca del ojo. En el ojo enojado hay una separación entre la parte superior del iris y el párpado. Paso 1 - Dibuja un círculo con forma de un arco iris por encima de ella. Recuerde que debe dejar un espacio alrededor de la mitad del tamaño del iris en la parte superior entre la tapa y la parte superior del iris. Paso 2 - Dibuje en la forma de la ceja. Asegúrese de que está en ángulo hacia abajo hacia la esquina interior del ojo. Debe conectarse realmente con los ojos las pestañas en la parte superior párpado Paso 3 - Dibujar en el alumno y el párpado inferior. Deje un espacio negro en el alumno para una reflexión. El párpado inferior debe rozar la parte inferior del iris. Paso 4 - La parte inferior del párpado es literalmente envuelto en todo el globo ocular. Hacer un plato debajo de la forma como el ojo torcido y añadir una línea en la esquina interior del ojo a la pista a un lado de la nariz. Paso 5 - La sombra de la pupila y el iris del ojo y la parte superior de las pestañas. Tenga en cuenta que la parte superior de las pestañas son más anchas y más completa que la parte inferior queridos. Paso 6 - Sombra en la ceja. Tenga en cuenta que no es uniforme en toda la sombra. Paso 7 - Oscurecer la zona alrededor del ojo, pero no toque el área blanca. Los ojos parecen hundirse en más de una persona cuando está enojado, la creación de las sombras más profundas. Merrill Kazanjian
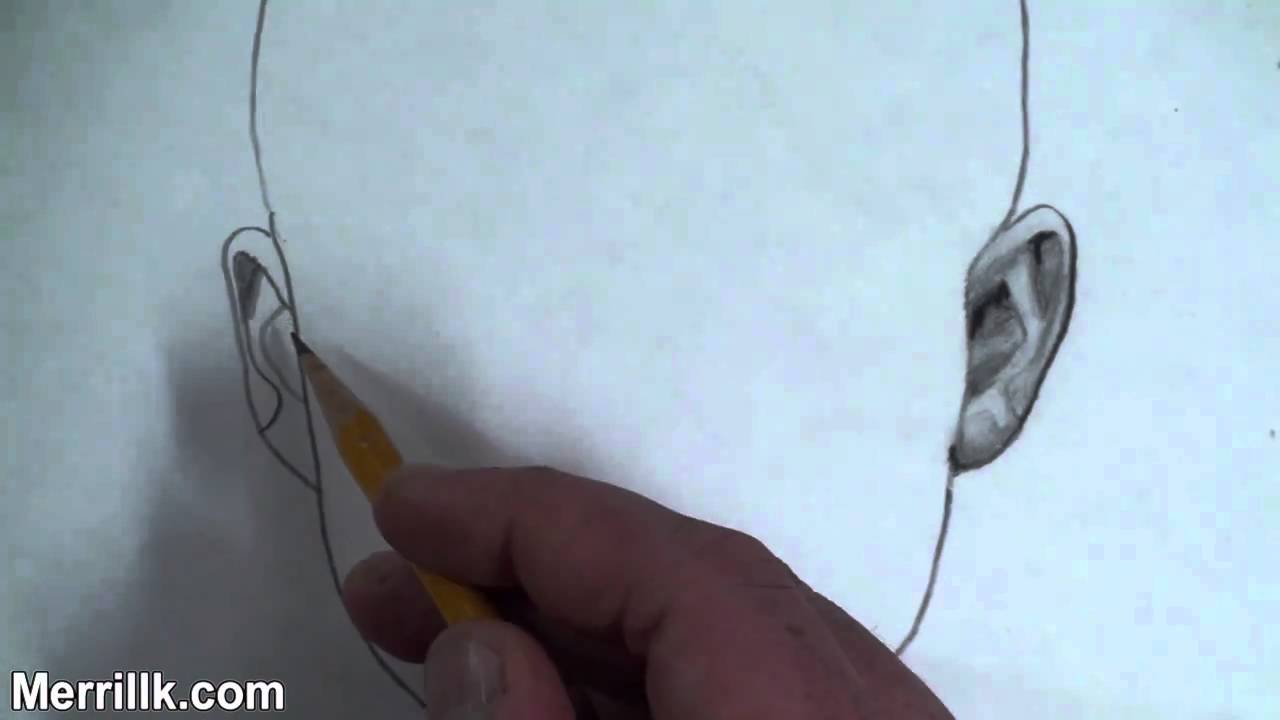
Welcome to the third part of my three video tutorial. These tutorials will show you how to draw the ear at the three most common angles. This video will specifically show you how to draw the ear from the perspective of the front of the face. I recommend that you pause the video at the end of each step and listen to the instructions. Lets begin.
Step 1: Make the two shapes that you see. Notice that the top part of each shape is wider than the bottom.
Step 2: Observe the reference image and then draw in the lines that I just added
Step 3: Step 3 is a little bit confusing, so be sure to take your time. I just added a line to each side and a rainbow shape on the inner part of the ear.
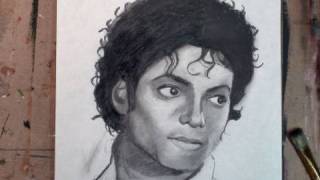
LINK- http://merrillk.com/?part=fineart&articles_id=8423&act=artist1&artist=69&collection=114 Hey, I got a question. Do you "Remember the Time" that you asked me to do a tutorial on how to draw Michael Jackson? Well, this "Smooth Criminal" listened to your requests because i'm not one of those youtubers who says "Leave Me Alone." I like "The Way You Make Me Feel" when you leave comments and give me feedback....so thank you!
This video is going to break the process of drawing Michael Jackson down in to simple steps.... just like "ABC".... which is as easy as 1,2,3. After the easy steps, you are going to learn how to build tones so that you can shade your drawing. But dont stress, because it don't matter to me if your drawing is too "Black or White". If you mess up, just keep it "In the Closet" and hit the link in the video description so that I can really help you. The link will take you to a Michael Jackson drawing cheat sheet with step by step pictures. Its my way of saying "Ill be There", because I dont want your drawing to be "Bad".
Art "Heals the World".... and I "Wanna be Starting Somethin" on my youtube channel. So please click on the little old "Man in the Mirror" to subscribe! I "Want You Back", and not too many people can spell kazanjianm. So Come on.... youll get a free art education, and I "Dont Stop Til You Get Enough". You cant "Beat It".
Note: This drawing is of Michael from early to mid career when he was in his mid to late twenties. I used several reference images from the Thriller Era to make this drawing (although none are shown in this video).
Step 1: Draw the two oval shapes for the area around the eye. Notice that the shape on the right is slightly smaller than the one on the left.
Step 2: Make the shapes for the bottom of the nose and the top lip. Take some extra time to observe and perfect the spacing.
Step 3: Add the contour line to create the shape around Michael's face. Be sure to notice that Michael's head is turned towards his left. Also be sure to notice that the oval shape on the left side of his face, is touching the contour line.
Step 4: Add the shape for Michaels ear and hair. His ear is partially blocked by his hair, but notice that his ear goes from where his eyebrows will be, to almost the bottom of his nose.
Step 5: Add the four shapes that make up the neck and the shirt.
Step 6: Observe the eye region and add the eyes and eyebrows. Notice that the eyebrows are connected to the top of the oval shape from step 1. The eyes are almond shaped and are at the bottom of the oval shape. Be sure to notice the spacing in between the eyes and eyebrows.
Step 7: Add more curls to Michaels hair and details to his ear. Dont waste your time copying from the reference image for this step. Make your own or else you will drive yourself crazy!
The second part of the video will teach you how to shade your drawing of Michael Jackson. I will use a paintbrush to do my blending and shading as well as a set of drawing pencils. I use a HB pencil to start as well as a 4B pencil and a 9B graphite stick to draw the hair. The eyes and the hair are the darkest tones in the drawing and I always start off with the eyes. Regardless of a persons hair color the eyes are the darkest feature of the face. I use a method called cross hatching where lines are drawn one after another and next to each other. After I cross hatch, I blend with a paint brush and then do another layer of hatching on top of the previous layer. This method allows me to build deep, rich tones in my art work. Learn to draw, tutorial man draws perfect face "how to draw famous people step by step"

WE NEED A VISUAL ARTS CATEGORY ON YOUTUBE THREAD-http://www.google.com/support/forum/p/youtube/thread?tid=2a9806f929074cbd&hl=en&fid=2a9806f929074cbd0004b630ad37cc3e
Facebook- http://facebook.com/kazanjianm
Twitter- http://twitter.com/kazanjianm
Website- http://merrillk.com
(Merrill) Supplies I Use- http://www.jdoqocy.com/click-4....247664-805536?url=ht
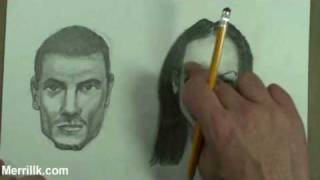
This video will give you explicit instructions on how to draw the rapper Eminem, step by step. Just follow the instructions on the eight steps that I give you and shade along with me during the shading tutorial at the end of this video .....and I guarantee that you will surprise yourself with your drawing. Lets get started.
Cold Wind Blows, Talkin 2 Myself (ft. Kobe), On Fire , Won't Back Down (ft. Pink) W.T.P. (White Trash Party) Not Afraid Seduction No Love (ft. Lil Wayne) Space Bound Cinderella Man 25 to Life So Bad Almost Famous Love the Way You Lie (ft. Rihanna)You're Never Over Without Me Sing For The MomentLose Yourself Mocking Bird The Real Slim Shady The Way I Am Like Toy Soldiers Stan Superman Beautiful My Name Is White America Just Lose It Going Through Changes Insane Cleanin' Out My Closet When I'm Gone Hello Soldier Seduction Kill You Guilty Conscience Bagpipes from Baghdad Hailie's Song Square Dance Stay Wide Awake Role Model Criminal Marshal Mathers Say Goodbye Hollywood Must be the Ganja Who Knew Drug Ballad Till I Collapse Bad Meets Evil American Psycho 2 Armageddon Freestyle Dead Wrong Don't Approach Me Forget About Dre Everything is Shady Brain Damage Bumps Head Crack a Bottle Come on Everybody Curtains Up Come On In Don't Push Me Failed Destiny Go To School If I get Locked Up Tonight Make Some Noise I'm Having a Relapse Just the Two of Us Jimmy Crack Corn My Words are Weapons Nail in the Coffin Off the Wall One Last Time My Fault Never Enough No Apologies Public Service Announcement Rabbit Run Shady Narcotics So What You Say We all Die Someday We As Americans When the Music Stops You Don't Know marshall mathers matters
Step 1: Make a bowl shape. Notice that the left side of the bowl is more vertical than the right side of the bowl, which is more curved. Also, make the other two parallel lines that you see. One is slightly left of the middle of the bowl shape and the other is to the right of the bowl shape.
Step 2: Make Eminem's ear. Notice how it fits perfectly with the lines from step 1. If you need more explanation on how to draw an ear at this angle, click on the image to go to one of my ear tutorials, and then come back.
Step 3: Draw in the mouth shape. The two lips together look like a flattened heart shape. Notice that the bottom lip is slightly thicker than the top lip. Also notice that the top lip slightly resembles a lightning bolt.
Step 4: This is by far the trickiest step. Complete the outline of the face. The only way that you will get this is by observing this reference picture. Notice that the face goes up about three times the height of the original bowl shape. Use the ear and the mouth as reference points or comparison points to where the line goes. If there's vomit on your sweater already, i'm worried......but if you get this step, you will get the entire image, so push it.
Step 5: Make the small line above the mouth.
Step 6: Make the nose shape. It should stem from the line that you made from step five. Eminems head is turned and only one nostril is clearly visible. Notice that there is only a line on the left side of the nose and it leads up to the eyebrow shape on the left. The inner part of the eyebrow on the right lines up perfectly with the right edge of the nostril.
Step 7: Draw in the hair shape. Notice that it gets wider towards your right hand side at the top. Also, notice that the line for the top of the hair meets with Eminem's ear and then continues to his neck.
Step 8: Add the eyes. Notice that there is about one eye length between each eye. Overall, the eye shapes are almond shaped but have other lines around the almond shape on the top and on the bottom.

Facebook- http://facebook.com/kazanjianm
Twitter- http://twitter.com/kazanjianm
Website- http://merrillk.com
(Merrill) Supplies I Use- http://www.jdoqocy.com/click-4....247664-805536?url=ht
Music by Kevin MacLeod- http://incompetech.com Thank you Kevin!
The winner is orangemonkey92! Congratulations to Mr. Serafin Ureno!
About the Contest: (Narration from Video) "You've asked for it, so lets start the new year in a fun way by having an Art Contest! Here is your challenge question: "What did my channel mascot, Little Old Man look like when he was a young man?" To answer this challenge, you can use any media that you want - be creative and have some fun.....etc..... Remember you have over 140 videos to help you with this task on my channel. When I judge the artwork, I will be looking for humor and creativity but your artwork will have to resemble a younger version of Little Old Man. But Merrill, whats the prize? I will make a pencil portrait and a step by step video of the winner so that the world can draw YOU! I will also feature the winning artwork and the winners youtube channel in an upcoming video. Now for the rules so listen carefully. You will need to follow all three of these rules to win. 1.) Post the words "Im in" in the comments section of this video. 2.) You have to be a subscriber to kazanjianm to be entered, so hit the subscribe button in the video if you haven't subscribed yet. 3.) You can post your entries in one of two places. Your first option is to take a video of your entry and post it as a video response to this video. Your second option is to post your entry to my facebook like page- If you do that, make sure to submit your entry with your channel name. Just hit the link in the video description or visit my channel page to get to my facebook like page. The deadline for entries is January 15, 2011! I cant wait to see the artwork and I will respond to every single entry. Happy new year everybody!"
Link- http://merrillk.com/index.php?part=fineart&articles_id=4676&collection=114
This video will illustrate the differences between male and female faces. In part 1 of this video, I will compare male and female facial features, bone structure and musculature. In the in the second part of this video, I will do a demonstration. During this demonstration, I will review what we learned in the first part and teach you how to draw the nuances of the male and female face for artistic (art) purposes. During my demonstration, I use a pencil an eraser and a blending stick (stub) also known as a tortillion.
Lets look at the differences of the male and female skull first and then we will work our way up to the skin. Male and female children have similar skull shapes. But once children hit puberty, the differences start to appear. Testosterone provokes the growth of certain facial features in males, while female faces remain relatively childlike. The presence of higher levels of testosterone give men a thicker bone structure with more prominent bones. Male faces have a wider, more prominent jaw, chin and cheekbones (also known as the zygomatic arch). The physical size of the male skull is usually larger than the female skull. A very distinct characteristic of a male skull, is a protruding supraorbital ridge also known as a brow line.
Female faces are more rounded and tend to have a narrow jaw line. They have a softness that the male face lacks. It carries more fat than the male face, especially in the cheeks. Female faces tend to have thicker lips and a higher arch on the top lip. Female eyebrows generally sit a little higher than male eyebrows and they usually have a thinner and more arched shape, mainly due to plucking. The female nose tends to be smaller, shorter and have a narrower bridge and nostrils than the male one. Also, female noses often have a straighter or more concave profile. Men tend to have thicker and lower eyebrows than women. The male jaw line is wider than the female chin. It is also more muscular and square in shape. The lips are thicker and more full on a female. Also there is less of a distance between the arch of the top lip and the bottom of the nose.
Before we go on to part 2. I want to make this complex subject as simple as possible so I took notes for you! If you are watching this on youtube hit the link. If not, just go to my website Merrillk.com and type skull in the search box and download this cheat sheet for when you draw.
Merrill Kazanjian is a contemporary artist based in New York City. He is also a New York State Certified Art instructor with 8 years of experience. He specializes in drawing, painting and mixed media art.

WE NEED A VISUAL ARTS CATEGORY ON YOUTUBE THREAD-http://www.google.com/support/forum/p/youtube/thread?tid=2a9806f929074cbd&hl=en&fid=2a9806f929074cbd0004b630ad37cc3e
Facebook- http://facebook.com/kazanjianm
Twitter- http://twitter.com/kazanjianm
Website- http://merrillk.com
(Merrill) Supplies I Use- http://www.jdoqocy.com/click-4....247664-805536?url=ht
Every artist goes through growing pains while learning their craft. I recently got an interesting comment from a subscriber who wrote, " Merrill could you please make another video for practicing the shading. I made my drawings good than i screw them up with shading! please help!
Fut Duppe was famous for ruining his portraits, by shading too much. His name has entered the colloquial and artists often express their displeasure while critiquing a work by saying phrases such as, "Wow! Your drawing is Fut Duppe" meaning that it is flawed in the quality of the shading. Here is an example of a Fut Duppe Drawing. Girls dont have moustaches........Thats Fut Duppe.
Step 5: Take out a ballpoint pen in a color that is not similar to the pencil shading of the Fut Dup Drawing. Go over every correct line. Do not touch the Fut Duppe parts. It is imperative that you do not move the paper while doing this to prevent a second Fut Duppe Drawing. Essentially what we are making is a print.
If you follow my steps correctly the graphite on the back will make a print on the paper below, thanks to the pressure from the ball point pen.
Step 6: After you finish retracing the lines that you want with the ballpoint pen, remove the Fut Duppe Drawing from the paper below. You are now be able to restart your shading and there should be no fear of screwing up again because this process can be repeated as many times as you want.
So there you have it. Now the young artists of the world know that can take chances with their shading without worrying that they are going to BLEEP it up. Happy drawing everybody!
Song- Brandenburg No4-1 BWV1049 by Kevin MacLeod of Incompetech.com

This video will teach you how to draw a realistic looking face with a happy (smile) expression. The "calm" eye is almond shaped but when a person is smiling, squeeze the two eyelids together. The "calm" eye is almond shaped but when a person is smiling, squeeze the two eyelids together.Notice that you can see the fold of the upper eyelid a little bit more. The eyebrows and forehead are in a relaxed position. To draw a smiling face successfully, you need to be able to make the cheeks seem more rounded....especially with the shadow below the cheek! Right now, I am adding a construction line for where the shading will go.( I am working from a reference picture, BTW.) To draw a smiling face successfully, you need to be able to make the cheeks seem more rounded....especially with the shadow below the cheek! Right now, I am adding a construction line for where the shading will go.( I am working from a reference picture, BTW.) SLOWLY build up the shading and be very patient! CONFESSION: I used non drawing paper for this drawing! Watch and see what it does when I erase! ARGH!!!! Yes there is a difference!OK couldn't wait! "Drawing paper" is more textured....or as artists say...."has more tooth"....watch the shading VANISH when I erase because the surface is as slippery as ICE! ARGH!!!! The eyebrows are NOT one solid tone. Try to observe the eyebrows of whoever you are drawing before shading them. The only exception is when heavy make up is applied.....Maybe its Maybelline! Shading is ALWAYS dependant upon LIGHT! There are no universal rules to applying tones to drawing.....because lighting conditions vary so much! REMEMBER THAT! In this case, the light came from above. This is most often the case. Notice the shadow that I am adding between the brow and eye. When drawing a smiling face, the area UNDER the eye is very important! The orbicularis oculi muscle (muscle around eye) contracts...The eye is ball shaped.....thus "eyeball"....our shading has to show that it is ROUNDED!The brush is a BIG help. It allows me to shade something delicately....which is needed, when drawing skin.....I use bristle AND soft tipped brushes.... both give slightly different effects. REMEMBER, when a person is smiling, you will (usually) only see their top row of teeth. ALSO, notice the corners of the mouth. Notice that the two sides of the mouth are shaded dark (because the teeth wrap around in a horseshoe shape).REMEMBER, when a person is smiling, you will (usually) only see their top row of teeth. Everyones smile (the shape of their mouth during a smile) is unique! OBSERVE OBSERVE OBSERVE! Draw in the lashes as triangular masses. Notice that the top eyelashes are a LOT longer and fuller than the bottom lashes. This is the case for everybody. Males, in general have shorter lashes than females...Maybe he's born with it...Maybe its TESTOSTERONE! If you are GOOD at line drawings and want to work on shading, make photocopies of your work so that you can make multiple attempts at shading....you will learn FAST! TRUST ME! CLICK HERE to go to my shading tutorial.....It gives you a link to a print out worksheet (so that you could shade along with me.) Remember SHADING is all about RELATIVITY! So compare the tones of different areas of your reference image or sitter. Be sure NOT to make the "smile line" look too much like a "line".....just like the eyebrows, it is NOT a solid shape! Right now I am using a tortillion (blending stump). It moves the graphite from the pencil more quickly and efficiently than the paint brush. Tortillions are also very good at making lines. They are simply stumps of paper shapes like pencils. The edges of the face are TRICKY.......YES, they need to be darker in tone to seem rounded but they cannot appear as a solid line, or else your drawing will not seem believable. NOTICE that I am using the technique of cross hatching (line next to line) to apply the tones....then I am smudging it....followed by another layer of hatching...or I could then create a highlight with the eraser. Be careful with the hairline. It is always a gradual transition of tone....Believe it or not, even if a person is BALD, the top of the head is rounded and requires a gradual gradation of tone! The areas around the eyes seemed dark before.....right?....See what happens when you add darker tones? Shading is ALL ABOUT RELATIVITY! I did the hair with a 9B graphite stick BTW! Try to notice the subtle shading that I am doing to round the forehead.....Remember that I want to make it seem serene, since the facial expression is a smile. I am going to darken the corners to make it seem rounded. QUICK! DONT LOOK AT THE SCREEN! Merrill is using his fingers! Tsk Tsk! I am only using them because of the "skating rink" that I am drawing on (I am using non drawing paper which does not have a textured surface
Canon Performed by Kevin Macleod (http://incompetech.com) ISRC: USUAN1100301

Listen carefully and do everything I say and what you are about to see....is going to blow your mind.
There are three simple steps in this process.
Step one: Press the full screen button at the bottom of this video player.
Step two: will take 30 seconds of your undivided attention. I want you to stare at the red dot in the middle of the Little Old Man's nose. But not yet. Wait for the music to start.
Step three: As soon as the music stops, Turn your eyes towards the wall or ceiling or somewhere else with a plain surface.
Immediately, start blinking your eyes quickly!
Are you ready to begin? Remember, just stare at the red dot and try not to blink. Then, when the music stops, turn your eyes to a plain surface and blink your eyes quickly. Ready? Go!
Now find a plain surface and blink your eyes as fast as you can!
WE NEED A VISUAL ARTS CATEGORY ON YOUTUBE THREAD-http://www.google.com/support/forum/p/youtube/thread?tid=2a9806f929074cbd&hl=en&fid=2a9806f929074cbd0004b630ad37cc3e
Facebook- http://facebook.com/kazanjianm
Twitter- http://twitter.com/kazanjianm
Website- http://merrillk.com
All music by Kevin MacLeod http://incompetech.com Thank you Kevin!

WE NEED A VISUAL ARTS CATEGORY ON YOUTUBE THREAD-http://www.google.com/support/forum/p/youtube/thread?tid=2a9806f929074cbd&hl=en&fid=2a9806f929074cbd0004b630ad37cc3e
Facebook- http://facebook.com/kazanjianm
Twitter- http://twitter.com/kazanjianm
Website- http://merrillk.com
(Merrill) Supplies I Use- http://www.jdoqocy.com/click-4....247664-805536?url=ht
This video will give you step by step instruction on how to paint a realistic human eye. Just follow my step by step instructions and pause the video at the end of each step and you will surprise yourself with the end result. Lets begin.
Step 1: Draw the almond shape and the U shape to begin your eye. Please note that I am using a regular pencil on canvas paper. Many painters prefer to use a charcoal pencil for when they draw their under drawing, since the charcoal will blend in to the paint.
Step 2: Add the circle for the iris and then the line for the fold of the eyelid.
Step 3: Add the shapes in the corners of the eye.
Step 4: Add the eyelashes. Be sure to notice that the eyelashes on the top are more full and longer.
Step 5: Add the eyebrow. Notice that it slants downwards towards the inner corner of the eye. Be sure to notice its placement in relation to the eye shape.
Now its time to paint. I chose a simple palette with very common colors such as Lamp Black, Titanium White, Ultramarine Blue, Cadmium Red, Cadmium Yellow and Green Earth. For the next section, pause the video every 30 seconds and observe the image on the screen. Also be sure to listen to the hints that I give you as I narrate.
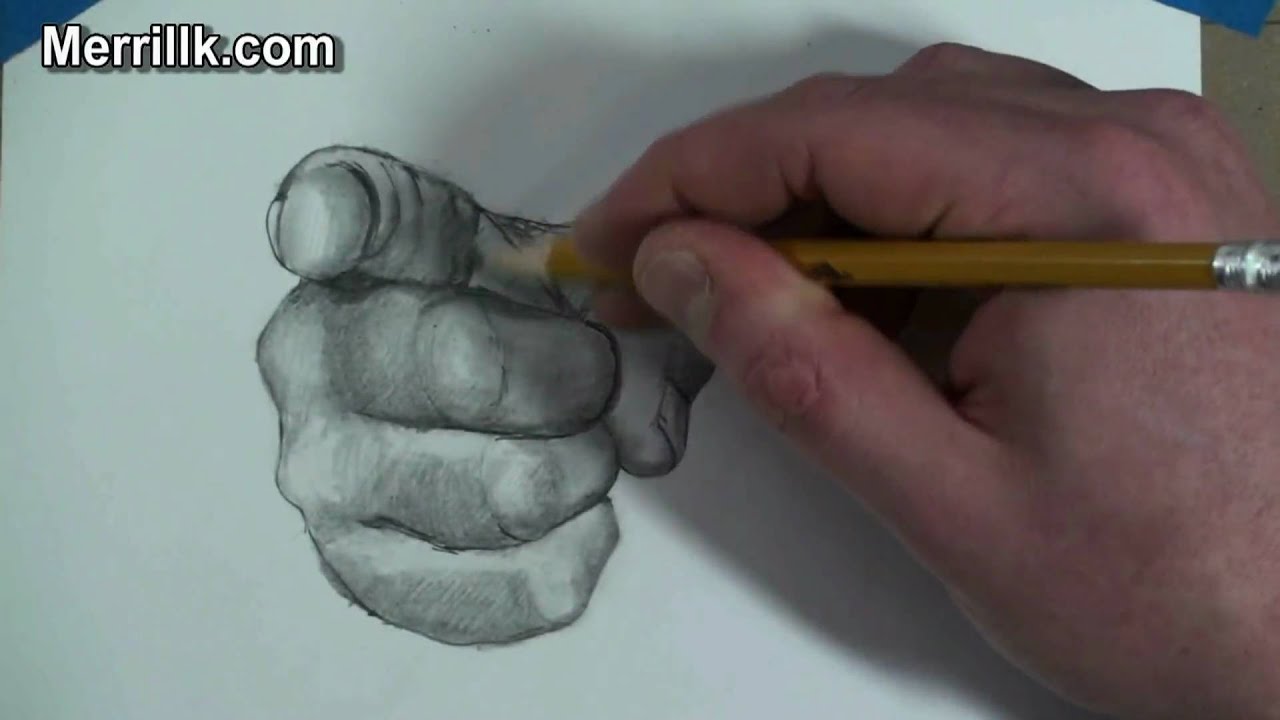
Link-http://merrillk.com/index.php?part=fineart&articles_id=6414&act=artist1&artist=69&collection=188 How to draw the Uncle Sam pointing hand pose. This is the first in a series of videos that I will make on drawing the hand. In this video, I am going to teach you how to draw a pointing hand step by step. I have gone out of my way to make this as easy as possible and I made three resources to help you. The first resource is this video, where I will demonstrate the process for you. The second is a link to step by step directions on my website. The third resource is a printable PDF file with big pictures and text. Also, check http:merrillk.com in the coming weeks for printable PDF's for all of my videos. Alright, lets get started!
Be sure to pause the video at the end of each step and look at your reference image as much as possible.
Step 1: Make three ovals that get slightly smaller (from top to bottom).
Step 2: Put in the three connected shapes that I just added. Notice the angle that the top and bottom lines create as they slope inward towards each other.
Step 3: Observe the picture (above) and put in the four lines. Notice the direction of each of their curves.
Step 4: Put in the shape for the pointer finger. The small banana shape that you see to the left is the fingernail. Do not close the top!
Step 5: Close the shape to create the knuckles.
Step 6: Put in the triangle shape above the pointer finger.
Step 7: Close the shape at the top by connecting the top of the banana shape with the top of the triangle. Notice the creases of skin on the foreshortened finger.
Step 8: Put in the shape that sort of looks like a birds head from the side.
Step 9: Make a kite shape below the beak of the bird head shape.
Step 10: Close the shape
Now its time to shade. You will need a q-tip or blending stump for this part.

LINK- http://merrillk.com/?part=fineart&articles_id=7450&act=artist1&artist=69&collection=114Lets get started.
with the most common unit of measurement- a head length. Head lengths are the most common measurement in figure drawing From antiquity through the Renaissance, artists painted and sculpted figures that were 8 or 9 head lengths tall. For instance, Michelangelo's David, when measured, is 8 head lengths tall. The proportions of the David are idealized and heroic and different than the proportions of the average person, such as myself. I measured 7 1/4 head lengths tall. Now, I could never get a consistant answer on how many headlengths tall the average human body is....so I decided to construct an experiment. have read in some places that the body is as short as 7 head lengths and as tall as 8. I measured 100 people. 50 males and 50 females....right now you are seeing only a small sample... I made sure to include various body types to make this study scientific. I was able to learn that a humans proportions in head lengths is directly related with a persons height. The shortest person measured only 5 and 1/3 head lengths...the tallest was 8 and a half head lengths. ...But the vast majority were very close to 7.5 head lengths....and When I averaged the 100 people together, the result was 7.47 head lengths. Merrill! What the Hell is that .....and how does this relate to figure drawing? ......Oh dont worry, this chart shows you a normal distribution of heights. All that you need to know is that you can use 7.5 head lengths as a fairly accurate measurement, 95 percent of the time. So there its settled. The average human is 7.5 head lengths tall. Spaces on our bodies equivalent to one head length are...on our arm, 1.) from the top of the armpit to the joint of the elbow 2.) From the bottom of our chin to our nipples 3.) From our nipples to our navel 4. ) The height of our rear end. While females have differences in their anatomy, these measurements will work on them as well.Where do two head lengths fit on the human body?
1.) Its two head lengths down the upper leg
2.) It is also two head lengths down the lower leg
3.) It is two head lengths between the clavicle and the anterior iliadic crest...also known as the bony area that protrudes slightly lower than and on either side of your navel.
4.) It is also two head lengths from the elbow to the tip of the middle finger
5.) It is also two head lengths down the back, not including the neck
Across
1.) Two heads across the shoulders
What about three head lengths?
1.) 3 head lengths from the top of the head to the belly button
2.) 3 head lengths from the top of the armpit to the tip of the middle finger
and Four head lengths?
1.) The length of the leg is four head lengths
I have an important suggestion for when we draw the entire body. We know that the average body is 7 1/2 head lengths. Split up these head lengths in to three from the top and four from the bottom, with the extra half head length in the middle of the body. Splitting up the body in this way allows us to identify the landmarks more easily. We know that the height of the leg is four heads and the nipples and navel are landmarks that can be used from the top down.
Another suggestion that I have is to remember the belly button rule. This comes from Leonardo DaVinci who states that if a persons legs are chopped off below the knee, the belly button becomes the center of the body.
Also, it is the same distance from the top of the head to the tip of the middle finger, as it is from the ground to the belly button.
Davinci also said that the width of a persons shoulders is 1/4 of their height. I have found this measurement to be less accurate than head lengths but it is still applicable most of the time. Knowing this information also gives us the ability to break the body in to four parts.
1.) Head to nipples
2.) nipples to groin
3.) Groin to kneecap
4.) Kneecap to ground
Now lets talk about size relationships between similar body parts. On average, the arm is about 25 percent smaller than the leg. The hand is the same size as the face. It is also the same size as the foot without the toes. The head is very similar in size to the foot. Finally there is about one hand length between the rib cage and the pelvis. The video was planned and created by me (Merrill Kazanjian). All music is from Incompetech.com, a site with royalty free music. The intro song was: Brandenburg No4-1 BWV1049 (Kevin MacLeod). This song was followed by "Zap Beat" (Kevin Macleod). In addition to my own photographs, I used creative commons royalty free images. For instance- 1.) http://www.flickr.com/photos/f....elipeskroski/1596099 2.) Ming- http://www.flickr.com/photos/s....jsharktank/356095129 3.) Wadlow- http://www.flickr.com/photos/fallout/2509803773/ 4.) Skeleton- http://search.creativecommons.org/?q=female+bathing+suit&sourceid=Mozilla-search# 5.) http://www.flickr.com/photos/yourdon/3757583035/

Facebook: http://facebook.com/kazanjianm
Twitter: http://twitter.com/kazanjianm
This video is part one of an extensive series that I am launching about the topic of perspective in drawing. You can access other segments of this series by clicking on the navigation bar at the top right of the video player. This is video one where I will begin to brain wash you.
Subscribe to kazanjianm (Don't miss any new videos that I make)- http://www.youtube.com/subscri....ption_center?add_use
Facebook: Like me on Facebook to find out about live hangouts or to post your work!- http://facebook.com/kazanjianm
Twitter: I tweet! Do you? http://twitter.com/kazanjianm
My Website: http://merrillk.com
Art Supplies I Use in my Art Work- http://merrillk.com/?sid=135&idpage=supplies_i_use
YouTube Visual Arts Category Petition: http://www.change.org/petition....s/create-a-visual-ar
Step by Step Drawing Playlist: http://www.youtube.com/playlis....t?list=PLD6E34C7CD58

How do artists draw hair? This video will break down the complicated process in to simple steps.
Supplies I Use- http://www.jdoqocy.com/click-4....247664-805536?url=ht
My Facebook- http://facebook.com/kazanjianm
My Twitter- http://twitter.com/kazanjianm
I will discuss the tools that are needed and how to use these drawing tools. I recommend that you use drawing paper rather than printer paper. You will also need:
- A bristle brush
- A blending stump (also called a tortillion) or a Q-Tip
- A kneaded eraser
You will use these tools

Today I have two minutes to teach you how to draw the expression of fear in the human eye. I will demonstrate the process step by step and I will try to make it totally painless.
Dont be scared, this is what you have to look for-
Notice that a fearful eye features a distinct gap between the iris and the top eyelid. This separation is about one fifth the height of the eye. The shape of the eye is slightly taller than a calm eye with a higher arching rainbow on the top eyelid. The bottom eyelid has become more flexed and is hugging the eyeball more than in the calm eye. The biggest difference is the distance between the eyebrow and the eye. The muscles of the forehead pull the eyebrow upwards. The skin between the eyebrow and the eye resembles the tightness of skin tight clothing. The viewer can see the bony area at the top of the eye socket and the rounded shape of the top of the eyeball (which can lead to extreme shadows depending upon the lighting).
Step 1- Make a circle with a rainbow shape above it. Leave a gap that is one fifth the height of the eye between the circle and rainbow.
Step 2- Add the bottom eyelid and the tear duct in the corner of the eye. The eyelid should barely graze the bottom of the iris.
Step 3- Complete the shapes of the top and bottom eyelids.
Step 4- Fill in the shape of the eyebrow. Be sure to leave a lot of space between the top of the eyelid and the bottom of the eyebrow.
Step 5- Shade the pupil and iris. The Iris should always be the darkest tone on the face.
Step 6- Shade the area above the upper eyelid and below the eyebrow. The darkest shading in this part should be immediately above the eyelid. Gradually shade lighter as you approach the eyebrow.
Step 7- Shade in the eyebrow. It should be similar in tone to the area above the eyelid.
Step 8- Shade in the upper eyelid and the eyelashes. The lashes should be slightly lighter than the pupil.
Step 9- Shade in the lower eyelid slightly darker than the upper eyelid.
Remember if you want a print version of this lesson, go to my website Merrillk.com and type in fearful eye in the search box in the upper left corner. Thanks for watching the video!....Merrill Kazanjian
Hoy tengo dos minutos para que le enseñe cómo dibujar la expresión de miedo en el ojo humano. Voy a demostrar el proceso paso a paso y voy a intentar que sea totalmente indoloro.
No se asuste, esto es lo que usted tiene que buscar -
Observe que un ojo temeroso características una clara diferencia entre el iris y el párpado superior. Esta separación es aproximadamente una quinta parte de la altura de los ojos. La forma de los ojos es ligeramente más alto que un ojo con calma un arqueo superior arco iris en la parte superior del párpado. El párpado inferior se ha vuelto más flexionadas y abrazando el globo ocular es más que la calma en el ojo. La mayor diferencia es la distancia entre la ceja y el ojo. Los músculos de la frente hacia arriba, tire de la ceja. La piel entre las cejas y el ojo se parece a la estrechez de la piel ropa ajustada. El espectador puede ver la zona ósea en la parte superior de las órbitas y la forma redondeada de la parte superior del globo ocular (lo que puede conducir a la extrema sombras dependiendo de la iluminación).
Paso 1 - Hacer un círculo con forma de un arco iris por encima de ella. Deja un vacío que es un quinto de la altura de los ojos entre el círculo y el arco iris.
Paso 2 - Añadir la parte inferior del párpado y la rotura del conducto en la esquina del ojo. Los párpados deben rozar apenas la parte inferior del iris.
Paso 3 - Completar las formas de los párpados superior e inferior.
Paso 4 - Introducir en la forma de la ceja. Asegúrese de dejar un montón de espacio entre la parte superior del párpado y la parte inferior de la ceja.
Paso 5 - La sombra de la pupila y el iris. El Iris debe ser siempre el tono más oscuro en la cara.
Paso 6 - la zona de sombra sobre el párpado superior y por debajo de la ceja. El sombreado más oscuro en esta parte debe ser inmediatamente por encima del párpado. Poco a poco la sombra más ligera a medida que se aproxima la ceja.
Paso 7 - Sombra en la ceja. Debe ser similar en tono a la zona por encima del párpado.
Paso 8 - La sombra en el párpado superior y las pestañas. Las pestañas deben ser ligeramente más liviano que el alumno.
Paso 9 - La sombra en el párpado inferior ligeramente más oscuro que el párpado superior.
Recuerde que si desea una versión impresa de esta lección, ir a mi sitio web Merrillk.com y el tipo de miedo en los ojos el cuadro de búsqueda en la esquina superior izquierda. Gracias por ver el video !.... Merrill Kazanjian
teme asustar asusta miedo susto inolvidable ojos sorprendidos miedo peligrosas conmocionado choque chocante piercing asusta sorprendente capturados fuera de guardia offguard corazón salta un ritmo impresionante gritando arrebato raptured mirar

Lately, I have seen more visual artists posting high quality work on youtube than ever before.
Tonight, my channel hit a milestone. Kazanjianm reached 25,000 subscribers. But to celebrate, I want to ask you a simple question.
What channel do you think is the most underrated visual arts channel on YouTube? In the comments section below, please nominate a channel with less than 10,000 subscribers. If you want to nominate your channel, post your best video as a video response to this video.
One week from today, I am going to tally up all of the comments and up votes, and I am going to do something special for the channel that gets the most votes.
WE NEED A VISUAL ARTS CATEGORY ON YOUTUBE THREAD-http://www.google.com/support/forum/p/youtube/thread?tid=2a9806f929074cbd&hl=en&fid=2a9806f929074cbd0004b630ad37cc3e
Facebook- http://facebook.com/kazanjianm
Twitter- http://twitter.com/kazanjianm
Website- http://merrillk.com
(Merrill) Supplies I Use- http://www.jdoqocy.com/click-4....247664-805536?url=ht

NARRATED VERSION HERE: https://youtu.be/H4j2U861bi4
REALISM CHALLENGE BOOK: http://amzn.com/0385346298
SUBSCRIBE: http://bit.ly/markcrilleySUBSCRIBE
All 6 "Brody's Ghost" books at Amazon: http://bit.ly/BRODYSGHOSTbooks
"Mastering Manga" bookS at Amazon: http://bit.ly/MASTERINGMANGA
All 4 “Miki Falls” books at Amazon: http://bit.ly/MIKIFALLSbooks
Brody 1-Shot Comic at TFAW: http://bit.ly/BRODYoneshot
OFFICIAL CRILLEY PLAYLIST: http://bit.ly/CRILLEYPLAYLIST
All of my books are available through your local bookstore-- Ask them to special order if they don't have my books on the shelf. Thanks for your support!! ~Mark
FACEBOOK: http://www.facebook.com/markcrilleyOFFICIAL
TWITTER: http://www.twitter.com/markcrilley
INSTAGRAM: http://instagram.com/markcrilleyreal/
All music created in GarageBand
Visit my channel for YouTube’s #1 most-viewed drawing videos!
