أحدث مقاطع الفيديو

This video will give you step by step "Lin"struction on how to draw New York Knicks point guard Jeremy Lin. All you need is a sharp"lin"ed pencil and some paper. Just follow my easy steps and I will "Lin"hance your artistic abilities and "Lin"able you to draw a portrait of the Knicks "Lin"famous point guard, who is currently living a "Lin"derella story. Whats that you say? You shoot free throws like Shaquille O'neal and you make stick figures look fat when you draw? Oh thats silly talk! Dont worry! This is a team effort.
Let me say this in your "Lin"go because I dont want to be mis"lin"terpreted. This will be as easy as playing "Lin"tendo. Drawing is part of every persons basic "Lin"stincts. It is natural to draw and it is a "lin"stigated effort to learn your letters. We are going to turn back the clock and re"lin"vent your artistic vocabulary.
What? Are you not "Lin"tertained? Put down your Egg McMuff"lin" and grab a pencil. Lets begin!
Step 1: Draw the two shapes that you see. Be sure to notice the angle of the V shape. Notice that the right side of the V is slightly higher than the left side.
Step 2: Add the five shapes that I just added. Be sure to notice their scale and how they overlap the shapes from step 1.
Step 3: Add one more finger to the shape from step 2.
Step 4: Add the tall U shape. Notice its angle and observe that it is slightly taller than the shape from step 1.
Step 5: Add the shapes around the U shape.
Step 6: Point guards need fingers. Give Linsanity some fingers.
Step 7: Give the man a jersey! The Jersey is about 3 times as tall as the shape from step 1.
Step 8: Add his other arm.
Step 9: Now its time to letter his Jersey. Just remember that the New York is at armpit level. And the number 1 is under the New and the 7 is under the York. If you want to challenge yourself, try to leave a white outline around the letters.
Step 10: Make an oval for the head. If you want to make him a bobble head make a large oval. Either way, try to keep the same height versus width proportions as mine. Notice that I added three lines. The head can be split up in four somewhat equal sections; 1.) chin to bottom of nose 2.) bottom of nose to eyebrows 3.) eyebrows to hairline ....and 4.) hair. Notice that the only section that was slightly longer on Jeremy Lin was from bottom of nose to chin. The other three sections fit that formula perfectly. The hair might seem shorter, but that is because I am going to extend it when I shade his hair.
Step 11: Add the two shapes for the orbits of each eye. Notice their scale compared to the head shape and notice that that they are situated towards your right.
Step 12: Add the hairline.
Step 13: Add the nose.
Step 14: Add the ears.
Step 15: Add the rainbow shapes for the upper eyelids.
Step 16: Place the pupil and iris underneath.
Step 17: Add the eyebrows at the top of the eye shape.
Step 18: Add the eyelids above the eyes.
Step 19: Add the opening for the mouth. Notice that it is a flattened half circle and that it is situated more towards the nose than the chin.
Step 20: Add the lips. Notice that the upper lip and lower lip are similar in size.
Step 21: It is time to do the hair. The first thing that you need to do is erase the original line because the hairline is a soft line. I extended the hair on the top and in front. Both have very soft edges.
Step 22: Will cover the top of Jeremy Lin's face. I started off by erasing the lines. Then I added wrinkle lines to the forehead since he has a tense expression. Then I darkened the area above the eyes and used the blending stump to smudge. I used the eraser to create highlights.
Step 23: There are very distinct lines at the bottom of the orbits of the eye on Jeremy Lin's face. They point towards the bottom of the ears. Generally speaking the neck will be darker than the face. Jeremy Lin has a very muscular face so dont worry about softening things. Its ok to leave jagged edges. He has a very dark shadow under his chin.
Step 24: I started by creating a dark line around the collar and the sleeves. Then I added a second line above it which left a solid white line in between. The lettering is tricky. You just have to take your time with it. Try to maintain the white edge around the letters and numbers.
Step 25: In step 25 we draw the hands and arms. Use the eraser to add highlights and the pencil to add shading.

Link- http://merrillk.com/?part=fineart&act=artist1&artist=69&collection=462 Bruno Mars
WE NEED A VISUAL ARTS CATEGORY ON YOUTUBE THREAD-http://www.google.com/support/forum/p/youtube/thread?tid=2a9806f929074cbd&hl=en&fid=2a9806f929074cbd0004b630ad37cc3e
Facebook- http://facebook.com/kazanjianm
Twitter- http://twitter.com/kazanjianm
Website- http://merrillk.com
(Merrill) Supplies I Use- http://www.jdoqocy.com/click-4....247664-805536?url=ht
Drawing Tutorial- Howto draw Bruno Mars Step by Step. Today, if you feel like doing something, I am going to teach you how to draw Bruno Mars. Don't just lay in your bed, kick up your feet and stare at a fan. Thats just silly talk. Artists have to remain occupied or else we wind up moving to the South of France to chop off our ears. So I recommend that you get out of your snuggie and grab a pencil and some paper. While you are at it, hit the link in the video description. The link will take you to my guide with photos and text, which accompanies this video. It will make drawing Bruno Mars a lot less difficult. Oh and if you wanted to see someone dougie, here you go.
Step 1: Draw the two shapes that you see. I recommend that you start out in the lower right corner.
Step 2: Draw in the neck shape. Try to match the width and the height of this shape as closely as you can.
Step 3: Draw in the other shoulder.
Step 4: Draw in a bowl shape for the bottom of his head.
Step 5: Add the top of the head. Notice that it is significantly larger than the bowl shape at the bottom of the head. Do your best to observe and draw the contour line as accurately as possible.
Step 6: Add the triangular shape to the side of the head.
Step 7: Add the ear shape. Notice that its origin is at the line which runs accross the bowl shape.
Step 8: This is the trickiest step. Draw the shapes that I just added. This tip will help. It is a similar distance from the eyebrow to the bottom of the nose, as it is from the eyebrow to the hairline.
Step 9: Draw in the shape for Bruno's left eye socket.
Step 10 Draw in the shape for Bruno's left eye and eyebrow. Notice the placement of both of these shapes within the eye socket shape.
Step 11: Complete the nose shape
Step 12: Add Bruno's hat. Look closely and see that his hat is basically a banana shape and a trapezoid.
Step 13: Add Bruno Mars upper lip.
Step 14: Add Bruno Mars bottom lip.
songs, grenade, just the way you are, lyrics count on me, new song, girlfriend, marry you, doo wops and hooligans, she got me, click clack away, the lazy song, somewhere in brooklyn, lighters, our first time, live, concert, acoustic, unplugged, talking to the moon, liquor store blues, the other side,

Subscribe to kazanjianm (Don't miss any new videos that I make)- http://www.youtube.com/subscri....ption_center?add_use
Facebook: Like me on Facebook to find out about live hangouts or to post your work!- http://facebook.com/kazanjianm
Twitter: I tweet! Do you? http://twitter.com/kazanjianm
My Website: http://merrillk.com
Art Supplies I Use in my Art Work- http://merrillk.com/?sid=135&idpage=supplies_i_use
YouTube Visual Arts Category Petition: http://www.change.org/petition....s/create-a-visual-ar
Step by Step Drawing Playlist: http://www.youtube.com/playlis....t?list=PLD6E34C7CD58
Intro (CC)- http://www.youtube.com/watch?v=Ov0A7dJmQ1E

Gelatine Pink Rabbit: 44°14'38.11"N 7°46'9.40"E https://www.youtube.com/watch?v=QXv8xRqoZbc
Rachel Nevada KFC- 37°38'47.03"N 115°45'0.72"W
https://www.youtube.com/watch?v=fsH4gws35ro
Spiral Jetty, Great Salt Lake Utah
https://www.youtube.com/watch?v=vCfm95GyZt4
World Islands Dubai, United Arab Emirates
https://www.youtube.com/watch?v=7eUcRjo9Yv4
Roden Crater (James Turrell)
https://www.youtube.com/watch?v=nPI65cEXbXI
Blog post- http://www.damncoolpictures.co....m/2010/07/40-most-bi
Do you know what there is a pink bunny visible from outer space? Well I did! Let me show you what I mean. After I read about this pink bunny and started navigating Google Earth, I began to wonder.........What else is visible in the Google Earth Art Gallery? In this video you will find some of the coolest artwork, visible from outer space. Some of these artworks have videos made about them already, and I will put the links in the upper right hand corner of the video player. I have barely scratched the surface of what is out there, so if you know of something cool. Put its Geo tag in the comments so others can find it. The geo tags of everything mentioned in this video are in the video description.

Two people inspired me to create this portrait. Nelson Mandela, the first democratically elected president of South Africa is obviously one. The other is an artist named Igor Kazarin who has a popular art channel on youtube called portraitdrawing. I wanted to try his amazing Dry Brush Technique which combines oil paint, watercolor paper and a kneaded eraser. I added my own touch to this portrait by finishing it with a prismacolor pencil. -Merrill Kazanjian
If you want to try Dry Brush Technique, you will need:
- Watercolor paper (At least 150 LBS)
- Oil Paint (I am using Lamp Black.....this technique works in with color too)
- Kneaded Eraser
- I also used Prismacolor Color Pencils at the end (optional)

Link- http://merrillk.com/?part=fineart&articles_id=12733&act=artist1&artist=69&collection=188
Facebook- http://facebook.com/kazanjianm
WE NEED A VISUAL ARTS CATEGORY ON YOUTUBE THREAD-http://www.google.com/support/forum/p/youtube/thread?tid=2a9806f929074cbd&hl=en&fid=2a9806f929074cbd0004b630ad37cc3e
Twitter- http://twitter.com/kazanjianm
Website- http://merrillk.com
(Merrill) Supplies I Use- http://www.jdoqocy.com/click-4....247664-805536?url=ht
Men can sometimes struggle with words.
Little Old Man: Are you a parking ticket?
Little Old Lady: (What?)
Little Old Man: Because, you got fine written all over you.
Fortunately, Merrill is here to help. Imagery can replace words and today, I am going to teach you how to make a drawing that you could give to your crush or your significant other. All you will need is paper, a pencil and some romantic incentive and I will take care of the rest.
It has been said that a picture is worth 1000 words, so you probably don't want to mess up this drawing. Don't worry. You won't. Hit the link in the video description. The link will take you to my guide with photos and text, which will make this drawing as easy as possible.
Little Old Man: Baby, you are like a student and I am like a math book, you solve all my problems
Little Old Lady: (Slap)
Little Old Man: I'm not a player I just crush a lot.
Step 1: Draw an oval and two tree stump shapes.
Step 2: Draw the fist shape. Be sure to notice its placement within the oval shape.
Step 3: Draw the shape that I just added. Notice that it looks like a cartoon face from profile view. Also notice that a part of this shape goes outside the oval shape.
Step 4: Add the upside down rainbow shape, between the two shapes from the previous steps.
Step 5: Add the fingernails.
Step 6: Add the lines between the fingers.
Step 7: Erase the egg shape.
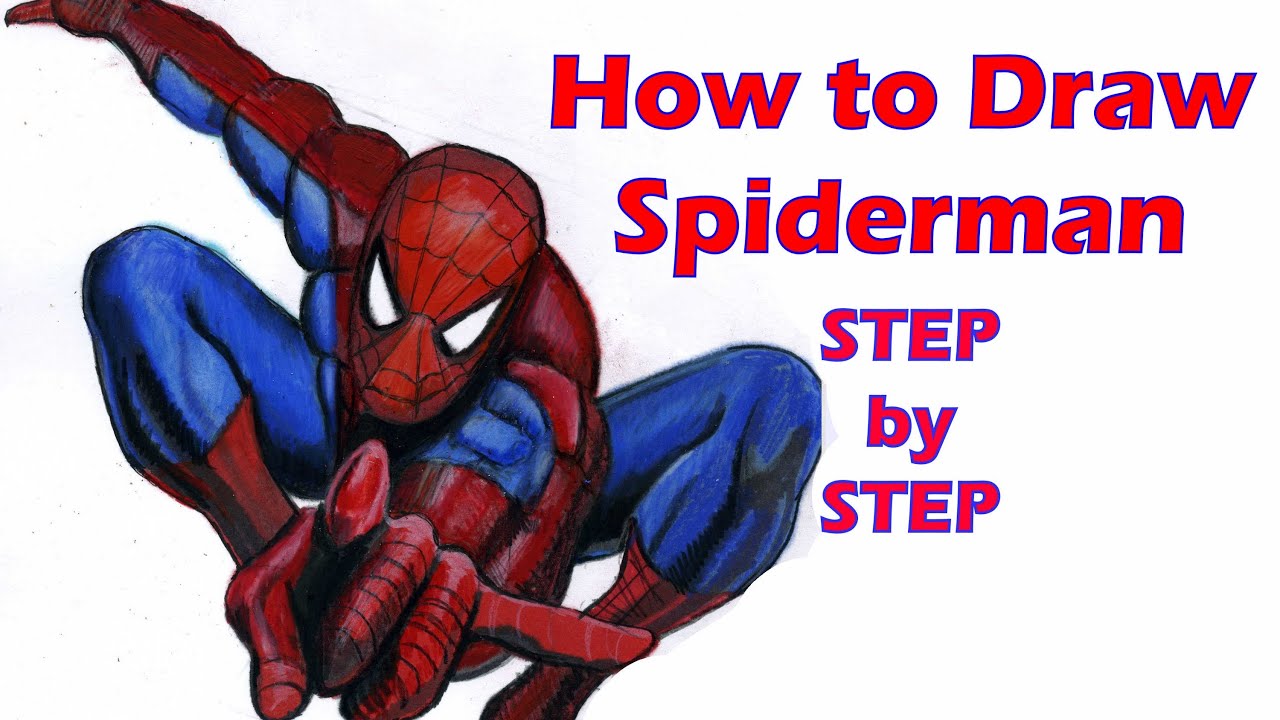
This is a step by step tutorial on how to draw Spiderman
Subscribe to kazanjianm (Don't miss any new videos that I make)- http://www.youtube.com/subscri....ption_center?add_use
Supplies I use- http://merrillk.com/?sid=135&idpage=supplies_i_use
Facebook: Like me on Facebook to find out about live hangouts or to post your work!- http://facebook.com/kazanjianm
Twitter: I tweet! Do you? http://twitter.com/kazanjianm
My Website: http://merrillk.com
YouTube Visual Arts Category Petition: http://www.change.org/petition....s/create-a-visual-ar
Step by Step Drawing Playlist: http://www.youtube.com/playlis....t?list=PLD6E34C7CD58
Video intro by Tergnats - http://www.youtube.com/watch?v=mJbr43x7bhI
Book Recommendations to draw from your mind-
Ron Tiner - Figure Drawing Without A Model
Andrew Loomis - Creative Illustration
Andrew Loomis - Drawing the Head and Hands
Andrew Loomis - Figure Drawing For All It's Worth
Andrew Loomis - Fun with a Pencil
Andrew Loomis - Successful Drawing
Andrew Loomis - The Eye of the Painter
George B. Bridgman - Constructive Anatomy
George B. Bridgman - The Human Machine
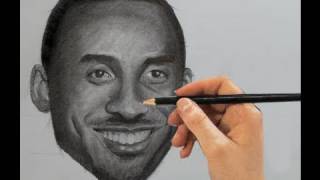
Link- http://merrillk.com/index.php?part=fineart&articles_id=5980&collection=114 Today, YOU are going to draw Kobe Bryant. It doesn't matter if you have prior art training or not. This video will break the process down in to simple steps so that anyone can do it. Grab a pencil and paper and let me show you what I mean. Remember to pause the video when you need to. Here we go.
Step 1: Draw an oval shape for Kobe's head. Notice that the bottom of the oval looks like an upside down trapezoid while the top of the oval shape is rounded.
Step 2: Make four horizontal lines. The top line MUST intersect the midway point of the oval shape. The lowest line should be placed at the bottom of the chin. After drawing the top and bottom lines, add two EVENLY SPACED lines between the top and bottom line. At the end of step two, you should have THREE evenly spaced segments between the top and bottom lines (refer to the picture).
Step 3: Observe the six dots that I added. The top four map out the corners of Kobe's eyes, while the bottom two map out the corners of his mouth. Lets look at their relationship. Notice that these dots are leaning towards the right side of the oval. This is due to the fact that Kobe's head is slightly turned. Also, take a second to notice the distance in between the two eyes is equal to one eye length. Finally, notice that the middle part of the space designated for each eye, will line up with the outer corners of the mouth. Now, draw in the six dots.
Step 4: Draw in the eyes....The upper eyelid as a rainbow shape and the bottom lid is close to a straight line. Notice that the iris is partially blocked by the upper eyelid.
Step 5: Encapsulate the eye in the oval shape that I just added.
Step 6: In this step, make the bottom of the nose by drawing three connected, upside down arches. Do not worry about the bridge of the nose yet. After you make the bottom of the nose, draw the shape for the upper lip...... The upper lip looks like a squished McDonalds logo (picture the golden arches squished).
Step 7: Add the bottom lip. It is similar to a banana shape. Notice that the bottom lip is thicker than the top lip. Now that we have the eyes and part of the mouth done, take a second to notice the perfect square that is formed when you connect the points from the middle of the eye and the corners of the mouth. Make adjustments if you do not have this perfect square.
Step 8: Draw in the two shapes between the eyes and nose. Like the bottom lip, these shapes are very similar to banana shapes. They will help us shade the nose later.
Step 9: Now add in the ears. Due to the fact that Kobe's head is turned; it appears that his left ear is smaller than his right. This, of course is not the case, but draw what you see.
Step 10: Draw in the lines, stemming from the chin, as well as Kobe's dimple lines.
Step 11: Draw in Kobe's hairline. Again, due to the turn of his head, you will see more hair on the right side.
Step 12: Erase the construction lines
Now, I will show you how to shade your drawing. Don't worry, this too, will be easy! You have three options to learn shading. Option one- click the link in the video description to go to a webpage that I made for this video..... on my website, merrillk.com. You will see a series of 17 steps with picture references and words. You will also see a free downloadable resource that you can print. Option two is to watch a shading demonstration in the second part of this video; and option three is a separate video; where I will demonstrate how I shaded Kobe at a slower pace. Please take advantage of all of these options. I am confident that they will help. Special thanks to Rico Shen for use of his photograph via Creative Commons. http://commons.wikimedia.org/w....iki/File:NikeTaipeiF
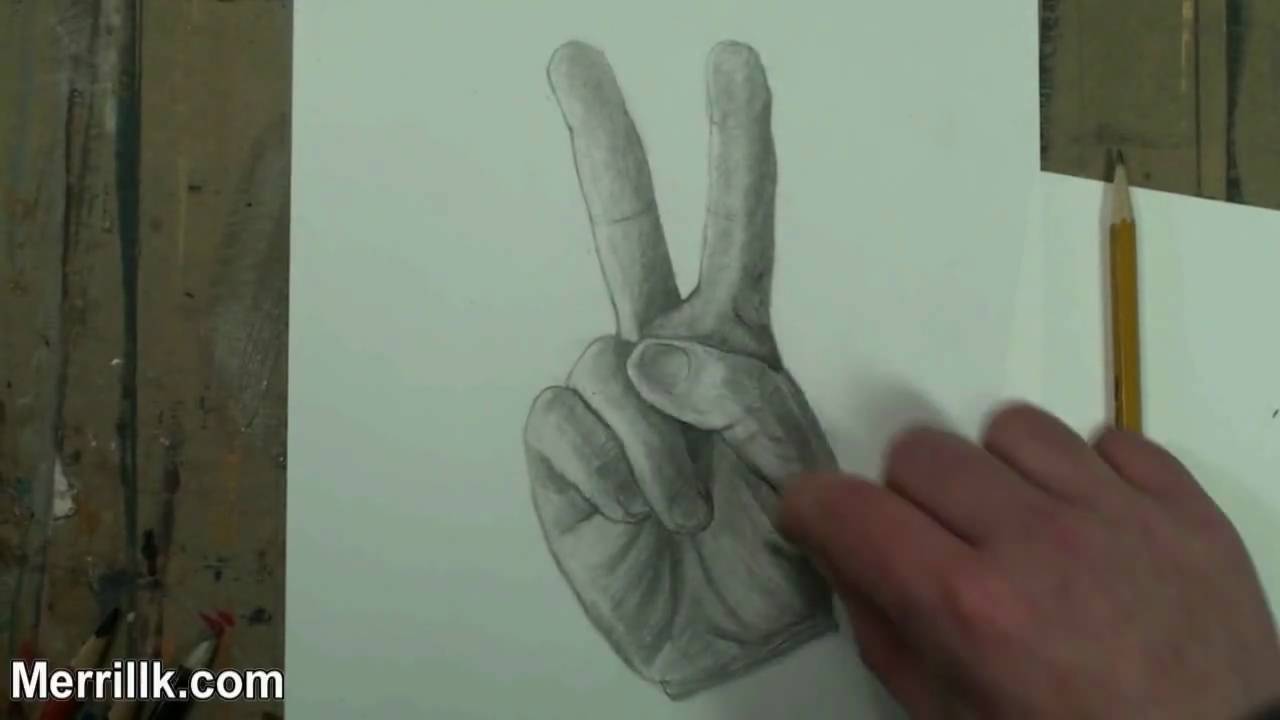
Link- http://merrillk.com/index.php?part=fineart&articles_id=6556&collection=114 This is the second in a series of twenty videos, that will show you how to draw the hand in various poses. This video will specifically focus on the peace sign hand gesture. I broke the process down in to simple steps and I went the "extra mile" to make sure that EVERYONE could do it, even if you havent had much experience with art. The link in the videos description will take you to a web page with step by step instructions and a PDF Book that you could download and print for free..... Lets get ready to draw
As a general recommendation, pause the video at the end of each step and look at the reference image often.
Step 1: Draw the two fingertip shapes. Notice that the fingertip on the left is at a different angle than the fingertip on the right.
Step 2: Add the next two shapes. Notice that they are slightly longer than the fingertip shapes.
Step 3: Draw the trapezoid shape in addition to the two shapes that complete the fingers. Notice that the bottoms of the fingers are slightly longer than the mid sections of the fingers.
Step 4: Step four is a tricky step! Be sure to spend some extra observation time. Notice that the thumb overlaps the trapezoid shape. Also notice that the thumb in this position, resembles a flying saucer tilting to the side.....YES...a flying saucer with a thumbnail in it.
Step 5: Draw the traingle shape. Notice that it is directly below the V shape from the two fingers. Also notice the tiny shape that I made tp the right side of the thumb.
Step 6: Draw the tilted U shape, to the left of the triangle. Also, draw in the fingernail.
Step 7: Observe the picture to close the U shape from step 6.
Step 8: Add in the shape that I just added. It will eventually be a part of the pinky finger.
Step 9: Add in the fingertip and fingernail to complete the shape for the pinky finger.
Step 10: Add the triangle shape next to the pinky finger. This will eventually be part of the palm.
Step 11: Add in the shape for the lower palm.
Step 12: Observe the line that was just added. It is similar to the bottom of a cup. It starts at the middle of the ring finger and ends at the thumb shape from Step 4.
Step 13: Take some extra time to observe the line that I just added. Then, complete the shape for the bottom of the palm
Step 14: Now, take a second to observe the lines that I ALMOST totally erased.
SHADING
Step 15: Build the tones up slowly. Start cross hatching with an HB (#2) pencil.
Step 16: (NOT SHOWN) I use a blending stump to smudge my hatches. And then I do more hatching atop of the smudges.
Step 17: The darkest parts will be the triangle in the center and the areas on the edges of the right side of the hand (and fingers....see this developed in the next few steps).
Step 18: At this point I am using my darker (in tone) 2B, 3B, 4B and 5B pencils. I also use the eraser (A LOT) to create highlights.
Step 19: I always try to finish a drawing by smoothing it out by using the pencil, the eraser and the blending stub (tortillion).
Step 20: Finished!

Want to draw Abraham Lincoln? This video will give you step by step instruction so that you can draw Abe......Honestly!!!!!
Subscribe to kazanjianm (Don't miss any new videos that I make)- http://www.youtube.com/subscri....ption_center?add_use
Facebook: Like me on Facebook to find out about live hangouts or to post your work!- http://facebook.com/kazanjianm
Twitter: I tweet! Do you? http://twitter.com/kazanjianm
My Website: http://merrillk.com
Art Supplies I Use in my Art Work- http://merrillk.com/?sid=135&idpage=supplies_i_use
YouTube Visual Arts Category Petition: http://www.change.org/petition....s/create-a-visual-ar
Step by Step Drawing Playlist: http://www.youtube.com/playlis....t?list=PLD6E34C7CD58

Today, I decided to incorporate oil pastels in to a mixed media work of art. I also used/combiled oil paint illustration markers and Prismacolor Color Pencils to create the portrait that you see. I describe my process as I narrate: First, I did a pencil sketch which I inked. Second I used illustration markers (Prismacolor and Ad Chartpak) to lay down the first layer of color. Then I added a layer of oil pastels atop the layer of illustration marker. The oil pastels are more mixable than the color pencils and are also more opaque. They mix with liquin (like the color pencils and oil paint). I discovered that the process closely resembles painting (especially) when you mix the pastels on a palette, with liquin and then apply with a paintbrush. I finished my (quasi- Bob Ross demonstration) with a few layers of oil paint, since there is no substitute for oil paints mixability and layering capabilities (as well as the range of opacities). I am happy with the portrait that I made of youtube user armanchik24. I learned a lot while incorporating the oil pastels in to my artwork.
"oil pastels" "crayola oil pastels" "how to use oil pastels" "sennelier oil pastels" "using oil pastels" "pentel oil pastels" "oil pastels how to use" "holbein oil pastels" "cray pas oil pastels" "buy oil pastels" "blending oil pastels" "how to paint with oil pastels" "oil pastels paintings" "oil pastels painting" "van gogh oil pastels" "oil pastels for beginners" "painting with oil pastels" "oil pastels tutorial" "drawing oil pastels" "oil pastels for kids" "painting oil pastels" "working with oil pastels" "sakura oil pastels" "oil pastels for children"

This video will teach you how to draw the Golden Gate Bridge in perspective. Please be sure to rate and comment! Your feedback helps!
Subscribe to kazanjianm (Don't miss any new videos that I make)- http://www.youtube.com/subscri....ption_center?add_use
Facebook: Like me on Facebook to find out about live hangouts or to post your work!- http://facebook.com/kazanjianm
Twitter: I tweet! Do you? http://twitter.com/kazanjianm
My Website: http://merrillk.com
Art Supplies I Use in my Art Work- http://merrillk.com/?sid=135&idpage=supplies_i_use
YouTube Visual Arts Category Petition: http://www.change.org/petition....s/create-a-visual-ar
Step by Step Drawing Playlist: http://www.youtube.com/playlis....t?list=PLD6E34C7CD58
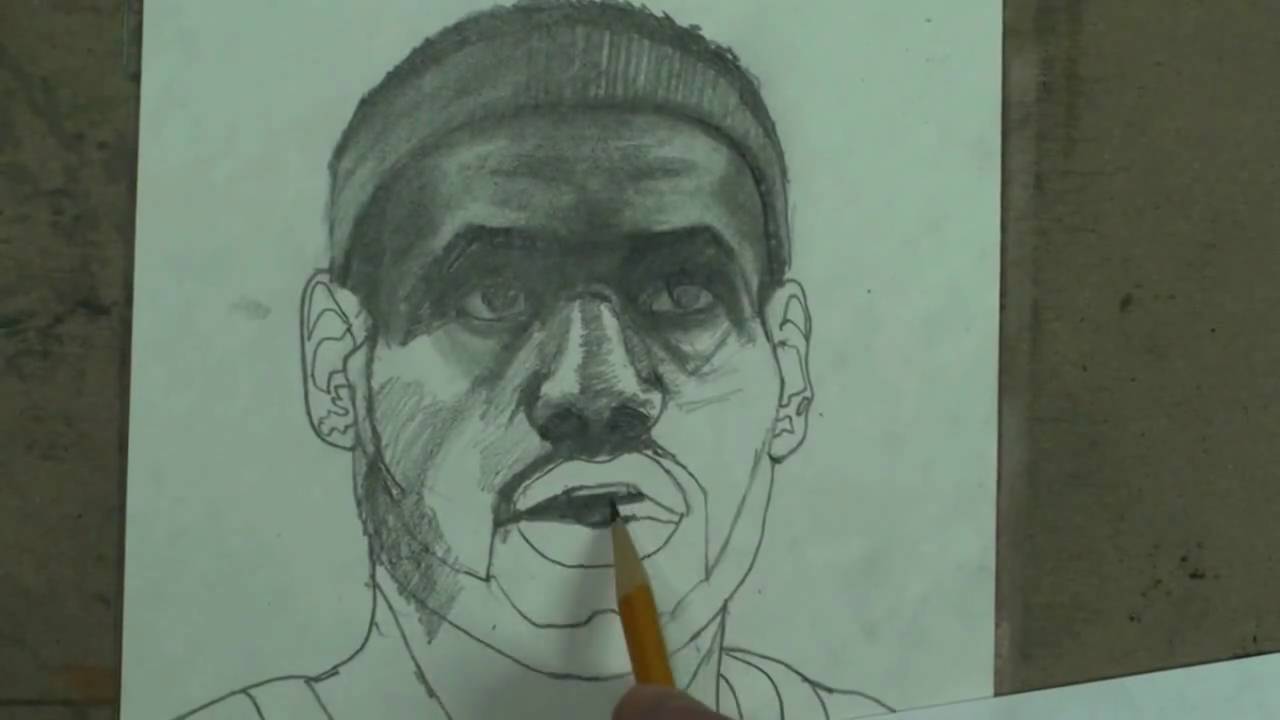
This is a demonstration of how I shaded a drawing of LeBron James. This is part 2- I will hyperlink part 1
Hints- The eyes, and hair (including eyebrows and facial hair) always have the darkest tones. I am using 2 methods- 1.) cross hatching and 2.) blending w/ a blending stump (tortillion). When I combine them, I get the best (tonal) effect.... Here's what I do- I do a layer of cross hatching, and then I push it down with a blending stump. Followed by another layer of hatching atop. This can be repeated many times.
WE NEED A VISUAL ARTS CATEGORY ON YOUTUBE THREAD-http://www.google.com/support/forum/p/youtube/thread?tid=2a9806f929074cbd&hl=en&fid=2a9806f929074cbd0004b630ad37cc3e
Facebook- http://facebook.com/kazanjianm
Twitter- http://twitter.com/kazanjianm
Website- http://merrillk.com
(Merrill) Supplies I Use- http://www.jdoqocy.com/click-4....247664-805536?url=ht
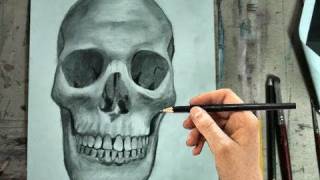
Today, you are going to learn how to draw the human skull in front view. Just follow my step my step instructions and I promise you that you will surprise yourself. But I want to try something new. After you complete your drawing, take a video of it and post it as a video response to this video. I will personally critique the first ten video responses to this video.
Step 1: Draw a half circle shape, with two tiny half circles on each end.
Step 2: Draw the holes for the eyes and the nose. Notice that the top of the eye shape starts at the bottom of the half circle shape from step one. Also, notice that the nose shape is triangular and it starts 1/3 of the way up the eye shape.
Step 3: is a tricky step. Add the line that I just added to complete the shape. Notice the perfect symmetry on each side. Notice that the bottom has a squiggly line.
Step 4: Add the upper teeth. There are 12 upper teeth visible and the largest ones appear to be at the front of the mouth. The mouth curves back in a horseshoe shape and the back teeth are blocked. Be sure to make the teeth smaller as they go further back in the mouth. Also be sure to notice that the teeth in the front are somewhat trapezoidal in shape and widest away from the gum.
Step 5: Add the bottom row of teeth. Notice that they are slightly smaller than the top teeth. Also, notice that the top row partially overlaps the bottom. Finally, be sure to see that their widest point is also away from the gum. Here is a close up.
Step 6: Add the jawline. Be sure to notice the shapes that connect the jaw with the rest of the skull.
Step 7: Add the details on the eye sockets and nose.
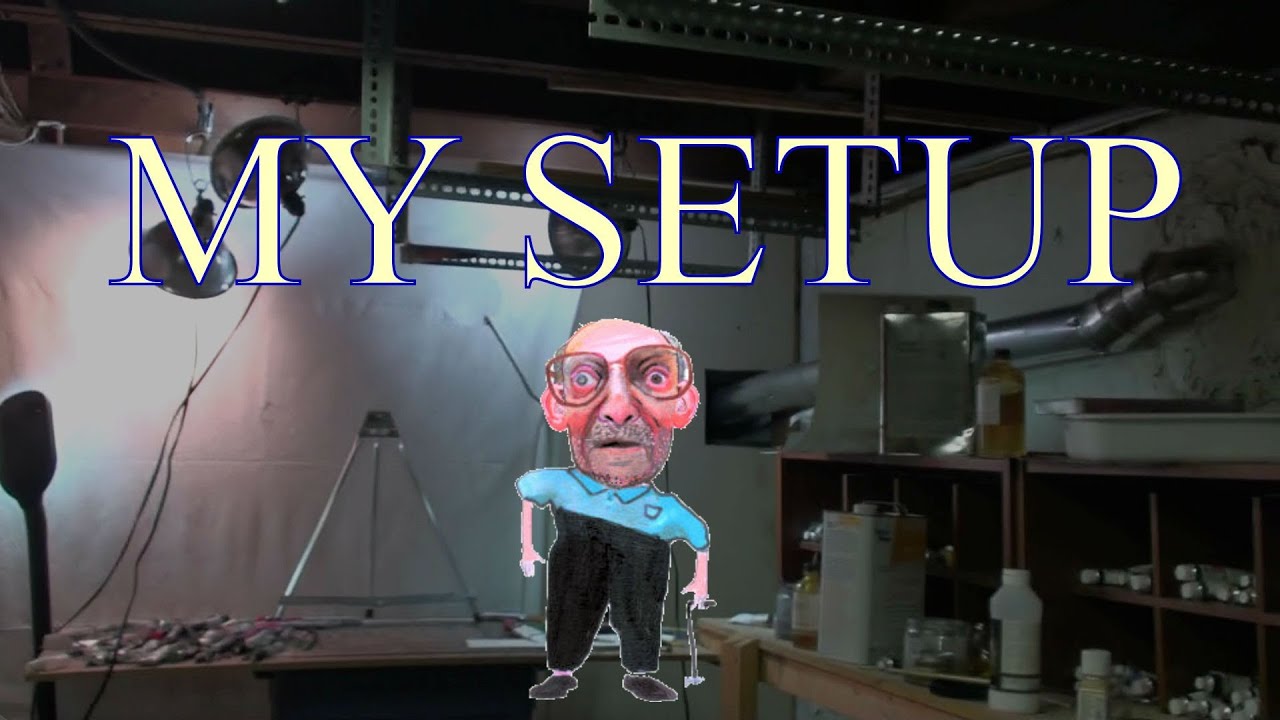
This video will show my viewers how I film one of my videos. It will give a mini tour of my studio and will make recommendations on lighting.
YouTube Visual Arts Category Forum- http://www.google.com/support/forum/p/youtube/thread?tid=2a9806f929074cbd&...
Supplies I Use- http://www.jdoqocy.com/click-4....247664-805536?url=ht
Facebook Page- http://facebook.com/kazanjianm
Twitter- http://twitter.com/kazanjianm
This video will show you:
1.) How to film a drawing video.
2.) How to film a speed painting video.
3.) How to film an art video.
4.) How to position the camera from above.
5.) How to position a camera mount.
6.) How to Film a drawing.
7.) Lighting for a drawing video.
8.) Setup for a drawing video.
9.) how to set up a camera for drawing
10.) drawing camera set up
11.) video camera for drawing
12.) camara setup for drawing
13.) Art Setup

WE NEED A VISUAL ARTS CATEGORY ON YOUTUBE THREAD-http://www.google.com/support/forum/p/youtube/thread?tid=2a9806f929074cbd&hl=en&fid=2a9806f929074cbd0004b630ad37cc3e
Facebook- http://facebook.com/kazanjianm
Twitter- http://twitter.com/kazanjianm
Website- http://merrillk.com
(Merrill) Supplies I Use- http://www.jdoqocy.com/click-4....247664-805536?url=ht
Tonight we dine in Hell. If you are up for the challenge, I will teach you how to draw a very angry greek man who likes to kick people in to bottomless pits.
It doesnt matter if you are new to drawing the more you sweat here , the less you'll bleed in battle. Just follow my step by step instructions... and remember...No retreat, no surrender. Our pencils will block out the sun...Then we shall draw in the shade.
Merrill.....um this is Madness
Madness? THIS IS KAZANJIANM!!
Be sure to pause the video at the end of each step.
Step 1: Draw in the Beard Shape. Be sure to notice that it is slightly asymetrical.
Step 2: Draw in the shape for the hair. Notice that the shapes from steps 1 and 2 are equal in height.
Step 3: Draw in the ovals for the eye sockets and the ear shape
Step 4: Add the shape for his clothing. This shape does not have to be perfect but notice that it is slightly wider at the neck.
Step 5: is a difficult step. The sword shape is slightly taller than the head and it points away from the body and towards the left upper corner of the page. The fingers will be heavily shaded later so it is more important that you focus on the shape of the hand. Take extra time on this step.
Step 6: Add some light lines to define the chest and left arm. Do not press hard, just hint at their existence, they will be shaded heavily later. Add an arrow going through Leonidas' chest......
Step 7: Take your time and add the detail to Leonidas' face. Take extra time to observe the placement of the teeth and the eyes. In order to get a likeness this is an important step to conquer. Gerard Butler

WE NEED A VISUAL ARTS CATEGORY ON YOUTUBE THREAD-http://www.google.com/support/forum/p/youtube/thread?tid=2a9806f929074cbd&hl=en&fid=2a9806f929074cbd0004b630ad37cc3e
Facebook- http://facebook.com/kazanjianm
Twitter- http://twitter.com/kazanjianm
Website- http://merrillk.com
(Merrill) Supplies I Use- http://www.jdoqocy.com/click-4....247664-805536?url=ht
Search the internet or your library for information on the proportions of the human face. You will find a ton of information, but each source seems to say something different. This is video 1 in a series of videos which will make you less confused about the proportions of the human face. You will be less confused, because I will give you proof that a lot of the formulas that you learned for portrait drawing were wrong. At the end of this video, I will give you a new formula to help you draw the human face from memory.
In this experiment, I have taken the most common formulas for facial proportion and tested them on a group of people in a similar pose. I used a computer program to help me take accurate measurements. I made sure that my control group was comprised of both males and females and were of many different races.
So lets get started with a very common proportion rule. The question is- Is it one eye length between each eye? The answer, as you can see, is yes. But this was the only rule that I found to be universally correct.
Lets stick with the eyes for question 2. It is often stated that it is five eye lengths across the face. It turns out that for 9 of the 10 people that I tested, that rule is incorrect. I found that if you included the width of the ear on to the face, then that rule would be closer to true, but definitely not universal. Of the control group, only one person, had a fit, so we can conclude that this proportion does exist, but it does not fit the majority of people and thus, shouldn't be part of a drawing formula.
I recently saw on the internet that the outer corners of the nose, should line up with the inner corners of the eye. Only one of 10 people that I tested proved that proportion to be true. There were also two people who came close. Once again, we can conclude that this proportion does exist, but it does not fit the majority of people and thus, shouldn't be part of a drawing formula. Most often, the outer nose lined up where the tear ducts met the white of the eye. For the record, I hope that the lady in the bottom left never catches a cold.
Question four asks: Does the pupil and iris line up with the corners of the mouth when the face is calm? I will warn you that this was the most difficult to answer, because the mouth is the most variable feature of the face. The shape slightly differs from person to person and it moves a lot. I found that only two people had eyes and mouths which lined up, but, everybody except the gentleman on the top left was extremely close. So, despite the results, I would include this measurement for a general face proportion formula, but I would also be sure to observe the person who I am drawing to get my answer. It is also important to note that 8 of the 10 peoples mouths fit between the lines drawn down from the middle of each eye.
Since question five is related to the placement of the ears, I changed a few of the photos in the control group. In order to gauge this, I had to be able to see the ears clearly. Most portrait formulas state that the ears go from the top of the eye to the bottom of the nose. This turned out to be a pretty accurate statement. Question six is directly related to question five and asks whether the nose and the ears are generally the same size. Although there were only two exact measurements, every other person was very close in measurement. So we can conclude that it is Accurate to say that the ear generally goes between the upper eye and the bottom of the nose and is very close in height to the nose.
Now lets test the most common and controversial face proportion question.....Are the eyes at the exact half way point of the head? You will find top results on the search engines stating that this is the case. I once had a teacher who insisted this and took off points on any student who disagreed with him.....If he only did his homework! The eyes are NOT at the center of the head. The actual middle of the head is just below the orbits of each eye. There was only one person whose eyes were measured as the center of their head, and of course it was MacAulay Culkin.

Subscribe to kazanjianm (Don't miss any new videos that I make)- http://www.youtube.com/subscri....ption_center?add_use
Facebook: Like me on Facebook to find out about live hangouts or to pos

LINK- http://merrillk.com/?part=fineart&articles_id=3731&act=artist1&artist=69&collection=461 Today, YOU will be drawing President Barack Obama- So grab a pencil and some paper. This video will show you step by step how to draw President Obama. Each step will be shown in two second intervals. Pause each step, as you need to or download a print version of this lesson from my website, http://merrillk.com. Feel free to save a copy to your computer and print it. Give it a try. I think that you are going to surprise yourself! Use your eraser if its TIME FOR A CHANGE. Good luck!- Merrill Kazanjian
The song Hail to the Chief was performed by the United States Air Force Band.
