Лучшие

Tête de mort mexicaine (Calavera)
mini tuto Pixel Art
N’oubliez pas de me donner vos idées dans les commentaires !
--------------------------------------------------
Matériel :
- Règle
- Crayon à papier
- Grande feuille blanche
- Promarker noir/ Gris glacé 1/ Orange brillant
--------------------------------------------------
Musiques:
https://www.youtube.com/watch?v=Y66vYUSzGdY
--------------------------------------------------
Liens importants :
La Team Draw : @_teamdraw
https://www.instagram.com/_teamdraw/?hl=fr
Mon Instagram : @marine_le_dolphin
https://www.instagram.com/marine_le_dolphin/
Mon FaceBook : Pixy Art
https://www.facebook.com/pixyartyoutube/
Ciné Raté :
https://www.youtube.com/channe....l/UC8CehJsMLNjGPNwiq
DrawMarket :
https://www.drawmarket.fr/
Merci :D

Inktober jour 29 : « Union »
Temps : 8 min
Matériel :
- Critérium (croquis)
- Micro pigment noir
Musique :
https://www.youtube.com/watch?v=qF_KwjPVa-g
---------------------------------------------------------
Le site de TutoDraw :
https://www.drawmarket.fr/
La Team Draw : @_teamdraw
https://www.instagram.com/_teamdraw/?hl=fr
Mon Instagram : @marine_le_dolphin
https://www.instagram.com/marine_le_dolphin/
Mon FaceBook : Pixy Art
https://www.facebook.com/pixyartyoutube/
A demain !

How to draw Disney Princess Tangled with pixel ?!
MATERIAL / MATERIEL dans la description -
-------------------------------------------------
Tools/Outils :
Ruler
Gum
Promarkers list:
- Noir / Black
- Améthyste / Amethyst
- Rose rose / Pink rose
- Lila / Lilac
- Jaune Canari / Canary
- Tournesol / Sunflower
- Baie Rouge / Berry Red
- Bleu ciel / Sky Blue
- Aqua Frais / Cool Aqua
- Bleu Pastel / Pastel Blue
- Turquoise / Turquesa
- Rouge pivoine / Blush
--------------------------------------------------
music by : heroboard – Musique Sans Copyright
[Pop] Jon Prezant - Remember Me
https://www.youtube.com/watch?v=ayXafebOi-c
--------------------------------------------------
Level : Easy !
Niveau : Facile !
--------------------------------------------------
Mon Instagram : @marine_le_dolphin
https://www.instagram.com/marine_le_dolphin/
Thanks for watch :D

How to draw easy heart with pixels for your lover
MATERIAL / MATERIEL dans la description -
-------------------------------------------------
Tools/Outils :
Ruler
Promarkers list :
- Noir / Black
- Baie Rouge / Berry red
- gum
--------------------------------------------------
music by : Argofox | Royalty Free Music
Collapse - love. [Creative Commons]
https://www.youtube.com/watch?v=RpMAUAuP4gY
--------------------------------------------------
Level : Verry Easy !
Pour dessiner ce cœur, le niveau de difficulté
est Facile !
--------------------------------------------------
Thanks for watch :D

Inktober #31 : "Masque"
Temps : 1h
Matériel :
- Critérium (croquis)
- Micro pigment noir
- Promarker noir
Musique :
https://www.youtube.com/watch?v=nUD2gfmG7og
https://www.youtube.com/watch?v=ROIcQvo5FIY
https://www.youtube.com/watch?v=J3PLujiKcEM
https://www.youtube.com/watch?v=dRm41l7EYRY
https://www.youtube.com/watch?v=-lI9D-Ypda4
---------------------------------------------------------
Le site de TutoDraw :
https://www.drawmarket.fr/
La Team Draw : @_teamdraw
https://www.instagram.com/_teamdraw/?hl=fr
Mon Instagram : @marine_le_dolphin
https://www.instagram.com/marine_le_dolphin/
Mon FaceBook : Pixy Art
https://www.facebook.com/pixyartyoutube/
A demain !

How to draw Coca Cola Bottle with pixels
MATERIAL / MATERIEL dans la description -
-------------------------------------------------
Tools/Outils :
Ruler
Promarkers list:
Hum ……. Not possible ! :p
mainly : red, black, shades of grey (a lot), orange (many blends)
- gum
--------------------------------------------------
music by : NoCopyrightSounds
Desmeon - Back From The Dead [NCS Release]
https://www.youtube.com/watch?v=OFWT4...
--------------------------------------------------
Level : IMPOSSIBLE !
Ne le faites pas .. Jamais ! :’)
--------------------------------------------------
My Instagram account : @marine_le_dolphin
https://www.instagram.com/marine_le_d...
Thanks for watch :D

Inktober jour 2 : « Divisé »
Le thème est-il respecté? ;)
Matériel :
- Micro Pigment noir
- Stylo gel blanc
- Critérium (croquis)
- Gomme
- Promarker :
-Noir
-Bleu ciel
-Bleu pastel
-Bleu royal
- Gris glacé 1 – 3 – 4
Mon inspiration: @lighanesartblog
https://www.instagram.com/lighanesartblog/?hl=fr
Superbe Musique :
https://www.youtube.com/watch?v=b-QaUYF59no
https://www.youtube.com/watch?v=wXODYTx00Ic
La Team Draw : @_teamdraw
https://www.instagram.com/_teamdraw/?hl=fr
Mon Instagram : @marine_le_dolphin
https://www.instagram.com/marine_le_dolphin/
Mon FaceBook : PixyArt
https://www.facebook.com/pixyartyoutube/
A demain pour le jour 3 ! ^^

Beautiful romantic drawing of - love - bird for Valentine’s day !
MATERIAL / MATERIEL dans la description -
-------------------------------------------------
Tools/Outils :
Ruler
Promarkers list :
- Noir / Black
- gum
--------------------------------------------------
music by : TutoDraw
- Oiseau -
--------------------------------------------------
Level : Difficult :O
Pour dessiner ces oiseaux, le niveau de difficulté
est difficile !
--------------------------------------------------
Thanks for watch and happy Valentine's Day !

Inktober jour 14 : « Féroce »
Temps : 25 min
Matériel :
- Critérium (croquis)
- Micro pigment noir
- Promarkers (gris glacé 1 - 3 - 4, Noir)
Musique :
https://www.youtube.com/watch?v=atYHbIxW-30
La Team Draw : @_teamdraw
https://www.instagram.com/_teamdraw/?hl=fr
Mon Instagram : @marine_le_dolphin
https://www.instagram.com/marine_le_dolphin/
Mon FaceBook : Pixy Art
https://www.facebook.com/pixyartyoutube/
A demain !
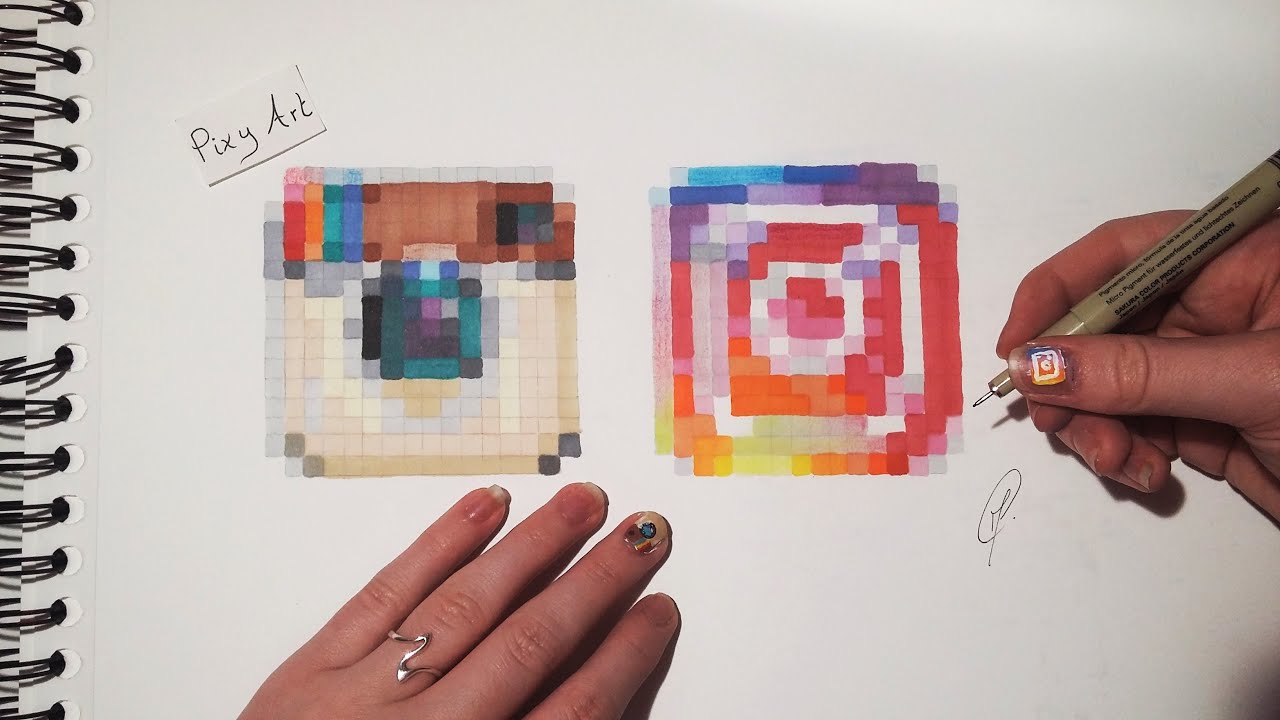
How to draw Instagram Logos with pixel ?!
MATERIAL / MATERIEL dans la description -
-------------------------------------------------
Tools/Outils :
Ruler
Gum
Pastel Pencil (Blue, Red, Orange, Pink)
Promarkers list:
- Noir / Black
- Abricot / Apricot
- Rubis
- Bleu ciel / Sky Blue
- Cannelle / Cinnamon
- Cacao / Chocolate
- Bleu Pastel / Pastel Blue
- Turquoise / Turquesa
- Gris Glacé 2 / Ice Grey 4
- Gris Glacé 4 / Ice Grey 4
- Gris Glacé 1 / Ice Grey 1
- Rouge / Red
- Champagne /
- Citrouille / Pumpkin
- Canari / Canary
- Rose rose / Pink rose
- Rouge rouge à lèvre / Lipstick red
--------------------------------------------------
music by : heroboard – Musique Sans Copyright
[Future Bass] Anozira - Happy Daze
https://www.youtube.com/watch?v=YpJU-Blg3W8
AND
[Pop] Jon Prezant - Remember Me
https://www.youtube.com/watch?v=ayXafebOi-c
--------------------------------------------------
Level : Medium !
Niveau : Moyen !
--------------------------------------------------
Mon Instagram : @marine_le_dolphin
https://www.instagram.com/marine_le_dolphin/
Thanks for watch :D

This video will give you step by step "Lin"struction on how to draw New York Knicks point guard Jeremy Lin. All you need is a sharp"lin"ed pencil and some paper. Just follow my easy steps and I will "Lin"hance your artistic abilities and "Lin"able you to draw a portrait of the Knicks "Lin"famous point guard, who is currently living a "Lin"derella story. Whats that you say? You shoot free throws like Shaquille O'neal and you make stick figures look fat when you draw? Oh thats silly talk! Dont worry! This is a team effort.
Let me say this in your "Lin"go because I dont want to be mis"lin"terpreted. This will be as easy as playing "Lin"tendo. Drawing is part of every persons basic "Lin"stincts. It is natural to draw and it is a "lin"stigated effort to learn your letters. We are going to turn back the clock and re"lin"vent your artistic vocabulary.
What? Are you not "Lin"tertained? Put down your Egg McMuff"lin" and grab a pencil. Lets begin!
Step 1: Draw the two shapes that you see. Be sure to notice the angle of the V shape. Notice that the right side of the V is slightly higher than the left side.
Step 2: Add the five shapes that I just added. Be sure to notice their scale and how they overlap the shapes from step 1.
Step 3: Add one more finger to the shape from step 2.
Step 4: Add the tall U shape. Notice its angle and observe that it is slightly taller than the shape from step 1.
Step 5: Add the shapes around the U shape.
Step 6: Point guards need fingers. Give Linsanity some fingers.
Step 7: Give the man a jersey! The Jersey is about 3 times as tall as the shape from step 1.
Step 8: Add his other arm.
Step 9: Now its time to letter his Jersey. Just remember that the New York is at armpit level. And the number 1 is under the New and the 7 is under the York. If you want to challenge yourself, try to leave a white outline around the letters.
Step 10: Make an oval for the head. If you want to make him a bobble head make a large oval. Either way, try to keep the same height versus width proportions as mine. Notice that I added three lines. The head can be split up in four somewhat equal sections; 1.) chin to bottom of nose 2.) bottom of nose to eyebrows 3.) eyebrows to hairline ....and 4.) hair. Notice that the only section that was slightly longer on Jeremy Lin was from bottom of nose to chin. The other three sections fit that formula perfectly. The hair might seem shorter, but that is because I am going to extend it when I shade his hair.
Step 11: Add the two shapes for the orbits of each eye. Notice their scale compared to the head shape and notice that that they are situated towards your right.
Step 12: Add the hairline.
Step 13: Add the nose.
Step 14: Add the ears.
Step 15: Add the rainbow shapes for the upper eyelids.
Step 16: Place the pupil and iris underneath.
Step 17: Add the eyebrows at the top of the eye shape.
Step 18: Add the eyelids above the eyes.
Step 19: Add the opening for the mouth. Notice that it is a flattened half circle and that it is situated more towards the nose than the chin.
Step 20: Add the lips. Notice that the upper lip and lower lip are similar in size.
Step 21: It is time to do the hair. The first thing that you need to do is erase the original line because the hairline is a soft line. I extended the hair on the top and in front. Both have very soft edges.
Step 22: Will cover the top of Jeremy Lin's face. I started off by erasing the lines. Then I added wrinkle lines to the forehead since he has a tense expression. Then I darkened the area above the eyes and used the blending stump to smudge. I used the eraser to create highlights.
Step 23: There are very distinct lines at the bottom of the orbits of the eye on Jeremy Lin's face. They point towards the bottom of the ears. Generally speaking the neck will be darker than the face. Jeremy Lin has a very muscular face so dont worry about softening things. Its ok to leave jagged edges. He has a very dark shadow under his chin.
Step 24: I started by creating a dark line around the collar and the sleeves. Then I added a second line above it which left a solid white line in between. The lettering is tricky. You just have to take your time with it. Try to maintain the white edge around the letters and numbers.
Step 25: In step 25 we draw the hands and arms. Use the eraser to add highlights and the pencil to add shading.

Link- http://merrillk.com/?part=fineart&articles_id=12733&act=artist1&artist=69&collection=188
Facebook- http://facebook.com/kazanjianm
WE NEED A VISUAL ARTS CATEGORY ON YOUTUBE THREAD-http://www.google.com/support/forum/p/youtube/thread?tid=2a9806f929074cbd&hl=en&fid=2a9806f929074cbd0004b630ad37cc3e
Twitter- http://twitter.com/kazanjianm
Website- http://merrillk.com
(Merrill) Supplies I Use- http://www.jdoqocy.com/click-4....247664-805536?url=ht
Men can sometimes struggle with words.
Little Old Man: Are you a parking ticket?
Little Old Lady: (What?)
Little Old Man: Because, you got fine written all over you.
Fortunately, Merrill is here to help. Imagery can replace words and today, I am going to teach you how to make a drawing that you could give to your crush or your significant other. All you will need is paper, a pencil and some romantic incentive and I will take care of the rest.
It has been said that a picture is worth 1000 words, so you probably don't want to mess up this drawing. Don't worry. You won't. Hit the link in the video description. The link will take you to my guide with photos and text, which will make this drawing as easy as possible.
Little Old Man: Baby, you are like a student and I am like a math book, you solve all my problems
Little Old Lady: (Slap)
Little Old Man: I'm not a player I just crush a lot.
Step 1: Draw an oval and two tree stump shapes.
Step 2: Draw the fist shape. Be sure to notice its placement within the oval shape.
Step 3: Draw the shape that I just added. Notice that it looks like a cartoon face from profile view. Also notice that a part of this shape goes outside the oval shape.
Step 4: Add the upside down rainbow shape, between the two shapes from the previous steps.
Step 5: Add the fingernails.
Step 6: Add the lines between the fingers.
Step 7: Erase the egg shape.
Link- http://merrillk.com/?part=fineart&articles_id=5413&act=artist1&artist=69&collection=464
Supplies I Use- http://www.jdoqocy.com/click-4....247664-805536?url=ht
Facebook: http://facebook.com/kazanjianm
Twitter: http://twitter.com/kazanjianm
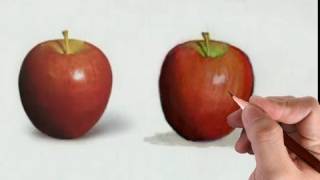
This video shows my process for making an illustration. I use prismacolor illustration markers for the first layer and color pencils (prisma once again) and a wax blending stick for the second layer. I make my illustrations in two steps. Step 1- I observe my reference drawings or photos and try to see what lies beneath. There is no way to blend markers in the same way that one can blend paint (ironically even with a marker blender) so I lie down the base tones with markers (the first layer). Step 2- Is created with color pencils. Color pencils are mixable / blendable and I mix the color pencils directly above my marker drawing. I use the wax stick to finish the surface and tie everything together. - Merrill Kazanjian
0:13 Take a second to observe the colors lying beneath the surface.
1.)Yellow/green/orange at the top
2.) Orange top/middle
3.) Brownish purple in the shadow on the left.
4.) Strong red on the right side. Everywhere else (but the red) is lower in chroma (intensity of color)
0:20- I start my drawing with the yellowed orange marker from prismacolor. I try to match the undertone.
0:38 I use marker color Apple Green at the top of the apple
0:48 I use the color Mahogany Red to add the general shape and color of the shadows
1:02 I use the marker Poppy Red to create the high chroma red on the area next to the highlight.
1:20 Now I use Tuscan Red to adjust the shadow. This color is a bot deeper than Mahogany Red.
1:28 I add the color Lemon Yellow (for the stem)
1:38 I use the Colored Pencil: French Grey 30% to drop the intensity of the color for the highlight. Highlights are NOT intense in color.
1:45 I use the colored pencil Goldenrod to get the yellow values towards the top of the apple.
2:15 I use the colored pencil White to create the bright highlight.
2:25 I use the color pencil Carmine Red to get the beautiful bright "fire engine red" hue on the side of the apple.
2:37 I alternated between the colors Canary Yellow and White to define the top of the apple.
2:54 Tuscan Red is one of the most important colors that you could get in your palette. It is strong (intense), dark in tone and purplish brown in hue. It is great for portraits as well!
3:06 I am using the colored pencil Carmine Red again. I am using it to start my blending so that my drawing does not look segmented.
3:10 I am using the Tuscan Red again and for the same reason as the previous color. I am trying to blend and make smooth color transitions.
3:20 For the first time in this illustration drawing, I am using the color Olive Green to do the shadow of the stem.
3:26 The colored pencil Magenta is a purplish red which makes a great bridge between the Tuscan Red and the Carmine Red.
3:31 Now, I am using the color Black Cherry which is a bit darker than the Tuscan Red. This color will help me define the edges a bit more.
3:42 The Prismacolor Art Stix Colorless Wax Blender is a very handy tool to finish an illustration. All it is, is the wax (the binder) for the colored pencils without the color. It is an incredible tool for colored pencil artists. Notice that I blend in the opposite direction as my cross hatching.
4:13 I use a variety of color pencils such as Black, White, Goldenrod, Carmine Red and Olive Green to finish my drawing.
I hope that this tutorial helped, if it did, please subscribe to my channel for more quality art instruction.

Link- http://merrillk.com/?part=fineart&act=artist1&artist=69&collection=462 Bruno Mars
WE NEED A VISUAL ARTS CATEGORY ON YOUTUBE THREAD-http://www.google.com/support/forum/p/youtube/thread?tid=2a9806f929074cbd&hl=en&fid=2a9806f929074cbd0004b630ad37cc3e
Facebook- http://facebook.com/kazanjianm
Twitter- http://twitter.com/kazanjianm
Website- http://merrillk.com
(Merrill) Supplies I Use- http://www.jdoqocy.com/click-4....247664-805536?url=ht
Drawing Tutorial- Howto draw Bruno Mars Step by Step. Today, if you feel like doing something, I am going to teach you how to draw Bruno Mars. Don't just lay in your bed, kick up your feet and stare at a fan. Thats just silly talk. Artists have to remain occupied or else we wind up moving to the South of France to chop off our ears. So I recommend that you get out of your snuggie and grab a pencil and some paper. While you are at it, hit the link in the video description. The link will take you to my guide with photos and text, which accompanies this video. It will make drawing Bruno Mars a lot less difficult. Oh and if you wanted to see someone dougie, here you go.
Step 1: Draw the two shapes that you see. I recommend that you start out in the lower right corner.
Step 2: Draw in the neck shape. Try to match the width and the height of this shape as closely as you can.
Step 3: Draw in the other shoulder.
Step 4: Draw in a bowl shape for the bottom of his head.
Step 5: Add the top of the head. Notice that it is significantly larger than the bowl shape at the bottom of the head. Do your best to observe and draw the contour line as accurately as possible.
Step 6: Add the triangular shape to the side of the head.
Step 7: Add the ear shape. Notice that its origin is at the line which runs accross the bowl shape.
Step 8: This is the trickiest step. Draw the shapes that I just added. This tip will help. It is a similar distance from the eyebrow to the bottom of the nose, as it is from the eyebrow to the hairline.
Step 9: Draw in the shape for Bruno's left eye socket.
Step 10 Draw in the shape for Bruno's left eye and eyebrow. Notice the placement of both of these shapes within the eye socket shape.
Step 11: Complete the nose shape
Step 12: Add Bruno's hat. Look closely and see that his hat is basically a banana shape and a trapezoid.
Step 13: Add Bruno Mars upper lip.
Step 14: Add Bruno Mars bottom lip.
songs, grenade, just the way you are, lyrics count on me, new song, girlfriend, marry you, doo wops and hooligans, she got me, click clack away, the lazy song, somewhere in brooklyn, lighters, our first time, live, concert, acoustic, unplugged, talking to the moon, liquor store blues, the other side,
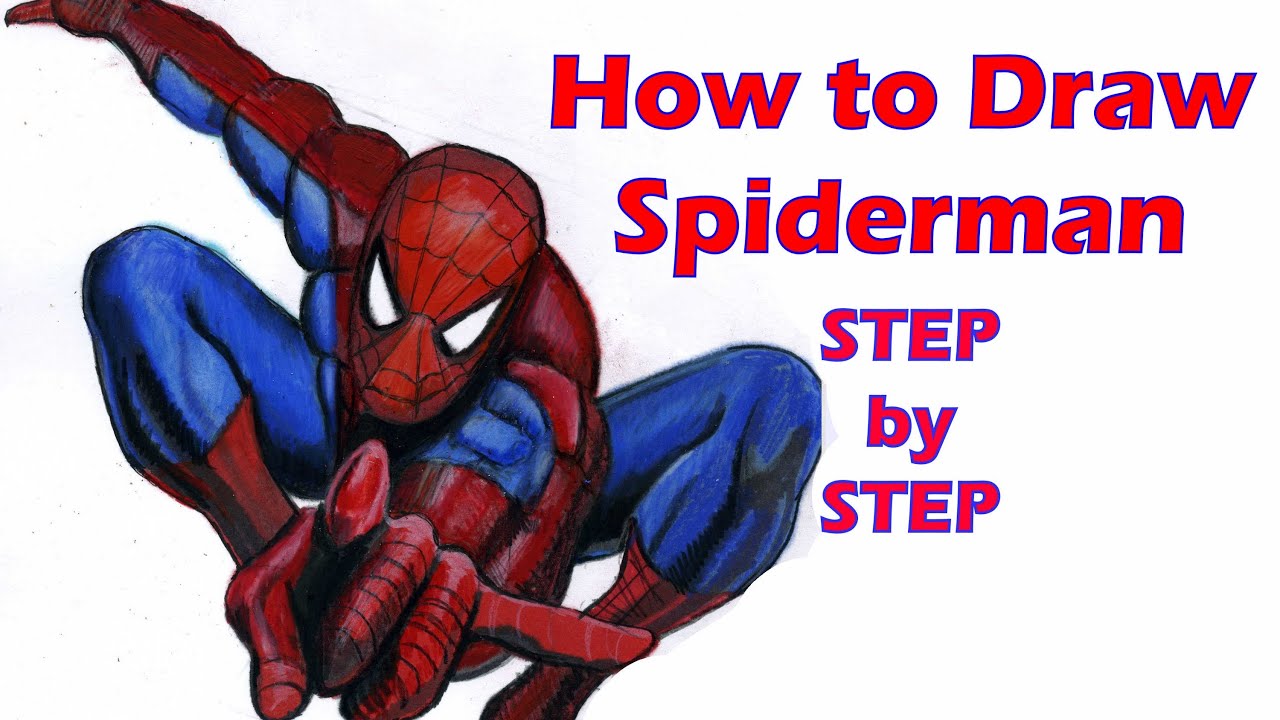
This is a step by step tutorial on how to draw Spiderman
Subscribe to kazanjianm (Don't miss any new videos that I make)- http://www.youtube.com/subscri....ption_center?add_use
Supplies I use- http://merrillk.com/?sid=135&idpage=supplies_i_use
Facebook: Like me on Facebook to find out about live hangouts or to post your work!- http://facebook.com/kazanjianm
Twitter: I tweet! Do you? http://twitter.com/kazanjianm
My Website: http://merrillk.com
YouTube Visual Arts Category Petition: http://www.change.org/petition....s/create-a-visual-ar
Step by Step Drawing Playlist: http://www.youtube.com/playlis....t?list=PLD6E34C7CD58
Video intro by Tergnats - http://www.youtube.com/watch?v=mJbr43x7bhI
Book Recommendations to draw from your mind-
Ron Tiner - Figure Drawing Without A Model
Andrew Loomis - Creative Illustration
Andrew Loomis - Drawing the Head and Hands
Andrew Loomis - Figure Drawing For All It's Worth
Andrew Loomis - Fun with a Pencil
Andrew Loomis - Successful Drawing
Andrew Loomis - The Eye of the Painter
George B. Bridgman - Constructive Anatomy
George B. Bridgman - The Human Machine

Hey its Merrill. I recommend that you watch parts 1 and 2 before you watch Part 3... Click on the pictures to see parts 1 and 2.Welcome to part 3 of my workshop on proportions for portrait drawing ... This series is made for art students and this part will cover the profile (side) view of the head. I hope to give you some easy to remember rules and a formula, so that you will be able to draw the human head from your memory. Lets get started by reviewing what we learned already. Videos one and two proved that 1.) The eyes are not at the center of the head. 2.) Its generally five eye lengths across the face if you include the ears. 3.) Its one eye length between the two eyes. 4.) The outer corners of the nose generally lines up with the outer edge of the tear duct in the eye. 5.) The corners of the mouth is generally not as wide as the midpoint of the eye (but its close) 6.) The ears generally fall between the upper eyelid and the bottom of the nose. Now, lets look at the head from the side/profile view and add to our existing knowledge. 1.) The first question asks. Is the head more tall?......... or is it more deep? In other words, lets compare the distance between the chin and the top of the head.......Wow, it looks close......but there is a strange reason for that...........Observe the slope of the forehead and the shape of the top of the head. When we measure from the jaw line we go up to the top front of the head.......which is lower in height than the back of the head when we are looking forwards. Notice the difference when we measure the distance from the chin to the top....back of the head....there is no comparison anymore. For our purposes, lets think of the head as an egg shape from the side. But the egg is not straight up and down, it is at an angle.......HMMMM egg shaped....maybe Stewie's head isn't that out of proportion.Now that we understand the basic shape of the head from the side, lets look for universal rules. A good place to start is Leonardo DaVinci 2.) Leonardo said, "The distance from the middle of the nose to the bottom of the chin, is half the length of the face." This rule applied to all 8 of the models.....and the middle of the nose as a half way point, compliments what we learned in Video 1 and 2. Lets add it to our formula.3.) Leonardo also measured the distance between the chin and the throat and the mouth and the bottom of the chin as equal distances. This rule applied to all 8 of the models.4.) he also said, "From the chin to the back of the neck, is the same distance as between the mouth and the roots of the hair." Once again, this rule applied to all 8 models.The three previous rules were helpful, but some of Davinci's formula didnt apply to our models......For instance, The space from the chin to the base of the nose e f is the third part of the face and equal to the length of the nose and to the forehead. This breaks the face up in to three equal parts....but it only applied to five of our models.
Finally, DaVinci stated, "From the eyebrow to the junction of the lip with the chin, and the angle of the jaw and the upper angle where the ear joins the temple will be a perfect square.......... Zero out of eight people formed a perfect square from the four points that DaVinci named. I am mentioning this because we should keep the relationship between these four points in the back of our mind when we draw from observation, but lets leave them out of our proportion formula. One of the biggest mistakes that students make when drawing the head from profile is the depth of the ear, or on other words, how far back it is from the face. I recently came across a website that stated that the ear is exactly half the distance between the face and the back of the head.......WRONG!!!! It is definitely further back than that. The green line measures the distance from the face to the midpoint of the ear and the red line measures the distance between the midpoint of the ear and the back of the head. I estimate that the midpoint of the ear is 55 to 70 percent of the distance from the face to the back of the head. Be sure to notice that there is a range of values rather than a universal rule, so we will have to average our answer. Now I am going to test a measurement from one of my former teachers at the Art Students League of New York who taught me that there is an imaginary equilateral triangle that connects the pupil, the back arch of the ear and the chin. When I tested this measurement, it existed in 7 of the 8 people I measured. However, there is a flaw to this system. Notice that the bottom point exists at different points on the jaw line. But overall, this measurement helps us see that it is usually an equal distance between the eyes and the chin, the eyes and the ear and the chin and the ear.

Want to draw Abraham Lincoln? This video will give you step by step instruction so that you can draw Abe......Honestly!!!!!
Subscribe to kazanjianm (Don't miss any new videos that I make)- http://www.youtube.com/subscri....ption_center?add_use
Facebook: Like me on Facebook to find out about live hangouts or to post your work!- http://facebook.com/kazanjianm
Twitter: I tweet! Do you? http://twitter.com/kazanjianm
My Website: http://merrillk.com
Art Supplies I Use in my Art Work- http://merrillk.com/?sid=135&idpage=supplies_i_use
YouTube Visual Arts Category Petition: http://www.change.org/petition....s/create-a-visual-ar
Step by Step Drawing Playlist: http://www.youtube.com/playlis....t?list=PLD6E34C7CD58

Link- http://merrillk.com/index.php?part=fineart&articles_id=5315&collection=114 In this video, I will demonstrate how to build tones while drawing. I will teach you about drawing pencils and when and how to use them. And I will demonstrate the drawing technique of cross hatching. But, this time I am going to do something different....You have the option to follow along! I decided to go the extra mile and provide you with a worksheet for the final segment of this video. Take a second to go to http://merrillk.com and type in "shading resource"...print it out and do your best. We have a lot to cover, so lets start off with learning about pencils.
Key Points
- Start out with a light to neutral pencil and go darker as you go on.
- Each row of hatches should be done at a slightly different angle to the previous row.
-When you cross hatch you should build your tones up slowly
- You can differentiate your tones through adding pressure to the pencil but dont dent the paper or things will get more difficult.
- To make neat hatches, use the tip that I gave you (put a piece of paper by the edge)
-A slip sheet prevents smudges
This piece took me two hours to make! Take your time
supplemental supplement make making teacher master mastery linear marks course seeing draft best art skills worksheet range scale tool stub stump

This video will teach you how to draw the Golden Gate Bridge in perspective. Please be sure to rate and comment! Your feedback helps!
Subscribe to kazanjianm (Don't miss any new videos that I make)- http://www.youtube.com/subscri....ption_center?add_use
Facebook: Like me on Facebook to find out about live hangouts or to post your work!- http://facebook.com/kazanjianm
Twitter: I tweet! Do you? http://twitter.com/kazanjianm
My Website: http://merrillk.com
Art Supplies I Use in my Art Work- http://merrillk.com/?sid=135&idpage=supplies_i_use
YouTube Visual Arts Category Petition: http://www.change.org/petition....s/create-a-visual-ar
Step by Step Drawing Playlist: http://www.youtube.com/playlis....t?list=PLD6E34C7CD58

A portrait of Vladimir (Wladimir) Lenin by Merrill Kazanjian. Dry Brush Oil painting on watercolor paper. I did a detailed pencil sketch on to the watercolor paper before laying down any paint. I am using Lamp Black oil paint (a black cooler in temperature). I am mixing the Lamp Black on Canvas paper. When I want to get a lighter tone, I mix the black with paint thinner (mineral spirits). When the black is more concentrated, it is darker. When the black is more diluted (with the mineral spirits) it does not have the same covering power and seems lighter in tone. FYI- Lenin died in 1924...but was NOT buried. He is "resting in state" for all to see in a mausoleum in Downtown Moscow. I used two round tipped brushes to do this artwork- One Size 5 medium and one Size three Medium. Both were (Synthetic) Sable. The only areas which I went dark black (pure paint no mineral spirits) right away were the eyes and the bottom of the eyebrows. I am working from three different reference images; all are within five years of his death. UMM.....yeah....thats Smirnoff Vodka to the left. To get inspired while drawing a Russian subject!!! Dont worry! Merrill RARELY gets "inspired" anymore! Kinda looks like Sean Connery now! ......But Lenin is not a "Shecks Shymbol" like "double O Sheven"..SHHHHHPLENDID! I usually finish the eyes first, but I wanted the eyes to be done last for Lenin, since his eyes are so intense. In other words, when the tones are set for the rest of the face, I can respond and stylize the eyes. When you darken the background, it allows you to draw more attention to the face. It also gives you a chance to "play up" the tones! The traditional approach is a criss cross- (Lighter side of face with darker background.....and vice versa) I am now putting on the finishing touches with prismacolor color pencils. Black White and Neutral Gray.
Music is by Kevin MacLeod of Incompetech.com. Songs- Song of the Volga Boatmen, Padanaya Blokov and Amazing Plan. Портрет Владимира (Владимира) Ленина Merrill Kazanjian. Картина маслом на бумаге акварелью. Я сделал подробный эскиз карандашом на акварельной бумаги, прежде чем заложить вниз от краски. Я использую лампы Черного масляной краской (черный кулер температуры). Я смешивания Лампа черного на бумаге, холсте. Когда я хочу получить светлый оттенок, я сочетание черного с краски (уайт-спирита). Когда черный более концентрированной, она темнее. Когда черный ослабляется (с уайт-спирита) он не обладает такими же полномочиями покрытие и, кажется, легкие тона. FYI-Ленин умер в 1924 году ..., но не похоронили. Он "отдыхал в состоянии" на всеобщее обозрение в мавзолее в центре Москвы. Я использовал две круглые щетки наконечником для этого работа-One Размер 5 средних и один размер 3 среде. Оба они были (синтетические) Соболь. Только области, которые я пошел черными (чистые краски не-спирита) сразу же были глаза, и в нижней части брови. Я работаю с трех разных образах ведения; все они в течение пяти лет его смерти. УММ ..... да .... тот Водка Smirnoff налево. Чтобы получить вдохновение во время рисования в русское подданство! Dont беспокойтесь! Merrill редко получает "вдохновил" больше!