Лучшие

Colorful abstract painting made with acrylic colors.
Follow us on .....
Instagram : https://www.instagram.com/surajfinearts/
Facebook : https://www.facebook.com/SurajFineArts/
Facebook : https://www.facebook.com/patelsuraj02/
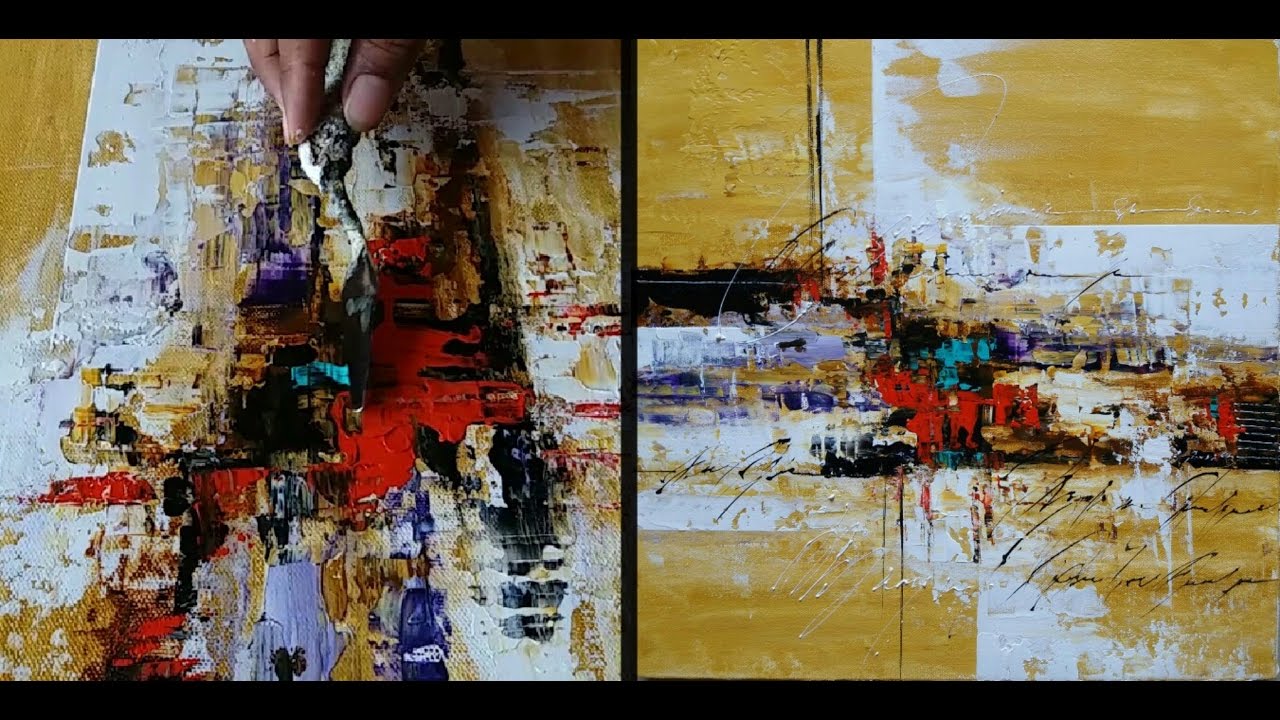
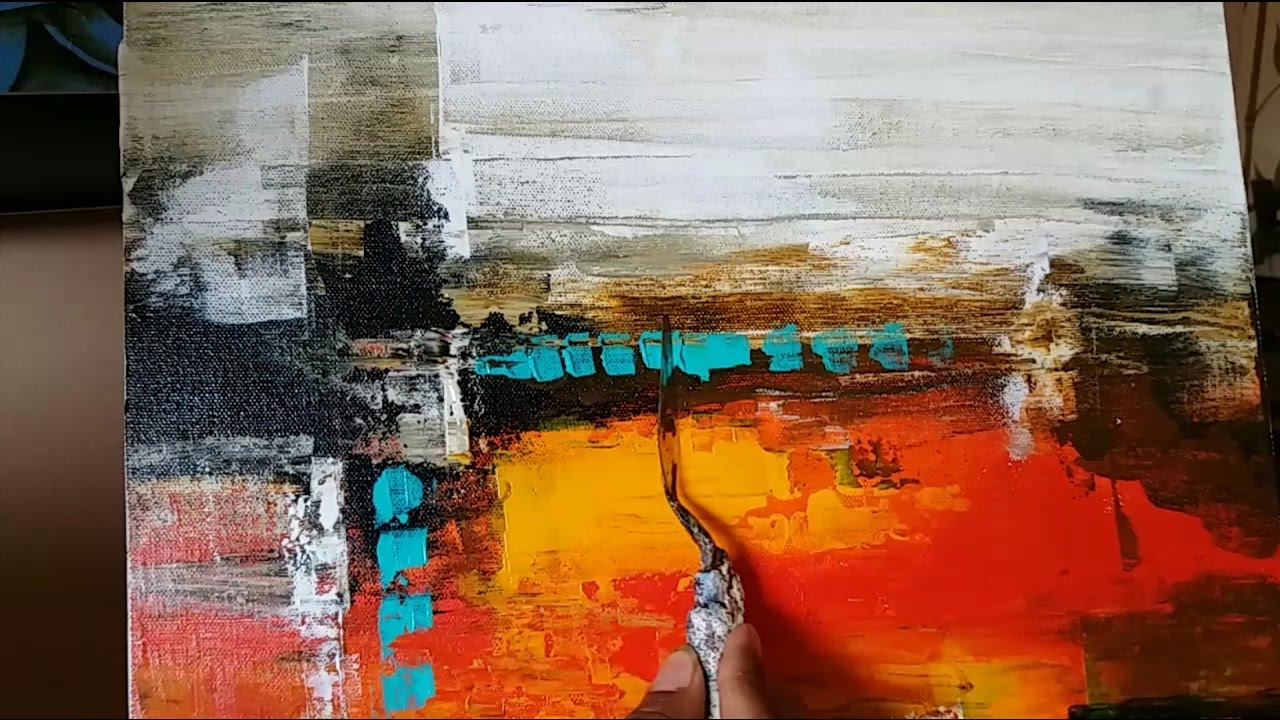
Demonstration of acrylic abstract painting done with palette knife.
Tools used - Palette knife and zero number brush.
Colors used - yellow ochre , white, Mauve,
Vermilion red and aqua blue
(Heavy body)
- burnt siena, black ( fluid )
Follow us on .....
Instagram : https://www.instagram.com/surajfinearts/
Facebook : https://www.facebook.com/SurajFineArts/
Facebook : https://www.facebook.com/patelsuraj02/

Relaxing demo of abstract painting "red sailboats on canvas using acrylic paints from Daily Art Therapy/ Day #0193
Now you can purchase my first WORKSHOP VIDEO VOLUME - 1
For more info please visit....
Instagram : https://www.instagram.com/surajfinearts/
Facebook : https://www.facebook.com/SurajFineArts/
Facebook : https://www.facebook.com/patelsuraj02/

Demo of abstract painting for beginners on canvas using easy technique in acrylics from Daily Art Therapy/ Day #0213
Now you can purchase my first WORKSHOP VIDEO VOLUME - 1
For more info please visit....
Instagram : https://www.instagram.com/surajfinearts/
Facebook : https://www.facebook.com/SurajFineArts/
Facebook : https://www.facebook.com/patelsuraj02/

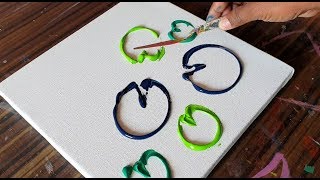
Demo of simple abstract painting on canvas just using rubber squeegee and acrylic paints from Daily Art Therapy / Day #082
Now you can purchase my first WORKSHOP VIDEO VOLUME - 1
For more info please visit....
Instagram : https://www.instagram.com/surajfinearts/
Facebook : https://www.facebook.com/SurajFineArts/
Facebook : https://www.facebook.com/patelsuraj02/

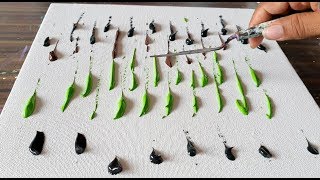
Abstract Painting Demonstration / White Flowers /Beautiful /Satisfying/ Project 365 days / Day #0344
Beautiful satisfying demonstration of abstract painting "white flowers" on canvas using acrylic paints and palette knife from project 365 days / day #0344
Now you can purchase my first WORKSHOP VIDEO VOLUME - 1
For more info please visit....
Instagram : https://www.instagram.com/surajfinearts/
Facebook : https://www.facebook.com/SurajFineArts/
Facebook : https://www.facebook.com/patelsuraj02/
Email : patelsuraj02@gmail.com

Demonstration of easy abstract painting for begginers in acrylics. Gesso is applied a bit on background and allowed it to dry completely.
Info about my abstract painting Instructional workshop video for SALE @
Instagram : https://www.instagram.com/surajfinearts/
Facebook : https://www.facebook.com/SurajFineArts/
Facebook : https://www.facebook.com/patelsuraj02/

Satisfying and relaxing demonstration of abstract painting "cityscape" on canvas using acrylic paints and palette knife from project 365 days / day #0342
Now you can purchase my first WORKSHOP VIDEO VOLUME - 1
For more info please visit....
Instagram : https://www.instagram.com/surajfinearts/
Facebook : https://www.facebook.com/SurajFineArts/
Facebook : https://www.facebook.com/patelsuraj02/
Email : patelsuraj02@gmail.com
Satisfying demo of easy abstract floral painting for beginners on canvas using acrylic paints and palette knife from Daily Art Therapy / Day #081
Now you can purchase my first WORKSHOP VIDEO VOLUME - 1
For more info please visit....
Instagram : https://www.instagram.com/surajfinearts/
Facebook : https://www.facebook.com/SurajFineArts/
Facebook : https://www.facebook.com/patelsuraj02/
Easy and satisfying demonstration of abstract painting "Water Lillies" on canvas using acrylic paints and palette knife from project 365 days / Day #0332
Now you can purchase my first WORKSHOP VIDEO VOLUME - 1
For more info please visit....
Instagram : https://www.instagram.com/surajfinearts/
Facebook : https://www.facebook.com/SurajFineArts/
Facebook : https://www.facebook.com/patelsuraj02/
Email : patelsuraj02@gmail.com

Lavender Field Painting Demo / Easy for beginners / Abstract / Relaxing /Daily Art Therapy/Day #0161
Relaxing demo of abstract painting "lavender field" easy for beginners on canvas using acrylic paints from Daily Art Therapy/ Day #0161
Now you can purchase my first WORKSHOP VIDEO VOLUME - 1
For more info please visit....
Instagram : https://www.instagram.com/surajfinearts/
Facebook : https://www.facebook.com/SurajFineArts/
Facebook : https://www.facebook.com/patelsuraj02/

Satisfying demonstrations of easy abstract painting for beginners on canvas using acrylic paints from Daily Art Therapy/ Day #101
Now you can purchase my first WORKSHOP VIDEO VOLUME - 1
For more info please visit....
Instagram : https://www.instagram.com/surajfinearts/
Facebook : https://www.facebook.com/SurajFineArts/
Facebook : https://www.facebook.com/patelsuraj02/

Demonstration of easy and colorful abstract painting with acrylics and palette knife from project 365 days / day#043
Info about my abstract painting Instructional workshop video for SALE @
Instagram : https://www.instagram.com/surajfinearts/
Facebook : https://www.facebook.com/SurajFineArts/
Facebook : https://www.facebook.com/patelsuraj02/
Email : patelsuraj02@gmail.com

Satisfying Demonstration of easy abstract painting "sail boats" on canvas using acrylic paints and palette knife from Daily Art Therapy/ Day #0117
Now you can purchase my first WORKSHOP VIDEO VOLUME - 1
For more info please visit....
Instagram : https://www.instagram.com/surajfinearts/
Facebook : https://www.facebook.com/SurajFineArts/
Facebook : https://www.facebook.com/patelsuraj02/

Demo of easy abstract landscape painting for beginners on canvas using single color and fan brush from Daily Art Therapy/ DAY #0111
Now you can purchase my first WORKSHOP VIDEO VOLUME - 1
For more info please visit....
Instagram : https://www.instagram.com/surajfinearts/
Facebook : https://www.facebook.com/SurajFineArts/
Facebook : https://www.facebook.com/patelsuraj02/

Break Free / Abstract Painting Demonstration in Acrylics / Satisfying /Daily Art Therapy / Day #0115
Satisfying demonstration of abstract painting " Break Free " on canvas using acrylic paints and palette knife from Daily Art Therapy/ Day #0115
Now you can purchase my first WORKSHOP VIDEO VOLUME - 1
For more info please visit....
Instagram : https://www.instagram.com/surajfinearts/
Facebook : https://www.facebook.com/SurajFineArts/
Facebook : https://www.facebook.com/patelsuraj02/

Easy and satisfying demo of floral abstract landscape painting on canvas using acrylic paints and palette knife from Daily Art Therapy/ Day #0148
Now you can purchase my first WORKSHOP VIDEO VOLUME - 1
For more info please visit....
Instagram : https://www.instagram.com/surajfinearts/
Facebook : https://www.facebook.com/SurajFineArts/
Facebook : https://www.facebook.com/patelsuraj02/
Demonstration of abstract painting in acrylics just using palette knife from project 365 days / Day #075
Now you can purchase my first ever INSTRUCTIONAL WORKSHOP VIDEO VOLUME-1
For more info please visit....
Instagram : https://www.instagram.com/surajfinearts/
Facebook : https://www.facebook.com/SurajFineArts/
Facebook : https://www.facebook.com/patelsuraj02/
Demonstration of acrylic abstract painting done with acrylic paints using palette knife.
Follow us on .....
Instagram : https://www.instagram.com/surajfinearts/
Facebook : https://www.facebook.com/SurajFineArts/
Facebook : https://www.facebook.com/patelsuraj02/

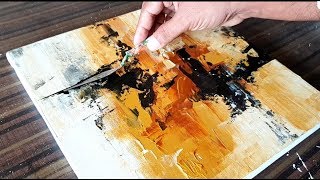
Demonstration of easy and simple abstract painting. This painting is made with acrylic paints only using palette knife and brayer.
Tools : Palette knife and Brayer
Colors : Vermilion red, orange, lemon yellow, golden yellow, aqua blue, black, white and burnt siena
Like Share Subscribe....
Follow us on .....
Instagram : https://www.instagram.com/surajfinearts/
Facebook : https://www.facebook.com/SurajFineArts/
Facebook : https://www.facebook.com/patelsuraj02/
