Образование
Подкатегория
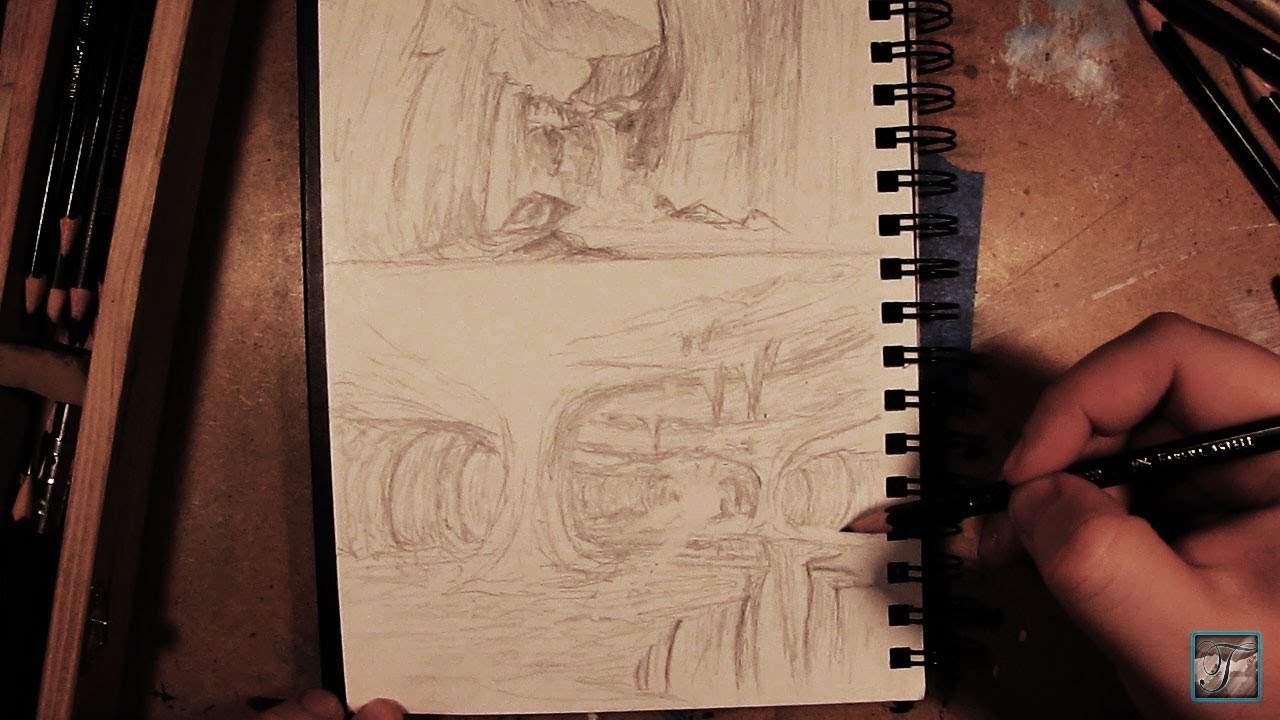
In this video, I show you how to make basic sketches for concept art. I go through all the steps that I would normally do to create different landscape scenes. These drawings that I do in the video are only done to a rough stage just to show the basics of creating form, composition, and tone values so that it can be used at a later date for reference. These types of sketches can also be done in a variety of different ways to come up with a final composition for the completed image.Enjoy!
Follow me!
Facebook: http://www.facebook.com/tylersartshack
Twitter: https://twitter.com/#!/TylersArtShack
Google+: https://plus.google.com/115405....344518849808905/post
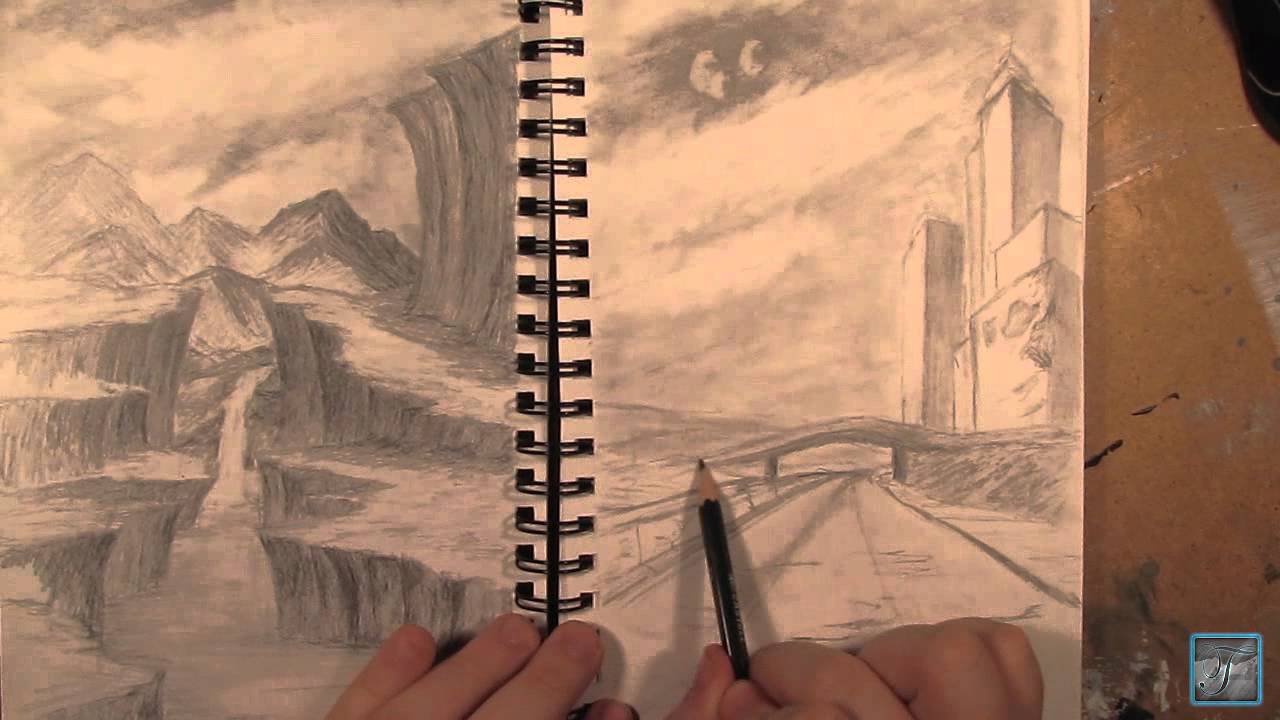
In this video, I show you all the steps that I took to draw this landscape scene that features a post apocalyptic type feel from start to finish.
Follow me!
Facebook: http://www.facebook.com/tylersartshack
Twitter: https://twitter.com/#!/TylersArtShack
Google+: https://plus.google.com/115405....344518849808905/post
Deviant Art: http://tylersartshack.deviantart.com/
Hey Everyone! Welcome back! In this video, I decided to let my audience fully decide what I should draw. During the hangout when I decided to switch from that cliff drawing to this one, I asked my audience what they would like to see me draw. They commented left and right and I got so many suggestions and really, all of them gave me such great ideas.
The suggestion that came up the most was a post apocalyptic city type drawing. When I heard that one, I got many ideas. The hardest part is creating the initial composition. But once you have a simple idea, it starts to build on top of itself and before you know it, a composition begins to unfold right on the page. That is my favorite part of the drawing. It is the part where I can use my drawing abilities best and create something out of my head. That is my favorite way to do a drawing.
Once the initial composition is completed, it is just about adding details and shading. But really, once you have the composition and basic shading down, the image does not change much from there. It is just about adding in the smaller details that makes the image more appealing to the eye. But once you do start adding details into the image, you can start to get a feel for how things going to look in the end and based from that you can always add in more details and objects.
I hope you all enjoyed this video, please give a thumbs up if you did!
Also subscribe! I release a video at least once per week.
Thank you all for watching! I will see you later!
Music Info,
Song: Down the lighted Path
Artist: Mactonite
Song can be found on cc.mixter.org

Did this once before in my sketch book. Came out ok so I did it again and made a video from it.
Supplies:
I used Staedtler pencils.
Started with 4h for laying in the ground work. Worked in layers gradually working my way all the way to 9b for the absolute dark parts.
Indent stylus for white lines in iris. Needle point makes indents in paper which keeps that area white.
Blending stumps to smooth out tones.
2 types of erasers. the pink one and a click advance one. Its called Tuff Stuff. Has a very firm eraser in it for accurate erasing. Used that for highlights within iris.
Song: Beautiful Moments
Artist: Ryan Farish
Farish Music International (BMI)
Licensed with permission, RYTONE Entertainment
You can view the final image here on my deviant page.
http://digg409.deviantart.com/#/d2q0s4e

Welcome back everyone to the start of my series on how to draw the mountains in the mist!
If you need a reference photo, try this one! http://sphotos-c.ak.fbcdn.net/....hphotos-ak-snc7/4793
Other Places to Find my Art
Facebook: http://www.facebook.com/tylersartshack
Twitter: https://twitter.com/#!/TylersArtShack
Google+: https://plus.google.com/115405....344518849808905/post
Deviant: http://tylersartshack.deviantart.com/
How to Draw Clouds:
In the video, I begin to show you my technique of how to draw clouds. This is something that I have come up with during my own struggles with drawing clouds. After a lot of practice, this is what the result of my cloud drawings have become. Now I can enjoy it even more because I can share it with everyone else. My method starts with just lightly sketching out where I want the clouds to be. After which I shade in with a 4B pencil in and around the areas making sure not to fill in the areas where I want the clouds to be.
Next step is to take a blending stump and blend out the whole shaded part of the sky to make it nice and smooth. Also use that blending stump to start to carry some of that shading into the bottoms of the clouds and fill in the greater part of them as well with shading.
Then take a kneaded eraser and press down with it and give it a bit of a twist on the tops of the clouds. It helps to give it that "wispy" look which helps to give it that illusion of depth. Keep doing this until all of your clouds have a nice overall appeal to them. After which all you really need to do is add in details inside the clouds which can also be done with a kneaded eraser in the same way the edges of the clouds were done.
Then all you need to do is take a fine tipped eraser and just add in some very small details here and there just to give it a bit more visual interest and then you are all set.
I hope you all enjoyed the video and thank you all for watching!
Music Info:
Artist: BOCrew
Song: Soul control
Music can be found on cc.mixter.org

Facebook Fan Page Link- http://www.facebook.com/pages/....Tylers-Art-Shack/181
This video is part of my "How to draw landscapes series"
This video will show you how I like to draw mountains. The basic shape of a mountain is a triangle. You take that initial shape and morph it into a mountain by building off it.
This process starts by taking that triangle shape and replace the lines with more organic lines. This means to create curved, jagged....anything but straight direct lines.
Then from that you can start to create peaks branching off from the triangular shape to create a more interesting mountain. Then when the first mountain is created, create a few more.
After that, you create an organic/irregular line from the peak of the mountain all the way down to the base. That line will help to determine where the light and shadow will be.
Then you need to establish where your light is coming from. This is essential for the drawing to have a real life look to it.
After this comes the shading. Where you determined the light source to be is how you will shade the mountains. The side of the mountain facing the light will be lighter than the side facing away from the light source.

Facebook Fan Page Link http://www.facebook.com/pages/....Tylers-Art-Shack/181
Welcome back everybody. This is part 2 to how to draw a tree tutorial. Last video was the tree anatomy and the basics on just how to draw one. This video is going to focus on the detail process including the shading and form.
The sketch started out by just using cylinders and manipulating the shape of it. The shading process of the tree will be using some charcoal. The name of the charcoal is Generals. And ill be using hard medium and extra soft.
You need to establish where the light will be coming from to enable you to understand where the highlights and shadows will be on the tree. Where the light hits the tree will be very light and where the light doesn't hit the tree will be very dark.
The cylinders are only there to help you understand the basic shape of the tree. You leave the cylinder shape on the page and just shade over everything.
The branches and twigs takes some practice. You almost need to twist the pencil in your hand as you are drawing.
With the last parts of the drawing, you want to keep it irregular and unique to help to replicate what a realistic tree would look like in the real world. It really helps to go out and take some reference images or go on google to find images. It is always a plus to have an image next to you to always look back to when you are stuck or dont know where to draw in something.
This whole drawing took me just over 20 minutes or so.

I get back Into OIL PASTELS!! This is what I am really known for on YouTube. In this video I show you how to draw a simple landscape scene using a simple sketch then going over it with oil pastel to add color and vibrance to the piece.
=========================================================
Follow me!
Facebook: http://www.facebook.com/tylersartshack
Twitter: https://twitter.com/#!/TylersArtShack
Google+: https://plus.google.com/115405....344518849808905/post
=======================================================
In this drawing, I started off with a very rough pencil sketch using an HB pencil. I roughly sketched out everything that I wanted in the picture with minimal detail. So for the mountains the the background, I just drew simple outlines for them showing very small details that I would fill in later with oil pastel. The beach line was similar to this as well, I only scribbled in a few lines showing the movement and flow.
Once I had a very basic sketch placing all the objects to my liking I then broke out the oil pastel. When it comes to landscapes, I almost always start with the sky because it is the furthest object in the background and all other objects are usually placed over it. I started with the bottom of the sky nearest the mountains and made the sky with a very light blue color and made it darker as it went up. I also left space open for clouds. I added in white oil pastel even though the paper was white because it still makes a difference and makes them look more puffy. I then added some blue and tan into the clouds to add a bit of warmth and definition to them.
Moving down the landscape the next object that was worked on was the mountains. I wanted them to really feel like they were being pushed into the background so I added a lot of blue with them. Like I was saying the video, blue helps to add atmospheric perspective into the drawing helping to push them back and add depth to the picture.
After this I added a little bit of every color I used for the sky into the water. I wanted to keep the water very light in color as well. I did not want to have a very strong blue. I kept it light by adding in a lot of white and blending it horizontally with a blending stump.
After I got a lot of the water finished, I started to add in the foreground details. I added in some of the rocks that went into the water and the trees on the banks. I used a few shades of yellows and greens for the trees and just used a tapping movement with the oil pastel to make the leaves on the trees. This helped to add depth and show form.
all that was left was adding some minimal details to the rocks and adding in a tan color for the sand. After blending in the tan color, I took a warm brown and put that down where the water met the sand to give it a "wet" look. that brought the whole thing together.
This was a simple landscape drawing I did that hopefully a lot of you viewers can follow along with. If any of you plan to make a replication of this please be sure to share it with me by adding it as a video response to this video or by sharing on my facebook page.
I hope you all enjoyed this drawing as much as I did. Have a wonderful day!!!
Please leave some feedback! I will always respond!
Music I got form CC Mixters Website. It is a search engine for creative commons music.
The song in this video is called Time by Darkroom
Here is the Info!
"Time" by Darkroom (feat. SackJo22)
http://ccmixter.org/files/mactonite/29957
is licensed under a Creative Commons license:
http://creativecommons.org/licenses/by/3.0/
Did another one of those abstract/nonobjective art drawings. Ive done drawings like this a lot in the past and can be great fun to do. Its just doodling on an entire page with random stuff and it looks awesome in the end. It also gives a great boost in drawing technique and skill.
You can view this drawing along with all my other works of art from my deviant art page.
http://digg409.deviantart.com/gallery/
Song: Deep
Artist: Ryan Farish
Farish Music International (BMI)
Licensed with permission, RYTONE Entertainment
www.ryanfarish.com
You can purchase this song from Itunes here.
http://itunes.apple.com/us/album/deep/id327192176?i=327192284&ign-mpt=uo%3D4
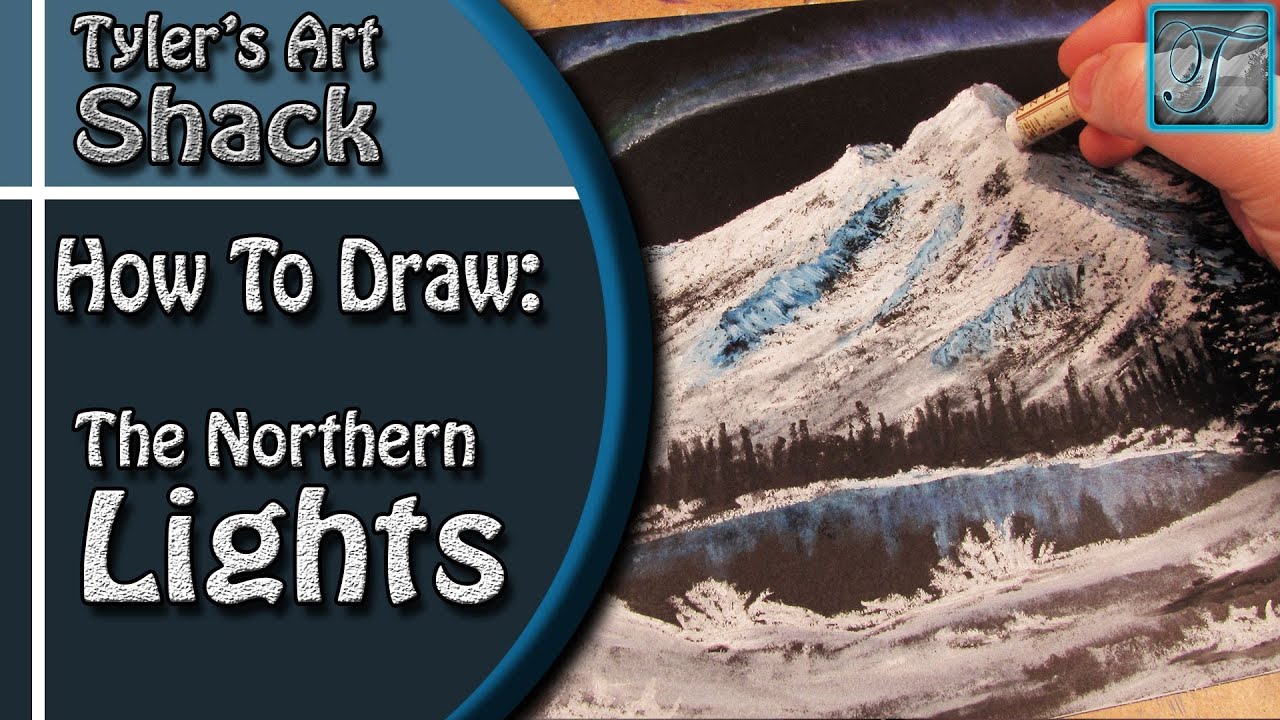
Brand of oil pastels used is Sennelier. They are a great brand but can be costly. I recommend that if you have fine art stores near you that carry the brand, sign yourself up to their newsletters because usually during the back to school sales, they will put them on sale for a pretty good price. That is how I got my first set of them.
Other Places to Find my Art
Website: http://www.tylersartshack.com
Facebook: http://www.facebook.com/tylersartshack
Twitter: https://twitter.com/#!/TylersArtShack
Google+: https://plus.google.com/115405....344518849808905/post
Deviant: http://tylersartshack.deviantart.com/
Welcome back everyone to an oil pastel drawing of the northern lights! This was a suggestion that I had gotten on facebook after asking what sorts of drawings everyone would like to see and that one sparked my interest. After searching around for some images, I decided to sort of keep it a bit more bob ross styled but with my own touch of course.
I started this one off with drawing in the mountains. I didn't have to worry about the sky because the paper was black to begin with and that is the color that I wanted the sky to be. It also makes it a lot easier to draw in the mountains with having a black background.
With drawing in the mountains, I started off with a pencil sketch to see where I wanted different details. and general placement of the objects overall. I then got myself going with the oil pastel. I used straight white for the highlighted side of the mountain. I also didn't press too hard on the pastel so that it would give it nice break look so that it would leave a nice texture for it. For the shadowed side, I used a very dark blue and then applied the white oil pastel on top of it to bring out a lighter color.
For the Northern Lights, I simply applied a very potent blue line followed by 2 more to create 3 lines all together. After applying some purple and green to give it added color, I took a blending stump and blended them towards the top of the page to help spread them to give them a better look. Later on I added a lot of white to really help bring them out more.
The trees were done with black oil pastels and did them in the traditional way that I normally do pine trees. I have quite a few videos that explain how to draw in this way. I also decided to add a bit of white oil pastel to make it look like a fresh snowfall just for the added effect.
On the foreground, I literally went to town with that oil pastel just creating different textures and such just to help create a nice area to finish things off. I didn't spend too much time with that. but In the end I think that this one came out really well.
Thank you everyone for watching and I hope you enjoyed the drawing!
Music info:
Artist: DJ_Rkod
Song: Faster than the Eye Can Persieve

Hello everybody welcome back to another drawing tutorial. This will probably be the easiest drawing tutorial I will put on youtube.
Supplies to use to participate in the drawing:
-Drawing Quality Paper
-Range of pencil tones, or school pencil
-Erasers
-Practice
This is a simple drawing tutorial. All you need to do is draw lines in an up and down like motion like sound waves in an audio file. You can make the lines larger to demonstrate distance. The larger lines will simulate larger trees along with adding details to it. This drawing sets you up for drawing in a lake type scene.
Hope you enjoyed the drawing tutorial. I will have another one very soon!

Yes, this video is a Re Upload from the other one that is on my channel. I had to change the music out.
Did this once before in my sketch book. Came out ok so I did it again and made a video from it.
Supplies:
I used Staedtler pencils.
Started with 4h for laying in the ground work. Worked in layers gradually working my way all the way to 9b for the absolute dark parts.
Indent stylus for white lines in iris. Needle point makes indents in paper which keeps that area white.
Blending stumps to smooth out tones.
2 types of erasers. the pink one and a click advance one. Its called Tuff Stuff. Has a very firm eraser in it for accurate erasing. Used that for highlights within iris.
Music is by Danosongs.com
Song name is Sun Starked
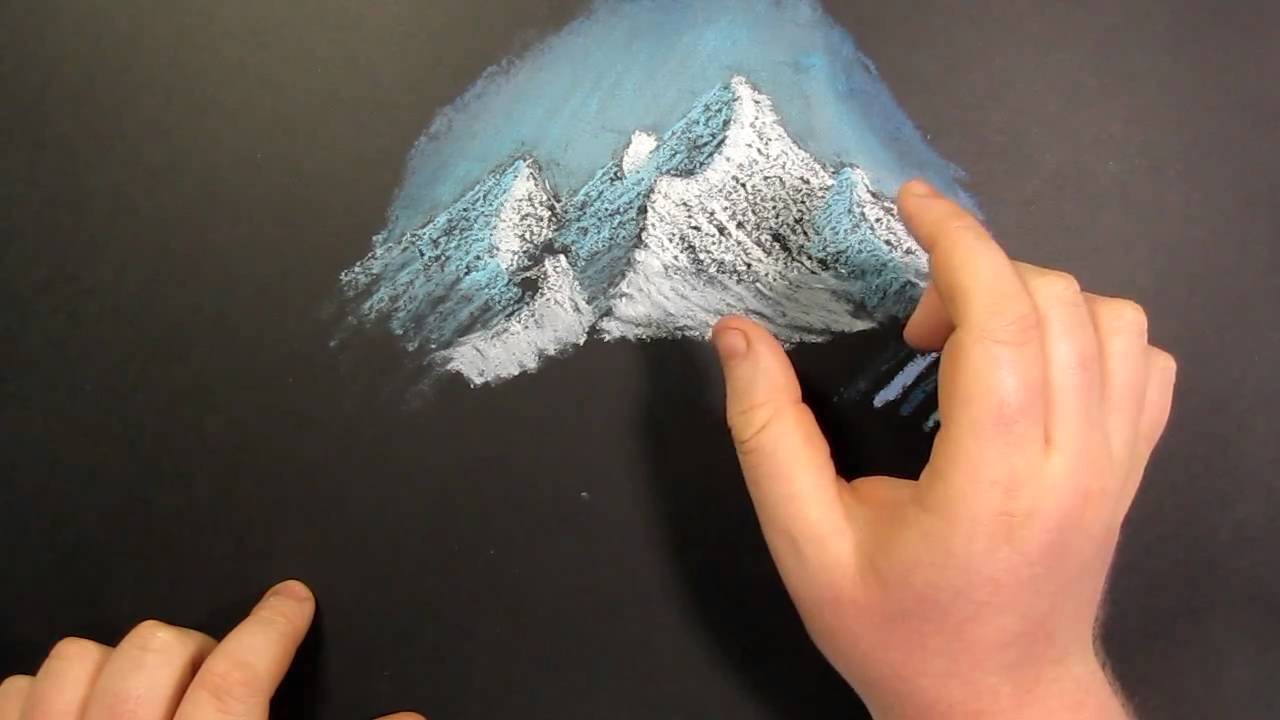
Welcome to tips and tricks number 2!
Here I will demonstrate and show you how to draw snow covered mountains in color with oil pastels in a bob ross like style. It has a very similar effect of having a breaking like texture similar in his paintings but with oil pastels. This is a very simple technique to pull off and takes no time whatsoever to do.
All you need to do this drawing is some black paper, oil pastels and blending stumps
The black paper is by Strathmore and it is called artagain. It is 12 by 18 inch paper
the oil pastel brand that I use is sennelier
The music in this video was done by a friend of mine. His youtube channel name is 007Regent.

Welcome back everyone to the Art Shack. This video I am going to cover the basics of different pencil textures and how you can apply them into your drawings.
Other Places to Find my Art
Website: http://www.tylersartshack.com
Facebook: http://www.facebook.com/tylersartshack
Twitter: https://twitter.com/#!/TylersArtShack
Google+: https://plus.google.com/115405....344518849808905/post
Deviant: http://tylersartshack.deviantart.com/
There are literally hundreds of different textures that you can create based off of what you normally draw. Everyone is going to have their own set of textures that they will use. You can also always go on google and look up pencil textures to give you ideas of different ways to go about drawing.
Pencil textures is an effective way to create realistic details without the painful process of drawing each and every little details. Textures are there as a short cut of sorts to help bring a long the drawing process more smoothly. Once your knowledge and understanding of textures increases, you will be able to combine and change them on the fly to create new textures to suite your needs for drawing.
I hope you all enjoy this video everyone and keep up the practice! Thanks a lot for watching everyone!
Music Info:
Artist: Spinmeister
Song: Moments in space
Music can be found on cc.mixter.org
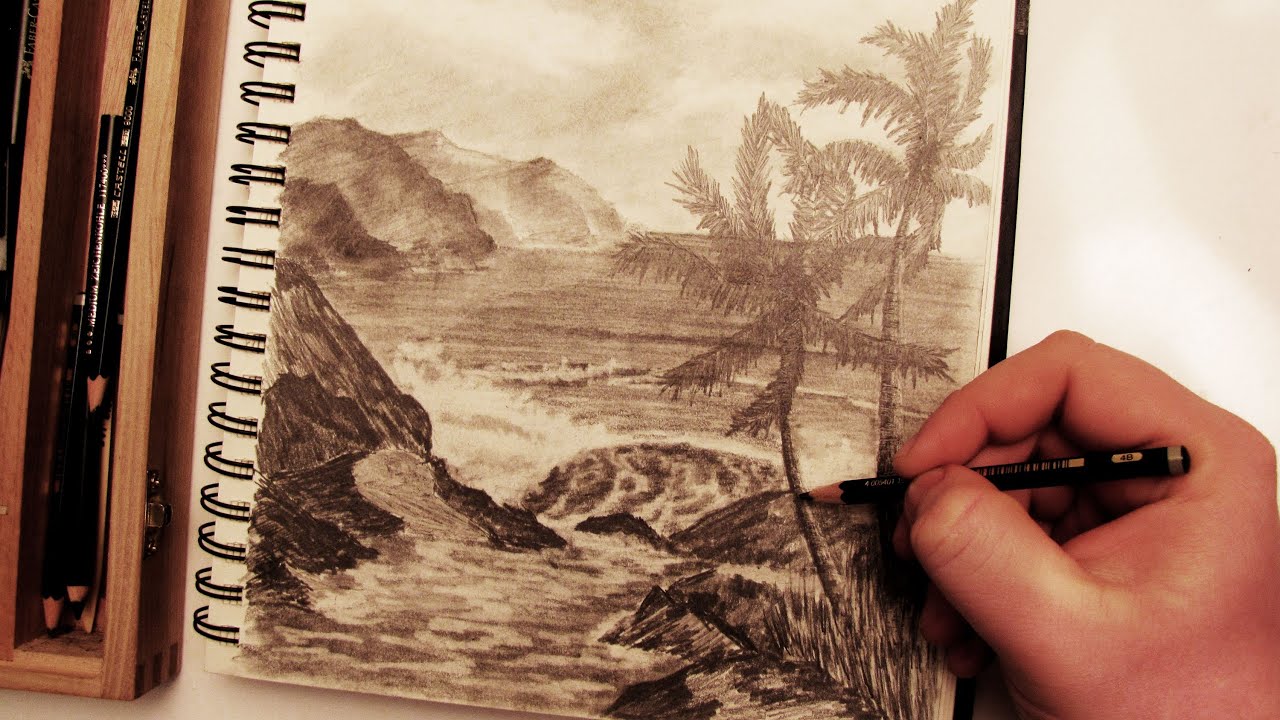
This video will show you the steps I took to create a completed palm tree beach landscape scene using different pencils and tools.
Follow me!
Facebook: http://www.facebook.com/tylersartshack
Twitter: https://twitter.com/#!/TylersArtShack
Google+: https://plus.google.com/115405....344518849808905/post
Supplies:
Pencils: Faber Castell 2H, B 4B
Erasers: Tuff stuff Eraser Stick, Kneaded eraser
Blending Stump
9x12 90Ib Drawing Paper
What is going on everybody, welcome to a brand new tutorial/drawing video. In this video I was just going to do a simple tutorial on how to draw a palm tree with a simple backdrop to give the scene a nice simple look. I started the drawing with putting in that light backdrop to set the scene and decided to make this a completed drawing with lots of details.
I started with the sky. I had never really made a very detailed and cloudy sky before in a landscape scene. Until recently, clouds were an element that I had a lot of trouble drawing. I had spent quite a bit of time drawing clouds in my sketch book and using that as a reference helped a lot when drawing these clouds. I started them out by using a 2H pencil and lightly shading around where I wanted the clouds to be. I usually leave the areas where I want clouds white on the page. After shading the page a bit darker I started to add in some details for the clouds. I started by using a kneaded eraser and softening the tops of the clouds while using a blending stump to blend out the bottoms of the clouds so that they blend in with the sky. I then used the blending stump with graphite all over it to start adding some shadows to the clouds themselves to give them some depth and volume. Then using a small eraser, I lightened up the tops of the clouds with a small white eraser to make them pop. With some fine tuning after this, the clouds took shape.
The next stage in this drawing was drawing in the distant rocks/mountains. I just did a simple outline for placement and shaded them in with simple tones. I didn't want to give them a lot of details because they are far back in the distance. A good way to portray that something is far in the distance, is by leaving it with minimal details. I still wanted to show that they were rugged rocks so I left them with a rough texture in the end.
The next step in the drawing was adding in the water. Water is a simple element to draw in but can be easily over done. I start in the back horizon and add strong horizontal lines close together. I space those lines out as they get closer to the picture plane. This helps to show that the water is receding into the background of the image. After I got most of the line work down, I used a blending stump to soften the water out a bit. I found that the texture was a bit too rough and wanted to calm it down a bit. I also added in a bit of reflection for the distant rocks but did not want to over do it.
Next comes the closer water details. I imagined from the start that I wanted to have a nice wave crashing on some rocks. So I started to map out where this wave would be and added some shading to it. I also showed some white water crashing around the wave as it was hitting the rocks. In the shading of the wave, I used my fine eraser and erased out some foam for details in the water.
Like I said in the beginning of the video, I wanted to have a palm tree demonstration so I had to decide where I wanted them. I wanted this image to be a dynamic landscape and the placement of these palm trees was crucial. If I had place them on the left side of the drawing near the distant rocks, it would have lead the eye right off into the horizon of the water on the right side of the page and it would also hide those rocks from the viewers eye taking away a lot of the visual interest. I did not want to lead the viewers eye off the page when they looked at this drawing. I decided that the best possible place to put them would be on the right side of the page. It was lacking in details as it was because the only object on that side was some rocks and the distant horizon line. When I was drawing in the trunk or main section of the palm trees, I was careful of the shape and direction of them as well. I wanted them lead the eye into the middle of the page where the wave was breaking on the rocks.
I got the general placement of them down and I like to draw the trunks of trees with texture. I did this by using 2 different pencils. I used a 2H pencil to draw in some horizontal details going up the trees and then used a 4B pencil to shade it. Because of the difference in tonal range between these 2 pencils, it left all that detail on the trees and also left the 2H pencil marks light making it look like highlights.
The final stages of this drawing were drawing in the palms themselves. I used a 2H pencil for the undertone and used 4B to make them a bit darker. After this it was adding in some final details for the rocks and added in some grass for the base of the palm tree.

In this video, I show you how to take a photograph and break it down into simple elements that can be transferred over to start a sketch.
If you would like a better look at the photo, Here is a link!
http://sphotos-a.xx.fbcdn.net/....hphotos-snc6/341311_
Other Places to Find my Art
Facebook: http://www.facebook.com/tylersartshack
Twitter: https://twitter.com/#!/TylersArtShack
Google+: https://plus.google.com/115405....344518849808905/post
Deviant: http://tylersartshack.deviantart.com/
Materials:
Photograph
Sketch or drawing paper
Any kind of marker
Drawing Pencils
Erasers
I started this with using a photo reference that I took a few years back. I printed it out and used that as a reference. If you do not have a printer, you could always use reference images from magazines or books and then just use some tracing paper on top of the image and extract the major lines that way.
I start by picking out major lines within the image to break it down. After which I use those lines in my sketch. This helps a lot with the placement of the overall objects as well.
You can also change what is in the original image. Just because it is there does not mean that it has to be that way. Of course it still can be the exact original. changing a few things up helps to make the artwork of your own creation and it helps build up your creativity.
I hope this video helped you all out and I hope you enjoyed it! Thanks everyone!
Music:
Artist: Mactonite
Song: Time
Music is from cc.mixter.org
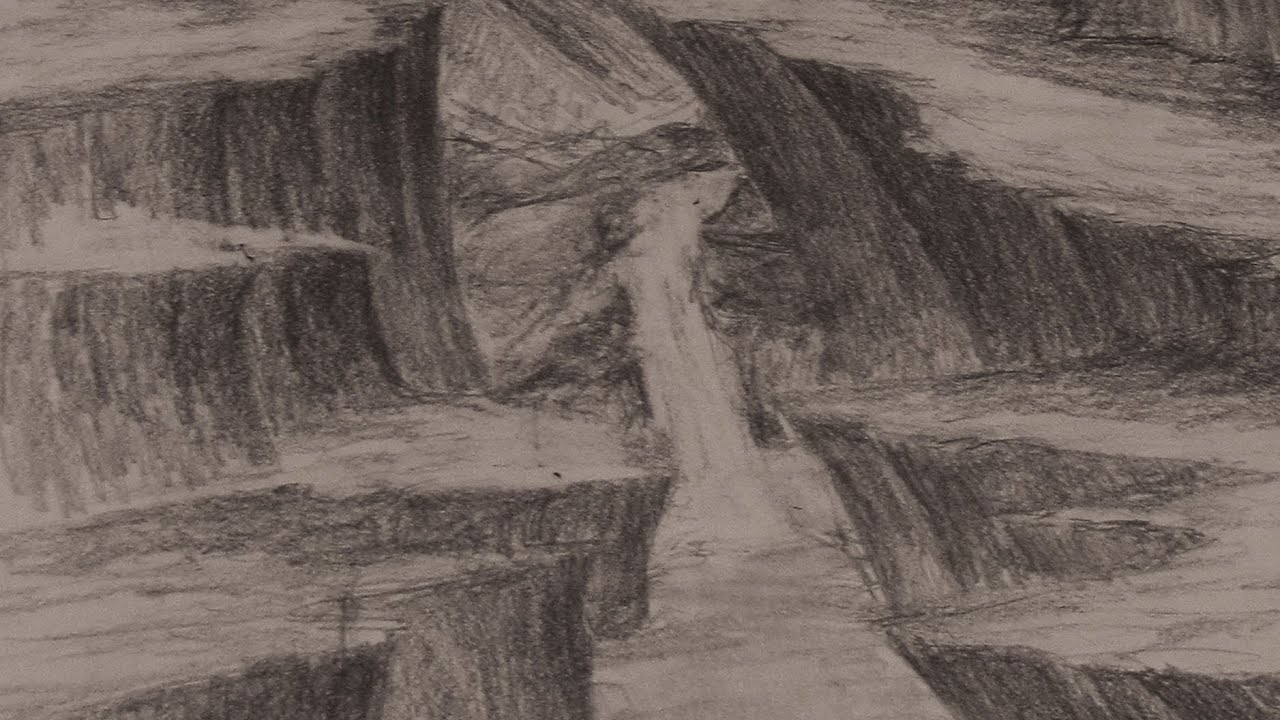
In this video, I take you from start to finish and show you all the steps along the way on how I drew an image full of cliffs. Check it out!
Follow me!
Facebook: http://www.facebook.com/tylersartshack
Twitter: https://twitter.com/#!/TylersArtShack
Google+: https://plus.google.com/115405....344518849808905/post
Deviant Art: http://tylersartshack.deviantart.com/
Music Info:
Music is from CC.mixter.org
Song: Yiourgh
Artist: DoKashiteru
In the start of the live hangout I did on my channel, I was really not sure about what I wanted to draw. So when I do not know what I want to draw, I will usually start making some shapes on the page. I start by making some series of curved lines and some straight. Just keeping things random. Then once I have a few different lines, I start to see what kind of shapes I can make from those. And from that, I start to form a composition. This is usually how I make different scenes even though I have no Idea what I want to draw. I find it another pretty good way to get out of an artists block but you also need to know the basics of how to draw objects in perspective to pull it off.
Once I did this, I created a composition of very steep cliffs. I always have a good time drawing cliffs because of how raw they can look. I always have a fun time trying to capture the rugged nature of them.
When I was in the thick of the drawing, I ended up asking my audience what they wanted to see me add into the drawing. I had about 30 people watching me live when I asked this and got a slew of suggestions. By popular demand, I ended up adding in a waterfall and changed the composition of the foreground to accommodate a river or stream.
I find it great when you kind of get stuck mid drawing and having someone to ask. In this case it was my live audience. The suggestions were all great and because of that, I was able to finish off the composition and complete the overall look of the image. I really enjoyed doing this drawing!

During this video, I take you step by step showing you how to draw detailed leaves on a tree branch that can be used to make a realistic looking tree.
==================================================
Follow me!
Facebook: http://www.facebook.com/tylersartshack
Twitter: https://twitter.com/#!/TylersArtShack
Google+: https://plus.google.com/115405....344518849808905/post
All you need for this tutorial is some standard computer printer paper. I do however recommend that you use drawing or sketch paper for better results because of the tooth of the paper. It makes it a lot easier to make tones because of it. The only other tool you really need is a range of pencils. I always recommend a 2H HB and 2B. Then use a 4B or 6B for the very last detail works of the piece.
Start any drawing out with a 2H. This will be used for getting general lines down in place as well as small detail work.
For this drawing, I used the lighter pencil to start out the very base of all the leaves in this drawing. I always start light to get the placement down as well as first initial details.
After I have the very first base coat down, I will then go in with darker pencils to make more volume within the drawing. Ill do this with the branches and leaves. This also helps to bring out a lot of depth within the drawing.
After the second layer is applied, the 3rd layer is just to darken all the darks of the drawing even more. This is usually the last step needed to create volumetric shapes and forms.
After this it is really just practice. Not everybody will be able to draw this right off but give it a few tries and it will come easily.
It is all within the practice!
Hope you all enjoyed this tutorial!
Please Subscribe for many more tutorials to come!

Welcome back everyone to Time Lapse Drawing - Summer in the Mountains
Other Places to Find my Art
Website: http://www.tylersartshack.com
Facebook: http://www.facebook.com/tylersartshack
Twitter: https://twitter.com/#!/TylersArtShack
Google+: https://plus.google.com/115405....344518849808905/post
Deviant: http://tylersartshack.deviantart.com
Make a Donation Via Paypal! http://tinyurl.com/o6cnnpv
Check out the Real Time Series Playlist here!
http://www.youtube.com/watch?v=dKAcaE4BuNk&list=PLQ2Zh_NCUBvS2AEvD3PthmMHbolcSrCCD&index=1
This video is a Time lapse based off my Summer in the Mountains Real Time series. I like to upload a time lapse just to help give an overview of the entire process that took place. I am quite happy with how the drawing turned out and I hope that you all enjoyed it as well!! Thanks a lot for watching everyone!
Music Info:
Song: Corporate Uplifting Rock
Artist: Plastic 3
http://tinyurl.com/nthpoga
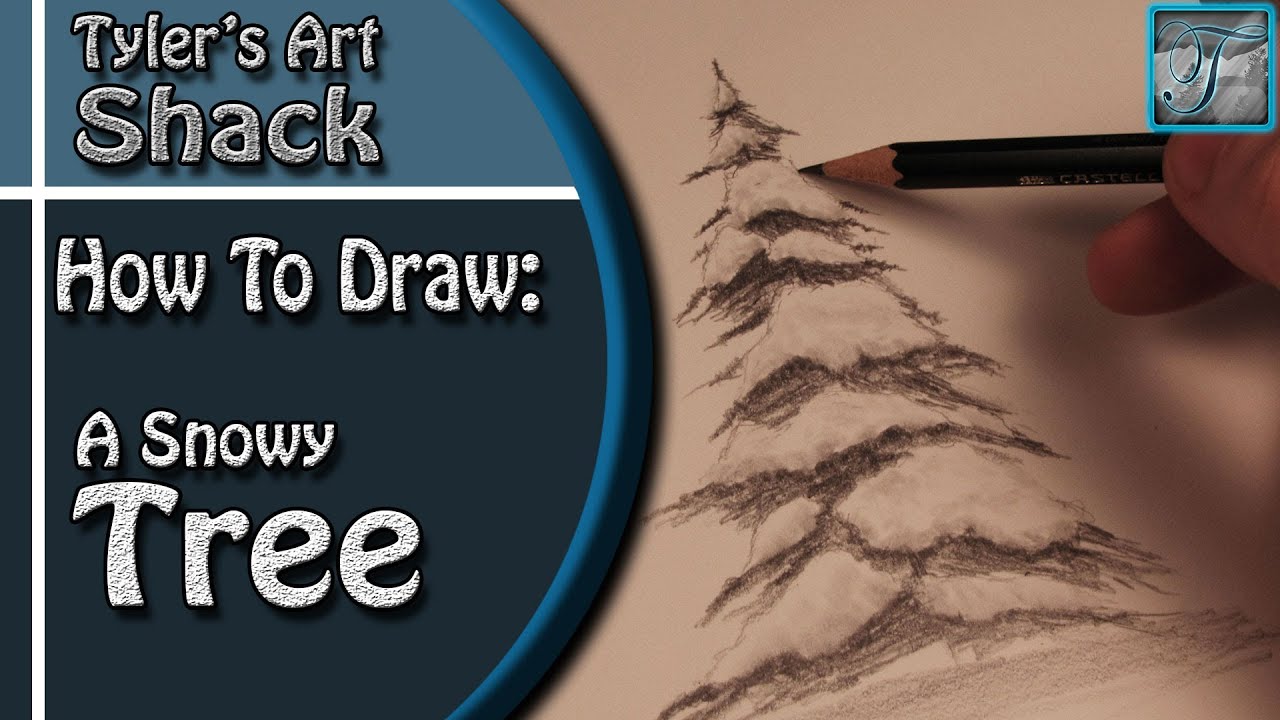
Welcome back everyone to this weeks drawing tutorial where I will take you in real time to show you how to draw a snow covered tree.
Other Places to Find my Art
Website: http://www.tylersartshack.com
Facebook: http://www.facebook.com/tylersartshack
Twitter: https://twitter.com/#!/TylersArtShack
Google+: https://plus.google.com/115405....344518849808905/post
Deviant: http://tylersartshack.deviantart.com/
So to start this drawing off, you don't need a huge variety of pencils. If you only have one pencil grade, that should do you just fine during this.
To start off, I made a line about 4 inches tall just to tell where the top and bottom of my tree is going to be. After this, you can also make a tall cone starting from the top of the line going down the to bottom to help keep your drawing within proportion.
I start the with the snow covered areas of the tree because they are going to be the lightest. Use a sharp pencil for this and follow along in the video where I start to make a snow shape. I start with the cap of the tree and usually do a hershy kiss shape. The rest of the tree I filled in as if I were drawing in clouds. Try to keep the shapes looking organic as it will help your tree to look more lifelike.
After the snow is applied, we are now going to draw in the tree details. Like a lot of my other how to draw tree videos, I use a pencil on its side and start to follow in the direction of the tree. Starting at the main stem and working my way out towards the outer parts of the tree. I try to keep these lines dark to keep a nice contrast.
Once that is finished up, you can go back in with a blending stump, and just blend some of the snow areas that we drew in. No need to add any more graphite to the page. Just blend what is on it so that it will give the snow a bit of volume.
After that you pretty much have a completed drawing! I hope you all enjoyed!
Music Info
Artist: GMZ
Song: Parametaphoriquement
Music can be found on cc.mixter.org

LINKS!
Website: www.TylersTurnings.com
Facebook (Woodworking) www.facebook.com/tylersturnings
Facebook (Drawing)www.facebook.com/tylersartshack
Another day of production in the shop where I show another stage of how an end grain cutting board is formed. This video, I take you through the process of taking the rough panels and running them through my 20 inch grizzly planer to make them smooth and suitable for gluing. I also take out the trash along the way.
Music
Artist: Del Sound
Song: Del & Rabae - Faith (Original Mix)
Del Social Links:
https://soundcloud.com/del-sound
https://delsound.bandcamp.com/
https://www.youtube.com/user/TheDelsound
https://instagram.com/del_sound/
https://twitter.com/Del_Sound
https://delsound.tumblr.com/
