Образование
Подкатегория

Welcome back everyone to a new real time drawing tutorial series. In this series, I will take you step by step to show you how to draw a spring meadow.
Other Places to Find my Art
Website: http://www.tylersartshack.com
Facebook: http://www.facebook.com/tylersartshack
Twitter: https://twitter.com/#!/TylersArtShack
Google+: https://plus.google.com/115405....344518849808905/post
Deviant: http://tylersartshack.deviantart.com
So, this is the final video of this series where I show you how to make some quick finishing touches to really bring out the final product. Some of the main aspects that I left to this very part was the water. Water is something that can be easily overdone if too much detail is added. But it also depends on the look that you are looking for. In this one, I just wanted some simple details to help bring out the drawing.
I also left out the details beneath the tree where the water line is. This area I made very dark just to show the shadows that would be there. I also took an eraser and erased out some roots that would be in the area to help add in some details. Once I erased them out a little bit, I went back in with the pencil to add some more detail and shadow to them.
A bit later in the video, I also add in another longer waterfall towards the bottom of the page. This waterfall took quite a lot of steps to achieve the effect but it is mostly layering. I would start by adding in a tone of pencil and then using the eraser to start to create the water fall. Once I have erased some parts out, I would then go back in with my pencil and just try and darken some of those areas to help make them pop. Going back and forth like this is what in the end really helped to make the waterfall turn out well.
I hope that you all enjoyed this drawing series and I hope to see your results on Facebook! Thanks a lot everyone for watching!!
Music Info:
Artist; Ghost
Song: Reverie Small Theme
music can be found on cc.mixter.org

Managed to find some time and get one of these done. I did this for my Grandmothers Birthday coming up soon and I wanted to give her something nice.
Took me a little over 2 hours to complete this drawing.
I mainly used pastels for this. I also used some charcoal here and there.
You can find a picture of the completed drawing on my deviant art page. As well as all my other works of art. http://digg409.deviantart.com/gallery/
Song: Believe
Artist: Ryan Farish
Farish Music International (BMI)
Licensed with permission, RYTONE Entertainment
www.ryanfarish.com
You can purchase this song from Itunes here.
http://itunes.apple.com/us/alb....um/believe-ep/id3001
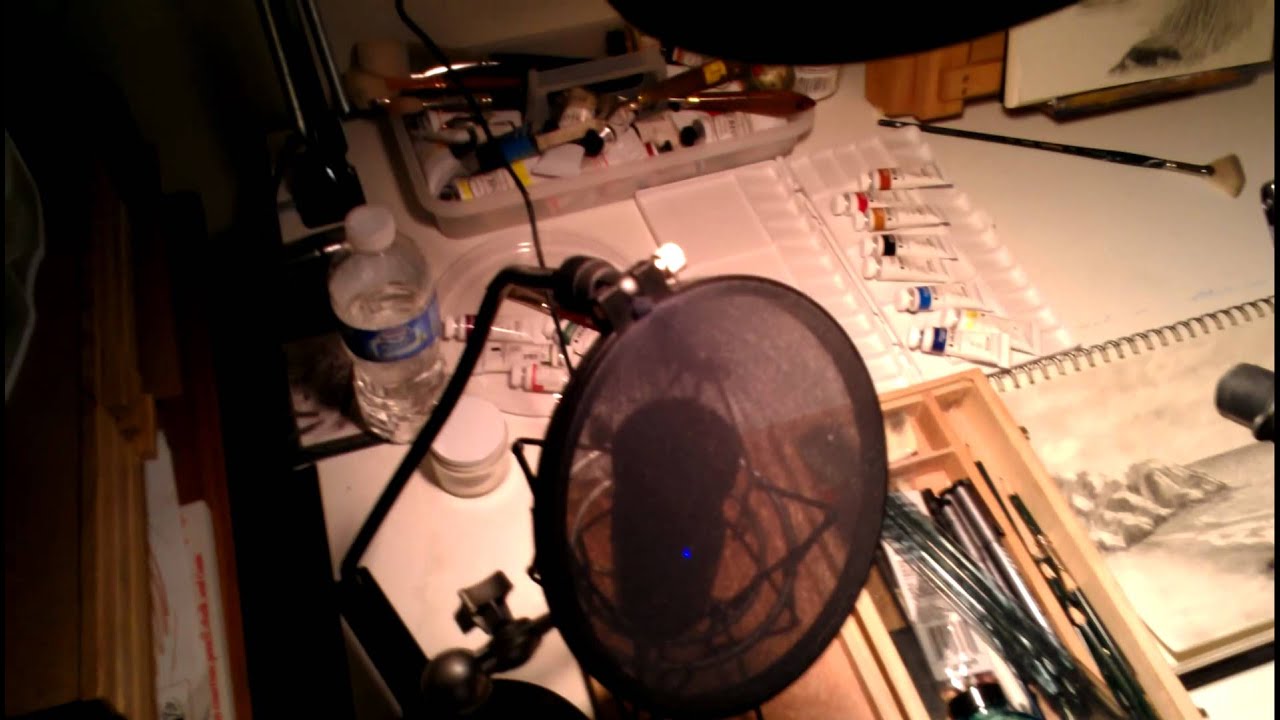
Here in this video, I do my best to explain how I set up my camera to record drawings so that you may better understand and maybe get some ideas on how you can do it.
video recorded on my HTC Rezound
Info about things I use in the video:
Main camera: Canon SX20IS 720P Digital Camera
Web Cam: Microsoft Studio LifeCam 1080P camera.
Microphone: Audio Technica AT2020
Camera Stand: Photo Basics reflector stand.

This is the way I have setup my drawing "studio". It used to be very basic and only consisted of the original reflector holder stand and a simple camera. But now that I am getting more of an audience and want to deliver better quality content, I have upgraded my setup.
I still use the reflector holder as the main camera mounting system. They can be found on amazon as well. I am also sure that stores that specialize in cameras and studio equipment would have the reflector stands. And I just use a pipe clamp to hold the cameras in place. The newer pipe clamps have hinge on one side so I needed to get a 3/4 inch size instead of a 1/2 like my older one that I have. Wit the pipe clamp, there is a hole on the top in which you can put a 1/4 inch screw and use a nut to secure it down in place. I then use the ballmounts and secure those on so that all I have to do is use that to adjust the camera angle.
Lighting is basic. I have very simple lamps with full spectrum bulbs in them. The bulbs cost more than the lamps haha. I then got some translucent 12 inch filters from interfit. I also got some 18 gauge wire so that I could have them hang from the lamps.
I use an Audio Technica AT2020 USB microphone for recording. There are parts of this video where the microphone does not sound all that great due to moving around so much haha. The microphone is Unidirectional which means that it only records good audio from 1 direction. Anything else it does not perform well. This is to help eliminate background noise that might occur. So keep that in mind :)
Other than that. I have a computer rig with high end components to help with the video editing and rendering. I use Audacity while recording with the microphone and use Adobe Premeire Pro CS6 to put it all together.
Hope you all enjoyed this one and ill see you all later!

Welcome back everyone to the start of my series on how to draw the mountains in the mist!
If you need a reference photo, try this one! http://sphotos-c.ak.fbcdn.net/....hphotos-ak-snc7/4793
Other Places to Find my Art
Facebook: http://www.facebook.com/tylersartshack
Twitter: https://twitter.com/#!/TylersArtShack
Google+: https://plus.google.com/115405....344518849808905/post
Deviant: http://tylersartshack.deviantart.com/
How to draw the Misty Trees
In this video, I highly recommend having a range of pencils. Pencil drawing is by far one of the cheapest artist mediums to get into and buying a set of pencils will run you about 10 - 15 dollars. I would recommend having pencil set or buying individual pencils. For this video I used 4H 2H HB 2B and a 4B for finishing touches. That is my general range of pencil usage for any type of drawing. I do not usually go much higher than that because the higher number B pencils can give off a shine.
Getting back to the drawing, I started off way in the background with a 4H and 2H pencils. I usually create a vertical line close together sort of like hatching and place those marks in moving along the image horizontally. The best way I can describe how to draw this is to make it look sort of like a sound file or one of those meters that measure an earthquake activity. Those up and down vertical lines that are created by these devices are very similar to what I am doing here. After the light layer is placed, I switched to an HB pencil to lay in a slightly darker line in the same way. Also I try to avoid creating a tree line that is too even. I try to vary it so that the natural mist that I drew in last video can move around and about the trees that we are drawing in. After the HB layer, I will usually go for a 2B for the final layer. this layer will also go all the way down the the bottom of the page. After this layer is added, I go back in and pick out some individual trees to add in details to. I don't want to over do the details here because I want to convey that the trees are far away. Far away objects tend to have less details.
I also go in to show you the details of adding in the river bank. For this all I do is put the pencil on its side so that the maximum amount of graphite on the pencil is on contact with the paper. And with a quick motion, I hold the pencil horizontally on the page and go in a side to side motion. this helps to just create a "filler" texture that takes the shape of a river bank. It is a neat little trick.
I hope you all enjoyed this video and stay tuned for next week for the continuation of this series. Thanks everyone!
Music info
Artist: Dokashiteru
Song: Echo
Music can be found on CC.mixter.org

Welcome back everyone to the start of my series on how to draw the mountains in the mist!
If you need a reference photo, try this one! http://sphotos-c.ak.fbcdn.net/....hphotos-ak-snc7/4793
Other Places to Find my Art
Facebook: http://www.facebook.com/tylersartshack
Twitter: https://twitter.com/#!/TylersArtShack
Google+: https://plus.google.com/115405....344518849808905/post
Deviant: http://tylersartshack.deviantart.com/
How to Draw a Tree
I usually start off my trees with just a simple guide line to show the full height of the tree before I even get started. This is so that I know the tree will fit within the composition of the drawing and fit in well. I like to start off with a 2H or B pencil and putting in very fine and small details for the top of the tree. The top of the trees I think are the most important. I put the most detail there.
After I get the first layer down. Ill go back in with a darker pencil like a 2B and just add in some darker shadows to help bring it out.
When drawing in the details of the tree, I like to stagger and separate some of the details to help bring out a natural look to the tree. I also like to give it a bit of character by adding in some dead branches and having some branches smaller or larger than others. It just needs a little bit of variation to help give it that nice natural look. It can be easily overdone so just be careful.
I hope you all enjoyed this video, please give it a thumbs up as it always helps out and thanks everyone for watching!!!
Music Info:
song: Revolve
Artist: HisBoyElroy
Music can be found on dig.ccmixter.org

This is great drawing practice if anybody wants to gain a boost in artistic talent. Believe me, when I first started drawing, I could only draw stick figures. After drawing like this for about a year or so, I can do all the things I do now. I do believe that art is something you are born with but I also believe that one can also learn the skill. Try and draw at least 1 thing every day and you will get much better as time goes on.
Song: Indian Summer
Artist: Ryan Farish
Farish Music International (BMI)
Licensed with permission, RYTONE Entertainment
www.ryanfarish.com
You can purchase this song from this link.
http://itunes.apple.com/us/album/beau...

Welcome back everyone to my drawing tutorial on how to draw a hollyhock flower.
Other Places to Find my Art
Website: http://www.tylersartshack.com
Facebook: http://www.facebook.com/tylersartshack
Twitter: https://twitter.com/#!/TylersArtShack
Google+: https://plus.google.com/115405....344518849808905/post
Deviant: http://tylersartshack.deviantart.com
The supplies for this drawing remain relatively simple. I used an HB pencil for the sketch and used a 2B for starting process of shading. For the real dark areas, I used a 4B.
This drawing started with a sketch on the page just for the rough placement of all the objects. I also used a grid method again for this drawing. It is a good process for aiding in the accuracy of object size and placement. I don't always use it but when I do, it is a big help.
Starting with the flowers, I used a 2B pencil to start working in some dark lines. Work them in a radial direction working out from the center. Then I used a blending stump to smooth everything out and added in some lines again just to bring out some more details.
The leaves are done in a similar way. I used a 2B pencil to give it a general shading and then used the eraser to bring out the vein lines in the leaves. Then using a regular pencil again, I made a line that follows the highlight to give it some depth.
Music Info:
Song: The Owl Named Orion
Artist: DanoSongs
Music by Dan-O at DanoSongs.com

Be sure to visit my Facebook Fan Page. http://www.facebook.com/pages/....Tylers-Art-Shack/181
Welcome to how to draw dead trees part 1. This video will show you a technique I saw and I thought it was very cool. I think you will be able to learn from it quite easily.
The process starts off with drawing cylinders and being able to shade them. Another shape to learn to draw is a cone like shape. Combining and altering these shapes help to form a tree shape. After that is done. The shading part comes in next. You need to make a big decision and decide where the light will be coming from. The spots where the light would hit would be the lighter areas on the tree or "highlight" and the are of the tree that the light isnt hitting would be the "shadow" area. This adds volume and 3d to the drawing. It also makes it more interesting.
After this, you could add more tree branches as you see fit. Put in a ground or foundation for the tree to sit by scribbling in some lines or actually spending time to put in some grass and some roots popping out of the ground.
Welcome back everyone to a new real time drawing tutorial series. In this series, I will take you step by step to show you how to draw a spring meadow.
Other Places to Find my Art
Website: http://www.tylersartshack.com
Facebook: http://www.facebook.com/tylersartshack
Twitter: https://twitter.com/#!/TylersArtShack
Google+: https://plus.google.com/115405....344518849808905/post
Deviant: http://tylersartshack.deviantart.com/
In this video I show you the basics of how to sketch out the scene. I start out by showing a grid to help line up all the objects with better accuracy. The paper I am using is 6 1/4 inches by 10 inches. I use the paper horizontally so the vertical lines fall at 2 1/2 inches 5 inches and 7.5 inches dividing the page into thirds. The horizontal line falls 3.1/2 inches from the top of the page making the line below center.
These lines help with the accuracy of line placement of the objects of the drawing. This method is great for drawing from a reference image. Just make sure that the lines you create can be easily erased.
Music Info:
Artist; Ghost
Song: Reverie Small Theme
music can be found on cc.mixter.org

Welcome back everyone to a new real time drawing tutorial series. In this series, I will take you step by step to show you how to draw a spring meadow.
Other Places to Find my Art
Website: http://www.tylersartshack.com
Facebook: http://www.facebook.com/tylersartshack
Twitter: https://twitter.com/#!/TylersArtShack
Google+: https://plus.google.com/115405....344518849808905/post
Deviant: http://tylersartshack.deviantart.com/
Drawing trees is probably going to be one of the more time consuming aspects of the drawing. With some practice and patience, they will begin to take shape on their own. For drawing these trees, I wanted to use a darker pencil so that they would stand out more against the sky. So I used more of an HB to 2B pencil range. After the skeleton work of the tree is completed, that is when I start to work on the leaves.
Drawing in the leaves can present its challenges. First off the average tree probably has over a few hundred leaves. So drawing that many objects is very time consuming. Although drawing each leave would make an amazing looking tree, I just really don't feel like doing that so I spent time finding textures that would best be suitable for drawing them. So what I ended up doing was using a sharp pencil and using it on its side. Making small scribble like movements helps to replicate thee leaves of the tree. This method eliminates a lot of time that would otherwise be spent on drawing each individual leaf. I also enjoy doing it this way because it gives the tree a bit more character.
I hope you all enjoyed this video and stay tuned next week for part 5! Thanks everyone for watching!
Music Info:
Artist; Ghost
Song: Reverie Small Theme
music can be found on cc.mixter.org

Taking advantage of having internet but still no power to bring you all an update as to how I am doing and basically what has been going on this week.
FOR MORE UPDATES:
http://www.facebook.com/tylersartshack
Alright everyone! Welcome back to my "in the dark" edition of Tyler's Art Shack haha. Still have no power after being hit by Hurricane Sandy 1 week ago. Also known as Frankenstorm or Super Storm Sandy. They always give these things nicknames haha. But still no power a week after the event and just hopeful that maybe next weekend ill be able to get it back. Things have been interesting with no power and I am just thankful to have the generator so that I can at least have the basics like heat and light haha. We can also at least run our laptops on it. And having the internet now makes that so much nicer. I can actually connect with the world to see how everyone else did during the storm.
The damage along the New Jersey Shore was pretty bad. A lot of the famous boardwalks got destroyed along with piers such as the Casino Pier and the Fun Town Pier both in Seaside Heights. Also a lot of the natural sand dunes are gone which is making any storm pretty serious because the only protection against the ocean is gone.
It is sure going to be interesting how things turn out for the Jersey coastline in the future.
What is interesting about this whole situation as well is the gas lines. Because there was no power anywhere, the only gas stations running were on generators. And they sold out so fast and the lines were miles long for them. I have never in my life had to wait over an hour to fill up a tank of gas. It is luckily getting a bit better though as power is being restored around the state.
Just really wanted to let you all know that I am doing well and wanted to give you all a quick update as to what happened. I hope that you are all doing much better than I am haha. Take care everyone!

Oil on canvas painting in a Bob Ross classic mountain style painting.
Used Grumbacher oil paints. The ones I got in the garage sale.
Took me just about an hour to paint this.
===============================================================
Follow Me!
Facebook: http://www.facebook.com/tylersartshack
Twitter: https://twitter.com/#!/TylersArtShack
Google+: https://plus.google.com/115405....344518849808905/post
===============================================================
I scored a lucky find at a garage sale and ended up getting a whole lot of Grumbacher oil paint colors for less than 20 bucks. I also picked up a whole assortment of oil paint brushes. This was one of my first attempts at a Bob Ross Style painting. I followed his classic method and style of painting and still use his techniques today.
The painting started off with a simple sky and large clouds. I used a mix of a few different shades of blue and white for the very top of the sky and lightened the color as I moved down. Clouds were then added into the scene.
After which I started to map out whwere I wanted to have the mountains placed. I decided right smack in the middle of the canvas would be a great place form them. After I got the dark background color down I used the classic roll of paint and started to map out the mountains.
After a few tries and experimenting, I got something that I liked and just left it at that. I then added in some distant grass and trees. The water is real simple. Just use the same color as the sky and brush it down. Add in a lighter color closer to the middle of the canvas. In this case I added a bit more of a green to pull the treeline reflections down into the water.
A really neat way to make nice water is to take a large brush and just dip it in some white. Then take that brush and quickly stroke it across the water to make a couple of streaks. this helps to show some movement and reflections happening in the water and adds a nice effect.
I quickly added in the foreground with some dabs of dark green for grass and pretty much called it a finished painting.
thanks for watching and I hope you enjoyed!
Song: Coloring Silence
Artist: Ryan Farish
Farish Music International (BMI)
Licensed with permission, RYTONE Entertainment
You can purchase this song from this link.
http://itunes.apple.com/us/album/let-it-rain/id360509452?i=360509579&ign-mpt=uo%3D4

This is one of my first attempts at a still life drawing. This video I originally did quite a long time ago and re uploaded it.
The actual drawing itself is 24x18 inches on bristol vellum paper. The whole drawing is done with pastels. It took me about 4 hours to completely draw the picture.
I really have never done a still life before and thought it would be a good Idea to give it a shot and see how well it would come out.
I started out by taking a small coffee table from the other room and setting that up with a small flower vase, wine bottle and some fruit. After that, I hung a green cloth behind the whole thing and draped it over the back half of the table. So, I had a whole live setup for this drawing to draw from.
I started out lightly sketching where objects would eventually appear on the page. After that, I started to go a bit bolder with the lines to finalize where everything would eventually be placed. I drew in the back drapery first and added highlights and shadows to it to show depth and to make it actually resemble cloth. After that, I erased out where all the objects would be placed so it would be easier to put more color down. The vase was hard because it was clear and I had to show the colors from the drapery reflecting through the glass. The apple and the pear were quite simple to draw in just by using a variety of colors and using them to make the apple and pear more 3D like. The wine bottle was a bit difficult. I tried my best to replicate what was on the label but it wasn't easy. The table was simple since it was mainly a single color and just colored the whole thing in.
The music is by Kevin MacLeod and the song is called Modern Jazz Samba

In this video I show you how I drew a castle in the mountains every step of the way.
Follow me!
Facebook: http://www.facebook.com/tylersartshack
Twitter: https://twitter.com/#!/TylersArtShack
Google+: https://plus.google.com/115405....344518849808905/post
Deviant Art: http://tylersartshack.deviantart.com/
This drawing starts out like I usually do. I will use a pencil that ranges from 2H to about an HB pencil. These are rather neutral pencils and are not too light or too dark. They are also easier to erase for making the general pencil lines. I used a lot of perspective to aid me into being able to create this drawing. It took me quite a while to get the sketch done because the drawing changed as it progressed. It was once just going to be a mountain, then it turned into some sort of aqueduct of sorts. but later on, I decided to just turn it into a castle.
This is why I do like drawing from imagination. Even though the drawing is not always accurate, you get to draw what you see fit and create some pretty cool images. I always found it to be a blast.
Thanks everyone for checking this video out! and I hope you all enjoyed it! Hit the like button and subscribe!
See you all later!!!
Music info:
Artist: freestylemix
song: hisboyelry-revolve
you can find this song on cc.mixter.org

Decided to take a Sunday off and go to Island Beach state park New Jersey. I took along my painting set along with the camera and had a great time.
I brought along my french easel and used a 10 by 20 inch canvas.
I always use gamblin oil paints. I have quite a large variety of colors.
For the sky colors:
Used a mixture of 80% prussan blue and 20 % titanium white for darkest blue part of the sky.
I kept adding more and more titanium white to lighten the color until I got to the horizon line.
I did the same for the sand. Starting out with about a 80% raw siena and 20% titianium white for the darker areas and mixed more and more titanium white to get the lighter shades.
The song is called Isolated and it is performed by Kevin MacLeod

Welcome back everyone to a new real time drawing tutorial series. In this series, I will take you step by step to show you how to draw a spring meadow.
Other Places to Find my Art
Website: http://www.tylersartshack.com
Facebook: http://www.facebook.com/tylersartshack
Twitter: https://twitter.com/#!/TylersArtShack
Google+: https://plus.google.com/115405....344518849808905/post
Deviant: http://tylersartshack.deviantart.com/
In this video I get back into the landscape and start to add in some of those shadows and highlights that will be showing up in and around different objects in the drawing. This is a pretty good time to get that out of the way because I am getting towards the end of the drawing process and don't want to wait too long. Also by doing this, it enables me to make some last minute decisions about the drawing if I want to add or take away different elements of the drawing.
I also start to shade in the main tree on the left side of the drawing. That is something that I have been waiting on to do and something quick to get out of the way for the next video. This will help me on my way to creating the leaves on the tree as well.
So, this video was mainly just setting up everything so that it can be finished up in the future videos. I hope you all enjoyed and thanks a lot for watching!
Music Info:
Artist; Ghost
Song: Reverie Small Theme
music can be found on cc.mixter.org

I show how to draw with using value only. Its a technique to make a drawing come alive in a step by step process.
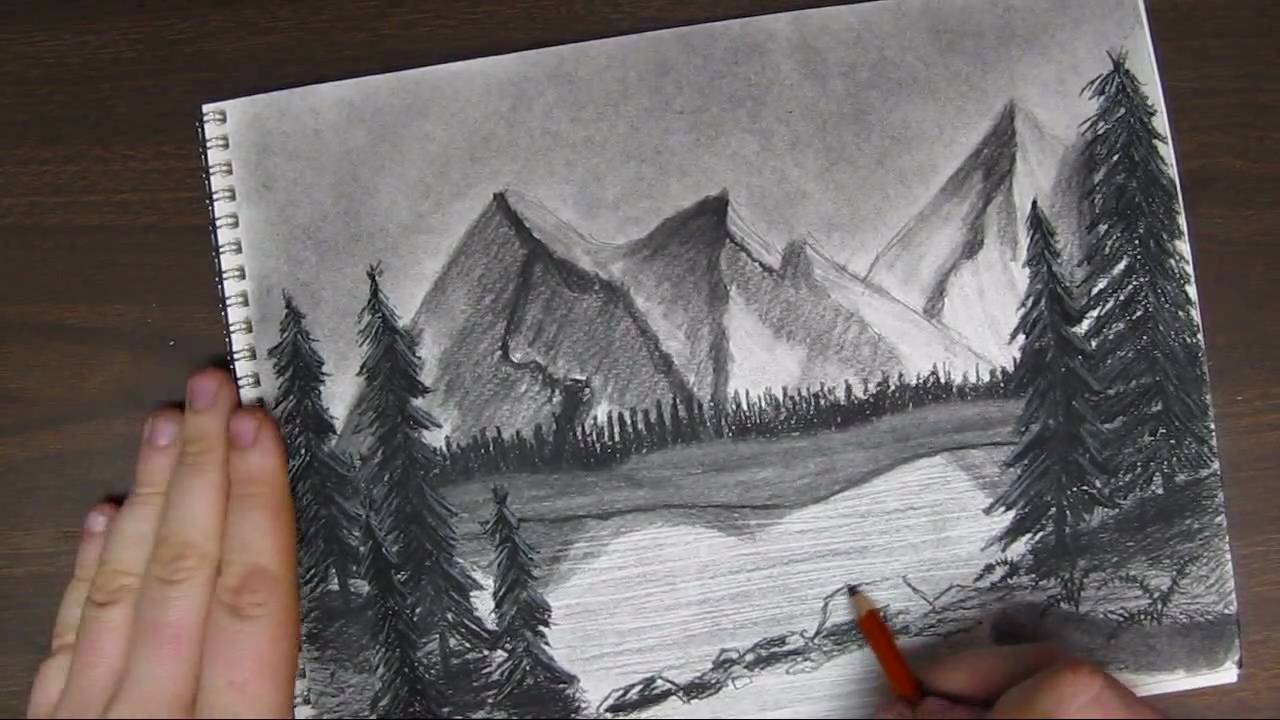
Welcome to the final part of how to draw a landscape series. In this part ill go over the rest of the trees and add some highlights and shadows into the mountains to give them a nice effect. I also go for it and add a nice waterfall at the end for a nice effect.
You can find this drawing and any other works of art for a reference to draw you very own picture.
http://digg409.deviantart.com/gallery/
GOOD LUCK!!! :)

Welcome back everyone to this weeks drawing tutorial about thumbnailing.
Other Places to Find my Art
Website: http://www.tylersartshack.com
Facebook: http://www.facebook.com/tylersartshack
Twitter: https://twitter.com/#!/TylersArtShack
Google+: https://plus.google.com/115405....344518849808905/post
Deviant: http://tylersartshack.deviantart.com/
In this video, I go over and show you different ways to go about thumb nailing your artwork so that you can work out you thoughts on a concept or idea or for future ideas.
This starts off by just having a small idea of some sort of design you wish to have in a final composition. The thumb nailing comes in handy when you need to work out certain problems or working out different angles and placement of objects. It is a very fast and efficient way to get ideas down quickly without spending a tremendous amount of time doing a large format drawing. These types of drawings are great for keeping yourself motivated and helps to bring up new ideas for future work.
I hope you all enjoy the video and thanks for watching!
Music info
Song: Coriolis Effect
Artist: MseQ
Music can be found on cc.mixter.org
