Лучшие

Today, I decided to incorporate oil pastels in to a mixed media work of art. I also used/combiled oil paint illustration markers and Prismacolor Color Pencils to create the portrait that you see. I describe my process as I narrate: First, I did a pencil sketch which I inked. Second I used illustration markers (Prismacolor and Ad Chartpak) to lay down the first layer of color. Then I added a layer of oil pastels atop the layer of illustration marker. The oil pastels are more mixable than the color pencils and are also more opaque. They mix with liquin (like the color pencils and oil paint). I discovered that the process closely resembles painting (especially) when you mix the pastels on a palette, with liquin and then apply with a paintbrush. I finished my (quasi- Bob Ross demonstration) with a few layers of oil paint, since there is no substitute for oil paints mixability and layering capabilities (as well as the range of opacities). I am happy with the portrait that I made of youtube user armanchik24. I learned a lot while incorporating the oil pastels in to my artwork.
"oil pastels" "crayola oil pastels" "how to use oil pastels" "sennelier oil pastels" "using oil pastels" "pentel oil pastels" "oil pastels how to use" "holbein oil pastels" "cray pas oil pastels" "buy oil pastels" "blending oil pastels" "how to paint with oil pastels" "oil pastels paintings" "oil pastels painting" "van gogh oil pastels" "oil pastels for beginners" "painting with oil pastels" "oil pastels tutorial" "drawing oil pastels" "oil pastels for kids" "painting oil pastels" "working with oil pastels" "sakura oil pastels" "oil pastels for children"

Subscribe to kazanjianm (Don't miss any new videos that I make)- http://www.youtube.com/subscri....ption_center?add_use
Facebook: Like me on Facebook to find out about live hangouts or to post your work!- http://facebook.com/kazanjianm
Twitter: I tweet! Do you? http://twitter.com/kazanjianm
My Website: http://merrillk.com
Art Supplies I Use in my Art Work- http://merrillk.com/?sid=135&idpage=supplies_i_use
YouTube Visual Arts Category Petition: http://www.change.org/petition....s/create-a-visual-ar
Step by Step Drawing Playlist: http://www.youtube.com/playlis....t?list=PLD6E34C7CD58

Part 1- I will start this drawing by taking a second to look at my reference photograph on the left. I try to see the mouth as one big shape first and I try to match that shape as best as I can to start. Next, I break the mouth in to three smaller shapes. I notice that the top lip looks like a flattened McDonalds Arch and the bottom lip looks similar to a crescent moon shape. The area in between is more complex but that is ok since I can create that shape by noticing the nuances of upper and lower lip.
Part 2- Take a second to notice that the lower lip is slightly fuller than the top lip. This is true for every person. Once I am somewhat satisfied with the upper and lower lip, I start to notice the space between the lips. That space is divided between the upper teeth and the negative space below the teeth. Please notice that when a person smiles, the bottom lip comes up and blocks the lower set of teeth. Many people make the mistake of drawing the upper and lower teeth in a smile. While drawing the teeth, I am very careful about not pressing too hard. Notice that there are NO dark tones, separating the teeth, only light to medium ones. The front of our face is rounded and the formations of the upper and lower sets of teeth are in a horseshoe shape. When drawing a person from the front, notice that as the teeth go further back towards the throat, they become more foreshortened. Also, as the teeth go back towards the throat, they are blocked more in a smile by the lips and are more shadowed. Be careful because this can easily be overdone. The color of the teeth are not white, they are bone colored, which is a cool off white.
It is a conscious choice for me to start this drawing with color pencil. I use color pencil because the fine tip of the color pencil gives me a lot of accuracy, and also because, color pencils can be mixed with oil paint. You will see me mix color pencil with oil paint in step four.
Part 3- At this point I am satisfied with the placement of all of my shapes. Once that task is accomplished, I focus on building tones and colors. In other words, my focus to this point has been to get all of the pieces of the puzzle in to the right place and now, I can have fun by mixing colors and matching tones. I try to also notice the qualities of the edges of shapes. For instance, there is a fuzzy, unclear edge between the upper lip and the gums above the teeth. It is there but it is hard to see. In contrast, there is a solid, distinct edge between the upper teeth and the darker area of negative space, below the teeth.
Color pencil is a great medium for a contemporary artist to learn. I greatly value the accuracy and detail work that can be achieved with color pencils. The flaws to this medium is that color pencil cannot be layered as well as paint, since it doesn't fully dry. Its biggest strength is also a big weakness. The fine tip of the color pencil, covers surfaces at an extremely slow rate. Both weaknesses can be fixed however. I found that if you dip a paintbrush in a painting medium called Liquin and start to paint, the color pencils essentially pick up the properties of oil paint. In the next step, I will use liquin and mix it with both the oil paint atop of the color pencil.
Part 4- Now I am painting with Liquin and oil paint over the color pencil. They are very compatible with each other and are essentially made with the same materials. The pigment of the color pencil is bound with wax; and wax has been used in parts of many painting mediums throughout the history of oil painting.
Oil paint is considered a traditional medium but many of its artistic capabilities have not yet been matched by other, newer mediums. Oil paint gives to the ability to work opaque, transparently and translucently. Today, I am using the combination of the oil paint and the liquin to soften my color pencil drawing below. I am using small soft paintbrushes and they pick up some of the color that was left below. The paintbrush is a great tool to create soft blends. That makes perfect sense if you compare it to the tip of a color pencil
I hope that you have enjoyed this video and I hope that you learned something. Feel free to ask me questions and please subscribe to my channel if you like concise, information rich videos on art.
Created by Merrill Kazanjian http://merrillk.com

Im bringing artsy back
My YouTube channel it deserves a plaque
Im gonna teach you how to draw like that
Go grab your pencil and your sketching pad
Take em to the bridge
Artsy babe
Dont waste your money on an MFA
Watch me on YouTube and subscribe its free
Follow my steps and you will draw JT (Justin Timberlake)
Take em to the chorus
Subscribe to kazanjianm (Don't miss any new videos that I make)- http://www.youtube.com/subscri....ption_center?add_use
Facebook: Like me on Facebook to find out about live hangouts or to post your work!- http://facebook.com/kazanjianm
Twitter: I tweet! Do you? http://twitter.com/kazanjianm
My Website: http://merrillk.com
Art Supplies I Use in my Art Work- http://merrillk.com/?sid=135&idpage=supplies_i_use
YouTube Visual Arts Category Petition: http://www.change.org/petition....s/create-a-visual-ar
Step by Step Drawing Playlist: http://www.youtube.com/playlis....t?list=PLD6E34C7CD58

Welcome to part two of my triple tutorial, which will show you how to draw the ear at the three most common angles. Part two will specifically show you how to draw the ear at the side profile angle. I recommend that you pause the video at the end of each step and listen to the instructions. Lets begin.
Step 1- Make a closed C shape. The placement of the ear falls between the bottom of the eyebrows and the bottom of the nose. Be sure to notice that the angle of the ear follows the jawline. It is not straight up and down.
Step 2- Make the candy cane shape. Notice that the candy cane closely resembles a smaller C shape.
Step 3- Make a bubble letter C shape. Notice that the bottom of this shape is a triangle. How to draw ears. Drawing the ear made easy. classroom demonstration of how to draw the ear. parts of the ear shapes of the ear. earring draw wear earrings ears cool trick shading tones smudging drawing tips blending

THE FINISHED "8LU5H-E" VIDEO: https://youtu.be/JDawSx-tCak
"The Drawing Lesson" at Amazon: http://amzn.com/0385346336
SUBSCRIBE: http://bit.ly/markcrilleySUBSCRIBE
"The Realism Challenge" at Amazon: http://amzn.com/0385346298
Brody's Ghost Collected Edition at Amazon: http://amzn.com/1616559012
"Mastering Manga" books at Amazon: http://bit.ly/MASTERINGMANGA
All 4 “Miki Falls” books at Amazon: http://bit.ly/MIKIFALLSbooks
All 6 "Brody's Ghost" books at Amazon: http://bit.ly/BRODYSGHOSTbooks
OFFICIAL CRILLEY PLAYLIST: http://bit.ly/CRILLEYPLAYLIST
THE ART SUPPLIES I USE: https://www.youtube.com/watch?v=xEBzCr_kNns
All of my books are available through your local bookstore-- Ask them to special order if they don't have my books on the shelf. Thanks for your support!! ~Mark
FACEBOOK: http://www.facebook.com/markcrilleyOFFICIAL
TWITTER: http://www.twitter.com/markcrilley
INSTAGRAM: http://instagram.com/markcrilleyreal/
All music created in GarageBand
Visit my channel for YouTube’s #1 most-viewed drawing videos!
![Drawing Time Lapse: Temple Interior [3 Point Perspective]](https://i.ytimg.com/vi/roGH5pL_rKY/mqdefault.jpg)
NARRATED VERSION: https://youtu.be/HG403Z9vE8U
REALISM CHALLENGE BOOK: http://amzn.com/0385346298
SUBSCRIBE: http://bit.ly/markcrilleySUBSCRIBE
All 6 "Brody's Ghost" books at Amazon: http://bit.ly/BRODYSGHOSTbooks
"Mastering Manga" bookS at Amazon: http://bit.ly/MASTERINGMANGA
All 4 “Miki Falls” books at Amazon: http://bit.ly/MIKIFALLSbooks
Brody 1-Shot Comic at TFAW: http://bit.ly/BRODYoneshot
OFFICIAL CRILLEY PLAYLIST: http://bit.ly/CRILLEYPLAYLIST
All of my books are available through your local bookstore-- Ask them to special order if they don't have my books on the shelf. Thanks for your support!! ~Mark
FACEBOOK: http://www.facebook.com/markcrilleyOFFICIAL
TWITTER: http://www.twitter.com/markcrilley
INSTAGRAM: http://instagram.com/markcrilleyreal/
All music created in GarageBand
Visit my channel for YouTube’s #1 most-viewed drawing videos!

How do artists draw hair? This video will break down the complicated process in to simple steps.
Supplies I Use- http://www.jdoqocy.com/click-4....247664-805536?url=ht
My Facebook- http://facebook.com/kazanjianm
My Twitter- http://twitter.com/kazanjianm
I will discuss the tools that are needed and how to use these drawing tools. I recommend that you use drawing paper rather than printer paper. You will also need:
- A bristle brush
- A blending stump (also called a tortillion) or a Q-Tip
- A kneaded eraser
You will use these tools

Facebook: http://facebook.com/kazanjianm
Twitter: http://twitter.com/kazanjianm
This video is part one of an extensive series that I am launching about the topic of perspective in drawing. You can access other segments of this series by clicking on the navigation bar at the top right of the video player. This is video one where I will begin to brain wash you.
Subscribe to kazanjianm (Don't miss any new videos that I make)- http://www.youtube.com/subscri....ption_center?add_use
Facebook: Like me on Facebook to find out about live hangouts or to post your work!- http://facebook.com/kazanjianm
Twitter: I tweet! Do you? http://twitter.com/kazanjianm
My Website: http://merrillk.com
Art Supplies I Use in my Art Work- http://merrillk.com/?sid=135&idpage=supplies_i_use
YouTube Visual Arts Category Petition: http://www.change.org/petition....s/create-a-visual-ar
Step by Step Drawing Playlist: http://www.youtube.com/playlis....t?list=PLD6E34C7CD58

WE NEED A VISUAL ARTS CATEGORY ON YOUTUBE THREAD-http://www.google.com/support/forum/p/youtube/thread?tid=2a9806f929074cbd&hl=en&fid=2a9806f929074cbd0004b630ad37cc3e
Facebook- http://facebook.com/kazanjianm
Twitter- http://twitter.com/kazanjianm
Website- http://merrillk.com
(Merrill) Supplies I Use- http://www.jdoqocy.com/click-4....247664-805536?url=ht
This video will give you step by step instruction on how to paint a realistic human eye. Just follow my step by step instructions and pause the video at the end of each step and you will surprise yourself with the end result. Lets begin.
Step 1: Draw the almond shape and the U shape to begin your eye. Please note that I am using a regular pencil on canvas paper. Many painters prefer to use a charcoal pencil for when they draw their under drawing, since the charcoal will blend in to the paint.
Step 2: Add the circle for the iris and then the line for the fold of the eyelid.
Step 3: Add the shapes in the corners of the eye.
Step 4: Add the eyelashes. Be sure to notice that the eyelashes on the top are more full and longer.
Step 5: Add the eyebrow. Notice that it slants downwards towards the inner corner of the eye. Be sure to notice its placement in relation to the eye shape.
Now its time to paint. I chose a simple palette with very common colors such as Lamp Black, Titanium White, Ultramarine Blue, Cadmium Red, Cadmium Yellow and Green Earth. For the next section, pause the video every 30 seconds and observe the image on the screen. Also be sure to listen to the hints that I give you as I narrate.

This video will teach you how to draw a realistic looking face with a happy (smile) expression. The "calm" eye is almond shaped but when a person is smiling, squeeze the two eyelids together. The "calm" eye is almond shaped but when a person is smiling, squeeze the two eyelids together.Notice that you can see the fold of the upper eyelid a little bit more. The eyebrows and forehead are in a relaxed position. To draw a smiling face successfully, you need to be able to make the cheeks seem more rounded....especially with the shadow below the cheek! Right now, I am adding a construction line for where the shading will go.( I am working from a reference picture, BTW.) To draw a smiling face successfully, you need to be able to make the cheeks seem more rounded....especially with the shadow below the cheek! Right now, I am adding a construction line for where the shading will go.( I am working from a reference picture, BTW.) SLOWLY build up the shading and be very patient! CONFESSION: I used non drawing paper for this drawing! Watch and see what it does when I erase! ARGH!!!! Yes there is a difference!OK couldn't wait! "Drawing paper" is more textured....or as artists say...."has more tooth"....watch the shading VANISH when I erase because the surface is as slippery as ICE! ARGH!!!! The eyebrows are NOT one solid tone. Try to observe the eyebrows of whoever you are drawing before shading them. The only exception is when heavy make up is applied.....Maybe its Maybelline! Shading is ALWAYS dependant upon LIGHT! There are no universal rules to applying tones to drawing.....because lighting conditions vary so much! REMEMBER THAT! In this case, the light came from above. This is most often the case. Notice the shadow that I am adding between the brow and eye. When drawing a smiling face, the area UNDER the eye is very important! The orbicularis oculi muscle (muscle around eye) contracts...The eye is ball shaped.....thus "eyeball"....our shading has to show that it is ROUNDED!The brush is a BIG help. It allows me to shade something delicately....which is needed, when drawing skin.....I use bristle AND soft tipped brushes.... both give slightly different effects. REMEMBER, when a person is smiling, you will (usually) only see their top row of teeth. ALSO, notice the corners of the mouth. Notice that the two sides of the mouth are shaded dark (because the teeth wrap around in a horseshoe shape).REMEMBER, when a person is smiling, you will (usually) only see their top row of teeth. Everyones smile (the shape of their mouth during a smile) is unique! OBSERVE OBSERVE OBSERVE! Draw in the lashes as triangular masses. Notice that the top eyelashes are a LOT longer and fuller than the bottom lashes. This is the case for everybody. Males, in general have shorter lashes than females...Maybe he's born with it...Maybe its TESTOSTERONE! If you are GOOD at line drawings and want to work on shading, make photocopies of your work so that you can make multiple attempts at shading....you will learn FAST! TRUST ME! CLICK HERE to go to my shading tutorial.....It gives you a link to a print out worksheet (so that you could shade along with me.) Remember SHADING is all about RELATIVITY! So compare the tones of different areas of your reference image or sitter. Be sure NOT to make the "smile line" look too much like a "line".....just like the eyebrows, it is NOT a solid shape! Right now I am using a tortillion (blending stump). It moves the graphite from the pencil more quickly and efficiently than the paint brush. Tortillions are also very good at making lines. They are simply stumps of paper shapes like pencils. The edges of the face are TRICKY.......YES, they need to be darker in tone to seem rounded but they cannot appear as a solid line, or else your drawing will not seem believable. NOTICE that I am using the technique of cross hatching (line next to line) to apply the tones....then I am smudging it....followed by another layer of hatching...or I could then create a highlight with the eraser. Be careful with the hairline. It is always a gradual transition of tone....Believe it or not, even if a person is BALD, the top of the head is rounded and requires a gradual gradation of tone! The areas around the eyes seemed dark before.....right?....See what happens when you add darker tones? Shading is ALL ABOUT RELATIVITY! I did the hair with a 9B graphite stick BTW! Try to notice the subtle shading that I am doing to round the forehead.....Remember that I want to make it seem serene, since the facial expression is a smile. I am going to darken the corners to make it seem rounded. QUICK! DONT LOOK AT THE SCREEN! Merrill is using his fingers! Tsk Tsk! I am only using them because of the "skating rink" that I am drawing on (I am using non drawing paper which does not have a textured surface
Canon Performed by Kevin Macleod (http://incompetech.com) ISRC: USUAN1100301

WE NEED A VISUAL ARTS CATEGORY ON YOUTUBE THREAD-http://www.google.com/support/forum/p/youtube/thread?tid=2a9806f929074cbd&hl=en&fid=2a9806f929074cbd0004b630ad37cc3e
Facebook- http://facebook.com/kazanjianm
Twitter- http://twitter.com/kazanjianm
Website- http://merrillk.com
(Merrill) Supplies I Use- http://www.jdoqocy.com/click-4....247664-805536?url=ht
Every artist goes through growing pains while learning their craft. I recently got an interesting comment from a subscriber who wrote, " Merrill could you please make another video for practicing the shading. I made my drawings good than i screw them up with shading! please help!
Fut Duppe was famous for ruining his portraits, by shading too much. His name has entered the colloquial and artists often express their displeasure while critiquing a work by saying phrases such as, "Wow! Your drawing is Fut Duppe" meaning that it is flawed in the quality of the shading. Here is an example of a Fut Duppe Drawing. Girls dont have moustaches........Thats Fut Duppe.
Step 5: Take out a ballpoint pen in a color that is not similar to the pencil shading of the Fut Dup Drawing. Go over every correct line. Do not touch the Fut Duppe parts. It is imperative that you do not move the paper while doing this to prevent a second Fut Duppe Drawing. Essentially what we are making is a print.
If you follow my steps correctly the graphite on the back will make a print on the paper below, thanks to the pressure from the ball point pen.
Step 6: After you finish retracing the lines that you want with the ballpoint pen, remove the Fut Duppe Drawing from the paper below. You are now be able to restart your shading and there should be no fear of screwing up again because this process can be repeated as many times as you want.
So there you have it. Now the young artists of the world know that can take chances with their shading without worrying that they are going to BLEEP it up. Happy drawing everybody!
Song- Brandenburg No4-1 BWV1049 by Kevin MacLeod of Incompetech.com

Try to notice that the shape around an angry eye is much more compressed than a calm eye. When a person is enraged, the muscles around the eye tighten and pull the eyelids inward. This creates deeper shadows and uncovers more of the white of the eye. In the angry eye there is a separation between the top of the iris and the eyelid.
Step 1- Draw a circle with a rainbow shape above it. Remember to leave a space about half of the size of the iris in between the upper lid and upper iris.
Step 2- Draw in the shape of the eyebrow. Make sure that it is angled downwards towards the inner corner of the eye. It should actually connect with the eye lashes on the upper eye lid
Step 3- Draw in the pupil and the lower eyelid. Leave a black space in the pupil for a reflection. The lower eyelid should graze the bottom of the iris.
Step 4- The bottom eyelid is literally wrapped around the eyeball. Make a bowl like shape below the eye and add a squiggly line on the inner corner of the eye to hint at the side of the nose.
Step 5- Shade the pupil and iris and the upper eye lashes. Please note that the upper eyelashes are thicker and fuller than the bottom ones.
Step 6- Shade in the eyebrow. Please notice that it is not evenly shaded throughout.
Step 7- Darken the area around the eye but do not touch the white area. The eyes seem to sink in more when a person is angry, creating deeper shadows. Merrill Kazanjian
Trate de notar que la forma alrededor de un ojo enojado comprimido es mucho más tranquilo que un ojo. Cuando una persona se enfureció, los músculos alrededor de los ojos y apretar los párpados tire hacia adentro. Esto crea las sombras más profundas y descubre más de la sustancia blanca del ojo. En el ojo enojado hay una separación entre la parte superior del iris y el párpado. Paso 1 - Dibuja un círculo con forma de un arco iris por encima de ella. Recuerde que debe dejar un espacio alrededor de la mitad del tamaño del iris en la parte superior entre la tapa y la parte superior del iris. Paso 2 - Dibuje en la forma de la ceja. Asegúrese de que está en ángulo hacia abajo hacia la esquina interior del ojo. Debe conectarse realmente con los ojos las pestañas en la parte superior párpado Paso 3 - Dibujar en el alumno y el párpado inferior. Deje un espacio negro en el alumno para una reflexión. El párpado inferior debe rozar la parte inferior del iris. Paso 4 - La parte inferior del párpado es literalmente envuelto en todo el globo ocular. Hacer un plato debajo de la forma como el ojo torcido y añadir una línea en la esquina interior del ojo a la pista a un lado de la nariz. Paso 5 - La sombra de la pupila y el iris del ojo y la parte superior de las pestañas. Tenga en cuenta que la parte superior de las pestañas son más anchas y más completa que la parte inferior queridos. Paso 6 - Sombra en la ceja. Tenga en cuenta que no es uniforme en toda la sombra. Paso 7 - Oscurecer la zona alrededor del ojo, pero no toque el área blanca. Los ojos parecen hundirse en más de una persona cuando está enojado, la creación de las sombras más profundas. Merrill Kazanjian

Today, I am going to demonstrate a new artistic technique. I am going to merge the best qualities of two artistic mediums; oil painting and color pencil. What you are now watching is a time lapse of me building up layers of illustration marker and color pencil over a pencil drawing. In about a minute, I will slow the video down to show you that color pencils can be blended by using mineral spirits and a paint brush. I am doing this artwork on 110 lb. bond paper and please note that this method will not work as well on simple 20 lb. printer paper. This drawing was done as a tribute to Manhattanville Colleges iconic History Professor- Mr. Lawson Bowling. Professor Bowling is a mentor and friend of mine. He just completed his 25th year of service at Manhattanville College. It is an honor to give him this drawing and possibly turn him in to an internet celebrity.
The best quality of oil painting is that you can 1.) Blend while the paint is wet and 2.) Add multiple layers of new paint after the previous layer dries. The greatest nuance of color pencil drawing is the accuracy that is attained by using the very fine point at the tip of the pencil. I dip the paintbrush in to the mineral spirits and then dab it on a paper towel; then I drag the brush over my drawing. The mineral spirits quickly break down the thick cake of color pencil. The soft tip of the paint brush allows me to move and blend the pigment from the color pencil in a manner that is similar to the process of painting. It takes only a few minutes for the mineral spirits and pencil to dryAfter the mineral spirits dry, you can add more layers of color pencil. I have actually finished an oil painting with color pencil and an oil paint medium called liquin before, but to save time, I built up the flesh tones today with markers and color pencil.
by Merrill Kazanjian http://merrillk.com

Where are video responses? Where did video responses go? Relax! They are still here. This is a tutorial on the NEW way of how to post video responses on youtube, since the new format was implemented March 2nd, 2010. A very short demonstration, answering, how do you post a video response? how to post video response 2010

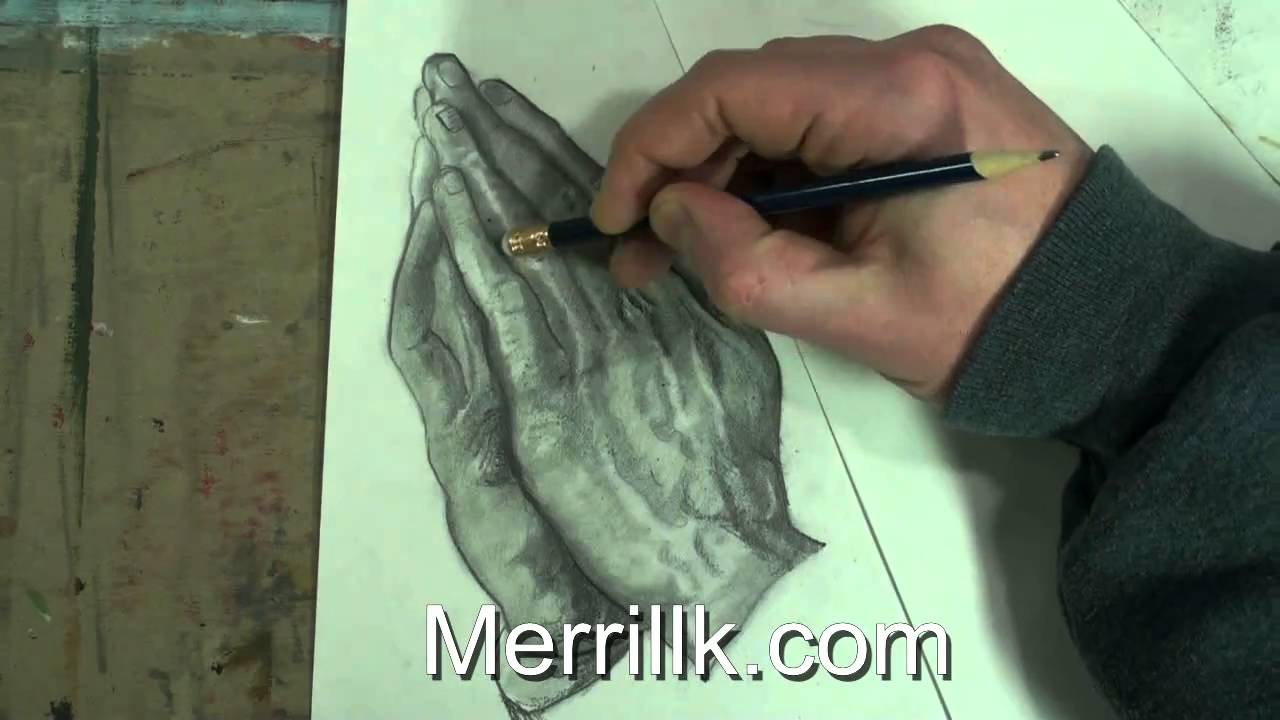
This video will show you how to draw the hand, step by step (Thumbs up pose). Link- http://merrillk.com/?part=fineart&articles_id=6974&act=artist1&artist=69&collection=114 The link will take you to a page with print resources, including a printable PDF. The video makes it possible for anybody to draw the hand. It is simplified with the 1.) Step by step instruction of the video 2.) Website resource 3.) Print resource. It doesnt matter how much experience you have with art, you will be able to do this. This process makes it easy as possible. You dont have to pray that your drawing turns out OK...Thumbs up!!!!- Merrill Kazanjian
Este video te mostrará cómo sacar la mano, paso a paso (Thumbs up plantean). Link-http://merrillk.com/?part=fineart&articles_id=6974&act=artist1&artist=69&collection=114 El enlace te llevará a una página con los recursos de impresión, incluyendo un PDF imprimible. El vídeo hace posible que a nadie a sacar la mano. Se simplifica con el 1.) Instrucciones paso a paso de las 2 de vídeo.) Sitio Web de recursos 3.) De los recursos de impresión. Se doesnt importa cuánto usted tiene experiencia con el arte, usted será capaz de hacer esto. Este proceso hace que sea más fácil posible. Usted no tiene que rezar para que el dibujo resulta bien ... Thumbs up!!! Este vídeo vai mostrar como a chamar a mão, passo a passo (thumbs up pose). Link-http://merrillk.com/?part=fineart&articles_id=6974&act=artist1&artist=69&collection=114 O link levará você a uma página com recursos de impressão, incluindo um PDF para impressão. O vídeo possibilita que qualquer pessoa a desenhar a mão. É simplificado com o 1.) Instruções passo a passo do vídeo 2.) Website recurso 3.) Recurso de impressão. Não importa o quanto você tem experiência com a arte, você será capaz de fazer isso. Este processo faz com que seja mais fácil possível. Você não tem que rezar para que o desenho acaba bem ... Thumbs up!! Cette vidéo va vous montrer comment dessiner la main, étape par étape (Thumbs posent up). Link-http://merrillk.com/?part=fineart&articles_id=6974&act=artist1&artist=69&collection=114 Le lien vous amène sur une page avec des ressources d'impression, y compris un PDF imprimable. La vidéo permet à quiconque de tirer la main. Il est simplifié avec le 1.) Instructions étape par étape de la vidéo 2.) Site de ressources 3.) Ressources d'impression. It doesnt importe l'expérience que vous avez avec l'art, vous serez en mesure de le faire. Ce processus rend facile que possible. Vous n'avez pas de prier pour que votre dessin se révèle OK ... Thumbs up!! 此影片将告诉你如何绘制手,一步(竖起大拇指构成步骤)。链路http://merrillk.com/?part=fineart&articles_id=6974&act=artist1& amp;artist=69&collection=114的链接将带您到一个网页上打印资源,包括一个可打印的PDF。视频可让任何人利用手。它简化了1。)一步的视频2指令步。)网站资源3。)打印资源。它doesn't不管有多少经验,你对艺术有,你将能够做到这一点。这一过程可以很容易进行。您不应该祈祷您的绘图原来行...竖起大拇指!!इस वीडियो को आप कैसे दिखा हाथ खींचने के लिए कदम आगे बढ़ने की अनुमति (उत्तर प्रदेश मुद्रा से कदम,) है. लिंक-http://merrillk.com/?part=fineart&articles_id=6974&act=artist1&artist=69&collection=114 लिंक एक पृष्ठ पर आप एक मुद्रण योग्य PDF सहित प्रिंट संसाधन, साथ ले जाएगा. वीडियो इसके लिए किसी को हाथ खींचने के लिए संभव बनाता है. यह 1 से सरल.) है वीडियो 2 के कदम से कदम अनुदेश.) वेबसाइट संसाधन 3.) प्रिंट संसाधन. यह बात doesn't कितना अनुभव आप कला के साथ है, तुम यह करने में सक्षम होंगे. इस प्रक्रिया के रूप में यह संभव आसान बनाता है. तुम मत से प्रार्थना करती हूँ कि आपका चित्र बाहर ठीक है ... ऊपर अंगूठे! जाता है!!
Extended shading tutorial
You will see the dry brush painting technique in a slower version of this video- http://www.youtube.com/watch?v=5kAAErTo1SU
WE NEED A VISUAL ARTS CATEGORY ON YOUTUBE THREAD-http://www.google.com/support/forum/p/youtube/thread?tid=2a9806f929074cbd&hl=en&fid=2a9806f929074cbd0004b630ad37cc3e
Facebook- http://facebook.com/kazanjianm
Twitter- http://twitter.com/kazanjianm
Website- http://merrillk.com
(Merrill) Supplies I Use- http://www.jdoqocy.com/click-4....247664-805536?url=ht
- Watercolor Paper
- Bristle Brushes
- Black Oil Paint
- Mineral Spirits
- Kneaded Eraser
All music by Kevin MacLeod http://incompetech.com Thank you Kevin!
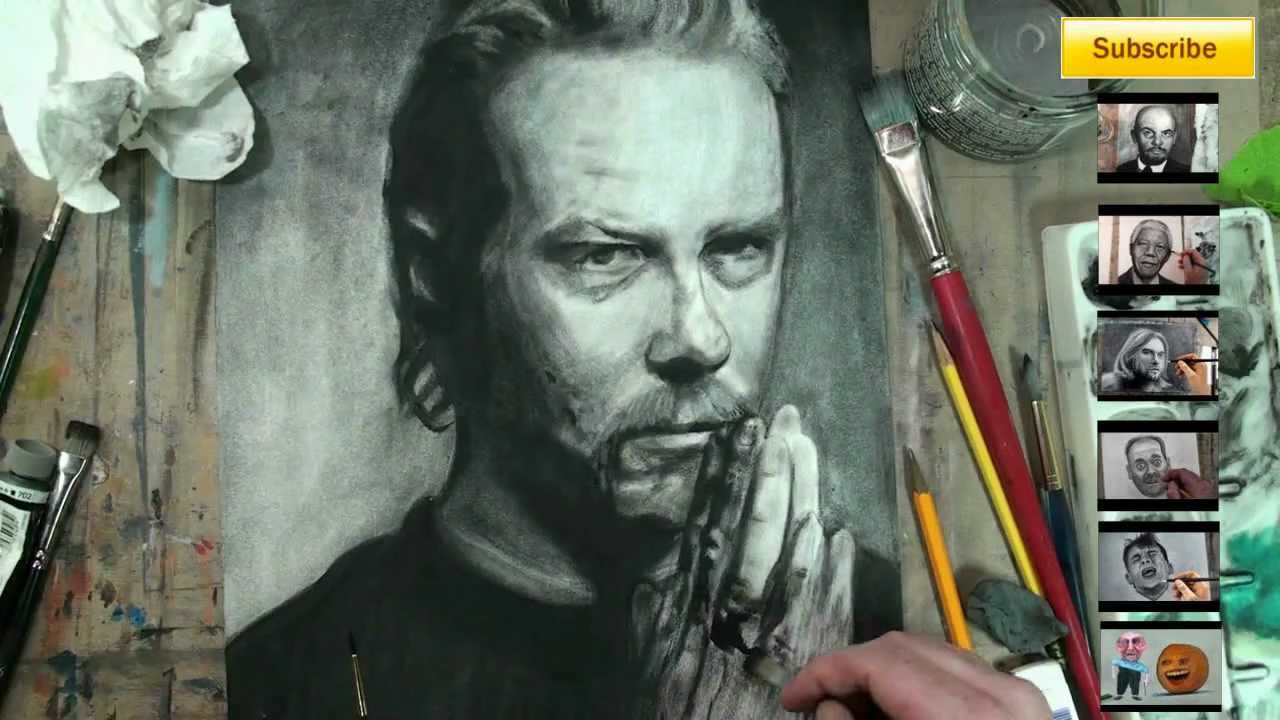
0:25 Right now I am blocking in all of the black shapes. I am NOT doing "dry brush" right now. My brush is quite wet. You can call this a "wash" of black. It is to speed the process up a bit. 0:43 Notice that I will use SEVERAL different brushes on this portrait. I try to use the larger brushes whenever possible so that I could block in SHAPES not LINES! Using bigger brushes accurately is a skill which is built over time.
Even though lines BARELY EXIST on the human body, people seem more comfortable working with a fine point.
If you want to be good at drybrush, break that habit (get used to rendering shapes NOT lines).
1:08 I am still using too much mineral spirits at this point. You want your brush to be relatively dry. DUH! Dry brush?
1:08 The watercolor paper is like QUICK SAND! It will separate the paint from the mineral spirits and the binder instantaneously and leave a charcoal like residue on the surface. Eventually, we will erase part of this residue to create the highlights.
1:28 Squint your eyes (if you have to) at the reference image (easy to find online) to see the tones. It is important that you see the tones in the composition as separate shapes (almost like a puzzle) The brush gives you A LOT MORE CONTROL of the tones than a pencil.
1:28 Brushes are also SUPERIOR at creating variation in the edges of shapes (hard edge, soft edge). 1:51 Do NOT be tempted to draw in the whites of James' eyes. They do not exist in this image. "Draw what you SEE, rather than what you KNOW to be true" - Betty Edwards 2:06 The moustache is quite complicated.....but then again...isn't EVERY moustache!
Its really just an extension of nostril hair! Don't you think?
ANYHOO- Paint the "stache" in more dark than it really is, and we will use the eraser later to soften it and create highlights.
The darkest part of the stache connects with the top lip. 2:31- Dont stress the ear too much. You can scratch it away with the dry brush or do a wash with the paint and mineral spirits (which is cheating I suppose if your going to call it "dry brush") EHH....There is no CHEATING in art. Use the "kitchen sink" if you have to! 3:02- You will notice that the paint does not SPREAD in drybrush. It SINKS
If Oil paint "floats" like a boat on canvas.....It "sinks" like an anchor on watercolor paper.
Be as accurate as possible and use this to your advantage. Get the "puzzle pieces" (the shapes formed by the tones) that you are sure of in first.
3:34 Background is darker on the right. Notice that this is the OPPOSITE of the tones on his face. You will need to use some mineral spirits for the background.3:58 James has very difficult eyebrows to paint. They are long and white like Pai Mei from Kill Bill.....Well maybe not that long.
The skin tone will be a bit darker than parts of the eyebrow (he is greying). Notice the darker parts of the eye socket around the bridge of the nose. This area will be dark but not quite as dark as the shirt. 4:26 It took me about 2 hours to paint this. Take your time! If you have a low frustration tolerance, know that there are always CREATIVE ways to fix things
For instance, if you think you went too dark, use the kneaded eraser. If you struggle with the paint brush, finish your work with color pencil
Link- http://merrillk.com/?part=fineart&articles_id=6935&act=artist1&artist=69&collection=114
Illustration markers are incredible tools for artists! They add color quickly and accurately without a time consuming set up or a messy clean up. They can be used alone or in combination with other artistic media. This tutorial will teach you what you need to know about illustration markers. You will learn how to use them as I demonstrate by drawing a basketball player. Lets Get Started with thos tutorial!
Lets start by giving you some background knowledge.
1a.) Brands- The most popular brands are Prismacolor, Copic , Ad Chartpak and Pantone. I will do a drawing demonstration of Ad Chartpak in this video.
1.) Markers- When you use illustration markers, think of yourself as a watercolor artist. Watercolor artists create their work with beautiful transparent colors. If you choose to try illustration markers, you will definitely be able to apply and make multiple layers of transparent color. But there is a difference......the ability to mix. The colors are pre mixed and they do not blend together like wet paint as you can see in this demonstration.
2.) Special Markers- There are two different types of special illustration markers; Blender markers and gray markers for tones. The blender marker is a little deceptive. It is simply a marker without color in it. It is comprised of the fluid that the marker is mixed in. When it is applied on paper, the colors will bleed together. Notice how the line in between the two colors has disappeared. You will see more examples of how to use the blender in my demonstration. The gray markers are used to build tones. They come is Warm and Cool chromas. The warm gray markers lean towards the warm orange half of the color wheel and the cool ones lean towards the cool blue half. As you saw in the previous section, we cant mix marker colors on a palette like paint, so these gray markers become extremely important. These markers give an illustrator the ability to add tones......and tones make an artwork interesting by giving it depth. As you can see, these markers have a range of tones from one to ten. Ten is the darkest tone and one is the lightest.
3.) Paper- In order to use Illustration Markers to their full capacity, you will need Bleedproof paper. It is specifically made for markers, and it prevents markers from running. Notice the difference in the amount of bleeding of the printer paper on the left, compared to the Bleedproof paper on the right.
4.) As a final point before you see the demonstration, I wanted to make you aware of an article that I wrote that goes in to depth about the nuances of illustration markers. I will recommend color palettes, compare brands and describe techniques for illustrators. It is a good resource for people who wish to learn about illustration or for any person who is in the market for illustration markers. I will leave a link in the video description.

WE NEED A VISUAL ARTS CATEGORY ON YOUTUBE THREAD-http://www.google.com/support/forum/p/youtube/thread?tid=2a9806f929074cbd&hl=en&fid=2a9806f929074cbd0004b630ad37cc3e
Facebook- http://facebook.com/kazanjianm
Twitter- http://twitter.com/kazanjianm
Website- http://merrillk.com
(Merrill) Supplies I Use- http://www.jdoqocy.com/click-4....247664-805536?url=ht
The Dark Ages (Middle Ages, Medieval Times) is my favorite period in art history. Monks did most of the artwork and kept literacy alive. The Roman infrastructure broke down after Constantine the Great (Constantine II) moved the capital to Byzantium (later Constantinople). Roads crumbled, barbarians sacked....people stayed still.....Latin broke down in to English, French, Spanish Italian, Romanian and Catalan. The artwork was called "gothic" by later art historians (which was an insulting term).
While the work lacked realism, it sure had a lot of character! I was inspired to do this mixed media work of art due to my fascination on this period in history. To make this artwork, Church vs. Crown, I used, pencil, color pencil, illustration marker,