Лучшие

Welcome to 「PIN KORO - YouTube」♪
Thank you for the visit.
Today's video is 「Very Easy!! How To Drawing Upside down Trompe-l'oeil "SAKASAE" on Paper for kids - Easy and Cute doodling art on paper」

Welcome to 「PIN KORO - YouTube」♪
Thank you for the visit.
Today's video is 「Very Easy ! How to draw turn word Cars3(Lightning McQueen 2017 Disney Pixar)step by step into a Cartoon - Learning Cute transformation doodle trick art on paper for beginners」
Let's learn how to drawing Kawaii doodle with me.
This movie is not trailer.
INCREIBLE TRUCO CON LA PALABRA Cars 3 - DIBUJO A Cars 3 CON SUS LETRAS

Welcome to 「PIN KORO - YouTube」♪
Thank you for the visit.
Today's video is 「Very Easy!! how to draw step by step 3D Floating Annoying Dog(Undertale)- Anamorphic Illusion - how to draw for beginners step by step 3D Trick Art on paper」
Today, In response to many request, I challenged "Draw a picture related to UNDERTALE".
※I am sorry.
I'm not so good at English, so my english sentence might be wrong.
Please forgive me because I am studying English more.

This video will teach you how to draw the muscles of the upper arm step by step.
Subscribe to kazanjianm (Don't miss any new videos that I make)- http://www.youtube.com/subscri....ption_center?add_use
Facebook: Like me on Facebook to find out about live hangouts or to post your work!- http://facebook.com/kazanjianm
Twitter: I tweet! Do you? http://twitter.com/kazanjianm
My Website: http://merrillk.com
Art Supplies I Use in my Art Work- http://merrillk.com/?sid=135&idpage=supplies_i_use
YouTube Visual Arts Category Petition: http://www.change.org/petition....s/create-a-visual-ar
Step by Step Drawing Playlist: http://www.youtube.com/playlis....t?list=PLD6E34C7CD58
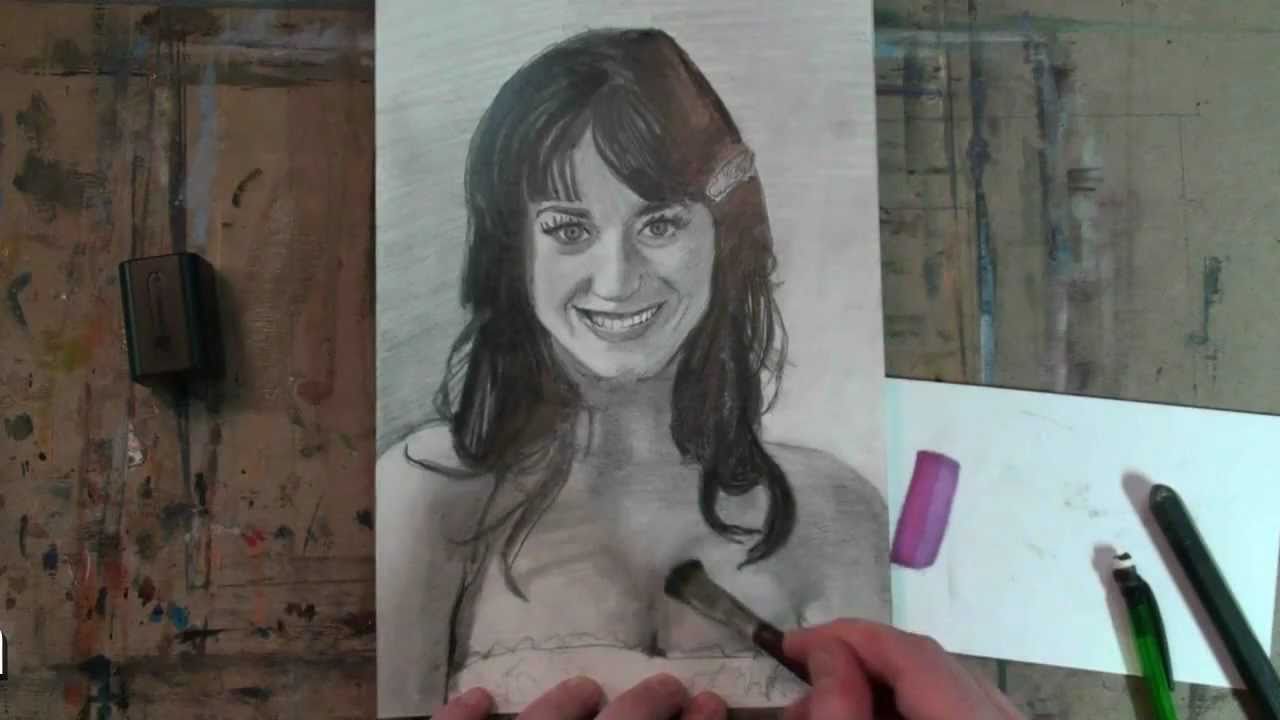
How to Draw Katy Perry- Extended Shading Tutorial. Music by Kevin MacLeod Incompetech.com
0:11- Notice that I am using a mechanical pencil. It has thinner graphite and it helps me create subtle tones for the features of the face.
0:21 Notice the difference between the upper eyelashes and the lower ones. The upper eyelashes are much darker. Use a 4B to 6B pencil on the eyelashes right away.
0:30 The pupil of the eye is darker in tone than the iris. You will see that I shade the "white" of the eye with the paintbrush. I pull some of the graphite over from the iris and the eyelashes. Do not go too dark though.
0:35 Watch how I use the paper stump to do the eyelashes. I "cross hatch" some lines, and then I spread the lines (graphite) with the stump. If you do not have a paper stump, use a Q-Tip.........And if you dont have Q-Tips, how the hell do you clean your ears????
0:45-- Do not go too dark under her eyes. Our skin thins and becomes more transparent as we age. Let Katy Perry keep her "Teenage Dream" and don't give her bags under her eyes......yet. It is OK to darken the area a bit because the eye protrudes from the eye socket (feel your eyeball NOW) and the area around the eyeball is almost always in shadow.
1:05 The darkest part of the mouth is the two corners.
1:26- "Float like a butterfly and shade like a bee"....In other words, move around. Do not get stuck in one place. Develop your drawing evenly.
2:00- Learning shading is like learning another language. You are translating tones. Get in the habit of looking at my reference image once for every five seconds.
2:10- At this point of the drawing and shading process, your goal should be to eliminate "lines" and notice the nuances of "edges". In other words, some shapes have solid edges, while others have softer edges. There is often a tonal difference as well.
2:34- Watch how I use the blending (paper) stump to soften an edge......Suggestion: Look in the mirror (right now) and notice the tonal and physical (hardness softness) differences of your face.
3:18- Every drawing has an "awkward" stage. This is the awkward stage for this drawing.
3:39- Notice that I am making points at the bottom of the teeth, between each tooth.
3:39- Teeth are tricky. Try not to keep the dark lines between each tooth. Generally, the upper teeth are more defined at the bottom, when a person smiles because they overlap the tops of the bottom teeth. Katy Perry's bottom teeth are not visible in this picture.
4:59- Hair has a lot of tones. I am going to start out with a 5B pencil and press hard to create solid straight lines in areas where there are a variety of "tones"- aka- light and dark "values". In generally darker areas such as the upper left, I am hatching in a neutral (half) tone, followed by darker values. Notice that this is the total opposite method of what I did for the skin of the face.
5:46- Hot tip- Use the kneaded eraser and the pencils eraser to create highlights.
5:46- Hot tip #2- Invest in graphite sticks (think really think pencils). You will see me use one in a moment.
7:27- Now, Watch me use all of my "tools" (brush, blending stump, graphite stick, eraser, finger) to get the effects that I want. Try not to use the fingers though because the oils in the hand will be absorbed in to the paper and the shading will be inconsistent.
9:28- It is important to darken (neutralize) the background of a portrait on white paper if you want the highlights to fully develop.
10:14- If the hair in your drawing looks like a "block" consider retouching the edges of the hair shape (as I am doing now).
10:31- I am making highlights with the eraser in the hair
11:21- I am starting to shade the body. Follow the same shading pattern as the face. The left is in highlight, the right is in slight shadow.
11:58- There are several slight shadows in the upper chest area between the two shapes for the hair. Take note of that as you watch me develop them.
12:33- The arm on the right (her left arm) will be about as dark as the shading on the neck.
12:55- It is common in portraiture for the background of an image to be the opposite as the foreground. For instance, notice that the highlight is on her right cheek and the background is dark. It switches on the other side. This is an old artists trick which works because the variance in tones moves the viewers eye around.
13:58- The last thing to do is to "soften" everything. Notice that I use the brush and the eraser a lot.

Have you ever wondered what the Minions from the Animated film "Despicable Me" would look like as "Mortal Kombat Fighters" ? well, I think they would probably look like this. Plus, who doesn't love minions? They look good in just about any type of attire.
This drawing has been requested countless times. Thank You to all who requested it; I'm sorry for the long wait. I hope you all enjoy the video.
Who is your favorite Mortal Kombat Character from this popular video game franchise? Leave a comment below.
This drawing was done using ballpoint pen and color pencil on Bristol paper.
Here is a list of all the characters in this video. There are a few Mortal Kombat characters I was unable to include, however I tried to include the most popular ones including some guest characters.
1.) Sub-Zero
2.) Scorpion
3.) Reptile
4.) Goro
5.) Raiden
6.) Liu Kang
7.) Johnny Cage
8.) Sonya Blade
9.) Kano
10.) Shang Tsung
11.) Ermac
12.) Mileena
13.) Sektor (Triborg)
14.) Baraka
15.) Cyrax (Triborg)
16.) Kitana
17.) Smoke (Triborg)
18.) Shao Kahn
19.) Kung Lao
20.) Jax
21.) Quan Chi
22.) Kenshi
23.) Shinnok
24.) Ferra and Torr
25.) Noob Saibot
26.) Kratos (God of War)
27.) Jason Voorhees (Friday the 13th)
28.) Freddy Krueger (A Nighmare on Elm Street)
29.) Predator
30.) Xenomorph (Alien)
Please ????, Comment and Subscribe
???? Drawing by: Serafin Ureno ✏️️
___
YOU DECIDE WHAT I DRAW NEXT! COMMENT OR TAKE THE POLL HERE: ➡️ goo.gl/icwQTM
➡️ WEBSITE: http://www.serafinureno.com
➡️ FACEBOOK: http://www.facebook.com/OrangeMonkeyart
➡️ DEVIANTART: http://omkdrawings.deviantart.com/
➡️ INSTAGRAM: http://instagram.com/orangemonkeyart
????MUSIC????
Song#1
I am using royalty free music provided by YouTube Audio Library
Artist: MK2
Name of track used: Destructoid
licensed under a Creative Commons license: http://creativecommons.org/licenses/by/4.0/
___________________________
Song #2
I am using royalty free music by: Teknoaxe
https://www.youtube.com/channe....l/UCtgf00GvfFQVsYBA7
Name of track used: Mangled in Thought
Direct Link: http://teknoaxe.com/Link_Code_3.php?q=1223
licensed under a Creative Commons license: http://creativecommons.org/licenses/by/4.0/

If Minions were Bendy and the Ink Machine, they would probably look like this.
Medium: Colored Pencils on Tone Tan paper
Who is your favorite? comment below!
Please ????, Comment and Subscribe
???? Drawing by: Serafin Ureno ✏️️
___
➡️ WEBSITE: http://www.serafinureno.com
➡️ FACEBOOK: http://www.facebook.com/OrangeMonkey92
➡️ DEVIANTART: http://omkdrawings.deviantart.com/
➡️ INSTAGRAM: http://instagram.com/orangemonkeyart
????MUSIC????
I am using royalty free music by: Teknoaxe
Name of tracks used: Royalty Free Music #129 (The Mysteries That are Unsolved)
Direct link to track: https://www.youtube.com/watch?v=13xXBdAVHpM
licensed under a Creative Commons license: http://creativecommons.org/licenses/by/4.0/
------------------------
I am using royalty free music by: Teknoaxe
Name of tracks used: Knock Knock - Electro Swing - Royalty Free Music
Direct link to track: https://www.youtube.com/watch?v=C1zmYI3oTNs
licensed under a Creative Commons license: http://creativecommons.org/licenses/by/4.0/
#Ifminionswere #bendyandtheinkmachine #drawing #art
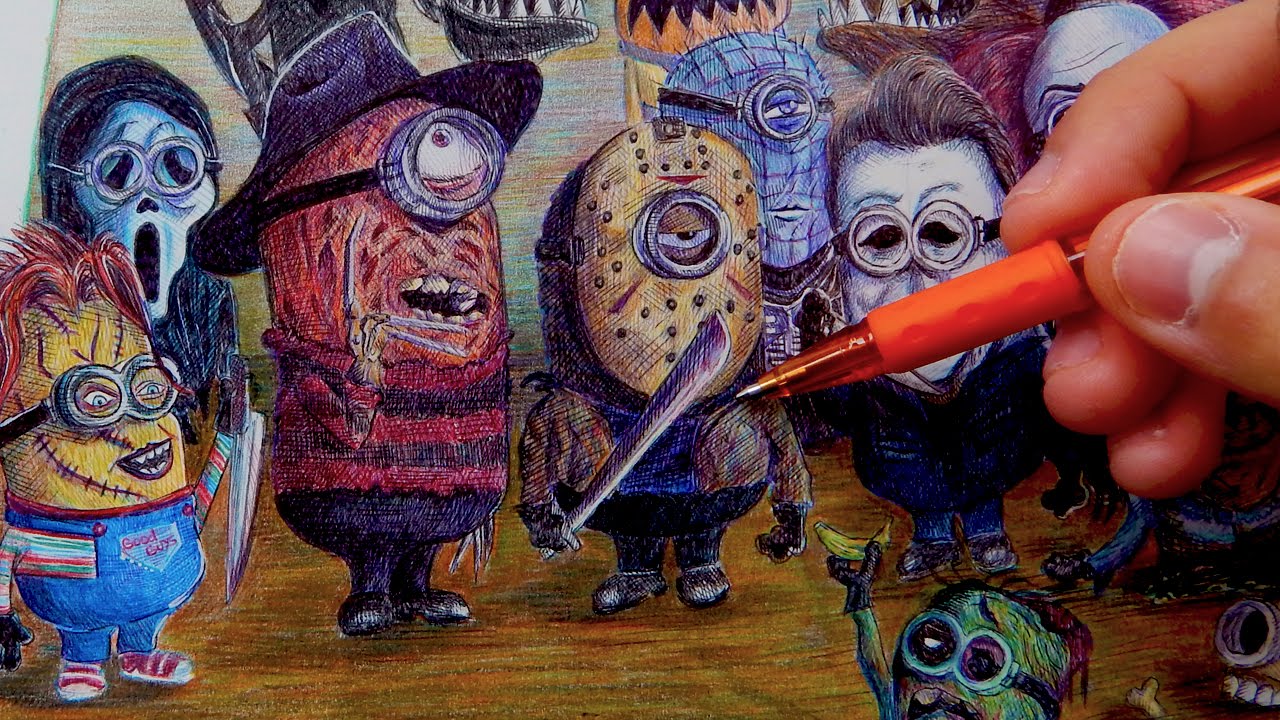
Happy Halloween! Have you ever wondered what the Minions from the Animated Film "Despicable Me" would look like as Villains from horror movies? I think they would probably look like this. Plus, who doesn't love minions? They look good on just about any type of attire.
That being said; Happy Halloween! Stay Safe!
Who is your favorite Horror Movie Villain? Comment Below
This drawing was done using ballpoint pen and color pencil on Bristol paper.
BUY ART PRINTS HERE: http://fineartamerica.com/prof....iles/serafin-ureno.h
1. Freddy Krueger (A Nightmare on Elm Street)
2. Jason Voorhees (Friday The 13th)
3. Michael Myers (Halloween)
4. Regan Macneil (The Exorcist)
5. Hannibal Lecter (The Silence Of The Lambs)
6. Frankenstein's Monster
7. Zombie
8. Leatherface (The Texas Chainsaw Massacre)
9. Pennywise The Clown (IT)
10. Chucky (Child's Play)
11. Ghostface (Scream)
12. Carrie
13. Alien
14. The Wolf Man
15. Billy The Puppet (SAW)
16. Leprechaun
17. Jeepers Creepers
18. Dracula
19. Annabelle
20. Hellraiser
Other Halloween Related Videos:
https://www.youtube.com/playli....st?list=PLC89E7AA5F6
Drawing by: Serafin Ureno
Other sites where you can find me!
FACEBOOK: http://www.facebook.com/OrangeMonkeyart
DEVIANTART: http://omkdrawings.deviantart.com/
THIS DRAWING ON DA:
INSTAGRAM: http://instagram.com/orangemonkeyart
(You Can follow me on Instagram; i'm constantly posting progress pictures and sketches on there.)
I am using royalty free music by: Kevin Macleod
http://incompetech.com/music/royalty-free/
Name of tracks used: Industrial Music Box, Big Rock, Spacial Winds
licensed under a Creative Commons license: http://creativecommons.org/licenses/by/3.0/
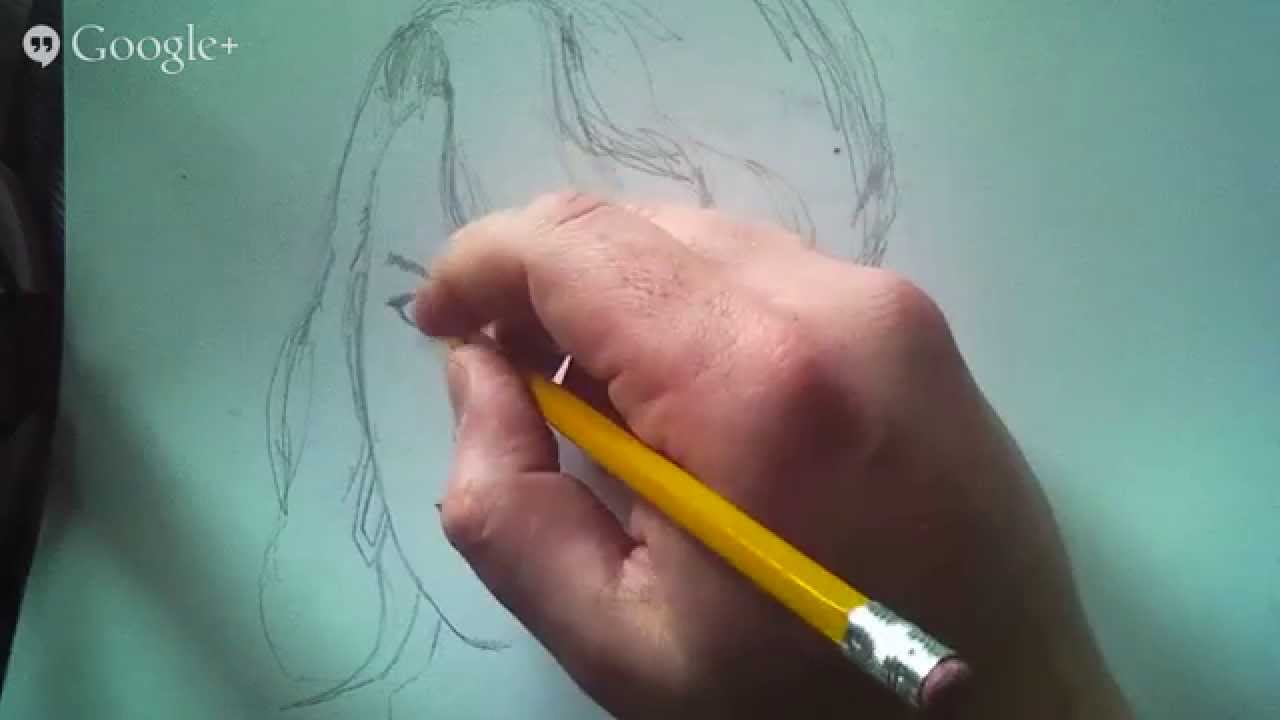
Watch me draw Taylor Swift with colored pencils. Subscribe to kazanjianm (Don't miss any new videos that I make)- http://www.youtube.com/subscri....ption_center?add_use
Facebook: Like me on F

I have created over 500 illustrated characters in 2008. This video shows about 100 of them. Each character has one pose (with the exception of my animations) and are interchangeable in my compositions. I digitally juxtapose my characters over digital photos-where I feel that they fit. (Please see what I mean on my website Merrillk.com.) Some characters have been used only once and some have been used dozens of times. I strive for each character to become iconic and to make my work easily identifiable. Some characters are actual people (friends of mine or well known celebrities) and some are created as caricatures based upon people that I have interacted with in life situations.
He creado más de 500 personajes ilustrados en 2008. Este video muestra a unos 100 de ellos. Cada personaje tiene una pose (con la excepción de mi animaciones) y son intercambiables en mis composiciones. I digitalmente yuxtaponer mis personajes más fotos digitales, donde creo que encajan. (Por favor, vea lo que digo en mi sitio web Merrillk.com.) Algunos personajes se han utilizado sólo una vez y algunos se han utilizado decenas de veces. Me esfuerzo para cada personaje para convertirse en icono y hacer mi trabajo fácilmente identificables. Algunos personajes son reales de la gente (amigos míos o bien conocido celebridades) y algunos se crean como caricaturas sobre la base de personas que han colaborado con el en las situaciones de la vida.

Today, I used a scanner to document the different stages of this drawing. It was made with color pencils and illustration markers. Every few minutes, I took a high resolution scan to show the progress of my work. I started out with a pencil drawing and then used illustration markers to develop the undertones (or as they say in painting- the underpainting. Next, I used color pencils to build transparent to opaque layers atop the layer of illustration markers. Thank you for watching the video. If you like my work, please subscribe to my uploads or visit my website http://merrillk.com . اليوم ، كنت ماسحة لتوثيق مراحل مختلفة من هذا الرسم. صدر مع أقلام ملونة وعلامات التوضيح. كل بضع دقائق ، وحصلت على قرار مسح عالية على نحو يظهر تقدم عملي. أنا بدأت مع الرسم بقلم الرصاص وتستخدم بعد ذلك دليلا لوضع علامات النغمات (أو كما يقولون في الرسم فإن - underpainting. وبعد ذلك ، كنت أقلام ملونة لبناء واضحة وشفافة لطبقات فوق طبقة من علامات التوضيح وشكرا للمشاهدة الفيديو. إذا كنت ترغب في عملي ، يرجى الاشتراك في بلادي تحميل أو زيارة موقع الويب الخاص بي http://merrillk.com.
Hoy en día, he usado un escáner para documentar las diferentes etapas de este dibujo. Fue hecho con lápices de colores y marcadores de ilustración. Cada pocos minutos, tomé un escaneado de alta resolución para mostrar el progreso de mi trabajo. Empecé con un dibujo a lápiz y luego utilizados para desarrollar marcadores de ilustración The Undertones (o como dicen en la pintura-underpainting. A continuación, utiliza lápices de colores para crear capas de opaco a transparente encima de la capa de marcadores de ilustración. Gracias por mirar el vídeo. Si te gusta mi trabajo, por favor suscríbete a mis archivos o visite mi sitio web http://merrillk.com.
今天,我用一台扫描仪文件的不同阶段的抽签。它是用彩色铅笔和说明标记。每隔几分钟,我在高分辨率扫描,以显示我的工作进展情况。我开始了用铅笔画,然后用实例标记发展而Undertones (或如他们所说的绘画的underpainting 。下一步,我用彩色铅笔,建立透明的,不透明层之上的层的说明标志。感谢您的收看视频。如果你喜欢我的工作,请订阅我的上载,或访问我的网站http://merrillk.com 。आज, मैं इस बैठक के विभिन्न चरणों दस्तावेज़ करने के लिए एक स्कैनर थे. यह रंग पेंसिल और चित्रण मार्करों के साथ किया गया था. हर कुछ मिनट, मैं अपने काम की प्रगति को दिखाने के लिए स्कैन एक उच्च संकल्प लिया. मैं एक पेंसिल ड्राइंग के साथ और बाहर लगी तो undertones को विकसित करने के लिए चित्रण मार्करों इस्तेमाल (या के रूप में वे पेंटिंग में कहा कि underpainting. अगला, मैं चित्रण मार्करों के परत के ऊपर अपारदर्शी परतों को पारदर्शी देखने के लिए धन्यवाद. बनाने के लिए रंग पेंसिल प्रयुक्त वीडियो. मेरे काम तुम अगर पसंद है, कृपया मेरी अपलोड की सदस्यता या मेरी वेबसाइट http://merrillk.com पर जाएँ. Aujourd'hui, j'ai utilisé un scanner pour documenter les différentes étapes de ce dessin. Il a été fait avec les crayons de couleur et l'illustration des marqueurs. Toutes les quelques minutes, j'ai pris un scanner haute résolution pour montrer les progrès de mon travail. J'ai commencé avec un dessin au crayon, puis l'illustration des marqueurs utilisés pour développer les Undertones (ou comme on dit dans la peinture de la underpainting. Ensuite, j'ai utilisé les crayons de couleur pour construire transparent à opaque couches au sommet de la couche d'illustration marqueurs. Thank you for watching la vidéo. Si vous aimez mon travail, s'il vous plaît vous abonner à mon ajouts ou visitez mon site Web http://merrillk.com.

Link- http://merrillk.com/?part=fineart&articles_id=11497&act=artist1&artist=69&collection=230
WE NEED A VISUAL ARTS CATEGORY ON YOUTUBE THREAD-http://www.google.com/support/forum/p/youtube/thread?tid=2a9806f929074cbd&hl=en&fid=2a9806f929074cbd0004b630ad37cc3e
Facebook- http://facebook.com/kazanjianm
Twitter- http://twitter.com/kazanjianm
Website- http://merrillk.com
(Merrill) Supplies I Use- http://www.jdoqocy.com/click-4....247664-805536?url=ht
Phase 1: I began this oil portrait with a pencil sketch on drawing paper. This is very unorthodox (when compared to painting techniques of the past) because oil portraits are usually done on canvas or wood panel and any sketching is done with vine charcoal. Paint becomes more transparent in time and pencils lines will eventually be seen through a painting as it ages. The vine charcoal will blend with oil paint but pencil will not. I have a very creative fix to this problem (as you will see in the coming steps).
Phase 2: The second step of a traditional painting is usually an underpainting with brown paint (usually burnt sienna). Underpaintings give painters an opportunity to build masses with paint (turn thin lines from drawing instruments in to blocks of tone, with the help of a paint brush). Underpaintings also allow artists to build tones. I use gray illustration markers rather than oil paint, because of the speed in which I can apply it (no mixing / superior drying time) I recommend the Warm and Cool Grays Marker Set listed below if you wish to try my technique.Chartpak Ad Marker Set: Warm and Cool Grays- Set of 25 A single nib with three distinct line weights. These waterproof, permanent, solvent-based markers deliver brilliant, sparkling color in fine point, medium weight, or broad strokes, with just a shift of the wrist. From crisply articulated tight comps to broadly expressive illustrations, one marker gives you all the lines you need. Phase 3: To build skin tones, I used flesh tone Chartpak AD Illustration Markers. These markers can create wonderful works of art when used alone, but I used them as a quick means to color my drawing (soon to be painting). Flesh tone Markers Flesh Tone and Gray Markers Pantone Prismacolor Ad Chartpak. Phase 4: Next, I added a layer of Prismacolor Color Pencils. Prismas are translucent and very mixable. The fine point of the color pencil helped me get great details for the features of the face (fine tipped paint brushes ALWAYS RUN OUT OF PAINT!!!!)Phase 5: Scan. Here is where things get interesting! I scanned my drawing to edit on my computer (clean it up). Below is the updated version of the scanner I used. I have gotten a lot of mileage out of it and I love it!HP Designjet 510 24" Printer Fast printing: up to 3.5 min/page color A1/D size on coated media, 55 sec/page line drawings Prints HP-GL/2 and PLT files with click of a button Ideal for in-house printing of high-quality CAD drawings. Phase 7: Now it is time for some painting!!!! I used the oil paint colors Ultramarine Blue, Venetian Red, Titanium White, Flake White, Transparent Earth Orange, Cadmium Red, Cadmium Yellow, Gold Ochre, Olive Green, Raw Siena, Lamp Black, Asphaltum, Caucasian Flesh Tone, and Alizarin Crimson Permanent. I started with the highlight areas I mixed a lot of Flake White in to the areas on the cheek (with the other colors. The ears and the lips recieved a lot of Cad. Red and Alizarin Crimson mixed with olive green and Tit. White and Lamp Black, Phase 7: (continued) The shadow areas were glazed (click on the image below to go to a video on how to glaze) Glazing is adding multiple layers of transparent paint atop opaque paint (see video).Accents on the Figure Set
This set offers painters nine colors based on accents from Gamblin's own Figure palette. The set contains the following materials: 9 oil colors in 37 ml (1.25 oz) tubes, including one each of Ultramarine Blue, Venetian Red, Flake White Replacement, Transparent Earth Orange, Gold Ochre, Olive Green, Asphaltum, Caucasian Flesh Tone, and Alizarin Permanent 2 oz (59 ml) of Galkyd SD 2 oz (59 ml) of Gamsol 2 oz (59 ml) of Neo Megilp Additional free sample oil color A DVD, "Navigating Color Space" Informational sheets and color chartsThis set contains an assortment of brushes and oil paints that are ideal for the beginning portrait artist. Each brush contains the finest hog bristles, a nickel-plated ferrule, and a long polished handle. The set includes the following materials: 8 filbert brushes, including two each of sizes 2 and 6, and one each of sizes 4, 8, 10, and 12 1 round brush, size 10 10 Pro-Mix assorted portrait oil colors in 37 ml (1.25 oz) tubes, including one each of Dark 1, Dark 2, Halftone 1, Halftone 2, Light 1, Light 2, Light 3, Neutral 3, Neutral 5, and Neutral 7

Subscribe to kazanjianm (Don't miss any new videos that I make)- http://www.youtube.com/subscri....ption_center?add_use
Facebook: Like me on Facebook to find out about live hangouts or to post your work!- http://facebook.com/kazanjianm
What i've been up to- https://sites.google.com/a/bro....nxlighthouse.org/blc
Twitter: I tweet! Do you? http://twitter.com/kazanjianm
My Website: http://merrillk.com
Art Supplies I Use in my Art Work- http://merrillk.com/?sid=135&idpage=supplies_i_use
YouTube Visual Arts Category Petition: http://www.change.org/petition....s/create-a-visual-ar
Step by Step Drawing Playlist: http://www.youtube.com/playlis....t?list=PLD6E34C7CD58

To draw the head from any angle you must first understand its basic structure. Look past all the distracting details and visualize the underlying forms. This ability to simplify can be applied to the features of the face, but when starting the drawing you could look even further. Ignore even the features and simplify to the most basic form of the head. I use a method taught by Andrew Loomis in his book, "Drawing the Head & Hands".
The head deconstructed into its basic forms, is a sphere as the cranium and a block as the jaw and cheek bones.A Sphere as the Cranium
The sides of the head are flat, so we can slice off a piece from both sides of the ball. From profile, this plane will be a perfect circle, but when drawing it from any other angle, it will appear to be an oval because of perspective. Divide this oval into quadrants. The vertical line represents the beginning of the jaw. The horizontal line represents the brow line. The top and bottom of the oval help you find the hair line and the bottom of the nose.A Block as the Jaw and Cheek Bones
Attach the shape of the jaw. The top will start at the brow line and the back will start at the center of the oval. This is a 3-D volume with a front plane, side planes, and bottom plane (bottom plane is seen from some angles).

YouTube Art News is a monthly video show that communicates relevant news to YouTube artists while highlighting the talent of the Visual Arts Community on YouTube. New Episodes on the 15th of every month on http://youtube.com/user/kazanjianm
The YouTube Art News Team
http://youtube.com/user/kazanjianm
http://youtube.com/orangemonkey92 (Subscriber Rankings)
http://youtube.com/thadtaylorart (2D Segment)
http://youtube.com/joshwaddey16 (Viral Art Video Segment)
http://youtube.com/yozcreative (Underviewed Artist Segment)
http://youtube.com/tylersartshack/ (Crashing Computers)
How to Create Auto Tags- http://simplevloggingtips.com/video-tags/
Matt Toast Segment (Maxpower285) - http://www.youtube.com/watch?v=Dd-flm0HM2s&feature=plcp
(Joshwaddey16) Beast mode Segment: http://www.youtube.com/user/ClifFroth
Tyler segment: MarkCrilley Sophiechan90 collaboration: http://www.youtube.com/watch?v=SNObZAm_XZU&feature=plcp
Thad Segment- (SplinteredStudios) http://youtube.com/splinteredstudios
Yoz Segment-
1.) http://youtube.com/gavinodonnellart
2.) http://youtube.com/clayguy1
CartoonBlock / Ty Moss collaboration- http://www.youtube.com/watch?v=TEqWsdr34yQ
YouTube's official stance on collaborating-
http://www.youtube.com/watch?v=Hg6OTar47ig
Focus on watch time: http://youtubecreator.blogspot.....com/2012/08/youtube
Annotations now in YouTube Insight: http://www.reelseo.com/youtube....-insight-analytics-o
Facebook: Like me on Facebook to find out about live hangouts or to post your work!- http://facebook.com/kazanjianm
Twitter: I tweet! Do you? http://twitter.com/kazanjianm
My Website: http://merrillk.com
Art Supplies I Use in my Art Work- http://merrillk.com/?sid=135&idpage=supplies_i_use
YouTube Visual Arts Category Petition: http://www.change.org/petition....s/create-a-visual-ar
Step by Step Drawing Playlist: http://www.youtube.com/playlis....t?list=PLD6E34C7CD58

Link- http://knicksnow.com/posts/111....8-amar-e-drawing-con
WE NEED A VISUAL ARTS CATEGORY ON YOUTUBE THREAD-http://www.google.com/support/forum/p/youtube/thread?tid=2a9806f929074cbd&hl=en&fid=2a9806f929074cbd0004b630ad37cc3e
Facebook- http://facebook.com/kazanjianm
Twitter- http://twitter.com/kazanjianm
Website- http://merrillk.com
(Merrill) Supplies I Use- http://www.jdoqocy.com/click-4....247664-805536?url=ht
And the winner is.....Terrence Animation. Congratulations you are now featured on Knicksnow.com and youre going to be getting your choice of a portrait or a step by step drawing video done by me. Our mystery judge who will be revealed in a moment liked your drawing style and the presentation of your artwork in your video. You did an awesome job and you are one smoothe dude! Check this out......As a native New Yorker and a lifelong Knicks fan, it was really cool for me to do this so thank you... And the winner is.....Terrence Animation. Congratulations you are now featured on Knicksnow.com and youre going to be getting your choice of a portrait or a step by step drawing video done by me. Our mystery judge who will be revealed in a moment liked your drawing style and the presentation of your artwork in your video. You did an awesome job and you are one smoothe dude! Check this out......As a native New Yorker and a lifelong Knicks fan, it was really cool for me to do this so thank you...

Facebook: http://facebook.com/kazanjianm
Twitter: http://twitter.com/kazanjianm
This video is part one of an extensive series that I am launching about the topic of perspective in drawing. You can access other segments of this series by clicking on the navigation bar at the top right of the video player. This is video one where I will begin to brain wash you.
Subscribe to kazanjianm (Don't miss any new videos that I make)- http://www.youtube.com/subscri....ption_center?add_use
Facebook: Like me on Facebook to find out about live hangouts or to post your work!- http://facebook.com/kazanjianm
Twitter: I tweet! Do you? http://twitter.com/kazanjianm
My Website: http://merrillk.com
Art Supplies I Use in my Art Work- http://merrillk.com/?sid=135&idpage=supplies_i_use
YouTube Visual Arts Category Petition: http://www.change.org/petition....s/create-a-visual-ar
Step by Step Drawing Playlist: http://www.youtube.com/playlis....t?list=PLD6E34C7CD58
WE NEED A VISUAL ARTS CATEGORY ON YOUTUBE THREAD-http://www.google.com/support/forum/p/youtube/thread?tid=2a9806f929074cbd&hl=en&fid=2a9806f929074cbd0004b630ad37cc3e
Facebook- http://facebook.com/kazanjianm
Twitter- http://twitter.com/kazanjianm
Website- http://merrillk.com
(Merrill) Supplies I Use- http://www.jdoqocy.com/click-4....247664-805536?url=ht
Today, you are going to learn how to draw the human skull in front view. Just follow my step my step instructions and I promise you that you will surprise yourself. But I want to try something new. After you complete your drawing, take a video of it and post it as a video response to this video. I will personally critique the first ten video responses to this video.
Step 1: Draw a half circle shape, with two tiny half circles on each end.
Step 2: Draw the holes for the eyes and the nose. Notice that the top of the eye shape starts at the bottom of the half circle shape from step one. Also, notice that the nose shape is triangular and it starts 1/3 of the way up the eye shape.
Step 3: is a tricky step. Add the line that I just added to complete the shape. Notice the perfect symmetry on each side. Notice that the bottom has a squiggly line.
Step 4: Add the upper teeth. There are 12 upper teeth visible and the largest ones appear to be at the front of the mouth. The mouth curves back in a horseshoe shape and the back teeth are blocked. Be sure to make the teeth smaller as they go further back in the mouth. Also be sure to notice that the teeth in the front are somewhat trapezoidal in shape and widest away from the gum.
Step 5: Add the bottom row of teeth. Notice that they are slightly smaller than the top teeth. Also, notice that the top row partially overlaps the bottom. Finally, be sure to see that their widest point is also away from the gum. Here is a close up.
Step 6: Add the jawline. Be sure to notice the shapes that connect the jaw with the rest of the skull.
Step 7: Add the details on the eye sockets and nose.

Where are video responses? Where did video responses go? Relax! They are still here. This is a tutorial on the NEW way of how to post video responses on youtube, since the new format was implemented March 2nd, 2010. A very short demonstration, answering, how do you post a video response? how to post video response 2010

Part 1- I will start this drawing by taking a second to look at my reference photograph on the left. I try to see the mouth as one big shape first and I try to match that shape as best as I can to start. Next, I break the mouth in to three smaller shapes. I notice that the top lip looks like a flattened McDonalds Arch and the bottom lip looks similar to a crescent moon shape. The area in between is more complex but that is ok since I can create that shape by noticing the nuances of upper and lower lip.
Part 2- Take a second to notice that the lower lip is slightly fuller than the top lip. This is true for every person. Once I am somewhat satisfied with the upper and lower lip, I start to notice the space between the lips. That space is divided between the upper teeth and the negative space below the teeth. Please notice that when a person smiles, the bottom lip comes up and blocks the lower set of teeth. Many people make the mistake of drawing the upper and lower teeth in a smile. While drawing the teeth, I am very careful about not pressing too hard. Notice that there are NO dark tones, separating the teeth, only light to medium ones. The front of our face is rounded and the formations of the upper and lower sets of teeth are in a horseshoe shape. When drawing a person from the front, notice that as the teeth go further back towards the throat, they become more foreshortened. Also, as the teeth go back towards the throat, they are blocked more in a smile by the lips and are more shadowed. Be careful because this can easily be overdone. The color of the teeth are not white, they are bone colored, which is a cool off white.
It is a conscious choice for me to start this drawing with color pencil. I use color pencil because the fine tip of the color pencil gives me a lot of accuracy, and also because, color pencils can be mixed with oil paint. You will see me mix color pencil with oil paint in step four.
Part 3- At this point I am satisfied with the placement of all of my shapes. Once that task is accomplished, I focus on building tones and colors. In other words, my focus to this point has been to get all of the pieces of the puzzle in to the right place and now, I can have fun by mixing colors and matching tones. I try to also notice the qualities of the edges of shapes. For instance, there is a fuzzy, unclear edge between the upper lip and the gums above the teeth. It is there but it is hard to see. In contrast, there is a solid, distinct edge between the upper teeth and the darker area of negative space, below the teeth.
Color pencil is a great medium for a contemporary artist to learn. I greatly value the accuracy and detail work that can be achieved with color pencils. The flaws to this medium is that color pencil cannot be layered as well as paint, since it doesn't fully dry. Its biggest strength is also a big weakness. The fine tip of the color pencil, covers surfaces at an extremely slow rate. Both weaknesses can be fixed however. I found that if you dip a paintbrush in a painting medium called Liquin and start to paint, the color pencils essentially pick up the properties of oil paint. In the next step, I will use liquin and mix it with both the oil paint atop of the color pencil.
Part 4- Now I am painting with Liquin and oil paint over the color pencil. They are very compatible with each other and are essentially made with the same materials. The pigment of the color pencil is bound with wax; and wax has been used in parts of many painting mediums throughout the history of oil painting.
Oil paint is considered a traditional medium but many of its artistic capabilities have not yet been matched by other, newer mediums. Oil paint gives to the ability to work opaque, transparently and translucently. Today, I am using the combination of the oil paint and the liquin to soften my color pencil drawing below. I am using small soft paintbrushes and they pick up some of the color that was left below. The paintbrush is a great tool to create soft blends. That makes perfect sense if you compare it to the tip of a color pencil
I hope that you have enjoyed this video and I hope that you learned something. Feel free to ask me questions and please subscribe to my channel if you like concise, information rich videos on art.
Created by Merrill Kazanjian http://merrillk.com
