Laatste video's

Here is link to my facebook fan page
http://www.facebook.com/pages/....Tylers-Art-Shack/181
The entire process for making clouds is that you almost never draw them in, but rather you erase them out. The eraser is normally a tool used to get rid of mistakes. In this case it is used to create. Start with a large eraser and start pulling out large shapes which will be later defined by a smaller eraser. Then lastly use a pencil or charcoal to put in some shadows on the clouds.
You an use some charcoal to go back into the upper part of the sky to make it darker. This will create a transition of tones from the top of the sky to the bottom going from dark to light.
Then once this is done. You can use a small eraser to get in and add some small details. This will brighten up the tops of the clouds to make them really white and puffy. This will also help to give some movement and realism to the clouds.

Live Hangout!
Others on this Hangout:
Merrill Kazanjian http://www.youtube.com/kazanjianm
Mason Criswell: https://www.youtube.com/channe....l/UClvjhOLHMGcsBjYyG
Shiny Spartan: http://www.youtube.com/user/shinyspartan
Artistic323: https://www.youtube.com/user/Artistic323
HS Manga: http://www.youtube.com/user/HSManga
Had a lot of fun with this hangout! I once again got the opportunity to ask my audience what they would like to see me draw. By popular demand, they requested that I draw an underwater cave seen. So that is what I started to sketch during this hangout. I love having that interactive drawing experience and it is a great way to get over that creative boundary of not knowing what to draw.


Welcome back everyone to How to Draw a Beach Series Part 2 - Using pastel for a Sky
Other Places to Find my Art
Website: http://www.tylersartshack.com
Facebook: http://www.facebook.com/tylersartshack
Twitter: https://twitter.com/#!/TylersArtShack
Google+: https://plus.google.com/115405....344518849808905/post
Deviant: http://tylersartshack.deviantart.com
Make a Donation Via Paypal! http://tinyurl.com/o6cnnpv
In this video, I finally am getting back into doing some color since I know a lot of you are wanting to learn how. It feels nice to get back into it again. So, lets talk about what I will be using during the rest of this video series. The main pastels that I have is a 72 set of Derwent pencil pastels. I also have some Prismacolor Nu pastels and Sennelier pastels as well. The other 2 brands are cheaper and they come in a set of about 24 for a pretty cheap price. They work really well though.
I picked out 3 shades of blue as well as some white for the sky. Using the light white for the bottom and working darker and darker towards the top is the way I generally like to color my skies in. Then just using some white pastel, I started to make some puffy clouds that will be floating off to the sides of the drawing. I also used a bit of darker brown to get some shadows into the clouds as well. You can do this if you like or you can just leave the bottoms of the clouds a bit of a darker blue color. That works as well.
Music Info:
Intro/Outro
Song: Corporate Uplifting Rock
Artist: Plastic 3
http://tinyurl.com/nthpoga
Background
Song: The Red Chair
Artist: Brown House Media
http://tinyurl.com/koekde7

Youtube Live Hangouts!
Serafin http://www.youtube.com/user/orangemonkey
Merrill http://www.youtube.com/user/kazanjianm

Hey everyone! I want to thank everyone that attended and is watching it after the event. I had a blast drawing for everyone.
Check out some of the channels that joined me during the hangout.
WayneTully1 http://www.youtube.com/user/WayneTully1
ShinySpartan http://www.youtube.com/user/shinyspartan
JoshWaddey16 http://www.youtube.com/user/joshwaddey16
This hangout was an interesting one. I was working on the drawing that I had from the other night. The one with all the cliffs and whatnot. I was still getting comments as to who I should draw jumping off those cliffs haha.... good times! But I was getting to the end of what I wanted to accomplish on that drawing.
But while I was drawing that landscape, I was getting a lot of feedback as to what I should draw between the cliffs and in the background. It became an interactive drawing session! I ended up drawing a river between the cliffs and a waterfall in the background.
Since we were on the topic of interactive drawing, I decided that for the next drawing, I would have the audience decide what I should draw. And by popular demand, there were a lot of hits for post apocalyptic city landscape of sorts. So I decided to draw an "I am Legend" style of it. Towards the end of the landscape, i started to draw in some overgrown trees and grass of sorts. Overall, I had a great time drawing this one. I got some awesome feedback from the audience and it made for a great time!
Thanks everyone!!

Welcome back everyone to my drawing series on How to Draw - Summer in the Mountains Series Part Three - How to Draw Trees
Other Places to Find my Art
Website: http://www.tylersartshack.com
Facebook: http://www.facebook.com/tylersartshack
Twitter: https://twitter.com/#!/TylersArtShack
Google+: https://plus.google.com/115405....344518849808905/post
Deviant: http://tylersartshack.deviantart.com
In this video, I will go over in depth on how to draw the trees that are on the cliffs in the background of the drawing. This starts out with using the side of a pencil to make a solid tree trunk. Adding in a few on each side will be enough to then later on fill the areas in with leaves.
Adding in the leaves is the same method that I do for most of my other videos where I explain how to do it. Ill use either a HB or 2B depending on how dark I would like the leaves to be. It is pretty much just using the pencil on its side to get a large variety of detail flowing and creating the forms and shapes of a tree.
I hope you all enjoyed the video and thanks a lot for watching!!
Music Info:
Artist: DanoSongs
Song: Remember How it Started
Music can be found at DanoSongs.com

2012 sure has proved that this channel has the potential to be a huge thing in the near future and it is all thanks to each and every one of you that watch my videos! Thank you all very much!

I re uploaded this video to this channel with a new song by Ryan Farish.
Song:Chasing the sun
Artist: Ryan Farish
Farish Music International (BMI)
Licensed with permission, RYTONE Entertainment
www.ryanfarish.com
You can purchase this song by this link http://itunes.apple.com/WebObjects/MZStore.woa/wa/viewAlbum?id=318686629&i=318686666&ign-mpt=uo=4

Feel free to like and favorite this video and use it as a quick resource for your needs. Also tell me in the description what sort of content you would like to see from me.
My facebook page: http://www.facebook.com/tylersartshack
Twitter: https://twitter.com/#!/TylersArtShack
Google +: https://plus.google.com/115405....344518849808905/post
Supplies:
Faber castell pencils:
4H 2H HB 2B 3B 4B
Paper mate tuff stuff eraser
sharp needle point
blending stumps
90IB hardbound sketch book.
Drawing duration: about 3 hours.
So here is a sketch that I have been wanting to do for a very long time. I have been looking on the web for a reference picture to draw but could not find one that I have liked. So what I just decided to draw this one straight out of my head. Drawing out of my head is something I have been practicing for a while now and it has taken me a while to get used to it. Once you get the shading down, you can draw any sort of convincing composition.
So I started the landscape drawing like I usually do. I outline where the mountains are going to go and then I start working on the sky. I started with a 2h pencil and used the weight of the pencil to shade it in. Then using a cloth, I blended everything smooth.
I have a few erasers that are very fine that I used to start erasing out some clouds. Once the clouds were erased out, I would go back in with a pencil again to add some shadow and detail to them.
Next step is the mountains. I usually leave one side of the considerably darker than the other to show dynamic lighting effect. It helps to convince the viewer that light is effecting the landscape. I will also make very dark lines going down the mountains to show texture on them to help bring them out.
The next portion was the waterfall. This one started out with a light sketch of where I wanted it to be and then I started to plant some rocks on both sides of it. Shading the rocks took me a long time to do. I worked then and shaded them with a lot of texture to make them as lifelike as I could make them.
The last portion of the drawing I just decided to add in a few bushes and eventually a tree. The tree really helped to balance out the overall drawing in the end which really made the drawing come together.
Song by Danosongs.com
Song is called "The Owl Named Orion"

I have a huge passion for the ocean and the best way I can express my love for the ocean is to capture it in the moment. Hope you enjoy!
Drawing was done with Sennelier pastels and oil pastels.
Song: Anthem of Hope
Artist: Ryan Farish
Farish Music International (BMI)
Licensed with permission, RYTONE Entertainment
You can purchase this song from the apple store here.
http://itunes.apple.com/us/album/bloom/id360509452?i=360509569&ign-mpt=uo%3D4

.This is a very old video of mine where I show you the very basics of how to draw a flower in charcoal.
I start off by showing photo reference and show how to translate a small image over to a larger image and then how to detail the image step by step. Hope you enjoy!

Check out how I draw a snow scene using painter to create. This was created the day after we had a blizzard and it just felt natural to draw a picture about it.
Thanks for watching my video. This photo will be posted on my facebook fan page. Check it out! http://www.facebook.com/pages/....Tylers-Art-Shack/181
Supplies I used for this drawing.
Wacom Bamboo Fun Tablet.
Corel Painter 11.
Debut Video Capture Software~ screen recorder.
I used the pastel brush and a blender brush.
For this drawing, I followed a style very similar to Bob Ross. I started with a light blue for the sky and gradually worked it into a darker blue towards the top of the page. I also did this for the bottom of the page for what would eventually be the water. I then used the blending tool to create a smooth transition of tones but for the dark blue I used to create a storm like cloud. The water I just smoothed out to create a very blended out tone.
For the mountains, I created the basic shapes with a very dark gray color. After creating the basic shapes and roughing them out, I used the blending tool and blended them all the way down to the blue on the bottom of the page. Right after, I used a dark blue for the shadow portion of the mountains and a pale white as well as a pure white for the light side of the mountains. I applied the color so that It would leave the dark gray from the underside to represent rocks and uncovered areas of the mountains. It gives it more realistic look to it.
After I created the mountains, I used the blender tool and blended out the base of the mountains to create a layer of mist.
I used the pastel brush again to make a dark green color and started to make some trees for the very far background. I used a lighter green to overlay on top of the trees I already put down to create some depth. I then added some white to make it look like there was snow on them. As the trees progressed closer and closer to the picture plane, I added some trees with details. I added detailed trees all the way to the foreground.
As I was doing this, The trees that were far in the background I split by putting in a shore line. The green left below that shore line would become a reflection. I used a blender brush to blend that and wiggle it a bit to create reflections.
I created a shore line under all the new trees I created and after that the picture was pretty much done.
Thanks for watching and please subscribe!
The music in this video is by Positively Dark
The song is called "The Runner"
Check these guys out at http://www.entropymusic.com/
They have some awesome music!

Welcome back everyone to my first Q & A about my childhood Art and the meaning of life as well as many other topics. I had a great amount of fun while doing this and I think this will be a great opportunity for all of you to get to know a little bit more about me.
Other Places to Find my Art
Website: http://www.tylersartshack.com
Facebook: http://www.facebook.com/tylersartshack
Twitter: https://twitter.com/#!/TylersArtShack
Google+: https://plus.google.com/115405....344518849808905/post
Deviant: http://tylersartshack.deviantart.com
Thanks a lot everyone for tuning in and leave me some feedback as to what you thought about the Q & A video!
Music Info:
Artist: Ghost
Song: Reverie
music can be found on cc.mixter.org
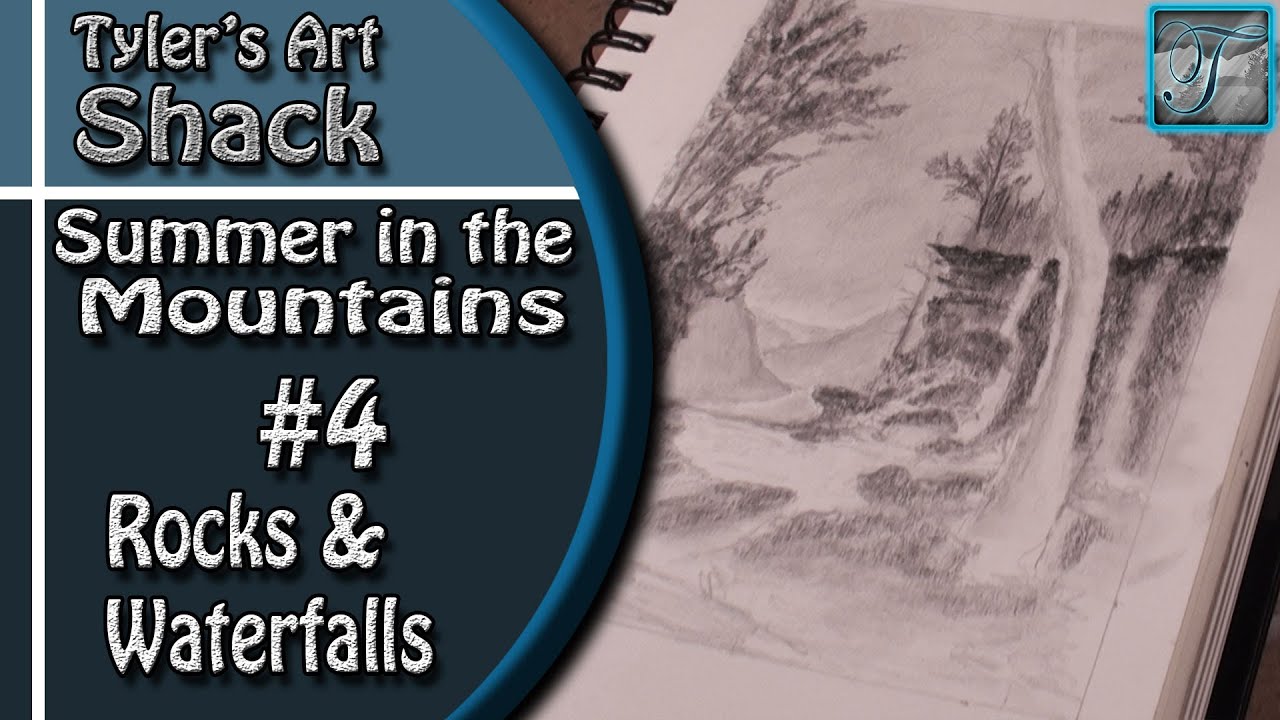
Welcome back everyone to How to Draw - Summer in the Mountains Series Part Four - How to Draw Rocks and a Waterfall
Other Places to Find my Art
Website: http://www.tylersartshack.com
Facebook: http://www.facebook.com/tylersartshack
Twitter: https://twitter.com/#!/TylersArtShack
Google+: https://plus.google.com/115405....344518849808905/post
Deviant: http://tylersartshack.deviantart.com
In this video, I decided to get some work done in the background rock cliffs and the waterfall. I start off by darkening and adding in some more details for the rocks so that the waterfall will have more contrast so that it will stand out more. Drawing a waterfall is a back and forth process. I like to add in a small amount of tone with a 2H pencil or so. It really helps to have a sharp eraser for this part. I will start to erase out parts of the pencil to create the highlights of the waterfall. Once this is done, I go back in and darken up some of the water to help build up some contrast and give it a bit of character. Then going back in with the eraser and blending stump to smooth things over and then repeating the process until I get to where I like it. Once that is done, we can go back in and finish up some of the rocks.
Because of the waterfall that I added and some of the objects around it, I had to change the perspective of the water pool just slightly. I did this by adding in more rocks on the bottom that took away from where the water would be. This helped to create the illusion that we were standing in the drawing. When the pool was more rounded, it gave a more overhead look of it which was counteracting the other perspectives that I had already placed in the drawing.
Next video I will start to work on the ground details and get them more finalized. I hope you are all enjoying the series and would greatly appreciate your feedback! Thanks a lot everyone for watching!
Music Info:
Artist: DanoSongs
Song: Remember How it Started
Music can be found at DanoSongs.com

This video will take you through the steps to draw a realistic pine tree. I show you the pencils and techniques you will need to draw a finished product.
This photograph will be posted on my facebook fan page. Hit the link to check that out. http://www.facebook.com/pages/....Tylers-Art-Shack/181
Supplies
HB Pencil
2b Pencil
Eraser
Blending stumps
Drawing paper
Pencil Sharpener
Welcome to my video on how to draw pine trees. I do not care if you do not know how to draw, I guarantee if you watch this video or some of my other videos and with a little bit of practice, you could draw just as well as me if not better!
I start my drawings out simple and work into the detail to bring it into a more life like look.
The first step is to get a center line that will be the entire tree. The center line helps a lot when drawing any tree. After this, it helps to create a general shape where the tree will be.
After this is done, make the center line higher. This will become the very top of the tree. I put in some scribbling detail on this. Work very quickly with this, It does not have to be perfect. Leave some spaces between branches and use the underhand grip to scribble in some small details.
Keep the pencil constantly moving, add in small scribbles, the more little detail you add in, the more realistic the tree will look.
Keep in mind that the tree is a free living thing, try and replicate the free look by swapping between detail and very loose hand strokes.
The whole general shape of the tree was done with an HB pencil. The next part of the tree is the shading part. This is all done with a 2B pencil
I use the 2B pencil and go under the branches and make them darker than the rest of the tree. Shading the tree helps to create a more lifelike and realistic look. Pay close attention to how I hold the pencil. It will help you when you draw this picture or any other tree.
I later add a trunk to the tree or a stump. This helps to add character and also plants the tree into the ground. After you add that, shade it in and the picture is pretty much done!
Good LUCK!!!

This is a speed drawing of a beach that I did quite a while back using oil pastels.
This video is a Re upload. I had to change the music out.
Check out my facebook page http://www.facebook.com/tylersartshack
Here is my very first drawing with oil pastels. The brand of oil pastels that I used is called Sennelier. Drawing time took me just over 2 hours.
Supplies:
Sennelier oil pastels
Canson Acrylic grade paper 185 pound
Blending stump
standard pencil
This is my very first attempt at drawing a landscape with my new Sennelier oil pastels. I started the picture out my lightly sketching the placement of the objects in pencil. I then used a combination of many colors to create the effect of movement in the water. As it came closer into the foreground, I used many different colors and shades to create the waves. Then using a white oil pastel, I lightly sketched some foam onto the faces of the waves.
This was probably one of my best landscape drawings I have done and it is still one of my favorite drawing's I have done.

This video shows you how I drew an old pirate ship in the waves. It was done using pastels and took me well over 8 hours to draw.
This video is a re upload. It was originally done on 1/12/10.
I put new music on this video.
Prepare to set sail on some stormy seas on a ghost ship ready to take anything on. The ship is very old and its sails are literally ripping to shreds as this ship tosses around in the ocean. The ship is fully equipped with cannons and many deck hands loyal to the captain and will fight for him no matter what.
The drawing took me about 8 hours to do and it is done with Derwent Pencil Pastels, PrismaColor Pastels, and Derwent Tinted Charcoal. Drawn on Bristol Velum Paper 14x17 inches.
The water alone in this drawing took up a solid 4 hours to do. I used a combination of pastels, tinted charcoal and regular charcoal to model the waves to look as realistic as possible. I remember spending hours on that part and it felt like it took forever.
The sky was probably the most difficult part of the drawing. It was hard to replicate the way it looked. There are about 30 different colors incorporated into the sky that I actually drew to try and best replicate what was actually happening in the reference image.
The actual ship was probably the easiest thing to draw in the whole drawing. It only took me about a half hour to draw it in. There were not that many colors that needed to be completed.
All in all this is probably one of my best drawings I have done. Still to this day it was the most labor intensive drawing I have ever done. But the payoff has never been better. I have framed this picture and it is hanging up on a wall in the main part of our house so everybody can see it as they walk in the house.
Music is by Kevin MacLeod and the song is called "Mistake the Getaway.

Here is a link to Merrill Kazanjians video about having youtube incorporate a visual arts category.
http://www.youtube.com/watch?v=aHvcc6NI8Tk
Here is the list of artists that I have found so far. They will be broken down into landscape and portrait sections. This list will be added upon so use this video as a resource to find new artists here on youtube. just copy and paste these names into the youtube search box.
Artists with UNDER 50 SUBSCRIBERS! Check them out!
gavinodonnellart
XSoulAlexX
HelloLeane
xxxChlo3OH3xxx
8DFineArt
tuurenmoon
Qualt93
MarcsWork
Sylviasdrawings
eslihannali
MrEruth
MrMiguelDomingo
elenouska15
Lewsayloo
jazzthriller
Landscape Artists
pinsetter1991
WatercolourWorkshop
CTANGLINGADVENTURES1
juriaan13
rvalentinorobinson
alankingwell
ArtistBenSaber
speedpaintingdvds
thevirtualinstructor
scottnaismith
barrypfinnegan2
Portrait Artists
OrangeMonkey92
CocoHotpix
DrawingsByDerek
bianquicreations
rayjaurigue
gavinodonnellart
onlypencil
Yakovdedyk
skylineaddict
Shane88L
HelenD4TT
Garti3
Reyliasdrawings
thedrawinghands
LewyAlsoDraws
noSovereign
5PencilMethod
fourquods
armsho
F45h10nart
RishanCooray
Everything Else
TheRucaSama
AnnikaGarratt
zyra333
oilpaintingworkshop
wwwdotFindIvandotcom
JZartist444

Check out Thads channel!!
He does a lot of landscape painting like me.
ThadTaylorArt http://www.youtube.com/user/Thadtaylorart
Hey guys. So this is a very long hangout that starts off with just me and Thad joins me later during it.
I spend the whole time working on a fantasy tree drawing while answering all of your questions. I had a great time during it, had a nice solid amount of viewers and got a lot of great questions! Thanks everyone!!
