Seneste videoer

WE NEED A VISUAL ARTS CATEGORY ON YOUTUBE THREAD-http://www.google.com/support/forum/p/youtube/thread?tid=2a9806f929074cbd&hl=en&fid=2a9806f929074cbd0004b630ad37cc3e
Facebook- http://facebook.com/kazanjianm
Twitter- http://twitter.com/kazanjianm
Website- http://merrillk.com
(Merrill) Supplies I Use- http://www.jdoqocy.com/click-4....247664-805536?url=ht
The Dark Ages (Middle Ages, Medieval Times) is my favorite period in art history. Monks did most of the artwork and kept literacy alive. The Roman infrastructure broke down after Constantine the Great (Constantine II) moved the capital to Byzantium (later Constantinople). Roads crumbled, barbarians sacked....people stayed still.....Latin broke down in to English, French, Spanish Italian, Romanian and Catalan. The artwork was called "gothic" by later art historians (which was an insulting term).
While the work lacked realism, it sure had a lot of character! I was inspired to do this mixed media work of art due to my fascination on this period in history. To make this artwork, Church vs. Crown, I used, pencil, color pencil, illustration marker,

Artist Merrill Kazanjian shows his technique for drawing from pictures. This technique is tailored for beginners. You do not have to have any experience to try this. Step one is called a mass drawing. Step two is called a line drawing. In step three, Kazanjian demonstrates how to do a rubbing. In step 4 the rubbing is reprinted. Step five is shading. This is an excellent process for beginners to learn how to render from a picture. All that you will need is. A yellow marker, two sheets of paper, a pencil, a picture to work from and a black pen. Drawing lessons for beginners. Drawing lessons for beginners.

How to draw the Bugatti Veyron Step by Step
bugatti veyron + bugatti veyron top speed - bugatti veyron top speed 434 km h top gear - bugatti veyron vs mclaren f1 - bugatti veyron vs jet + bugatti veyron vs koenigsegg agera r + bugatti veyron vs f1 formula + bugatti veyron crash + bugatti veyron in india + bugatti veyron prank bugatti veyron burnout + bugatti veyron build + bugatti veyron brake test + bugatti veyron black bess + bugatti veyron black +
bugatti veyron blue + bugatti veyron beaten + bugatti veyron birthday present + bugatti veyron birdman + bugatti veyron brakingbugatti veyron crash + bugatti veyron crash test + bugatti veyron crash in water + bugatti veyron commercial + bugatti veyron convertible +bugatti veyron custom + bugatti veyron crash caught on tape +
bugatti veyron convertible roof + bugatti veyron cristiano ronaldo +
bugatti veyron commercial 2014 bugatti veyron quarter mile +
bugatti veyron quicksilver exhaust + bugatti veyron quad turbo bugatti veyron supersport + bugatti veyron sound + bugatti veyron startup +
bugatti veyron singapore + bugatti veyron supersport vs koenigsegg agera r + bugatti veyron speed bugatti veyron super sport vs hennessey venom gt bugatti veyron sound exhaust bugatti veyron super sport acceleration bugatti veyron ss vs hennessey venom gt
asphalt 8 bugatti veyron bugatti veyron 0-60 +bugatti veyron 0-400 km h + bugatti veyron 0-100 km/h + bugatti veyron 0 to 60 +
bugatti veyron 0- + bugatti veyron 0-200 mph + bugatti veyron 0-400 + bugatti veyron 0-100 mph + bugatti veyron 0-200 + bugatti veyron 0-250
Subscribe to kazanjianm (Don't miss any new videos that I make)- http://www.youtube.com/subscri....ption_center?add_use
asphalt 7 bugatti veyron
Facebook: Like me on Facebook to find out about live hangouts or to post your work!- http://facebook.com/kazanjianm
Twitter: I tweet! Do you? http://twitter.com/kazanjianm
My Website: http://merrillk.com
Art Supplies I Use in my Art Work- http://merrillk.com/?sid=135&idpage=supplies_i_use
Petition: YouTube NEEDS a Visual Arts Category: http://www.change.org/petition....s/create-a-visual-ar
Step by Step Drawing Playlist: http://www.youtube.com/playlis....t?list=PLD6E34C7CD58
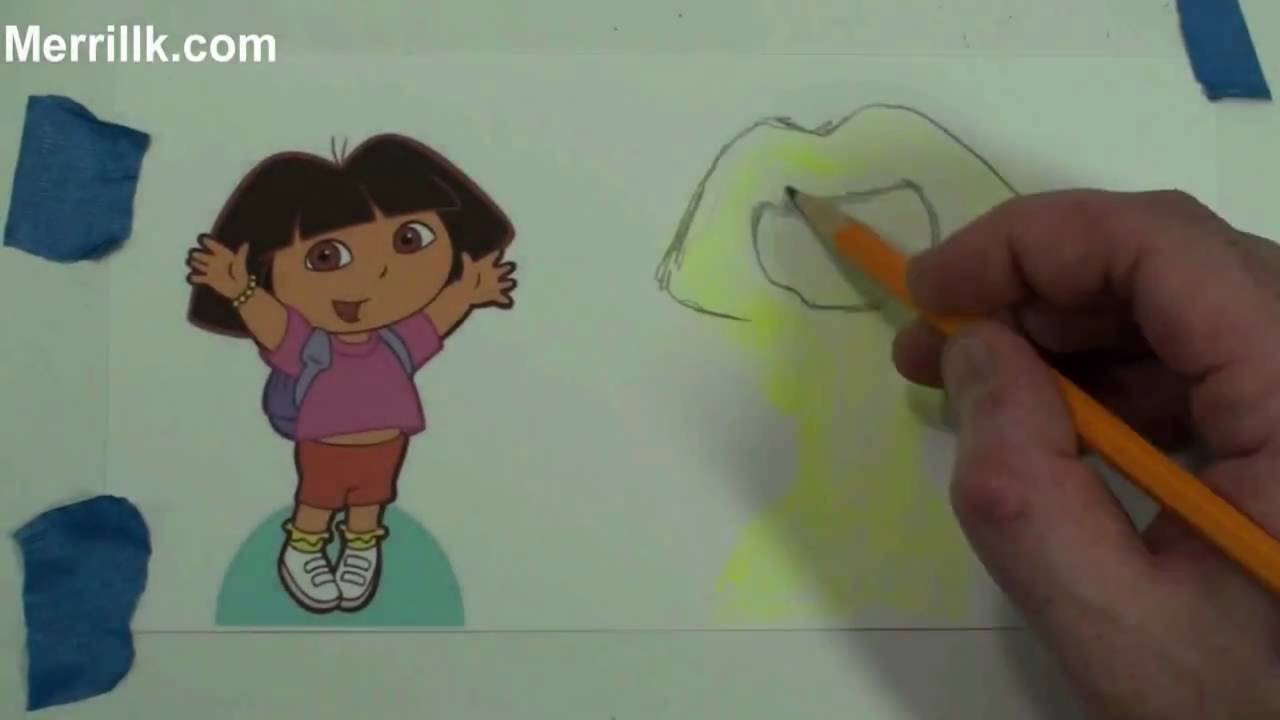
In this video I am going to share a very effective training technique that I use in my classroom. It is a strategy tailored for novice artists and it will make you better at drawing what you see (also known as the skill of rendering). I call this process mass drawing / line drawing. The process will seem awkward at first, but I have seen students get great results once they understand the process. So please give it a chance. All that you will need is a highlighter, a pencil and some paper. Lets begin.
This is a mass drawing. I used the highlighter to make a silhouette of the cartoon character, Ni Hao Kai Lan. I scribbled it in quickly and as a single mass. This will serve as a guide for the second step, the line drawing.
This is a line drawing. Notice that it is done directly over the mass drawing. But don't just outline; make corrections. The mass drawing will enable you to see the big picture and the mistakes that you made. Many of my students have found it much easier than guessing on a blank sheet of paper. So dont outline your mass drawing make corrections while doing the line drawing.
Take a second to look at how many changes I made to the original mass, such as the right arm, the shoes and the hair.
Still confused, thats ok, watch the process a few times and you will begin to understand it. Remember that it is just a drill and drills are used to build good habits for the future. This drill will help you build observation skills and comparative skills which will help you develop the ability to draw what you see. I don't expect you to use a highlighter for long. In fact, I will show you a more advanced method, later on in the video. I will also teach you a really cool trick that will get rid of the color from the highlighter.
But for now, remember that there are two steps to this process. Use the highlighter to create a mass drawing of what you are trying to draw. If you are very new to drawing, try to make your mass drawing a similar size to your reference picture or object. With more experience, you can experiment with scale. Remember that step two, the line drawing, is meant to be a correction of step one.
I have observed that when my students do this process for the first time, they struggle a bit, and complain that the yellow or pink from the highlighter "throws them off". Please remember that it takes three tries, on average, to get fully acquainted with this process. I have also observed that the students who improve the fastest, look at their reference image more often. Get in the habit of looking at your reference image at least once for every five seconds.
To get rid of the color from the highlighter, flip over your drawing and start to scribble all over the back. It is easiest to use the side of a graphite stick, but you could also use a pencil. Once the back of your drawing is covered, flip it over again and tape it down over a new piece of paper. Then, retrace over all of the lines. I used a blue pen for this step. When you remove the tape, you will see a perfect print of your drawing
Now, I am using the pencil to create a mass drawing. Notice that I am pressing very lightly while scribbling in the mass. I have observed that using a pencil is a little bit more difficult for beginners due to the tendency to apply too much pressure and leave dark lines. Also it is much easier to differentiate the bright colors from the highlighter then the subtle tones of a pencil. Still, after you feel that you are progressing with the markers, move on to this step. Do not worry about mastering the process with the highlighter, just get comfortable enough, and move on.
Thank you for watching my video, I reply to all of my comments, so feel free to ask me a question, or just let me know how it goes. Remember to try this at least three times before you judge the process. I guarantee that it will feel foreign at first, but I have used it for eight years in the classroom with a high success rate so give it some time. Happy drawing everybody!
In my demonstrations, I drew, Ni Hao Kai Lan, Spongebob, Homer Simpson, Moose A. Moose (Noggin), Characters from Yo Gabba Gabba, Lilo from Lilo and Stitch, Wow Wow Wubbzy, Dora the Explorer, Patrick Star (Spongebob), Stitch (Lilo and Stitch and Blue the Dog from Blues Clues (Nickelodeon Noggin). I am confident that this process could teach you how to draw any cartoon.

LINK TO PDF- http://merrillk.com/?part=fineart&act=artist1&artist=69&collection=186&articles_id=18075
Subscribe to kazanjianm (Don't miss any new videos that I make)- http://www.youtube.com/subscri....ption_center?add_use
Facebook: Like me on Facebook to find out about live hangouts or to post your work!- http://facebook.com/kazanjianm
Twitter: I tweet! Do you? http://twitter.com/kazanjianm
My Website: http://merrillk.com
Art Supplies I Use in my Art Work- http://merrillk.com/?sid=135&idpage=supplies_i_use
YouTube Visual Arts Category Petition: http://www.change.org/petition....s/create-a-visual-ar
Step by Step Drawing Playlist: http://www.youtube.com/playlis....t?list=PLD6E34C7CD58

Quick! Look in the mirror! I am hoping that you are smiling. If you are, you are seeing the Zygomaticus major, Zygomaticus minor and Risorius muscles working together to retract the corners of the mouth upwards and towards the back of your head. But, smiles are not just limited to the mouth. Your orbicularis oculi muscle has raised your cheeks and compressed your eyes.
Face proportions face anatomy head
Lets look at a smiling face and compare it with a straight face. Here are a few tips to remember. The forehead is very relaxed during a smile. The two eyelids get closer together and the top lid forms a less curved rainbow shape. The cheeks become pushed up like a mountain growing in height due to the movement of continental plates. In other words, the cheeks are literally pinched between the eye and the mouth, and this pushes the cheeks flesh away from the skull. There is little change to the nose.
There are common features to smiles. Notice how straight the top lip becomes and notice the trapezoid shape that forms above it. The corners of the mouth usually extend past the mid point of the eye. The eyebrows of most people remain neutral during a smile. Notice the symmetrical arcs that form which seem to connect the eyebrows to the folds in the cheek. Finally, notice that when people smile, the top row of teeth are often the only teeth, which are visible.
Now lets learn how to draw a smiling face. Please note that this is only the first of two videos which I plan to release on the topic. In this video, I will make eight cartoon like sketches. In video two will do a realistic two hour drawing. I hope that you will watch both videos, because they will give you a solid understanding of how to draw a smile. But, before the demo, we have an incoming message from the moon. Aw thanks, Little Old Man. It is OK to leave the whites of the eyes a little darker when drawing a smile! Trapezoid shape between the nose and upper lip. Slightly darker shadows around the eyes...especially if you are drawing an older person. This figure has eyes which seem totally shut (which is OK). Notice the strong line (arc) from the eyebrows to the folds in the cheek. Everything on the face can be a bit tighter. A smile tightens the skin like a face lift (with the exception of the neck). If the lighting calls for it, you can be more distinct with lines on the face. Notice the dark edges at the side of the mouth. These occur due to the rounded shape of the gums and teeth. Notice this in all of the figures so far. Drawing the head from three quarters (3/4) view.....General Tip: The eyes get foreshortened and the inner corners are slightly closer together. The trapezoid becomes more triangular. The rule about the mouth reaching past the middle of the eye becomes skewed. A more subtle smile. If the smile was more intense, his facial muscles would be more taut. Crows FeetT happen to older people when the eyes are taut!!!! CAW! The raising of the cheeks can affect the appearance of the jaw bone. (Mandible)
The song is called "Alien Restaurant" from Kevin MacLeod of Incompetech.com- a site recommended to youtube partners in the partner tutorial. The audio at the beginning is from Creative Commons Search and is listed in the public domain- http://blip.tv/file/2363588/. Some images are from creative commons search. For example the image of George Clooney- http://upload.wikimedia.org/wi....kipedia/commons/e/e9 The image of Beyonce- www.army.mil/.../army.mil-2007-08-30-154516.jpg "free online art lessons"

I was honored to do a live stream with:
http://youtube.com/sycra
http://youtube.com/cartoonblock
Links Mentioned
Lisa Irby's channel- http://youtube.com/lisa3876
DeviantArt - http://deviantart.com

While driving through Staten Island (one of the five boroughs of New York City), a field was ablaze and I drove though a HUGE plume of smoke after coming back from vacation on Easter Weekend. I estima
Facebook- http://facebook.com/kazanjianm
Twitter- http://twitter.com/kazanjianm
Website- http://merrillk.com
(Merrill) Supplies I Use- http://www.jdoqocy.com/click-4....247664-805536?url=ht
Music by Kevin Macleod- http://incompetech.com Rules- http://incompetech.com/m/c/royalty-free/faq.html Thank you Kevin!
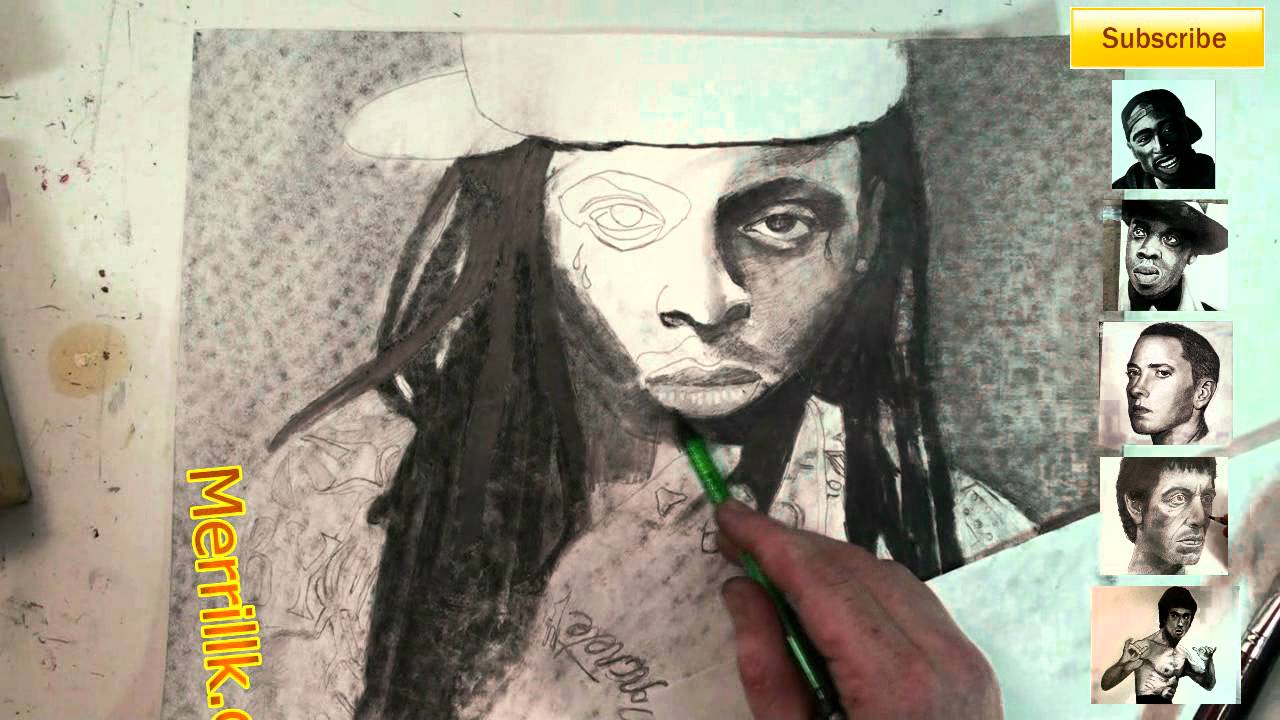
0:39 It is vine medium charcoal. I broke a stick and used the side to block in the masses for the hair.
0:55 There is a shadow that stretches across his neck. You can slightly see both sides of the neck. Under the lips is very dark.
1:24 Notice that I used a dry paper towel to blend the background (as well as the brush).
1:40- I am now adding pencil hatching directly above the charcoal.
2:01 To me, it is important to hatch over the charcoal, to UNIFY the surface of the drawing.....
HUH? What do you mean?- Charcoal is MATTE (Not shiny) and pencil is SHINY. -Charcoal MOVES and pencil is STABLE (doesn't move)
2:26 I am now using a graphite stick. Graphite sticks are really just BIG PENCILS!!!!!
They come in different tones like drawing pencils (HB, 2B, 4B, 8B, etc.)
2:51- Notice that I am holding my drawing in place with a paper towel in my hand. Try not to let your hands touch the surface of the paper (I always struggle with that.
2:51 I don't like to fasten my drawing with tape because I usually shade my background and the tape leaves white triangles in the corners where the tape was.....Maybe someone could give ME a tip on that!!!!
3:38 Eventually, the hair, the eyes, the area under the mouth and the area under the hands will be the darkest in tone.
4:03 The paper under my hand prevents my hand from touching the paper surface of the drawing.
3:52 Look at the C shape around the eye.
4:03 Also, notice once again, I laid the initial tones down in charcoal, and followed it with pencil hatching. I am using a CHEAP mechanical pencil now because it has thinner graphite, which helps me do detail work.
4:23 I am using the blending stump now.......and getting PISSED OFF!!!!!! The reason I am mad is because I made the mistake to put a piece of cardboard under the surface of my drawing (look at the dots in the background and on his face).....I gave Weezy Chicken Pocks!!!!! Argh! You'll see me remove the cardboard soon.
5:00 The top lip will be darker than the bottom one. Don't forget to leave the highlight over the top lip.
5:13 The shape under the nose (the nostrils) is not one tone. It is a complex shadow. The shadow under the neck is even more complex!
5:58 Our ultimate goal when we shade a drawing is to eliminate lines and maintain the likeness.
6:28- Eyebrows are never one solid tone, they are always darker towards the center of the face. The one exception is when a girl wears make up and darkens her eyebrows in to one tone.
7:00 Notice that I erased most of the original lines from the step by step.
7:50 I am breaking the rules a bit and using a prismacolor black colored pencil for super dark tones.
8:11 At this point, I only used the Prisma Black on one eye. Look at the difference.
8:33 The hat will be lighter than the background and darker than the highlights on the face
9:53 Have some fun with the tattoos! Know that I did not get them perfectly. Just mess around and practice your tones.
11:13 Don't get too complex with the shading of the hand. Focus on rounding the edges ar first. The spaces between the fingers are going to be dark.
11:32 The edges of the arm are going to be dark. DO NOT outline though!!!! Hatch (Cross hatching is adding line next to line next to line) and blend.
12:02 Highlight at the top of each shoulder. Use your kneaded eraser.
12:25 His chain can be carved out with an eraser.
13:09- Create a highlight on the upper tip of the hand.
14:01 To finish, I enhanced a few of the highlights with a white Conti Crayon.

http://merrillk.com/?part=publications
If you own a computer, and you have a myspace account, chances are, you have seen what is known as the myspace self photo....also known as the TOO MUCH INFORMATION profile pic! These photos are usually a combination of blatant misspelling and nudity. Sexxii Grannii (Sexy Granny) ON DECK (Whatever the HELL that means)!
As an artist, it is my job document what exists in the world around me. Right now (early 2010), the social networking sites are king......so I created this mixed media artwork, based upon a scary picture that I saw on Myspace.
I took a mixed media approach in creating this work.
1.) Pencil- I used the pencil to sketch the initial pose. I do not do any shading while working with the pencil (in step one)
2.) Illustration Marker- Prismacolor and Chartpak Ad markers allow me to put down layers of color quickly. These markers leave transparent marks of color, similar to watercolor paint and often, their vibrancy can be seen through layers of translucent color (added later).
3.) Color Pencils- The fine tip of color pencils allow me to make marks with extreme precision. I use prismacolor color pencils because they blend extremely well and are compatible with oil paint.
4.) Oil Paint- The most versatile medium. Oil paint can be applied in thick "impasto" style or in thin transparent glazes. In this case, I tried to finish my work......but I decided that I needed to make a few changes.
5.) In order to make those changes, I let my work dry, then scanned it, then opened it up in....
6.) Photoshop (And Paint Shop Pro 9)- THese two computer programs allow me to do digital collage and edit/refine my work. In this case, I changed the posture of the character.
7.) Print- On SPECIAL paper (hit the link)
8.) Color pencil- to bring out the tones (again) and prep the paper for oil paint (yes, it is a good primer). Also the color from the color pencils mix with the oil paint, which creates a cool effect.
9.) Oil Paint- Finishing touches
10.) Scan
11.) Save as a PNG file....so that I can use this character multiple times.
-Merrill Kazanjian

This is the 11th addition to my how to basketball players playlist- https://www.youtube.com/playli....st?list=PL23760CEE22 Harden has been a frequent request and I am going to try to answer as many of those as possible in 2015. Thats my new years resolution!
Music during Time Lapse: "Winner Winner" by Kevin McLeod
james harden highlights , james harden defensive juggernaut , james harden crossover top 10 , james harden mix , james harden eurostep, james harden highlights 2014 mix, james harden crossover, james harden footlocker commercial, james harden dunk
Subscribe to kazanjianm (Don't miss any new videos that I make)- http://www.youtube.com/subscri....ption_center?add_use
Facebook: Like me on Facebook to find out about live hangouts or to post your work!- http://facebook.com/kazanjianm
Twitter: I tweet! Do you? http://twitter.com/kazanjianm
My Website: http://merrillk.com
Art Supplies I Use in my Art Work- http://merrillk.com/?sid=135&idpage=supplies_i_use
Petition: YouTube NEEDS a Visual Arts Category: http://www.change.org/petition....s/create-a-visual-ar
Step by Step Drawing Playlist: http://www.youtube.com/playlis....t?list=PLD6E34C7CD58
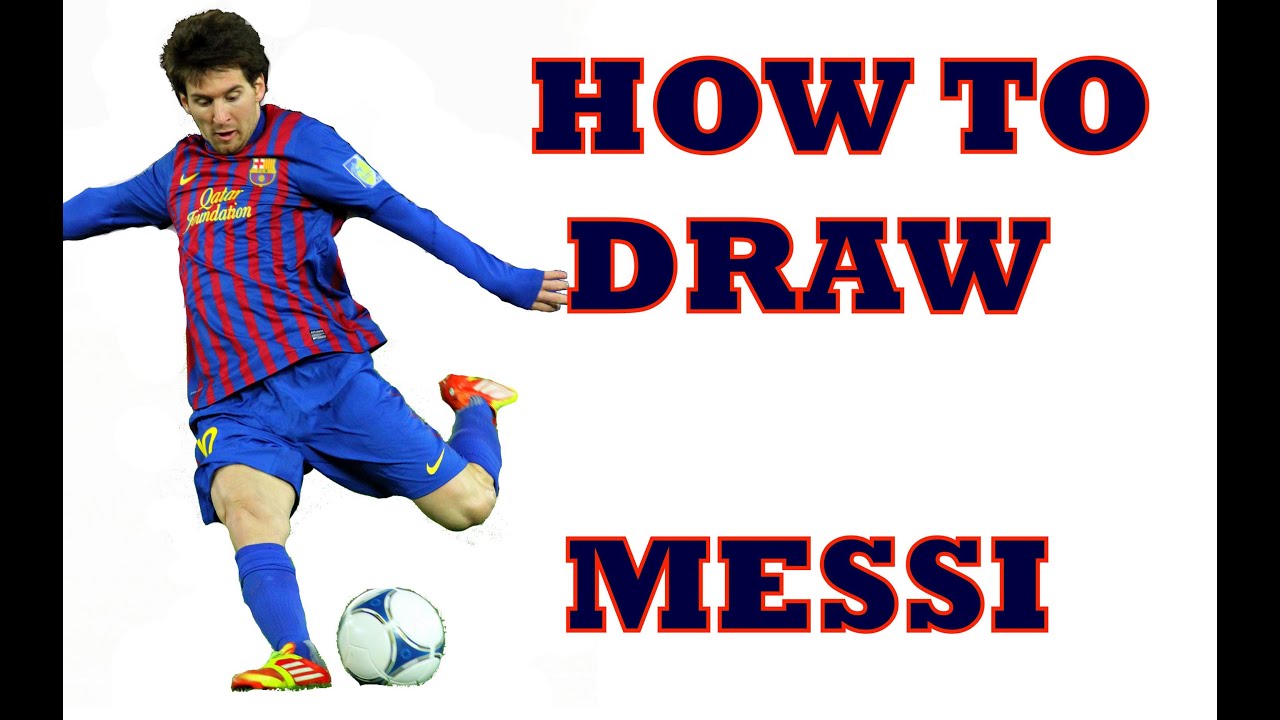
This video will teach you how to draw Lionel Messi step by step. The drawing instruction is designed for aspiring artists who wish to develop their skills.
Subscribe to kazanjianm (Don't miss any new videos that I make)- http://www.youtube.com/subscri....ption_center?add_use
Facebook: Like me on Facebook to find out about live hangouts or to post your work!- http://facebook.com/kazanjianm
Twitter: I tweet! Do you? http://twitter.com/kazanjianm
My Website: http://merrillk.com
Art Supplies I Use in my Art Work- http://merrillk.com/?sid=135&idpage=supplies_i_use
YouTube Visual Arts Category Petition: http://www.change.org/petition....s/create-a-visual-ar
Step by Step Drawing Playlist: http://www.youtube.com/playlis....t?list=PLD6E34C7CD58
Image- http://commons.wikimedia.org/w....iki/File:Lionel_Mess

Facebook: http://facebook.com/kazanjianm
Twitter: http://twitter.com/kazanjianm
Visual Arts Category Forum: http://www.google.com/support/forum/p/youtube/thread?fid=2a9806f929074cbd0004b8b1b6901a56&hl=en
I am very fortunate to say that I have the most talented audience on YouTube and the last time that we took a vote on my Facebook page, my viewers decided that that they want me to do a tutorial on how to draw Kate Beckinsale. And I listened! So this video will give you step by step instruction on how to draw actress Kate Beckinsale. Even if you are new to drawing, I guarantee that you will surprise yourself if you follow my steps. So grab your pencil and some drawing paper. If you have your doubts or if you need some motivation, hit the button that says "playlist". Millions of people have viewed my videos and thousands have completed them successfully. I have over 10 years of teaching experience and I am someone who didn't start drawing until I was 20 years old, so I have a different perspective on how to train aspiring artists. Lets Begin!
Step 1: Draw the box that you see. Notice that there are three rectangles inside the box. The reason that there are three rectangles is because a face can often be divided in to three equal segments. Hairline to brow line. Brow line to bottom of nose. Bottom of nose to chin. This formula works perfectly on Kate Beckinsale.
Step 2: Make the U shape that you see for the chin.
Step 3: Make the two shapes for the eye region. Notice that her head is slightly turned so these shapes are shifted slightly towards your left.
Step 4: Make the line at the bottom of the nose. Notice that the septum is lower than the two nostrils. Also, be sure to notice the amount of separation from the eye shapes.
Step 5: Add eyebrows at the top of the eye shapes
Step 6: Look at the image of Kate Beckinsale. Notice that there is a perfect square that is made between the pupils of the eye and the corners of the mouth. Add the four dots that you see. Take some extra time for this step. It is very important for the likeness.
Step 7: Kate is looking down in this image, so her eyes should be banana shaped. Use the dots to guide your placement of the banana shapes. Did I just say that?
Step 8: Add the eyelids above the banana shapes and the lines below.
Step 9: Add the hair shape. Notice how this shape intersects the top rectangle. The height of the hair is more than a third of the face because her head is tilted downwards.
Step 10: Add the top lip. Just connect the dots. The top of the upper lip is like a flattened M shape.
Step 11: I am clearly bananas for Kate because her bottom lip is banana shaped .....the area in between? You guessed it....bananas!
Step 12: Now add some teeth. Here is a close up! If you need help drawing teeth, check out this tutorial or make her a vampire!
Step 13: Kate needs ears. Dont sweat it....Just don't make her Dumbo.
Step 14: is optional. Add her earrings. If you expect to draw this perfectly, curb your enthusiasm. All you need to do is add some squiggley shapes and connect them. Add a banana if it floats your boat!
Step 15: Add a neck.
Step 16: Erase all of the guidelines. In other words, erase what is left from the rectangles. Next, take notice of the link that I just added. After this step we will do shading. Just click this link if you feel that you are messing up. The video that I linked to will teach you an easy way to restart from this point.
Step 17: We will start our shading with the eye region. If you have never cross hatched before, you might want to view the video that I just added in the upper right corner. It is

Crazy Cheerleader- The "inspiration" behind this artwork was a SCARY, ESPN fitness competition and a viral cheerleading video on YouTube. Bring it on. Movie. Some thirty-something woman dressed up as a cheerleader and danced around the stage, did backflips and finger push ups............All with a DISTURBING smile on her face!!!!....I coundn't get the imagery out of my head, so I did some art! I use Paint Shop Pro 9 instead of Photoshop because it is EASY. cheerleader cheering espn competition college football. It allows me to distort images and cut out images and juxtapose them over each other. I will later print my creation out and finish it with a color pencil. I did a creative commons search for "shocked" "surprised" and "OMG' and came up with these images. I am using the digital scissor to cut out my favorite parts! I made sure to widen the Eyes using the "Warp Brush" tool in PSP9. College sorority sports fitness flirting funny farts pwned owned. Widening the eyes and creating space between the iris and eyelids on both sides gives her that CRAZY and PERKY look! I will move the pupil and iris......because, at the moment, she has a "raptured" look. It gets tricky when merging photos together. Notice the different color schemes, tones and chromas happening! I will have to adjust that by blending and adjusting the color and tonal balances. I used the "burn tool" to draken the areas around the eyes. I also made sure to shrink and dilate the pupil and iris. She needed a new "DO"! Creative Commons Search here I come! Merging things on PSP9 is tricky. The girls from the three images which i've used so far, probably have similar skin tones, but the photographs were taken in different lighting. So I "blend", "dodge" and "burn" to fix this. I could also choose to cut out part of the original (the first girl) face and add it over the new section. (I didnt do that here because I am going to tie everything together with color pencil later. I am using the warp brush (pull) tool to extend the hair. I do this because I couldnt fully crop out the background. Yes, that was Obama. I am using the chromatic adjustment tool to manipulate the flesh tones. Often, when I cut out an image, the edge is destroyed. I am trying to recreate the pom pom edges. I am using the paint brush tool at a 90 percent opacity to cover over (both) uniforms (the top and bottom), since they are different colors. I will color over the uniform with color pencil next (and make my own design). Now, I am using prismacolor color pencils (they are the most opaque brand) to color over my print. @bunbear1308 The four songs that I use are from http://incompetech.com....They are FREE to use for any video and they were created by a cool guy named Kevin MacLeod. University of California Arizona Wisconsin SEC Big East WAC Southwest beach. Maui Invitational.The songs were- Royal Banana, Spazzmatica Polka (my favorite), Merry go and Scheming Weasel (faster). I use prismacolor color pencils. I have a lot of info on them in the "supplies I use" section of my website. Prismas are MUCH better in my opinion b/c they are semi opaque and mixable. My process which I am using in this video was inspired by Harlem Renaissance artist Romare Bearden. Bearden would use media cutouts to create an amazing narrative in his work.....often he would paint over them.
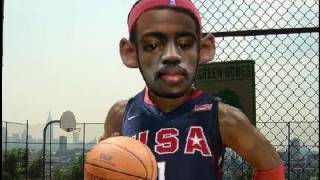
To celebrate the start of the 2009-2010 NBA season, I merged the faces of four of the NBA's biggest stars ( LeBron James of the Cleveland Cavaliers, Kobe Bryant of the Lakers, Dwayne Wade of the Miami Heat and Chris Paul of the New Orleans Hornets). I used both Photoshop CS3 and Paint Shop Pro 9 to make this "artmorph". I basically made digital cut outs from Creative Commons (CC) Photos.(see end of video) All images taken are from Creative Commons or are designated public domain. I respect copyright! used the blending tool a bit, the digital scissor (scalpel), I also used a very helpful light/dark tool to make highlights and shadows.
I used to enjoy making collages with torn paper, but digital art technology helps take collage to the next level. the next lebron james art that will mess with your head art that shook the world art that moves kinetic art merging pictures photos images in photoshop or psp paint shop pro 9. Para celebrar el inicio de la temporada 2009-2010 de la NBA, que fusionó los rostros de cuatro de las mayores estrellas de la NBA (LeBron James de los Cleveland Cavaliers, Kobe Bryant de los Lakers, Dwyane Wade de los Miami Heat y Chris Paul de Nueva Orleáns Hornets). Que utilice tanto Photoshop CS3 y Paint Shop Pro 9 para hacer este "artmorph". Yo básicamente recortes digitales de Creative Commons (CC) Fotos. Usé la herramienta de la mezcla un poco, la tijera digital (bisturí), que también se utiliza una luz muy útil / herramienta oscuro para luces y sombras. Me gustaba hacer collages con papel rasgado, pero la tecnología ayuda a tener el arte digital collage para el siguiente nivel. el próximo LeBron James arte que ensuciar con su arte la cabeza que sacudió el mundo del arte que se mueve el arte cinético, fusión de imágenes Fotos de imágenes en Photoshop o taller de pintura PSP Pro 9. Pour fêter le début de la saison NBA 2009-2010, j'ai fusionné les visages de quatre des plus grandes stars de la NBA (LeBron James des Cavaliers de Cleveland, Kobe Bryant des Lakers, Dwayne Wade du Miami Heat et Chris Paul de la Nouvelle Orléans frelons). J'ai utilisé les deux Photoshop CS3 et Paint Shop Pro 9 pour faire de ce artmorph ". J'ai pratiquement fait découpes numériques de Creative Commons (CC) Photos. J'ai utilisé l'outil de mélange un peu, les ciseaux numérique (scalpel), j'ai aussi utilisé un éclairage très utile / outil sombres de faire tons clairs et foncés. J'avais l'habitude de plaisir à faire des collages avec du papier déchiré, mais la technologie de l'art numérique permet de prendre collage pour le niveau suivant. Le prochain James LeBron art qui gâchera votre art avec la tête qui ont secoué le Monde de l'Art qui se déplace art cinétique fusion photos photos images dans Photoshop ou PSP Paint Shop Pro 9. Um den Beginn der NBA-Saison 2009-2010 zu feiern, fusionierte ich die Gesichter von vier der größten Stars der NBA (LeBron James von den Cleveland Cavaliers, Kobe Bryant von den Los Angeles Lakers, Dwayne Wade von den Miami Heat und Chris Paul von den New Orleans Hornets). Ich habe auch Photoshop CS3 und Paint Shop Pro 9 zu diesem "artmorph" zu machen. Ich grundsätzlich aus digitalen Ausschnitte von Creative Commons (CC) Fotos. Ich habe die Mischung ein wenig Werkzeug, das digitale Schere (Skalpell), ich auch eine sehr hilfreiche Hell-Dunkel-Werkzeug, um Lichter und Schatten zu machen. Ich habe zu genießen Collagen mit zerrissenen Papier, sondern digital art-Technologie hilft nehmen Collage auf die nächste Ebene. den nächsten Lebron James Kunst, die Messe mit dem Kopf Kunst, die Kunst aus aller Welt, was sich bewegt kinetischen Kunst verschmelzen Bilder Fotos Bilder in Photoshop oder schüttelte wird psp Paint Shop Pro 9. Per celebrare l'inizio della stagione NBA 2009-2010, ho unito i volti di quattro delle più grandi stelle della NBA (LeBron James dei Cleveland Cavaliers, Kobe Bryant dei Lakers, Dwayne Wade dei Miami Heat e Chris Paul dei New Orleans calabroni). Ho usato Photoshop CS3 e Paint Shop Pro 9 a rendere questo artmorph ". Io fondamentalmente fatto outs tagliati digitale da Creative Commons (CC) Foto. Ho usato lo strumento di fusione un po ', la forbice digitale (bisturi), ho anche usato una luce molto utile / scuro strumento per rendere luci e le ombre. Mi piaceva fare collage con carta strappata, ma la tecnologia digitale consente di prendere l'arte del collage al livello successivo. l'arte successiva Lebron James che pasticciare con la tua arte testa che hanno scosso il mondo dell'arte che muove l'arte cinetica si fondono le immagini immagini foto in Photoshop o PSP Paint Shop Pro 9.
WE NEED A VISUAL ARTS CATEGORY ON YOUTUBE THREAD-http://www.google.com/support/forum/p/youtube/thread?tid=2a9806f929074cbd&hl=en&fid=2a9806f929074cbd0004b630ad37cc3e
Facebook- http://facebook.com/kazanjianm
Twitter- http://twitter.com/kazanjianm
Website- http://merrillk.com
(Merrill) Supplies I Use- http://www.jdoqocy.com/click-4....247664-805536?url=ht
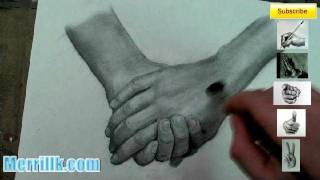
0:11 YOUR GOAL: Eliminate ALL LINES. It is normal to create lines while working with a pencil because you are using a fine tip. BUT, Cross-hatch and blend until you eliminate all lines.The difference between a good
"draw-er" and a great one is noticing the subtleties of EDGES!!!!
0:31-The darkest part will be where the fingers bend down towards the bottom of the page. The light source comes from above.
0:41- The Paintbrush is GREAT for creating neutral tones on white paper......Think about it, if you draw on white paper, you are STARTING on one GIGANTIC HIGHLIGHT!
1:03- IMPORTANT- One way to make the lines GO AWAY is to darken the region next to it. Look at the area that my brush is working on now.
1:17 Fingernails DO NOT have dark lines around them...Look at your hands, YOU DO NOT have dark lines. If you DO have dark lines:
1.) Wash your hands with industrial strength antibacterial soap.
2.) Fabreze YO SELF
3.) See a Dermatologist- It would not be a "RASH" decision.
1:35- Notice the tonal (light and dark) differences between each of the fingernails.
2:17- Some Artists have great line quality in their drawings (I don't). But it is shading, NOT line quality which gives a drawing the three dimensional effect.
2:52- Yes, there are lines in between the fingers, but, notice the subtle differences in tone which happen; both to the line and the area around it (to round the fingers)
3:07- That is a 3B pencil that I am using.
3:21- My wife says that IF you make this drawing and give it to your significant other.....don't make "chopped off hands" LOL......Nothing says "I LOVE YOU" like amputated hands!!!
3:48- Start to look at the edges now.....They are starting to develop. It is not one solid line anymore.....It will be developed even more as the drawing progresses.
4:12- Did you know that if our hands didnt move, we wouldnt have lines on them (I dont mean fingerprints). For instance, if someone is in a coma for four years (and doesn't move), when they wake up there will be less lines on their hand.
4:53- Develop the dark tones SLOWLY. If you RUSH, you will be making RUSSIAN art!
5:15- Notice that I do not hold the pencil at the tip. You get better control if you hold it further back. This will take a while to get used to.
5:41- I am only HINTING at the bone structure and musculature of the hand. As we get older, our skin thins, our muscle mass decreases and we can see the bones and what is left of the muscles more clearly.
Younger hands need more blending and less variation of tone.
6:15- Now its starting to come together
6:33- At this point of the drawing, it is all about clarification (Strong, well placed highlights and shadows) and smoothness (use the brush and the eraser).
Look at the subtleties of the bone structure. That was "sculpted" with 1.) cross hatching from the pencil tip 2.) smuding with the paintbrush 3.) the eraser..... Remember, this did not happen instantaneously. The tones were slowly developed.

Learn how to draw Miley Cyrus step by step by watching this video!
Subscribe to kazanjianm (Don't miss any new videos that I make)- http://www.youtube.com/subscri....ption_center?add_use
Facebook: Like me on Facebook to find out about live hangouts or to post your work!- http://facebook.com/kazanjianm
Twitter: I tweet! Do you? http://twitter.com/kazanjianm
My Website: http://merrillk.com
Art Supplies I Use in my Art Work- http://merrillk.com/?sid=135&idpage=supplies_i_use
YouTube Visual Arts Category Petition: http://www.change.org/petition....s/create-a-visual-ar
Step by Step Drawing Playlist: http://www.youtube.com/playlis....t?list=PLD6E34C7CD58

Do you fake the funk on a nasty dunk? Little Old Man's "got game", but his skills are nothing compared to Michael Jordan of the Chicago Bulls (NBA- National Basketball Association), the man most responsible for keeping my Knicks without a title in the 1990's. It took me a long time to forgive MJ for that... but I think I have ...so I made a two video tutorial on how to draw him......Video 1 will give you step by step instruction on how to draw his head and video 2 will give you step by step instruction on how to draw his body. As always, hit the link in the video description to go to a printable step by step guide to help you draw and shade. Pause the video at the end of each step. Lets get started
Step 1: Draw an egg shape
Step 2: Put ears on the egg shape.... notice that the ear to your right is smaller than the ear to the left because his head is turned. Notice that their placement is on either side of the center of the egg.
Step 3: Add the two polygons that you see. Start each polygon at the top of the ear shape. Take some extra time to notice their shape and size. Then, just below the bottom of each ear, add a flat line, which we will later turn in to Michael Jordans nose. Finally, add a line for the mouth, one third of the way down, between the nose line and the chin line, at the bottom of the egg.
Step 4: Take a second to observe what happened to the nose line- I turned it in to three connected arcs. Notice the size and placement of the nostrils. Also add the sloping lines on either side of the nose
Step 5: Add the lines around the mouth. Notice that the top lip is M shaped and smaller than the bottom lip, which is shaped like an upside down rainbow. Also, observe and add Michael Jordan's moustache.
Step 6: Add the eyes and eyebrows. Take a second to notice their size and placement. The eyebrows are somewhat triangular, and lie on the inside corners of the polygons. The eyes are almond shaped and lie closer to the top, than the bottom of the polygon.
Step 7: Take some time to observe and add the lines for the shadows at the top of his head.
Step 8: Now observe and add the shadow lines on the bottom of the face.....He kind of looks like Darth Maul from Star Wars
Step 9: Add the lines for the ear on the left. If you wish, do the same for the ear on the right.
To shade I used a paint brush, graphite sticks, 3B, 6B and HB pencils, a blending stump (tortillion)....a q-tip can be substituted. I made this drawing on charcoal paper.
Michael Jordan played most of his career with the Chicago Bulls, but also played for the Washington Wizards. He took a year off to play in the White Sox organization (MLB- Major League Baseball) for the
Birmingham Barons after the death of his father James Jordan, He hit 203 and managed to hit 3 home runs and drive in over 50 runs. While jordan was with the bulls, he teamed with Scottie Pippen and Phil Jackson to win five championships. Michael Jordan finished his career with the highest PPG average."how to draw famous people step by step" how to draw basketball players step by step

I used Prismacolor color pencils and Prismacolor markers (also Chartpak AD) markers and Pantone. (colored) This drawing took Two Hours but it is time lapsed in to one minute. If I succeeded with my artwork, I created, the Nerdiest Nerd in the world, the King of all Geeks, the Duke of Dorkhood, the Prince of Pocket Protectors....you get the point! Artist Merrill Kazanjian draws/paints a glorious nerd in a time lapse video. 2 Hours of work compressed in to a little over a minute.
Dos horas en un minuto. Haga clic aquí para ver la Nerdiest Nerd en el mundo, el Rey de todos los geeks, el duque de Dorkhood, el Príncipe de Protección Pocket .... te el punto! Merrill Kazanjian artista dibuja / pinta un glorioso empollon en video un lapso de tiempo. 2 horas de trabajo a un comprimido en poco más de un minuto.
You will see the dry brush painting technique in a slower version of this video- http://www.youtube.com/watch?v=5kAAErTo1SU
WE NEED A VISUAL ARTS CATEGORY ON YOUTUBE THREAD-http://www.google.com/support/forum/p/youtube/thread?tid=2a9806f929074cbd&hl=en&fid=2a9806f929074cbd0004b630ad37cc3e
Facebook- http://facebook.com/kazanjianm
Twitter- http://twitter.com/kazanjianm
Website- http://merrillk.com
(Merrill) Supplies I Use- http://www.jdoqocy.com/click-4....247664-805536?url=ht
- Watercolor Paper
- Bristle Brushes
- Black Oil Paint
- Mineral Spirits
- Kneaded Eraser
All music by Kevin MacLeod http://incompetech.com Thank you Kevin!
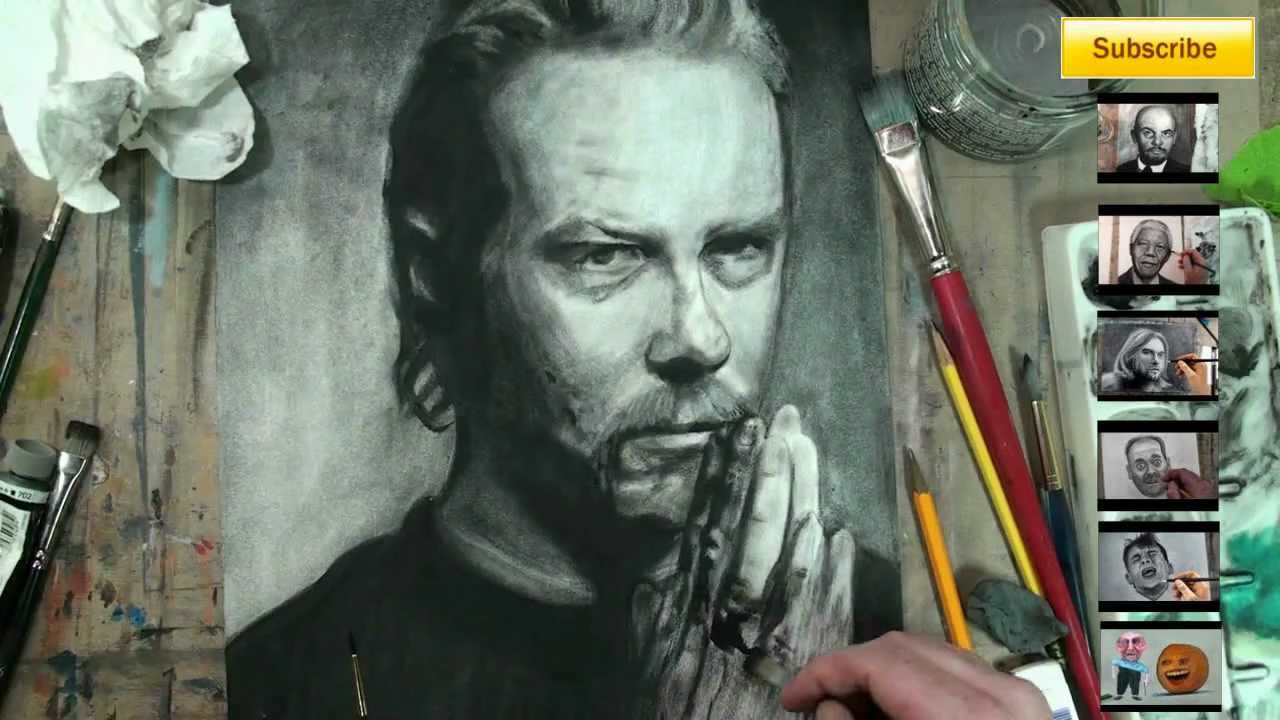
0:25 Right now I am blocking in all of the black shapes. I am NOT doing "dry brush" right now. My brush is quite wet. You can call this a "wash" of black. It is to speed the process up a bit. 0:43 Notice that I will use SEVERAL different brushes on this portrait. I try to use the larger brushes whenever possible so that I could block in SHAPES not LINES! Using bigger brushes accurately is a skill which is built over time.
Even though lines BARELY EXIST on the human body, people seem more comfortable working with a fine point.
If you want to be good at drybrush, break that habit (get used to rendering shapes NOT lines).
1:08 I am still using too much mineral spirits at this point. You want your brush to be relatively dry. DUH! Dry brush?
1:08 The watercolor paper is like QUICK SAND! It will separate the paint from the mineral spirits and the binder instantaneously and leave a charcoal like residue on the surface. Eventually, we will erase part of this residue to create the highlights.
1:28 Squint your eyes (if you have to) at the reference image (easy to find online) to see the tones. It is important that you see the tones in the composition as separate shapes (almost like a puzzle) The brush gives you A LOT MORE CONTROL of the tones than a pencil.
1:28 Brushes are also SUPERIOR at creating variation in the edges of shapes (hard edge, soft edge). 1:51 Do NOT be tempted to draw in the whites of James' eyes. They do not exist in this image. "Draw what you SEE, rather than what you KNOW to be true" - Betty Edwards 2:06 The moustache is quite complicated.....but then again...isn't EVERY moustache!
Its really just an extension of nostril hair! Don't you think?
ANYHOO- Paint the "stache" in more dark than it really is, and we will use the eraser later to soften it and create highlights.
The darkest part of the stache connects with the top lip. 2:31- Dont stress the ear too much. You can scratch it away with the dry brush or do a wash with the paint and mineral spirits (which is cheating I suppose if your going to call it "dry brush") EHH....There is no CHEATING in art. Use the "kitchen sink" if you have to! 3:02- You will notice that the paint does not SPREAD in drybrush. It SINKS
If Oil paint "floats" like a boat on canvas.....It "sinks" like an anchor on watercolor paper.
Be as accurate as possible and use this to your advantage. Get the "puzzle pieces" (the shapes formed by the tones) that you are sure of in first.
3:34 Background is darker on the right. Notice that this is the OPPOSITE of the tones on his face. You will need to use some mineral spirits for the background.3:58 James has very difficult eyebrows to paint. They are long and white like Pai Mei from Kill Bill.....Well maybe not that long.
The skin tone will be a bit darker than parts of the eyebrow (he is greying). Notice the darker parts of the eye socket around the bridge of the nose. This area will be dark but not quite as dark as the shirt. 4:26 It took me about 2 hours to paint this. Take your time! If you have a low frustration tolerance, know that there are always CREATIVE ways to fix things
For instance, if you think you went too dark, use the kneaded eraser. If you struggle with the paint brush, finish your work with color pencil
