تازہ ترین ویڈیوز

Really random??? YES! I was curious if I could turn chicklets gum from a stop motion object into a sculptural object. My last video was a tutorial on traditional painting....This one was as far from traditional painting as you could get. But I learned a lot doing it. For instance, you can layer gum like you layer paint and interestingly enough, gum gives an artist a medium that 1.) dries and solidifies 2.) can be used translucently or applied opaque (different thicknesses) 3.) can be layered 4.) GIVES ME A WICKED SUGAR RUSH!
Believe it or not, I want to experiment more with this medium. If you think about it, chewing gum's artistic possibilities lie somewhere between painting and sculpture. I had fun.....Now I have to burn the 1200 calories that I ingested!!!!! LOL -Merrill Kazanjian
anasazi armature sets set digital studio software clay star wars flash movies tips windows tools examples learn japanese paper puppet lighting cameras final cut frames per second stop frame animation claymation stop motion pro susannah shaw character 3d animation schools chewing gum clove jolt sugarless bubble yum gum dentyne gum beeman's gum wrigleys double bubble hubba bubba spearmint chicklets dentyne black jack orbit gum base how to make flavor thomas glee natural 5 big league chew clorets chewer chewing freshen up teaberry history bubblicious gum buster beechnut gum air waves gum blow gum freedent gum blowing gum peppermint gum cinnamon gum juicy fruit gum spruce gum bazooka bubble gum chicklets commercial cadbury gum nerds gum super bubble chewing gum removal
Realmente aleatorios??? ¡SÍ! Tenía curiosidad por si podría Chicklets goma de un objeto de stop motion en un objeto escultórico. Mi último video fue un tutorial sobre la pintura tradicional .... Esta fue tan lejos de la pintura tradicional, como usted puede obtener. Pero aprendí un montón haciéndolo. Por ejemplo, puede capa de goma como si la capa de pintura y, curiosamente, la goma le da a un artista de un medio que: 1.) Se seca y se solidifica 2.) Puede ser utilizado o aplicado translúcida, opaca (diferentes espesores) 3.) Puede ser capas 4. ) me da un WICKED SUGAR RUSH!
Lo creas o no, quiero experimentar más con este medio. Si lo piensas, masticar goma de mascar posibilidades artísticas de estar en algún lugar entre la pintura y la escultura. Me divertí mucho ..... Ahora tengo que grabar el 1200 calorías que ingiere !!!!! LOL-Merrill Kazanjian
órbita base del gato negro goma cómo hacer Thomas sabor alegría natural 5 grandes ligas mascar Clorets masticador masticar refrescar la historia Teaberry Bubblicious goma Buster Beechnut goma ondas goma goma golpe Freedent goma soplando goma goma de mascar de menta canela goma de mascar goma de mascar jugosa fruta abeto goma de chicle bazooka Chicklets comercial de Cadbury nerds Super Bubble Gum goma de mascar goma de mascar eliminación
Vraiment aléatoire??? OUI! J'étais curieux de savoir si je pouvais tourner chicklets la gomme d'un objet de stop motion dans un objet sculptural. Ma dernière vidéo est un tutoriel sur la peinture traditionnelle .... Celle-ci était aussi loin de la peinture classique comme vous avez pu obtenir. Mais j'ai beaucoup appris faire. Par exemple, vous pouvez la gomme sur les couches comme tu peins couche et chose intéressante, la gomme donne un artiste un support qui 1.) Dessèche et se solidifie 2.) Peut être utilisée ou appliquée translucently épaisseurs (opaque différentes) 3.) Peuvent être superposés 4. ) me donne un WICKED Sugar Rush!
Croyez-le ou non, je veux expérimenter plus avec ce médium. Si vous pensez cela, le chewing-gum possibilités artistiques se situent quelque part entre la peinture et la sculpture. J'ai eu du plaisir ..... Maintenant, je dois brûler les 1200 calories que j'ai ingéré !!!!! LOL-Merrill Kazanjian
Anasazi armature fixe ensemble de logiciels studio numérique star wars argile flash conseils films outils Windows exemples Apprendre le japonais caméras éclairage papier marionnette final cut frames par seconde frame stop motion animation claymation caractère de fin Susannah Shaw Pro 3D écoles d'animation du chewing-gum sans sucre gousse secousse bulle yum Gomme Dentyne gomme Beeman's Wrigleys Double Bubble Hubba Bubba chicklets menthe Dentyne Black Jack base orbite gomme comment faire thomas ligue saveur jubilation 5 naturels gros mâcher Clorets mâcheur de chewing rafraîchir Teaberry histoire gomme Bubblicious Buster faines gomme ondes Gomme coup gum Freedent soufflant gomme gomme à la menthe à la cannelle Juicy Fruit Gum gum gomme d'épinette bazooka bubble gum chicklets commercial de Cadbury nerds bubble gum gomme à mâcher le déménagement super-gum

Learn how to draw a female nerd step by step! Just follow my instruction and it will be easy!
Subscribe to kazanjianm (Don't miss any new videos that I make)- http://www.youtube.com/subscri....ption_center?add_use
Facebook: Like me on Facebook to find out about live hangouts or to post your work!- http://facebook.com/kazanjianm
Twitter: I tweet! Do you? http://twitter.com/kazanjianm
My Website: http://merrillk.com
Art Supplies I Use in my Art Work- http://merrillk.com/?sid=135&idpage=supplies_i_use
YouTube Visual Arts Category Petition: http://www.change.org/petition....s/create-a-visual-ar
Step by Step Drawing Playlist: http://www.youtube.com/playlis....t?list=PLD6E34C7CD58
See this guy? His tutorial has been on my channel for a few years......and he needs a girlfriend. So, take out your pocketbook protectors...... because this video will teach you how to draw a Female Nerd. Shes gonna be hot......in the Jeopardy sort of way. All you need is some drawing paper and pencil. Just listen to my steps and I will guide you through the process.

Graffiti Characters Bombing the Boulevard daily. out the techniques that I use to make art. But, for once, I want to talk to you about choices that I made with my own art. The first medium that I was proficient in was oil painting. But after college ended, I was too drained to paint after I got home from a day of work. The setup and clean up of paints took as long as the process of painting and the drying time was way too slow for my needs. I estimate that I painted only once or twice per week for about three hours per day and I only produced about two finished paintings per year. I did this for six years.
I slowly started dabbling with mixed media art. What you are seeing now is a process that I have worked out over the past 2 years for the past two years. This process allows me to have results similar to oil paintings, done in one day rather than six months. I even incorporate oil paint in to one of the steps.
Here it is:
1.) Pencil Drawing
2.) Illustration Markers (prismacolor, Ad, Decocolor)
3.) Color Pencil
4.) Thin Layer of Oil Paint
5.) Digital Additions (Photoshop, Paint Shop Pro)
I use this process to make my characters. Over the last 2 years I have made over 1500 characters. I scan them and save them as PNG files and I use them over and over in my artwork. PNG files stand for Portable Network Graphic and they are basically a filetype that works like a sticker. Stay tuned until the end of the video and I will show you what I mean. Contact me through my website merrillk.com or leave me a youtube comment and I will be sure to get back to you.
I used about five reference images for this work. I merged them (took my favorite parts of each and did this pencil drawing. The hand gesture was one of the best drawings that I did of a hand from my memory (head). This video is on time lapse, nut the pencil drawing part took the longest out of all the steps. Now I am using Illustration Markers (Prismacolor, Pantone, Ad Chartpak). The markers serve as the equivalent of an underpainting....they are fast, accurate and available in a variety of pre mixed colors and tones. The shirt will eventually be white, but I wanted the blue/green color to peek through the white when I add it in the next few steps. I am a HUGE fan of Prismacolor color pencils. They allow me to be accurate and to work with translucent color (meaning that light can only partially penetrate a layer of color pencil). Skin is translucent. Color pencils also blend (mix) very well with each other. Notice that I use several different, but similar (in tone and color) color pencils to do the arms and the shirt. Q: Why do paintings (most often) look more realistic than drawings?
A: Paintings are made of SEVERAL layers of (dried) transparent to translucent paint while drawings are done in one complex layer. Music by Kevin MacLeod at incompetech.com Song Protofunk

Link- http://merrillk.com/index.php?part=fineart&articles_id=5850&collection=114
Thank you for picking my nose video....UMMM....Yeah lets start over....Today I am going to teach you how to draw the male nose. Drawing is much easier when we break things down in to shapes. So lets do that with the nose. Notice that there are two trapezoids and an oval. These are our primary shapes with the nose. So grab a piece of paper and draw them now. Don't forget to put in the nostrils.
Now, I will show you how to shade the nose. Don't worry, its going to be easy this time! You have two options to learn shading. Option one- click the link in the video description to go to a webpage that I made for this video..... this page has eight super easy steps and still images from this video. Option two is to keep watching this video. I think that you should do both!
STEP 1- In step one of drawing the male nose, focus your attention on the shapes. There are three main shapes. 1.) An oval at the bottom, 2.) A tall trapezoid for the bridge of the nose. 3.) An upside down trapezoid at the top of the nose. 4.) Don't forget to add the shapes for the nostrils.
STEP 2- For step two, simply erase the lines on the inside of the nose. It doesn't look good yet......So let's do a "nose job" with the shading, to make it look more realistic!
STEP 3- For this step, darken the nostrils. Te nostrils will be the darkest tone on any persons nose.
STEP 4- *****Notice that I ERASED the lines on the sides of the bridge of the nose!******* This is where most people go wrong in drawing the nose! The only part of the nose that can be expressed as a line is the bottom (Below and to the sides of the nostrils...especially the sides).
STEP 5- While I am not drawing eyes for this part, at the top of the bridge of the nose is the inner part of the orbit (of the eye). The orbits are also known as the eye sockets. They are the indentations where each eye sits. There is an orbit on either side of the nose. The tool that I am using in this picture is called a tortillion (also known as a blending stump or stub). It is condensed paper, shaped to the form of a pencil. It is used for blending. It is better to smudge or blend with this, rather than your hand, because your hand has oil that will be absorbed by the paper. Once the oil is absorbed in to the paper, the blending will be uneven, and over time, the paper will decay.
STEP 6- Notice the long trapezoid that I shaded in the middle of the nose. It is shaded very lightly. I put it is to differentiate the drawing from the white background. Please note that this will NOT always appear. All shadows are DIRECTLY RELATED to lighting. For this drawing, I assumed that the light was bright and directly above the nose.
STEP 7- I am putting on the finishing touches. I used my eraser to make two light highlights on the sides of each nostril. Often light bounces off surfaces and causes a "glare" effect rather than a "spotlight" effect. I also darkened the shadow below the nose.
STEP 8- In the final step I darkened the nostrils.

This video is going to show you how to draw Megan Fox. It doesn't matter what your experience level is at drawing. All you have to do is follow the step by step instructions in this video. If you give it a try, you might transform your artistic skills.
meganfox megan fox no clothes videos
Step 1.) Draw the rainbow shape and the wavy line below it.
Step 2.) Turn the rainbow shape in to an egg shape. Notice that the bottom part of the egg shape is bigger than the top. Add the two ellipses below the wavy line. Notice that the two elipses are slightly different from each other. The one on your right is more circular and the one on the left is more oval like.
Step 3.) Step 3 is the tricky step. Take some extra time to observe before you draw. Notice the placement and shape of the squiggly line for the nose. It is slightly lower than the half way point of the egg shape for the head. It is not as wide as the flattened M shape for the top lip. When you draw the top lip, be sure to observe that it is closer to the nose, than the chin.
Step 4.) Add the bottom lip and the space between the lips. Notice that I put a darker line below where the teeth will go. The bottom lip is similar to the width of the two shapes above it.
Step 5.) Just breathe! While this step looks difficult it is not urgent to perfectly get the shape of the hair. Remember,,,,,With the exception of the MTV show, Jersey Shore, hair is moving and never in a constant shape. Observe the hair in this image and draw it on your paper.
Step 6.) Add the eyes and eye brows. Notice that the eyebrows are at the top of the ellipses and the eyes fall in the center of the shapes. Notice that there is a double line over each eye. Also notice where the pupil and iris fall within the eye shape. Dont go too dark (yet) on the pupil and iris. She has green eyes. Dont go too dark (yet) on the pupil and iris. She has green eyes. is applied, the lashes stick together in a triangular shape. Her lashes are SUPER long. You can add that as a dark value right away. Dont go too dark (yet) on the pupil and iris. She has green eyes. When make up is applied, the lashes stick together in a triangular shape. The eyebrows can be shaded in as one tone (usually there is variation). The tone should be dark. Make sure that the bottom lashes are NOT as long as the top. With the mascara, her bottom lashes seem to be half the length of the top ones. This will seem wierd!.....But, the way that her head was turned, I only put in one nostril (with a hint of the second one......SOMEONE CALL STAR MAGAZINE! Megan Fox only has one nostril! Just kidding! :) Looks kind of scary now!....All drawings go through their arkward stages....at least mine do! Try to develop all parts of your drawing at the same pace The nose is tricky in this picture. There is a strong shadow on the right side of her face, but it is very complex. It is darkest 1.) in the nostril, 2.) followed by the bottom of the nose. 3.) The top of the nose by the right eye......It will take time to develop these tones. Notice how far back I hold my pencil.....I recommend that you try it! It works well for drawing and shading. When I need more control, I hold it closer to the tip. That brush is VERY soft tipped! I will use a bristle brush later.....and a blending stump. The bristle brush and the blending stump move the graphite more effectively, the soft tip brush gives a smoother blend. I use a HB pencil for most of the skin shading. I used a 4B for the lashes, eyes, nose, brows and the corner of the mouth. That is the 4B drawing pencil. That is the shadow created by her hair (overlapping her face), It is a very important shadow for this drawing to be believable. Corners of the mouth 4B..... lips HB. Shadow at the bottom of the bottom lip.....dont go too dark! Go light on the lines between the teeth. Hint at their existence....especially at the gum line. That is a 9B Graphite stick. It is extra wide to cover large areas. A graphite stick is the SAME THING as a pencil. The hair is very variable. I just recommend that you take the shape from this picture...but dont feel pressure to get it perfectly. Notice what I did on (her) right side....I drew in strong lines with the 9B graphite stick and then hatched (cross hatching) over it with a few lighter pencils (lighter as in 7B, 4B, HB). After I finish the hair, notice how much I use the HB pencil for the skin tones- (the yellow and the blue pencils are the HB's) megan fox magazine cover megan fox fashion "megan fox videos"
Subscribe to kazanjianm (Don't miss any new videos that I make)- http://www.youtube.com/subscri....ption_center?add_use
Facebook: Like me on Facebook to find out about live hangouts or to post your work!- http://facebook.com/kazanjianm
Twitter: I tweet! Do you? http://twitter.com/kazanjianm
My Website: http://merrillk.com
Art Supplies I Use in my Art Work- http://merrillk.com/?sid=135&idpage=supplies_i_use
YouTube Visual Arts Category Petition: http://www.change.org/petition....s/create-a-visual-ar
Step by Step Drawing Playlist: http://www.youtube.com/playlis....t?list=PLD6E34C7CD58

Link- http://merrillk.com/?part=fineart&act=artist1&artist=69&collection=461
WE NEED A VISUAL ARTS CATEGORY ON YOUTUBE THREAD-http://www.google.com/support/forum/p/youtube/thread?tid=2a9806f929074cbd&hl=en&fid=2a9806f929074cbd0004b630ad37cc3e
Facebook- http://facebook.com/kazanjianm
Twitter- http://twitter.com/kazanjianm
Website- http://merrillk.com
(Merrill) Supplies I Use- http://www.jdoqocy.com/click-4....247664-805536?url=ht
Think about it......If you give a child something to write with, they going to make images. Its an instinct, ingrained in every human being. As we get older we learn our letters and we suppress our visual instincts. Many people never attempt to reach their potential in drawing because they are scared of messing up or looking bad. You don't have to worry about messing up today......Tell em why Little Old Man!
As I was saying.....Today, YOU are going to Draw Katy Perry and you are going to surprise yourself with the quality of your work. I recommend that you hit the link in the video description. The link will take you to a page on my website with photos and text. This guide on my website will enhance your understanding of what I am teaching you in this video. Everybody grab your pencils and paper, lets get started.
Step 1: Draw a bowl shape.
Step 2: Observe and draw the nose shape at the top of the bowl shape. Notice its size and placement within the bowl shape. Also, add the lines which look like parentheses; notice their angle and their placement compared to the outside of the bowl shape.
Step 3: Add the three shapes to make the smile. Notice the placement of these shapes, compared to the nose and the smile lines. Be sure to notice that the upper lip is the smallest of the three shapes and the bottom lip is the biggest.
Step 4: Draw in the teeth. Notice that each tooth appears to become smaller as they go further back in the mouth. This is not the case in real life, but it is when we draw a smile. Try not to darken the lines between the teeth too much.
Step 5: Merrill? What the HECK is THAT? Relax! Don't worry!....Ill make this nice and simple. First, notice that the new shape is taller than the bowl shape. The triangular shape at the top center is slightly wider than the nose shape. Look closely and notice that the left side is squared and the right side is rounded. Also, be sure to see that the right side is lower than the left.
Step 6: Listen, youre a firework!!!! Don't freak out! This is EASY! Hair moves all the time. You do not need to get this shape perfectly. Use your observational skills to get the general shape of the hair. Again, don't be intimidated by this step.... just generalize what you see.
Step 7: Draw in the eye shapes. Notice that there is one eye length between the eyes. Notice the difference in size between the top eyelashes and the bottom ones. Notice the size of the iris compared to the whites of the eye.
Step 8: Draw in the shapes for her body.

Tradigital art incorporates traditional materials with digital media. This video illustrates the tradigital process step by step (demonstration by artist Merrill Kazanjian). Link- http://merrillk.com/index.php?part=publications
This video will also highlight the use of opaque paint markers (Especially Decocolor) and their many uses in a work of art.
Kazanjian's process for this artwork-
1.) Pencil Drawing (regular HB pencil)
2.) Digital Scan
3.) Digital Collage with Paint Shop Pro / Photoshop
4.) Print
5.) Illustration Markers
6.) Opaque Paint Markers
7.) Scan (Again)
8.) Digital Touch Ups with Paint Shop Pro / Photoshop
9.) Save as PNG file
10.) Juxtapose PNG file
Arte Tradigital incorpora materiales tradicionales con medios digitales. Este vídeo muestra el proceso paso a paso tradigital (demostración de la artista Merrill Kazanjian). Link-http://merrillk.com/index.php?part=publications
Este vídeo también se hará hincapié en el uso de marcadores de pintura opaca (especialmente Decocolor) y sus múltiples usos en una obra de arte.
Proceso de Kazanjian para esta obra de arte -
1.) Lápiz de dibujo (lápiz HB regular)
2.) Digital Scan
3.) Collage digital con Paint Shop Pro / Photoshop
Imprimir 4.)
Marcadores Ilustración 5.)
6.) Opaco Paint Markers
7.) Scan (nuevo)
8.) Digital Touch Ups con Paint Shop Pro / Photoshop
9.) Guardar como archivo PNG
10.) Juxtapose PNG
Tradigital art incorpore des matériaux traditionnels avec les médias numériques. Cette vidéo illustre le procédé étape par étape tradigital (démonstration par l'artiste Merrill Kazanjian). Link-http://merrillk.com/index.php?part=publications
Cette vidéo sera également en évidence l'utilisation de marqueurs de peinture opaque (Surtout Decocolor) et leurs nombreuses utilisations dans une œuvre d'art.
Processus Kazanjian pour cette oeuvre -
1.) Dessin au crayon (crayon ordinaire HB)
2.) Digital Scan
3.) Digital Collage avec Paint Shop Pro / Photoshop
4.) Imprimer
5.) Marqueurs Illustration
6.) Opaque Paint Markers
7.) Scan (Again)
8.) Digital Touch Ups avec Paint Shop Pro / Photoshop
9.) Enregistrer en tant que fichier PNG
10.) Juxtapose fichier PNG

Time Lapse educational video by Merrill Kazanjian
Step 1- Sketch of the structure of the human face.
Step 2- For step two, I am using a computer scissor to cut out the features of the face from various photographs that I have collected. After I cut them out, I digitally juxtapose them over my simple facial sketch. Artists have called this a digital collage or a photo-manipulation, but I like to say that I am Frankensteining the face together.
This process has evolved from a need to work faster. My main area of expertise is oil painting but some of my paintings have taken me over a year to complete. In addition to being an artist, I am also a full time teacher and a new father. So free time is truly a luxury; I had to come up with a creative way to do my work and this is one of several techniques that I use.
In my opinion, there is no artistic medium that can compete with the surface beauty of an oil painting. Hand made items will always be more beautiful than manufactured ones. I have seen a lot of Digital art that is mechanical and inorganic. But making digital art is a much faster process than making traditional art. I have a lot to say as an artist and not a lot of time to say it, so, for this piece, I am using this digital collage as an underpainting for what I will do later.
Step 3- In Step Three, I am lightening the areas that I plan to rework.
Step 4- For step four, print at maximum dpi and on the thickest paper that you can fit through your printer
Step 5- For step five we will cover the traditional part of tradigital- I am using prismacolor (prisma) pencils and illustration markers and decocolor paint markers. Prismacolor sells great colored pencils. Their covering power is very impressive. Their marks lie somewhere between translucent and opaque. They can be used to mimic scumbling and glazing. In order to glaze mix the color pencil with the prisma marker blender. Decocolor markers have a type of paint inside which is very similar to acrylic paint and has a similar covering power to acrylic paint. Whenever I need to make opaque marks, I use the decocolor markers.
Years ago, I would have considered a method such as this, cheating. I no longer feel that way because art is so much more than just drawing. Drawing is a way for an artist to communicate but it is not the only means that an artist could use to communicate. I feel that while this method is unconventional, it has allowed me to work faster and leave a human fingerprint on the artwork that I produce. The digital collage allows me to Frankenstein interesting facial features and come up with new imagery in a manner similar to the cutouts of Pablo Picasso and Romare Bearden.
I have made bodies in a very similar manner. It can be even more fun to digitally collage a body together. After I finish making a character, I like to use the character multiple times. Since I took my break from oil painting, exactly a year ago, in December 2007, I have made over 500 different characters. My characters are saved as digital files and are used multiple times in my artistic compositions. A sample of my latest work is at the end of this video. Thank you so much for watching!
WE NEED A VISUAL ARTS CATEGORY ON YOUTUBE THREAD-http://www.google.com/support/forum/p/youtube/thread?tid=2a9806f929074cbd&hl=en&fid=2a9806f929074cbd0004b630ad37cc3e
Dear Youtube
We need a visual ar

What would a "merger" of Alan Greenspan, Ben Bernanke, Donald Trump, Mr. Krabs, Jim Cramer and the Monopoly Guy look like? Watch the video to find out! Sell Sell Sell !!!! Artmorph by Merrill Kazanjian
Charles S. Hamlin, William P. G. Harding, Daniel R. Crissinger, Roy A. Young, Eugene I. Meyer, Eugene R. Black, Marriner S. Eccles, Thomas B. McCabe, William McChesney Martin, Jr., Arthur F. Burns, G. William Miller , Paul A. Volcker, Alan Greenspan, Ben S. Bernanke, JP Morgan James Piedmont, lucrative, venture capitalism, vulture, bears and buills, bullish, stock, equity, equities, markets, trader, day, selling short, capital, investment banking, banker, irrational exuberance, gordon gecko, greed is good, market cap, cnbc, fast money, ron insana, carlos quintanilla, joe kernan, bubble, nasdaq, dow, bill gates, jack welch, bernie ebbers, chair, board, ceo, compensation, declare bankruptcy, real estate, bottom, candlestick, options, bonds, liquidity, crisis in confidence, david faber, larry kudlow, republican bias, donny deutch, hang seng, deutchemark, yen, rupee, oil, commodities, bloomberg, news, aig, santinelli, maria bartiromo, todd, thompson financial, citibank, lehman brothers, holdings, stock market, volatile, volume, buy low, sell high, tips, how to, invest

Love him or hate him, Allen Iverson plays the game of basketball with a lot of heart. I remember him when he first came in to the NBA from Georgetown University and I followed his career through Philadelphia (76ers), Denver (Nuggets) and now the Detroit Pistons. Hes known for his killer cross over dribble and his tenacious drives to the basket, despite his small frame. He has not won a championship as of yet but reached the finals when he was with the Sixers- Practically carrying that team on his back. There are plenty of highlight / mix tapes out there so my tribute comes in the form of a drawing. I documented the different steps that I took: 1.) Pencil Drawing 2.) Markers 3.) Color Pencils and you can download a print version that shows you step by step how to draw AI at my website merrillk.com. The first part is stop motion with a scanner and the second part is a time lapse. Hopefully its a slam dunk. Please rate and comment! Merrill Kazanjian

Its time for YOU to draw Beyonce. All that you will need is a pencil with an eraser, a blending stump or Q-Tip and a large index card. Be sure to stop the video at the end of each step and look at the reference picture on the computer screen. No drawing experience? Doesnt matter. You are gonna surprise yourself!
Step 1- Make a rainbow shape at the top of your large index card. Notice that the top of the rainbow is at the very top of the card. Then make the oval Notice that the bottom of the oval is more pointed than the top.
Step 2- Continue the line at the end of the rainbow down to the mid point of the card and then curve it upwards to the bottom of the oval. Do this on both sides.
Step 3- Try to match the two lines that I just added. Use the sides of the index card to gage their accuracy.
Step 4- Use your observation skills to draw the two lines that I just added. This will eventually be the bottom of Beyonce's left arm.
Step 5- Do the same for the top of her left arm.
Step 6- Now, create the top of her forearm. Hint, notice the shape that is formed in the background, think of this shape as a puzzle piece and use it to tweak the shapes around it.
Step 7- Create the V shape on her dress. Notice that the bottom of the V ends at the mid point of the shape that was formed in the previous step.
Step 8- I slightly changed the shape at the bottom of the hair on the left and created a neck. I also made another shape within the hair.
Step 9- I created another shape within the hair.
Step 10- I changed the side of her hair. I made 7 wild curls at the bottom with a wave above it.
Step 11- Take a second to observe and draw the shapes that I just drew on the other side of her hair.
Step 12- I exposed the neck some more by curling up the bottom of the hair on the left side of her head.
Step 13- I put a line for the shadow under her breasts
Step 14- I added an earring
Step 15- I added a belt
Step 16- I added two ovals on the face for the eye sockets. These will be broken down in to smaller shapes.
Step 17- I added a shape for the shadow on the right side of Beyonce's nose. Put this in very lightly
Step 18- I added Beyonces top lip. The shape is similar to a flattened McDonalds arch.
Step 19- I added Beyonce's bottom lip. Notice that it is wider than the top lip and has a shadow at the bottom.
Step 20- I added the eyebrows at the top of the eye socket
Step 21- I added her eyes. In this picture she is wearing a lot of eye liner, so the lines at the top and bottom of the eye could be similar in width.
After the step by step, I talk you through she difficult shading of the hair face and body. You will see me demonstrate strategies on how to shade hair with pencil, a tortillion (blending stump) and an eraser. I will also show you how to get a soft (smoothly shaded) face and how to build up the tones through layers of hatching to do the clothes and the body.
Image courtesy of kalumba99 (creative commons license)
Su tiempo para dibujar Beyonce. Todo lo que usted necesita es un lápiz con una goma de borrar, un difumino o Q-Tip y una tarjeta de índice general. Asegúrese de dejar el vídeo al final de cada paso y mirar el cuadro de referencia en la pantalla del ordenador. Sin experiencia de dibujo? Doesnt matter. Estás va a sorprenderte a ti mismo!

http://merrillk.com/index.php?part=fineart&articles_id=5337&collection=114 This is a continuation of my series on how to draw facial expressions with drawing pencils. Today, We are going to concentrate on the expressions of shock and fear. I video taped the creation of 14 sketches, to give you a lot of chances to learn. You will see profile, 3/4 and frontal views and both male and female faces. But, before we begin, take a second to glance at the major differences. This information will be discussed in the video and you can download on my website Merrillk.com. Just type the words shock and fear in the search box to download this resource. Or, if you are watching on my youtube channel, hit the link to the right to view this resource. I hope that you learn a lot. Here we go.
Character 1- In the first character, I want to highlight the gaping mouth. Notice that the top teeth are exposed. When you draw this expression, the top lip is pulled up, which shortens the distance between the lip and the nose
Character 2- For this character, I want to highlight that the eyebrows usually separate and the forehead flattens for this expression. This is the opposite of the expression of anger where the eyebrows are pulled closer to each other.
Character 3- For this sketch I want you to notice the separation of the iris from the bottom eyelid as well as the perfect C shape that the mouth is in when it is in profile.
Character 4- For this character, take note of the separation between the iris and the top eyelid and the amount of space between the eyebrows- Both very common in a fearful expression.
Character 5- For this character, I want to highlight the lines on either side of the nose. For this expression you can make these lines more visible.
Character 6- This character has his eyes shut tight and his mouth open wider than any other character in the picture. To draw a scream, make the area between the eyelids as dark as the lashes and darken the area around the eye. Make the mouth extra wide.
Character 7- This character seems more startled than scared because her mouth is less open and there is relatively little shading around the eye.
Character 8- In this character, I wish that I left the mouth in the classic C shape for drawing this expression in profile view.
Character 9- Notice the dark rings under the eyes of this character. That and the separation between the iris and the upper eyelid makes him look distraught. Also notice that the mouth doesn't always have to be gaped open to convey fear. Instead, I filled the gap with teeth.
Character 10- This character has a lot of facial commonalities with the other characters that have been drawn so far. I added a still pose with a pointing finger to supplement the facial expression.
Character 11- A very common pose to convey shock and fear is to place both hands on either side of the face- Also known as the OMG pose.
Character 12- Notice that this character has separation on both sides of her iris. A great way to make someone look terrified.
Character 13- Since this character wears glasses, I made each eye seem magnified. I wish that I added a separation between the iris and the eyelid.
Character 14- I should have stopped at 13!. I made his head too small for his position in the picture. I know this because the people in the row behind him were significantly bigger- a mistake in perspective drawing.

Subscribe to kazanjianm (Don't miss any new videos that I make)- http://www.youtube.com/subscri....ption_center?add_use
Facebook: Like me on Facebook to find out about live hangouts or to post your work!- http://facebook.com/kazanjianm
Twitter: I tweet! Do you? http://twitter.com/kazanjianm
My Website: http://merrillk.com
Art Supplies I Use in my Art Work- http://merrillk.com/?sid=135&idpage=supplies_i_use
YouTube Visual Arts Category Petition: http://www.change.org/petition....s/create-a-visual-ar
Step by Step Drawing Playlist: http://www.youtube.com/playlis....t?list=PLD6E34C7CD58
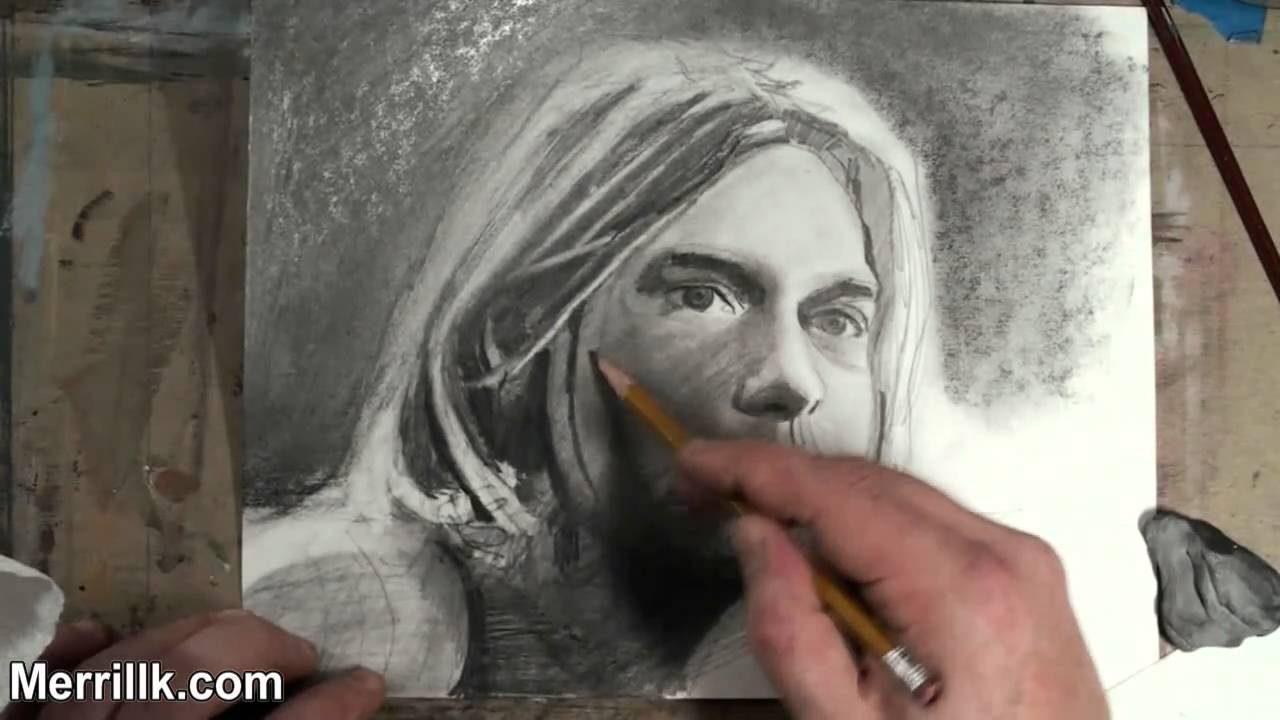
This is the extended shading tutorial on how to draw Kurt Cobain of Nirvana. Pause the video at different points and use the image on the screen as your reference image. I am combining two methods called 1.) cross hatching and 2.) smudging.....right now. Pause the video at different points and use the image on the screen as your reference image. It doesnt get very dark under the eyes.......however, above the eyes (between the eye and the eyebrow) it gets very dark. Kurt has dark and full eyebrows. Use a #2 (HB) pencil to start. Dont be scared to press hard in the eye region. The nose is tricky. The darkest part is the nostril (not part of the step by step video). But the entire shape of the bottom of the nose gets pretty dark. After, I fill it in, observe it, then draw it. I am using a #7 Bristle Flat brush for the shading. The top lip is dark and solid in shape. The LEFT side of his face (the side on YOUR right) is lighter in tone than the right side. The bottom left corner of the page will get very dark. I "went right in" with a 6B pencil. REMEMBER, shading is all about RELATIVITY, so compare the tones of the different areas of the image, The shape at the bottom of the face will eventually be blended in with other dark tones. In order to make the hair "pop out" you need to darken the background. (Its all about relativity!!!) The hair is a LOT of Adding....then erasing.....adding...then erasing ....Be sure to make your strokes in the same direction at the hair in this reference image.....Notice that I am using the eraser to "draw". Now the "PORTRAIT" begins....Now it looks like a human being......but I have to "wrestle" with it to make it look like Kurt Cobain. Use a slip sheet (look under my hand) when you get this far. The darkest areas have several layers of hatching. (8B pencil).
The Machine Thinks, Toccata and Fugue in D Minor and Waltz - Tschikovsky Op. 40 are by Kevin MacLeod of Incompetech.com and are under a Creative Commons license (attribution). I will credit Mr. MacLeod in the video description. All visuals are made by me (Merrill Kazanjian). I understand and choose to comply with the rules of copyright law.

WE NEED A VISUAL ARTS CATEGORY ON YOUTUBE THREAD-http://www.google.com/support/forum/p/youtube/thread?tid=2a9806f929074cbd&hl=en&fid=2a9806f929074cbd0004b630ad37cc3e
Facebook- http://facebook.com/kazanjianm
Twitter- http://twitter.com/kazanjianm
Website- http://merrillk.com
(Merrill) Supplies I Use- http://www.jdoqocy.com/click-4....247664-805536?url=ht
Ladies and Gentlemen, think about it. Santa Claus is a thug.
1.) Santa "Breaks and enters" illegally over a billion times each year........ on Jesus' birth day.
2.) Santa uses exploitative labor...... And the people who he exploits are shorter than three feet tall.
3.) Santa flies without a license and at his own leisure.....while the rest of us get molested at the airport.
4.) Santa wears red.......because he's a Socialist......just like Papa Smurf,
4.) Santa started a fistfight with a penguin........ just to prove that he is bipolar.
5.) While Eminem gets a lot of criticism about his lyrics towards women........Every other word out of Santa Claus' mouth is HO.
As a child, I was taught to leave Santa Claus cookies......But as an adult I know better. The following artwork will give a more accurate portrayal of Santa Claus.

This video will give you step by step instruction on how to draw Nicki Minaj. Grab a pencil and some paper and follow the steps at your own pace.
Subscribe to kazanjianm (Don't miss any new videos that I make)- http://www.youtube.com/subscri....ption_center?add_use
Facebook: Like me on Facebook to find out about live hangouts or to post your work!- http://facebook.com/kazanjianm
Twitter: I tweet! Do you? http://twitter.com/kazanjianm
My Website: http://merrillk.com
Art Supplies I Use in my Art Work- http://merrillk.com/?sid=135&idpage=supplies_i_use
YouTube Visual Arts Category Petition: http://www.change.org/petition....s/create-a-visual-ar
Step by Step Drawing Playlist: http://www.youtube.com/playlis....t?list=PLD6E34C7CD58
This one is for the boys who want a drawing system
Step One, Step Two, Ill share my drawing wisdom.
Gonna draw the mug, of Nicki Minaj
Just relax, grab a pen, park like garage
Im Merrill, and im real, Ill make you a deal
About Face all the time, a portrait revealed
My Pencil, it is dope, I draw for the pope
I always on the air, unless your internet is broke
Now Excuse me Merrill
Youre a hell of a guy
You cant rap for shit
But your drawings are fly.
You make me want to try
To draw portraits alright.
And your humor is dry.
You a troll? Hit the like
Your time I won't waste
Just draw at your pace
Sketch and erase
You wont have to trace
In the end youll have a Super Face.

My Alternative to oil painting by Merrill Kazanjian- Recently, I have made a lot of videos teaching about the techniques that I use to make art. But, for once, I want to talk to you about choices that I made with my own art. The first medium that I was proficient in was oil painting. But after college ended, I was too drained to paint after I got home from a day of work. The setup and clean up of paints took as long as the process of painting and the drying time was way too slow for my needs. I estimate that I painted only once or twice per week for about three hours per day and I only produced about two finished paintings per year. I did this for six years.
I slowly started dabbling with mixed media art. What you are seeing now is a process that I have worked out over the past 2 years for the past two years. This process allows me to have results similar to oil paintings, done in one day rather than six months. I even incorporate oil paint in to one of the steps.
Here it is:
1.) Pencil Drawing
2.) Illustration Markers (prismacolor, Ad, Decocolor)
3.) Color Pencil
4.) Thin Layer of Oil Paint
5.) Digital Additions (Photoshop, Paint Shop Pro)
I use this process to make my characters. Over the last 2 years I have made over 1500 characters. I scan them and save them as PNG files and I use them over and over in my artwork. PNG files stand for Portable Network Graphic and they are basically a filetype that works like a sticker. Stay tuned until the end of the video and I will show you what I mean. Contact me through my website merrillk.com or leave me a youtube comment and I will be sure to get back to you.

This video will teach YOU how to draw Simon Cowell STEP by STEP. Grab a pencil and paper and watch the video! Drawing from observation is a lot like putting a jigsaw puzzle together. In both a puzzle and a drawing, a person looks for shapes that fit together. Once a fit is discovered, a person moves on to the next piece. Remember this analogy when drawing today. This video will show you how to draw Simon Cowell. Each step will be shown in two second intervals. Pause each step, as you need to or download a print version of this lesson from my website, http://merrillk.com. Feel free to save a copy to your computer and print it. Pause the video after each shape appears and try to draw it. Press play when it looks similar to mine. If you follow each step and fit the shapes together correctly, you should have a decent contour drawing of Simon Cowell. Give it a try. I think that you are going to surprise yourself! To shade, I used a number two pencil and a blending stub. Search for my demonstrational shading videos online. It took me about fifteen minutes to do the contour drawing and about thirty minutes to shade. Merrill KazanjianCette vidéo vous apprendra comment attirer Simon Cowell étape par étape. Prenez un crayon et du papier et de regarder la vidéo! Dessin de l'observation est un peu comme mettre un puzzle ensemble. Dans les deux casse-tête et un dessin, une personne qui cherche des formes qui s'emboîtent. Une fois que l'ajustement est découvert, une personne passe à la prochaine pièce. Rappelez-vous cette analogie lors de l'élaboration d'aujourd'hui. Cette vidéo vous montrera comment tirer Simon Cowell. Chaque étape sera présenté en deux secondes d'intervalle. Pause chaque étape, comme vous avez besoin d'imprimer ou de télécharger une version de cette leçon de mon site web, http://merrillk.com. N'hésitez pas à enregistrer une copie sur votre ordinateur et l'imprimer. Pause de la vidéo après chaque forme apparaît et essayez de dessiner. Appuyez sur play quand il ressemble à la mienne. Si vous suivez chaque étape et le montage des formes correctement, vous devrez avoir un contour dessin de Simon Cowell. Give it a try. Je pense que vous allez vous surprendre! À l'ombre, j'ai utilisé un crayon, et numéro deux un mélange tampon. Recherche pour ma démonstration shading vidéos en ligne. Il m'a fallu une quinzaine de minutes pour faire le contour de dessin et une trentaine de minutes à l'ombre. Merrill Kazanjian.
Este video le enseñará cómo dibujar Simon Cowell paso a paso. Agarra un lápiz y papel y ver el video! A partir de la observación es muy similar a poner juntos un rompecabezas. En tanto un rompecabezas y un dibujo, una persona que busca formas que encajan entre sí. Una vez que se descubre un ataque, una persona pasa a la siguiente pieza. Recordar esta analogía, cuando dibujo el día de hoy. Este video le mostrará cómo sacar Simon Cowell. Cada paso se muestra en dos intervalos de un segundo. Pausa cada paso, como usted necesidad de imprimir o descargar una versión de esta lección de mi sitio web, http://merrillk.com. Siéntase libre para guardar una copia a su computadora e imprimirlo. Pausa en el vídeo aparece después de cada forma y tratar de dibujar. Pulse el botón de reproducción cuando se ve similar a la mía. Si usted sigue cada paso y colocar correctamente las formas, usted debe tener un dibujo del contorno decente Simon Cowell. Darle una oportunidad. Creo que va a sorprender a ti! A la sombra, he usado un lápiz número dos y una mezcla de talón. Buscar mi demostrativas sombreado videos. Me llevó unos quince minutos para hacer el contorno de dibujo y unos treinta minutos a la sombra. Merrill Kazanjian
