Лучшие
§ Скачайте мою книгу о столярничестве:
http://jurprime.ru/offers/book/
§ Подписывайтесь на канал:
http://www.youtube.com/user/ju....rprime?sub_confirmat
==
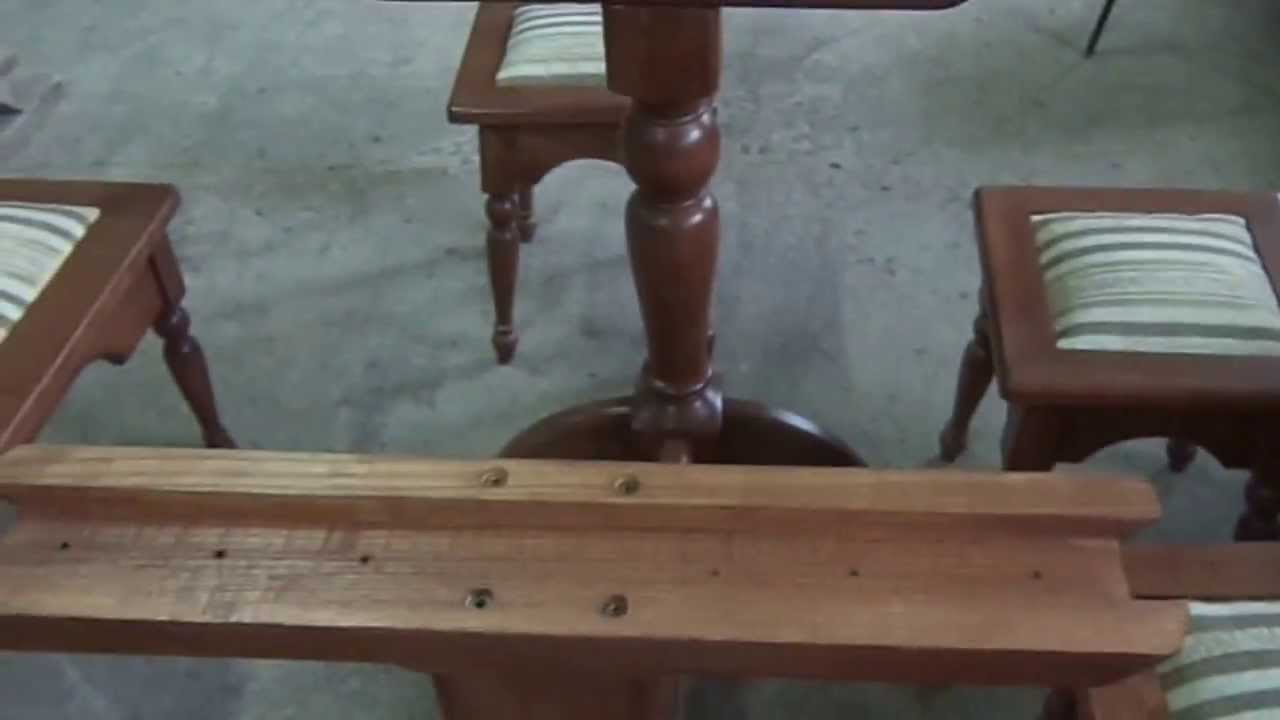
На видео показано и рассказано, как мы делаем столешницы из массива древесины, и какие методы применяем для того, чтобы уменьшить вероятность их коробления.
http://jurprime.ru/

§ Скачайте книгу "Основы столярного мастерства":http://jurprime.ru/jp_book
§ Подписывайтесь на канал: http://www.youtube.com/user/ju....rprime?sub_confirmat
===
Расчёт полуторной двери.
Каждый человек хочет, чтобы его изделие было красиво и имело какие-то пропорции.
Вот и при расчёте полуторной двери, если нет каких либо особых требований или пожеланий заказчика, лучше соблюдать определённые правила.
Это - одинаковая ширина филёнок (стёкол).
При этом очень важно не ошибиться в размерах каждой части двери. Иначе работу придётся переделывать.
Из своей практики знаю - нет ничего хуже, чем переделывать работу. Причём неважно, чужую или свою.
В ролике я познакомлю Вас с тем как я рассчитываю полуторную дверь, и как перепроверяю расчёты.
Возможно кому-то это поможет избежать ошибок.
===
Добавляйтесь в друзья:
Вконтакте: http://vk.com/jurprime
Facebook: https://www.facebook.com/jurprime
Twitter: https://twitter.com/jurprime
===
Посетите наш сайт!
http://jurprime.ru/
===
url:https://www.youtube.com/watch?v=qsV7Fkpy778
► Скачайте книгу "Основы столярного мастерства": http://jurprime.ru/jp_book
► Подписывайтесь на канал: http://www.youtube.com/user/ju....rprime?sub_confirmat
===
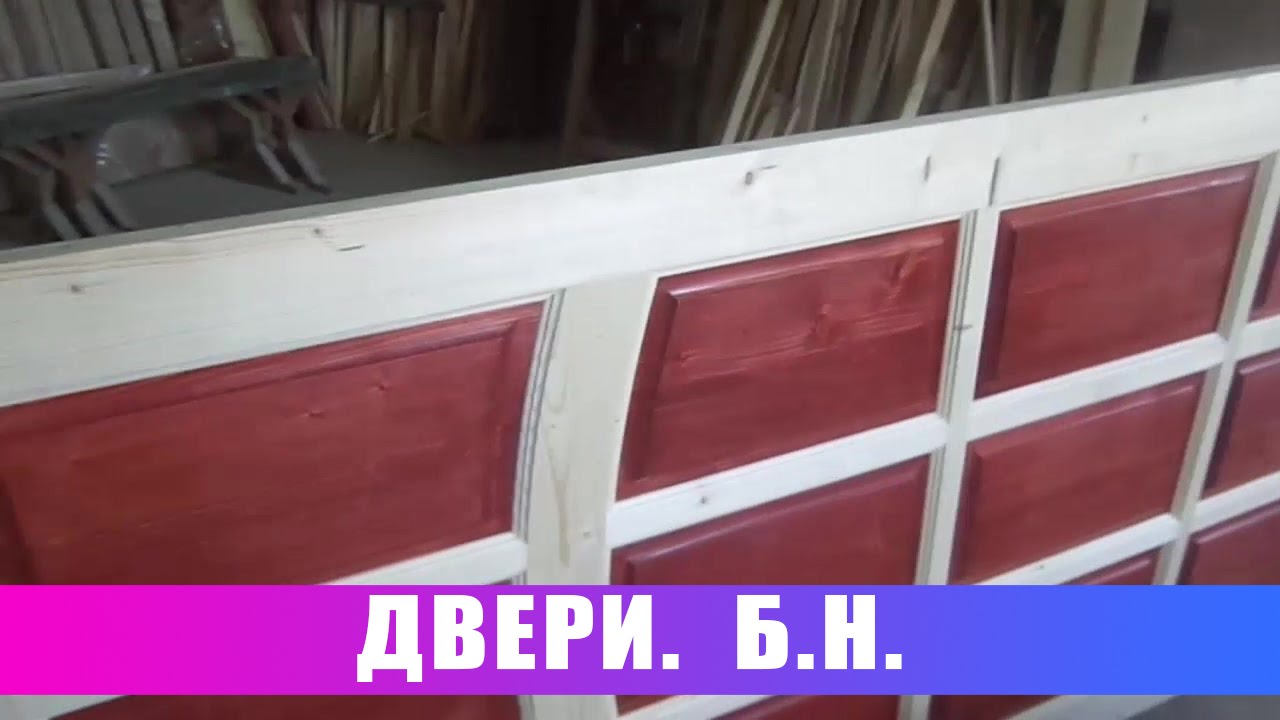
Двери.
Сколько столяров, столько и способов изготовления дверей.
В этом ролике я показал, как мы укрепляем дверное полотно шкантами.
Вариант показан упрощённый. Так мы делали пока не приобрели свёрла (или фрезы) для изготовления пробок.
Этот вариант доступен каждому, в том числе и в маленькой домашней мастерской.
Сейчас мы делаем почти так же.
Но отрезаем шкант на 30 мм короче и утапливаем его полностью.
Затем засверливаем место входа шканта сверлом пробковым на 20 мм и вставляем пробку на глубину 20 мм, с направлением волокон как у дверного фриза.
Зазор между шкантом и пробкой в 10 мм не позволяет шканту упереться в пробку при усыхании двери.
Всем удачи!
Все видео о дверях:https://www.youtube.com/watch?v=yViyS--cwUs&index=1&list=PLtmYLnLHv7dhUB0I8Iwpr5uImqmunMm5S
===
Вступайте в группу Вконтакте: http://vk.com/woodprime
Вопрос можно задать тут: http://vk.com/topic-69796727_29838799
Отзыв можно оставить тут: http://vk.com/topic-69796727_29838796
===
Добавляйтесь в друзья:
Вконтакте: http://vk.com/jurprime
Facebook: https://www.facebook.com/jurprime
Twitter: https://twitter.com/jurprime
===
Посетите наш сайт!
http://jurprime.ru/
===
Поделитесь этим видео с друзьями:https://www.youtube.com/watch?v=bO75uE4yZuY

► Скачайте книгу "Основы столярного мастерства": http://jurprime.ru/jp_book
► Подписывайтесь на канал: http://www.youtube.com/user/ju....rprime?sub_confirmat
===
Изготовление дверей от начала до конца.
У каждого мастера есть свои способы изготовления дверей.
В этой подборке видеороликов Вы увидите как делаем двери мы со Славой.
Хочу обратить внимание на то, что мы просто делимся своим опытом.
А уж Вам решать, брать что-либо из наших видео, или нет.
Надеюсь, что Вы найдёте в сюжетах о дверях что-то для себя полезное.
Удачи Вам!
Все видео о дверях: https://www.youtube.com/watch?v=yViyS--cwUs&list=PLtmYLnLHv7dhUB0I8Iwpr5uImqmunMm5S&index=1&src_vid=hFk0FIdl60Y&feature=iv&annotation_id=annotation_217991673
Столяра: Юрий, Слава.
Оператор:Слава.
Техническое обеспечение и поддержка: Денис.'
===
Вступайте в группу Вконтакте: http://vk.com/woodprime
Вопрос можно задать тут: http://vk.com/topic-69796727_29838799
Отзыв можно оставить тут: http://vk.com/topic-69796727_29838796
===
Добавляйтесь в друзья:
Вконтакте: http://vk.com/jurprime
Facebook: https://www.facebook.com/jurprime
Twitter: https://twitter.com/jurprime
===
Посетите наш сайт!
http://jurprime.ru/
===
Поделитесь этим видео с друзьями:https://www.youtube.com/watch?v=yViyS--cwUs
Скачайте мою книгу о столярничестве:
http://jurprime.ru/offers/book/
Подписывайтесь на канал:
http://www.youtube.com/user/ju....rprime?sub_confirmat
==
В этом видео я всего лишь попытался показать, как я лакирую изделия из мягкой древесины хвойных пород лаками на алкидной основе. Видеоролик получился не самым удачным. Просмотрев его после обработки, понял, что о многом не сказал, или сказал вскользь. Думаю, что сниму ещё несколько коротких роликов на эту тему. В них расскажу, как я готовлю изделия к лакировке, какой температурный режим соблюдаю. Почему лакирую разные изделия разными лаками.Почему давление на выходе из компрессора должно быть определённой величины и так далее.С уважением, Юрий.
=====================
Посетите наш сайт!
http://jurprime.ru/
=====================
Скачайте мою книгу о столярничестве:
http://jurprime.ru/offers/book/
Подписывайтесь на канал:
http://www.youtube.com/user/ju....rprime?sub_confirmat
==
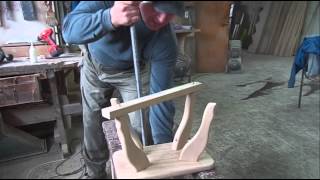
Стульчик для кухни, Такой или подобный есть в каждом доме. Если нет - сделайте его своими руками! ничего сложного в его изготовлении нет!!!
=====================
Посетите наш сайт!
http://jurprime.ru/
=====================
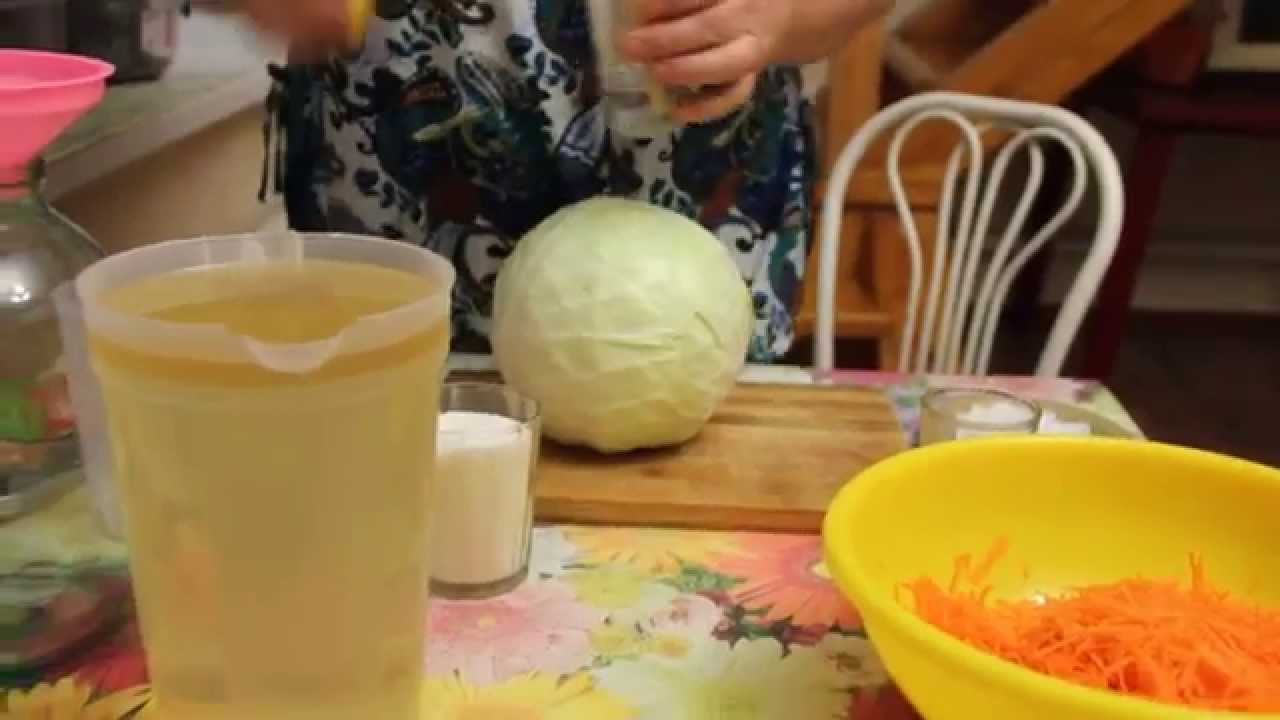
Рецепт капусты - скороспелки.

Заготовка зелени на зиму.

Этот рецепт томатного сока очень прост. В этом рецепте не используются ни уксус, ни специи, ни соль, ни сахар, его смело можно давать даже маленьким деткам. А соль можно добавить потом, когда откроете баночку, по вкусу.
Отличных Вам заготовок!
Эту мясорубку (с функцией соковыжималки) покупала на озоне http://goo.gl/aSXI5L
******************
● ПОДПИСАТЬСЯ, чтобы не пропустить новые видео → http://www.youtube.com/channel..../UCiWA1Ct_IdiUA8a-DT
Наша жизнь за кадром → https://www.youtube.com/watch?v=CYuJBR4-eFI&index=6&list=PLam19E6oNCG-CyadCV3rwKxeeq4tws05r
● Отвечаю на вопросы тут → http://ok.ru/profile/550906857588
● Общаемся, делимся опытом тут → http://ok.ru/covetyotyu
● Помогу советом тут → http://vk.com/id257485924
● Наш Инстаграм → https://www.instagram.com/vo_sadu_li_v_ogorode/
● Почта → olga_minyaeva@mail.ru
******
●Плейлисты с интересными видео:
Открываю секреты урожая
http://www.youtube.com/playlis....t?list=PLqCZWqsWs4QK
Заготовки на зиму
http://www.youtube.com/playlis....t?list=PLqCZWqsWs4QI
Очень вкусно! Рецепты.
http://www.youtube.com/playlis....t?list=PLqCZWqsWs4QJ
Мой опыт разведения домашней птицы
http://www.youtube.com/playlis....t?list=PLqCZWqsWs4QK

Ну очень вкусный и сытный салат на новогодний стол!
Рецепты на Новый год - одна из популярных тем сегодня, ведь праздник уже близко!
РЕЦЕПТ ДОМАШНЕГО МАЙОНЕЗА:
https://www.youtube.com/watch?v=sJS7nn5hHJA&t=0s&index=18&list=PLqCZWqsWs4QJbA3Yqsegd8sVD0C1ogbq5
****
Новый Год! Вот и приближается этот замечательный праздник! Вот и начинаем мы подбирать блюда на Новый Год, ищем необычные новогодние рецепты.
Ингредиенты:
огурец свежий
колбаса варено-копченая (или любое мясо копченое)
крабовые палочки
яйца
кукуруза
майонез
лук
зелень
#салат #новогоднийстол #миняева #восадуливогороде #рецептынановыйгод
Юлия Миняева, на канале Во саду ли в огороде.
(Yulia Minyaeva, Vo sadu li v ogorode).
****
Ах, как же всем знакомо, это настроение, когда Новый год уже совсем на носу, а вы спешите в предпраздничной суете найти самые простые и вкусные рецепты на новый год! Тут-то вам и приходит на помощь мой канал Во Саду Ли В Огороде. Потому что я с радостью каждый год делюсь с вами идеями, что можно приготовить на новый год, и этот год не исключение! В этом ролике расскажу что приготовить на новый год 2019, детально разберу рецепты на новый год пошагово.
В связи с тем, что мне неоднократно задают вопросы что приготовить на новый год 2019, подразумевается что приготовить на новый год 2019 рецепты. Отвечу сразу - простые рецепты на новый год 2019 - это, прежде всего, рецепты салатов на новый год, и их едят все. Поэтому давайте обсудим какие салаты приготовить на новый год и какие салаты на новый год 2019 будете подавать к столу вы.
Почему я предпочитаю рецепты простых блюд на новый год, и в тоже время, чтобы это были рецепты вкусных блюд на новый год? Так как простые рецепты салатов на новый год экономят бюджет, а вкусные рецепты на новый год порадуют любого гостя!
Новогодние блюда всегда отличались своим разнообразием, и каждая хозяйка всегда стремится состряпать для своих гостей вкусные блюда на новый год, используя в своем мастерстве новогодние рецепты 2019. В глобальной сети Интернет всегда в изобилии рецепты блюд на новый год, это и легендарные закуски на новый год, и ароматное горячее на новый год, и нежный праздничный торт на новый год, и печенье на новый год для гаданий и, конечно же, легкие свежие салаты на новый год.
А как же все-таки выбрать что приготовить на новый год свиньи 2019? Можно ли использовать рецепты на новый год из свинины или нет? Вопросов в новый год что приготовить на стол хоть отбавляй. Поэтому перед виртуозами кулинарии стоит нелегкая задача быстро отыскать рецепты на новый год 2019, а можно ведь заранее позаботиться о том, что приготовить на новый год. Что вам и предлагаю - подготовьте не торопясь рецепты новогодних блюд, пусть у вас будут под рукой оригинальные рецепты закусок на новый год, новые рецепты горячего на новый год, лучшие рецепты вкусных салатов на новый 2019 год. И тогда не придется наскоро думать, что приготовить на стол в новый год 2019, ведь вы уже знаете какие вкусные рецепты на новый год преобразят ваш праздничный стол.
Желаю вам прекрасного настроения!
***
Как мы знаем, самый Новогодний Салат это , конечно же, Салат Оливье.
Как приготовить Салат Оливье быстро. https://www.youtube.com/watch?v=8qEqWAao4dc
Другие рецепты для праздничного стола:
https://www.youtube.com/playli....st?list=PLqCZWqsWs4Q
Новенький салат на Новый год!
http://www.youtube.com/watch?v=rcLGbN_ObgQ&list=PLqCZWqsWs4QLWCcVHuzWEAeisxYFcWTnu&index=6
Селедка Под Шубой. Новый рецепт классической "шубы".
https://www.youtube.com/watch?v=TpNBul1yby8
Селедка Под Шубой по-Новому!
https://www.youtube.com/watch?v=YggOHkFOPwQ&t=14s
******
ЗАГОТОВКИ ИЗ КАПУСТЫ:
Квашеная капуста со свеклой. Рецепт моей мамы.
https://www.youtube.com/watch?v=94eS1KcaM48&t=0s&list=PLqCZWqsWs4QI6ReM6GbHSZip4TAql3DTa&index=50
Вкуснее КАПУСТЫ я еще не ела!!!
https://www.youtube.com/watch?v=9x47hMeQlkI&t=0s&list=PLqCZWqsWs4QI6ReM6GbHSZip4TAql3DTa&index=57
Квашеная капуста на зиму. Хороша закуска! - Квашена капустка!
https://www.youtube.com/watch?v=rvrdQEADtHY&t=0s&list=PLqCZWqsWs4QI6ReM6GbHSZip4TAql3DTa&index=87
Капуста-скороспелка. Очень вкусно!
https://www.youtube.com/watch?v=s88jUyjdVao&t=0s&list=PLqCZWqsWs4QI6ReM6GbHSZip4TAql3DTa&index=90
**********
● ПОДПИСАТЬСЯ, чтобы не пропустить новые видео → http://www.youtube.com/channel..../UCiWA1Ct_IdiUA8a-DT
Наша жизнь за кадром → https://www.youtube.com/channe....l/UCosY8oXpLMnN-dBa3
************
● Отвечаю на вопросы тут → http://ok.ru/profile/550906857588
● Общаемся, делимся опытом тут → http://ok.ru/covetyotyu
● Помогу советом тут → http://vk.com/id257485924
● Почта → olga_minyaeva@mail.ru
******
●Плейлисты с интересными видео:
Открываю секреты урожая
http://www.youtube.com/playlis....t?list=PLqCZWqsWs4QK
Очень вкусно! Рецепты.
http://www.youtube.com/playlis....t?list=PLqCZWqsWs4QJ
Нравиться наш канал? Можете поддержать его покупкой одного из видео-курсов:
"Шкаф своими руками" https://jurprime.ru/pages/shkaf_handm...
"Комод своими руками" https://jurprime.ru/pages/s_komod/
"Стол своими руками" https://jurprime.ru/pages/handmade_ta...
"Окна своими руками"https://jurprime.ru/pages/sale_window...
"Кровати своими руками" https://jurprime.ru/pages/inv_bed-yt/
Видео-курс "Столешница из массива" вы получите в подарок при покупке любого из выше перечисленных курсов.
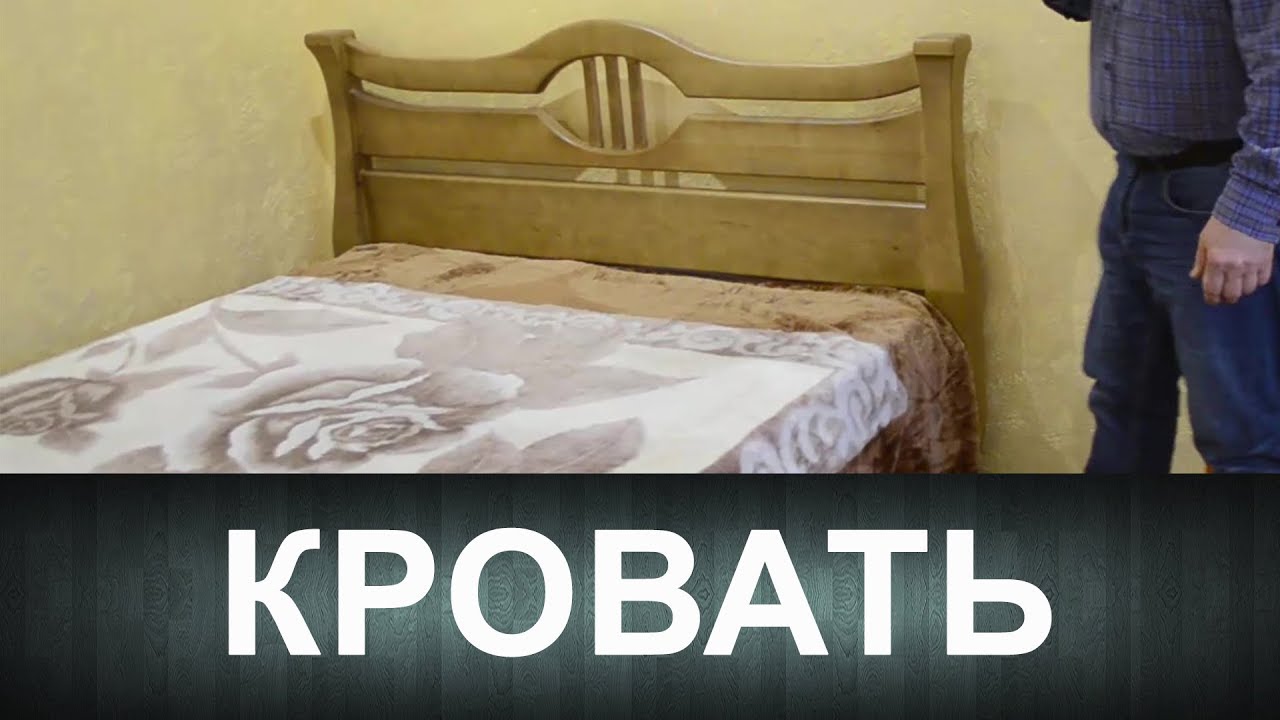
Интересная кровать!
► Чтобы попасть в рубрику "РАБОТА ДНЯ" присылайте свои фото сюда: https://vk.com/woodprime
===
Интересная кровать!
Небольшой обзор кровати.
Приятного просмотра!
===
Вступайте в группу Вконтакте: http://vk.com/woodprime
===
Добавляйтесь в друзья:
Вконтакте: http://vk.com/jurprime
Facebook: https://www.facebook.com/jurprime
Twitter: https://twitter.com/jurprime
===
Посетите наш сайт!
http://jurprime.ru/
===
Поделитесь этим видео с друзьями:https://www.youtube.com/watch?v=l68pGzPrwYc

Нравится наш канал? Можете поддержать его покупкой одного из видео-курсов:
"Шкаф своими руками" https://jurprime.ru/pages/shkaf_handm...
"Комод своими руками" https://jurprime.ru/pages/s_komod/
"Стол своими руками" https://jurprime.ru/pages/handmade_ta...
"Окна своими руками"https://jurprime.ru/pages/sale_window...
"Кровати своими руками" https://jurprime.ru/pages/inv_bed-yt/
Видео-курс "Столешница из массива" вы получите в подарок при покупке любого из выше перечисленных курсов.
►Почему не коробится столешня?
► Чтобы попасть в рубрику "РАБОТА ДНЯ" присылайте свои фото сюда: https://vk.com/woodprime
===
Почему не коробится столешня?
Рассказ о столе, которому уже больше 2-х лет.
Нет ни короблений, ни трещин....
Почему так произошло и говорится в этом ролике!
Приятного просмотра!
===
Вступайте в группу Вконтакте: http://vk.com/woodprime
===
Добавляйтесь в друзья:
Вконтакте: http://vk.com/jurprime
Facebook: https://www.facebook.com/jurprime
Twitter: https://twitter.com/jurprime
===
Посетите наш сайт!
http://jurprime.ru/
===
Поделитесь этим видео с друзьями:https://www.youtube.com/watch?v=NszqZQfreqE


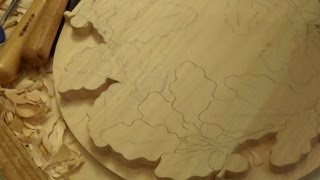
РИСУНКИ ДЛЯ РЕЗЬБЫ - http://vk.com/album277561541_230610296
Учебная доска, стиль "Татьянка", техно "муравка".
Дерево - липа, размер 20х10 см. (ориент.).

РИСУНКИ ДЛЯ РЕЗЬБЫ - http://vk.com/album277561541_230610296
Техно "березка" (резьба "Татьянка").
Материал - липа.
Стамески - № 17 (полукруглая), № 17 косая л/п, стамески малых диаметров № 2-3 (по выбору), нож-косяк.
Музыка:
Композиция "Bushwick Tarentella Loop" принадлежит исполнителю Kevin MacLeod. Лицензия: Creative Commons Attribution (https://creativecommons.org/licenses/by/4.0/).
Оригинальная версия: http://incompetech.com/music/r....oyalty-free/index.ht
Исполнитель: http://incompetech.com/
Композиция "B-Roll (ska) - Islandesque" принадлежит исполнителю Kevin MacLeod. Лицензия: Creative Commons Attribution (https://creativecommons.org/licenses/by/4.0/).
Оригинальная версия: http://incompetech.com/music/royalty-free/index.html?isrc=USUAN1100315.
Исполнитель: http://incompetech.com/
Композиция "All Good In The Wood" принадлежит исполнителю Audionautix. Лицензия: Creative Commons Attribution (https://creativecommons.org/licenses/by/4.0/).
Исполнитель: http://audionautix.com/
Композиция "For Mimi" принадлежит исполнителю Twin Musicom. Лицензия: Creative Commons Attribution (https://creativecommons.org/licenses/by/4.0/).
Исполнитель: http://www.twinmusicom.org/
Композиция "Hope Against Hope" принадлежит исполнителю Audionautix. Лицензия: Creative Commons Attribution (https://creativecommons.org/licenses/by/4.0/).
Исполнитель: http://audionautix.com/
Материал - липа.
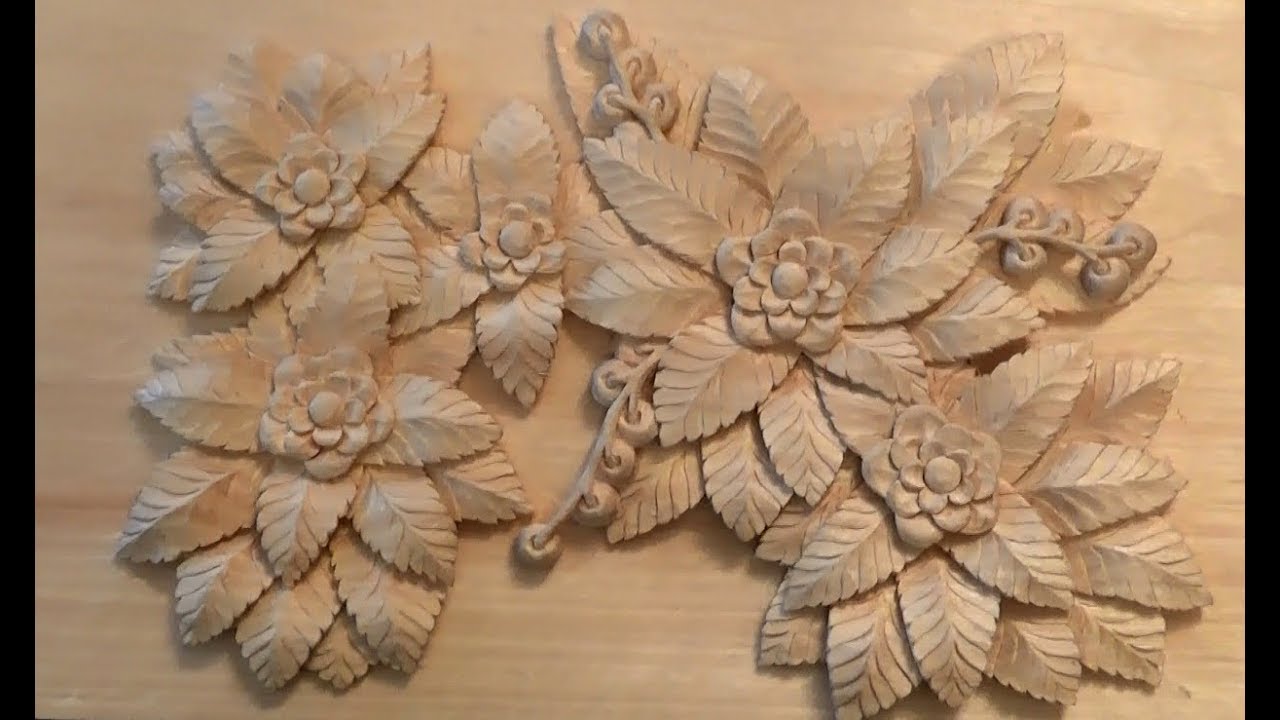
Видео - резьба по дереву. Техно "Альпийская роза". Итог
VK - http://vk.com/id277561541
Facebook - https://www.facebook.com/profi....le.php?id=1000060881
мой блог - http://reznoedelo.blogspot.ru
Обо мне - http://leto-aleksandr2008.wixsite.com/mysite/about

Резьба "Татьянка", техно "ивушка".
Доска - липа.
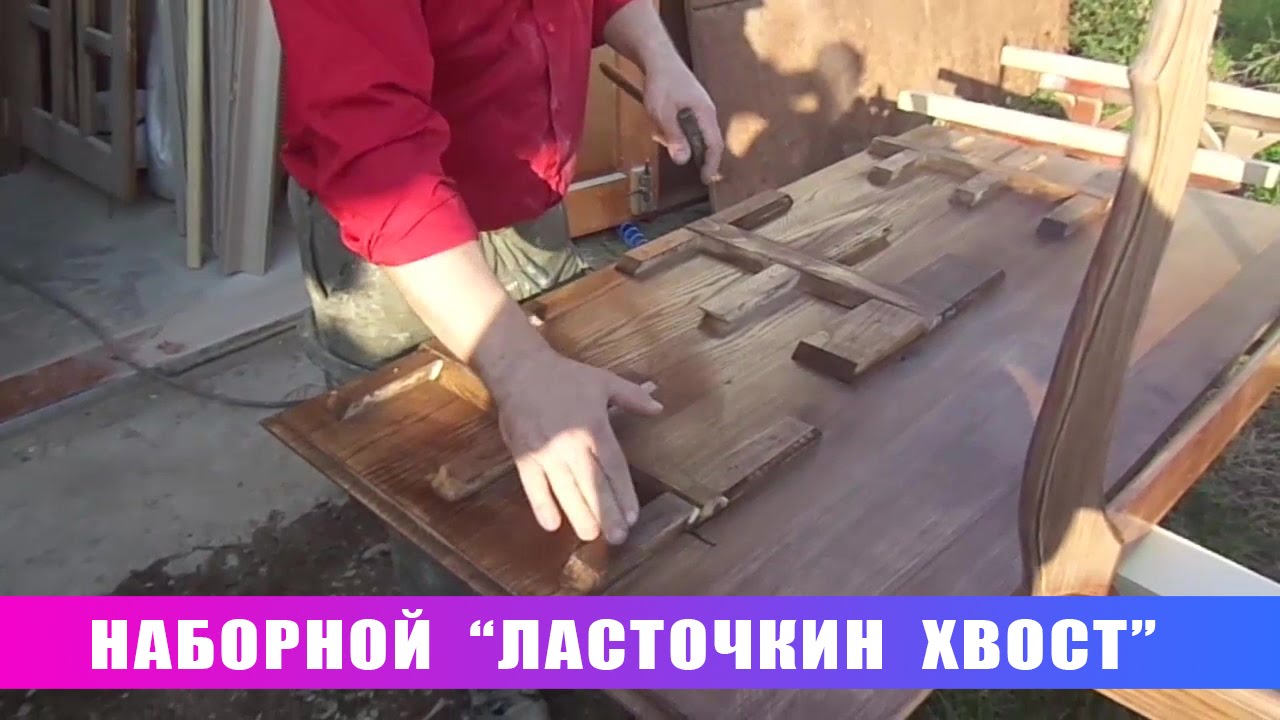
Наборной "ласточкин хвост".
► Скачайте книгу "Основы столярного мастерства": http://jurprime.ru/offers/book/
► Подписывайтесь на канал: http://www.youtube.com/user/ju....rprime?sub_confirmat
===
Ласточкин хвост, сделанный без выбирания паза в щите.
Оператор: Слава.
===
Вступайте в группу Вконтакте: http://vk.com/woodprime
===
Добавляйтесь в друзья:
Вконтакте: http://vk.com/jurprime
Facebook: https://www.facebook.com/jurprime
Twitter: https://twitter.com/jurprime
===
Посетите наш сайт!
http://jurprime.ru/
===
Поделитесь этим видео с друзьями:https://www.youtube.com/watch?v=2NR7owCNWi0
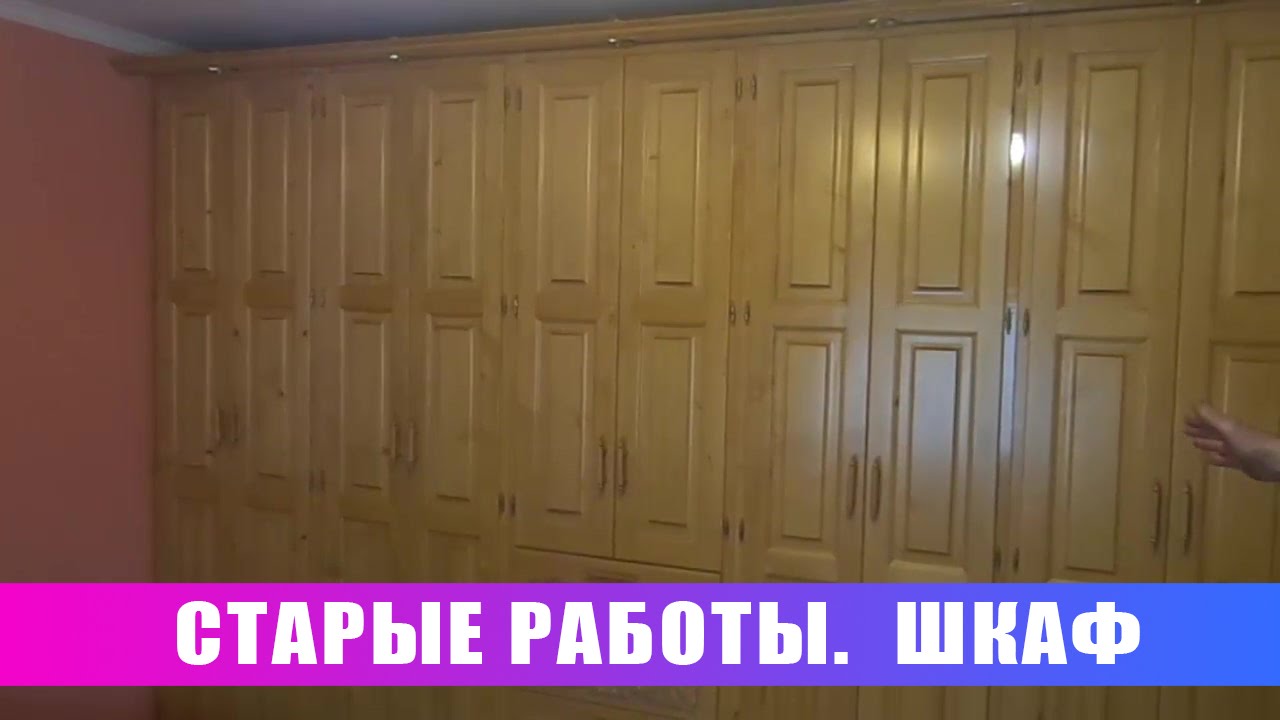
Ещё одна старая работа. Шкаф в спальню.
► Скачайте книгу "Основы столярного мастерства": http://jurprime.ru/offers/book/
► Подписывайтесь на канал: http://www.youtube.com/user/ju....rprime?sub_confirmat
===
Шкаф из массива смереки (карпатской ели).
Сделан "контейнерным способом. 5 контейнеров с дверями соединены на мебельные стяжки через бока.
Установлены на одно основание для всех 5-ти контейнеров.
Сделан один выступающий карниз для всего шкафа.
По истечении 5-ми лет двери шкафа, да и сам шкаф нигде не повело и не выгнуло.
Немного потянуло и чуть "выкривило" несколько петель.
Связываю это с усыханием дверей.
Сейчас этот недостаток устранён.
Приятного просмотра!
Оператор: Слава.
===
Вступайте в группу Вконтакте: http://vk.com/woodprime
===
Добавляйтесь в друзья:
Вконтакте: http://vk.com/jurprime
Facebook: https://www.facebook.com/jurprime
Twitter: https://twitter.com/jurprime
===
Посетите наш сайт!
http://jurprime.ru/
===
Поделитесь этим видео с друзьями:https://www.youtube.com/watch?v=-Vz0JsZMv8U
