Лучшие

Урок 10. Можно стричь брови или нет? Курс Мастер Бровист -Техника Граней Бриллиант
В этом видео я рассказываю можно ли стричь брови или нельзя! Мнения на столько разделились, одни говорят можно, другие говорят нельзя, настолько запутались все, что я решила высказать свое мнение на этот счет. Скажу сразу, что можно, а в некоторых случаях и необходимо! Волоски в бровях от природы могут быть жесткими и непослушными, а к средним годам вообще могут расти не равномерно. Вырастает один или два таких волоска, уверена многим знакома такая ситуация, и что делать в таких случаях? Их подстричь! Логично! А на просторах инета сейчас все больше и больше появляется противников стрижки бровей и доводы у них такие - если подстричь бровь, то волоски в бровях станут жесткими! Я не могу согласиться с этим - стрижка никаким образом на волосы не влияет! Жесткий волос в бровях - это либо наследственность, либо возраст, а могут быть и заболевания! Вообще в индустрии красоты сколько мастеров, столько и мнений похоже! Кто где учился и кто сколько учился и кто сколько работает - от этого зависит вывод того или иного мастера:) А вы как считаете, можно ли стричь брови или нет?:))
Если Вам понравилось видео ставьте лайки 👍, задавайте вопросы, пишите комментарии.
Подписывайтесь на мои каналы
Ресницы, брови, ногти, депиляция https://www.youtube.com/c/EvaLorman
Уроки парикмахеров https://www.youtube.com/c/EVALORMANTUTORIALS
ПОЛЕЗНЫЕ ВИДЕО
Прически. Идеи причесок. - https://www.youtube.com/playli....st?list=PLOFI1Q2RpVU
Волосы. Парикмахер - https://www.youtube.com/playli....st?list=PLOFI1Q2RpVU
Женские стрижки https://www.youtube.com/playli....st?list=PLOFI1Q2RpVU
Мужские стрижки. https://www.youtube.com/playli....st?list=PLOFI1Q2RpVU
Как покрасить волосы. Окрашивание волос. https://www.youtube.com/playli....st?list=PLOFI1Q2RpVU
Плетение кос https://www.youtube.com/playli....st?list=PLOFI1Q2RpVU
Наращивание ногтей - https://www.youtube.com/playli....st?list=PLdg2yJWxy1x
Ктийская роспись ногтей - https://www.youtube.com/playli....st?list=PLdg2yJWxy1x
Декоративная роспись ногтей - https://www.youtube.com/playli....st?list=PLOFI1Q2RpVU
Дизайн ногтей https://www.youtube.com/playli....st?list=PLdg2yJWxy1x
Как сделать ногти.
https://www.youtube.com/playli....st?list=PLOFI1Q2RpVU
Наращивание ресниц. Ламинирование ресниц -
https://www.youtube.com/playli....st?list=PLdg2yJWxy1x
Брови. Архитектура бровей. Окрашивание бровей. https://www.youtube.com/playli....st?list=PLOFI1Q2RpVU
Депиляция воском. Шугаринг. https://www.youtube.com/playli....st?list=PLdg2yJWxy1x
#евалорманброви #Ева_лорман #бровист
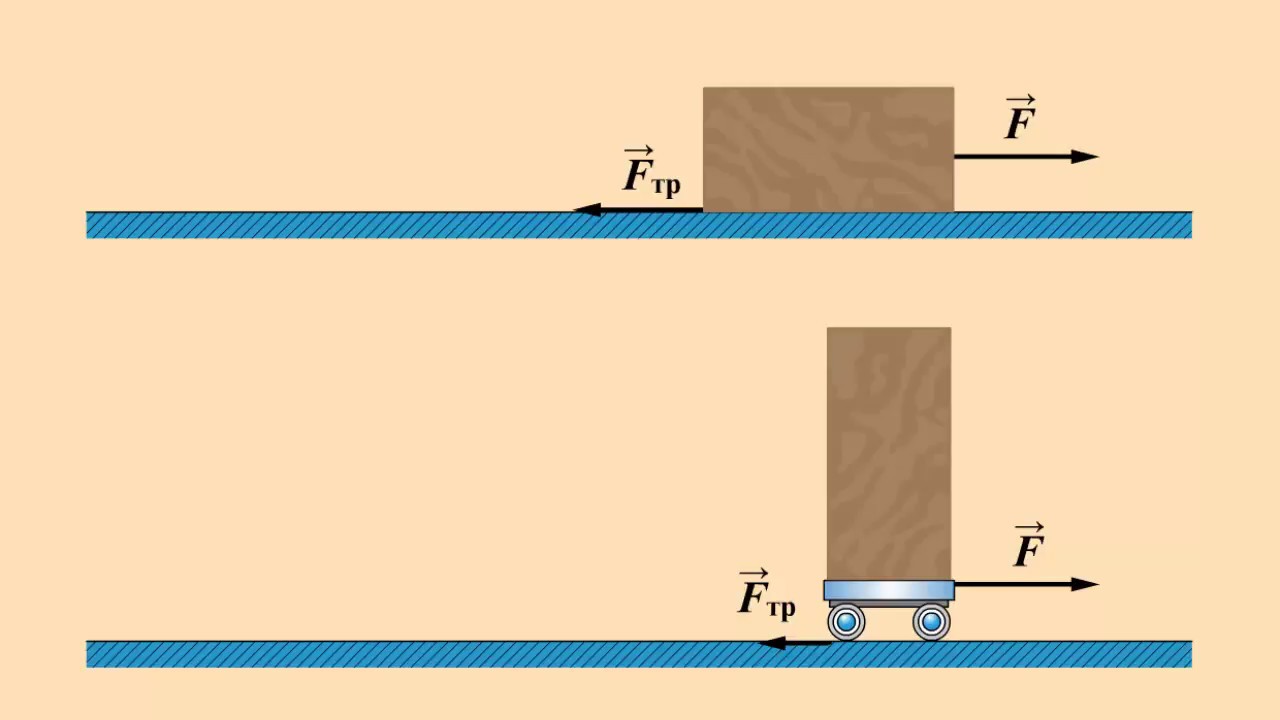
Существуют различные виды трения.
Обычно говорят о трении скольжения, трение качения, трение покоя.
На брусок движущийся по поверхности стола, действует сила трения, возникающая между соприкасающимися поверхностями.
Эту силу принято называть силой трения скольжения.
Если поставить брусок на тележку и привести ее в движении, то трения возникает между вращающимися колесами тележки и поверхностью стола.
И это уже будет трение качения.
Измерив силу трения качения мы можем убедиться, что она гораздо меньше силы трения скольжения.
Если подействовать на брусок силы недостаточной чтобы сдвинуть его с места, то на брусок будет действовать сила трения покоя, равная по модулю действующей силе, но направленная противоположно ей.
Урок на тему "Различные виды трения":
https://wkojla.com/razlichnye-vidy-trenija/
Урок физики 7 класс из темы "Сила трения"
За учебником Физика 7 класс Перышкин А. В.
Facebook- http://facebook.com/kazanjianm
Twitter- http://twitter.com/kazanjianm
Website- http://merrillk.com
Supplies I Use- http://merrillk.com/?sid=135&idpage=supplies_i_use
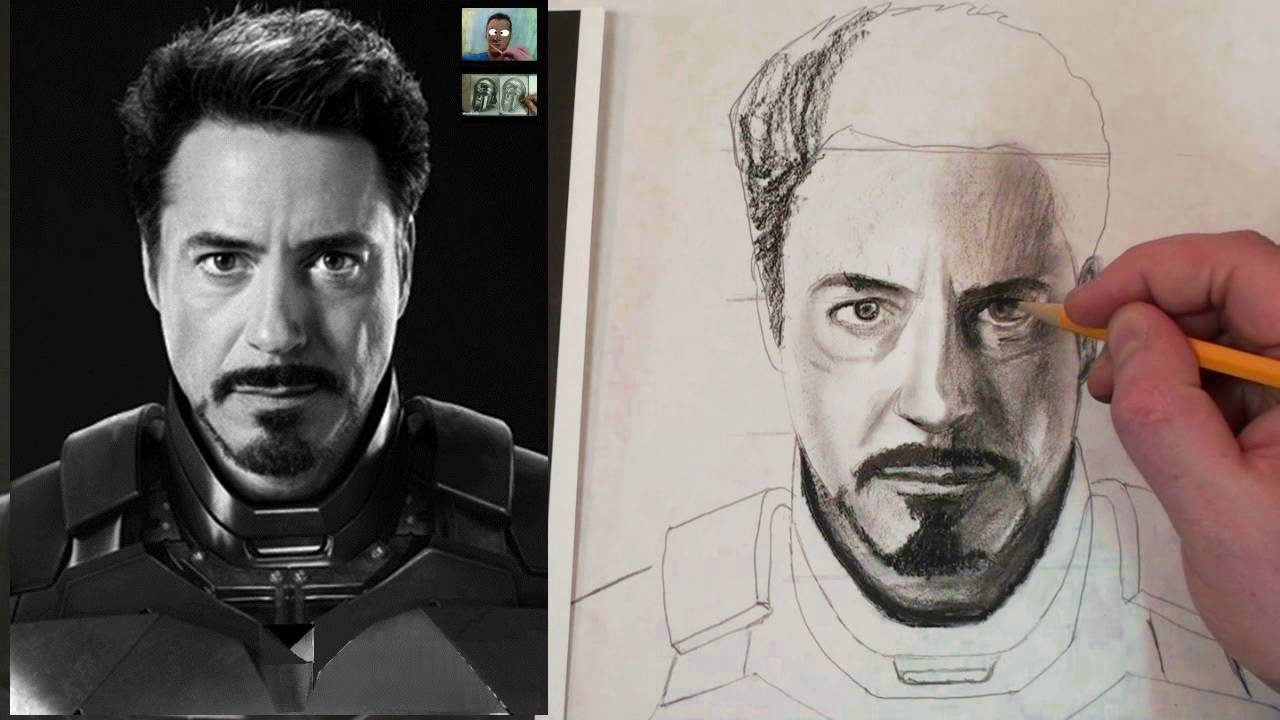
Last week, my audience voted for the tutorial that they wanted on my Facebook page. And Iron Man was the most popular choice. Since this tutorial was directly chosen by my viewers, I wanted to make it extra special. As always, I am going to give you step by step instruction on how to get a likeness of Iron Man. But after the steps, I am going to try to do something special. I am going to teach you how to incorporate charcoal and fixative in to a drawing so that you can layer it like a painting. This video will be a little longer than usual, but it will be packed with great information. Grab your pencils and some drawing paper. Lets begin.

A helpful trick with observational drawing is to see what you are drawing, as shapes. The basic shape of the human eye is similar to an almond shape. But this is only one of the several shapes that encompass the eye. Think of these shapes as puzzle pieces as you draw a persons eye in the near future. Remember that these shapes will slightly change based upon a persons facial expression. Today, I will show you step by step how to draw the human eye. Pause the video at any time if you need to. Here we go.
Step 1: Make a rainbow shape with a circle under it. The top of the circle should be partially blocked by the rainbow.
Step 2: Make the bottom lid. Notice that the lower part of the almond shape narrows as it approaches the tear duct on the inner corner of the eye.
Step 3: Make the pupil and leave an empty space in the middle for a reflection. The line above, is the eye lid folded back.
Step 4: Add the shape of the eyebrow.
Step 5: Add a light line below the eye to hint at the eye socket.
Step 6: Shade in the eyebrows. Try to notice that they are not one solid shape.
Step 7: Add the eyelashes. Try to notice that they are much thicker on the top eye lid.
Step 8: Add the final shading. The darkest areas should be directly under the eyebrow and under the eye.
I hope that this video helped you. If you still need help go to merrillk.com and download a print version of this lesson. This print version will give you step by step instruction through pictures and words. Once you are on Merrillk.com, click the gallery tag at the top of the page. Next, go to select an artwork at the top on the right, under the merrillk.com banner. Scroll down until you see Eye Worksheet 1, 2 or 3.
Un truco útil con el dibujo de observación es para ver lo que está dibujando, como las formas. La forma básica del ojo humano es similar a una forma de almendra. Pero esto es sólo una de las varias formas que abarcan los ojos. Estas formas de pensar como piezas como las personas que dibujar un ojo en el futuro próximo. Recuerde que estas formas se modifican levemente las personas sobre la base de una expresión facial. Hoy en día, yo te mostraré paso a paso cómo sacar el ojo humano. Pausa en el vídeo en cualquier momento si es necesario. Aquí vamos. Paso 1: Hacer un arco iris forma con un círculo en virtud del mismo. La parte superior del círculo debe ser parcialmente bloqueado por el arco iris. Paso 2: Hacer la tapa inferior. Observe que la parte inferior de la forma de almendra se reduce a medida que se acerca el conducto lagrimal en la esquina interior del ojo. Paso 3: Hacer que el alumno y dejar un espacio vacío en el centro de la reflexión. La línea anterior, se tapa los ojos recogidos. Paso 4: Añadir la forma de la ceja. Paso 5: Añadir una línea por debajo de la luz a los ojos en la pista de las órbitas. Paso 6: La sombra de las cejas. Trate de notar que no son una forma sólida. Paso 7: Añadir las pestañas. Trate de observar que son mucho más gruesa en el párpado superior. Paso 8: Añadir la última sombra. Las zonas más oscuras debe estar directamente bajo la ceja y en el marco del ojo. Espero que este video le ayudó. Si aún necesita ayuda para ir a merrillk.com y descargar una versión impresa de esta lección. Esta versión para imprimir le dará instrucciones paso a paso a través de imágenes y palabras. Una vez que esté en Merrillk.com, haga clic en la etiqueta de la galería en la parte superior de la página. A continuación, vaya a seleccionar una obra de arte en la parte superior de la derecha, bajo la bandera merrillk.com. Desplácese hacia abajo hasta que vea los ojos de trabajo 1, 2 o 3.
How to draw eye with teardrop? Amazing drawing a realistic eye. Awesome drawing step by step. This is a digital drawing. How to draw Corel Painter Essentials. Realistic Eye with teardrop. Cool drawing and painting. Computer graphics. Cool digital art.
Music: ANDY3, Teadrop
Follow me on Rumble https://rumble.com/register/vamosART/
Drawings created by Sandor Vamos. Copyright.

БРОВИ!!! КОРРЕКЦИЯ БРОВЕЙ В ТЕХНИКЕ ГРАНЕЙ! ОКРАШИВАНИЕ БРОВЕЙ ХНОЙ!!!
В этом ролике я показываю отработку коррекции бровей в Технике Граней "Бриллиант" на клиенте. Техника Граней позволяет создавать идеальную форму бровей. У многих людей брови от природы не симметричны, и при коррекции и окрашивании мастер подчеркивает их несимметричность. Либо старается исправить асимметрию бровей на глаз. Но глазомер часто подводит и многие мастера, да и кто сам себе делает коррекцию бровей, долго именно выводят форму и симметрию бровей. Я показываю самый простой способ - как сделать симметричные брови и также показываю - как окрашивать брови хной. Техника граней создается на основе построения 7 вертикальных граней и 3-4 горизонтальных. Строю грани при помощи ровной линейки, корректора и основ симметрии и гармонии. Понятие идеальной формы бровей у всех разные и нет четкого рисунка этой формы. Но природа уже все создала за нас. У бровиста есть определенная база - природная форма бровей. С ней надо уметь работать. Техника Граней позволяет создать идеальную форму бровей, опираясь в первую очередь на природную форму. При таком подходе к коррекции бровей мы можем точно быть уверены в создании идеальной формы бровей.
Если Вам понравилось видео ставьте лайки 👍, задавайте вопросы, делитесь с друзьями!.
Подписывайтесь на мои каналы
Ресницы, Брови, Ногти, Депиляция https://www.youtube.com/c/EvaLorman
Уроки парикмахеров https://www.youtube.com/c/EVALORMANTUTORIALS
ПОЛЕЗНЫЕ ВИДЕО
Прически. Идеи причесок. - https://www.youtube.com/playli....st?list=PLOFI1Q2RpVU
Волосы. Парикмахер - https://www.youtube.com/playli....st?list=PLOFI1Q2RpVU
Женские стрижки https://www.youtube.com/playli....st?list=PLOFI1Q2RpVU
Мужские стрижки. https://www.youtube.com/playli....st?list=PLOFI1Q2RpVU
Как покрасить волосы. Окрашивание волос. https://www.youtube.com/playli....st?list=PLOFI1Q2RpVU
Плетение кос https://www.youtube.com/playli....st?list=PLOFI1Q2RpVU
Наращивание ногтей - https://www.youtube.com/playli....st?list=PLdg2yJWxy1x
Ктийская роспись ногтей - https://www.youtube.com/playli....st?list=PLdg2yJWxy1x
Декоративная роспись ногтей - https://www.youtube.com/playli....st?list=PLOFI1Q2RpVU
Дизайн ногтей https://www.youtube.com/playli....st?list=PLdg2yJWxy1x
Как сделать ногти. https://www.youtube.com/playli....st?list=PLOFI1Q2RpVU
Наращивание ресниц. Ламинирование ресниц - https://www.youtube.com/playli....st?list=PLdg2yJWxy1x
Брови. Архитектура бровей. Окрашивание бровей. https://www.youtube.com/playli....st?list=PLOFI1Q2RpVU
Депиляция воском. Шугаринг. https://www.youtube.com/playli....st?list=PLdg2yJWxy1x
#евалорман #бровихной #брови

Молекулярная структура агрегатных состояний воды
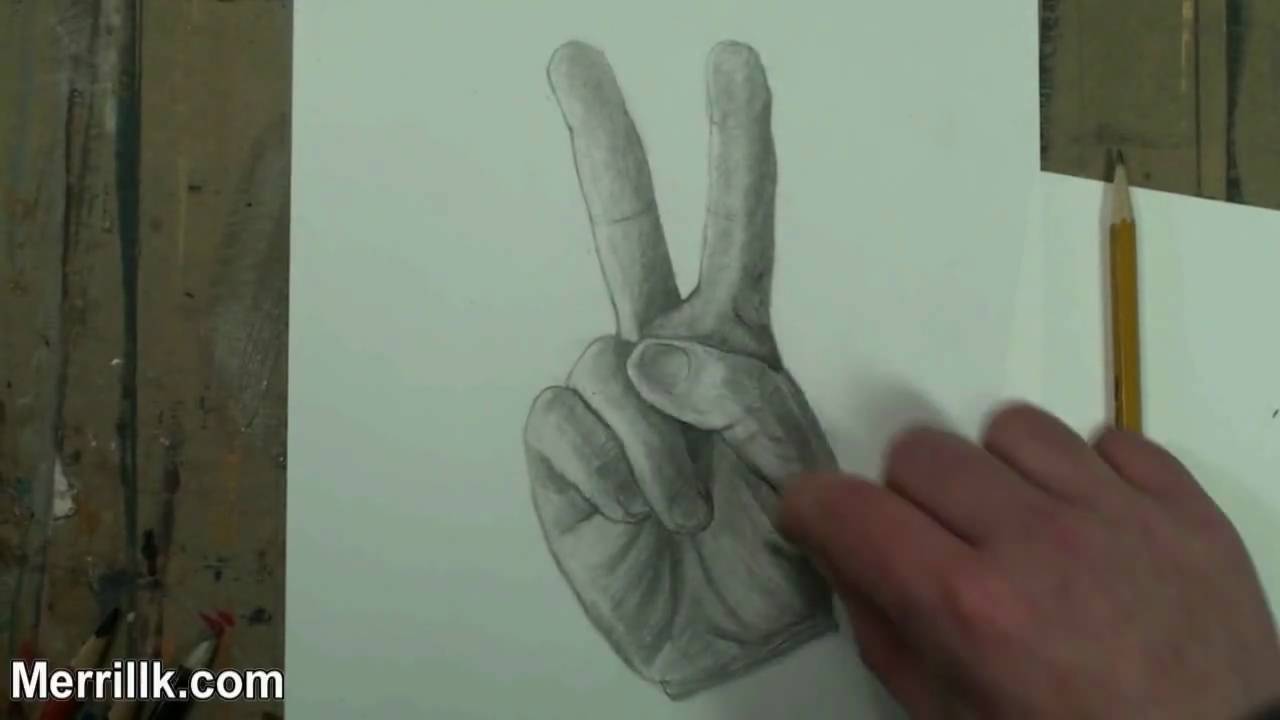
Link- http://merrillk.com/index.php?part=fineart&articles_id=6556&collection=114 This is the second in a series of twenty videos, that will show you how to draw the hand in various poses. This video will specifically focus on the peace sign hand gesture. I broke the process down in to simple steps and I went the "extra mile" to make sure that EVERYONE could do it, even if you havent had much experience with art. The link in the videos description will take you to a web page with step by step instructions and a PDF Book that you could download and print for free..... Lets get ready to draw
As a general recommendation, pause the video at the end of each step and look at the reference image often.
Step 1: Draw the two fingertip shapes. Notice that the fingertip on the left is at a different angle than the fingertip on the right.
Step 2: Add the next two shapes. Notice that they are slightly longer than the fingertip shapes.
Step 3: Draw the trapezoid shape in addition to the two shapes that complete the fingers. Notice that the bottoms of the fingers are slightly longer than the mid sections of the fingers.
Step 4: Step four is a tricky step! Be sure to spend some extra observation time. Notice that the thumb overlaps the trapezoid shape. Also notice that the thumb in this position, resembles a flying saucer tilting to the side.....YES...a flying saucer with a thumbnail in it.
Step 5: Draw the traingle shape. Notice that it is directly below the V shape from the two fingers. Also notice the tiny shape that I made tp the right side of the thumb.
Step 6: Draw the tilted U shape, to the left of the triangle. Also, draw in the fingernail.
Step 7: Observe the picture to close the U shape from step 6.
Step 8: Add in the shape that I just added. It will eventually be a part of the pinky finger.
Step 9: Add in the fingertip and fingernail to complete the shape for the pinky finger.
Step 10: Add the triangle shape next to the pinky finger. This will eventually be part of the palm.
Step 11: Add in the shape for the lower palm.
Step 12: Observe the line that was just added. It is similar to the bottom of a cup. It starts at the middle of the ring finger and ends at the thumb shape from Step 4.
Step 13: Take some extra time to observe the line that I just added. Then, complete the shape for the bottom of the palm
Step 14: Now, take a second to observe the lines that I ALMOST totally erased.
SHADING
Step 15: Build the tones up slowly. Start cross hatching with an HB (#2) pencil.
Step 16: (NOT SHOWN) I use a blending stump to smudge my hatches. And then I do more hatching atop of the smudges.
Step 17: The darkest parts will be the triangle in the center and the areas on the edges of the right side of the hand (and fingers....see this developed in the next few steps).
Step 18: At this point I am using my darker (in tone) 2B, 3B, 4B and 5B pencils. I also use the eraser (A LOT) to create highlights.
Step 19: I always try to finish a drawing by smoothing it out by using the pencil, the eraser and the blending stub (tortillion).
Step 20: Finished!
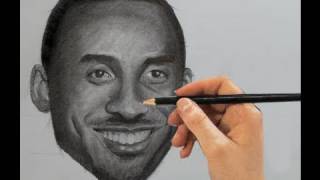
Link- http://merrillk.com/index.php?part=fineart&articles_id=5980&collection=114 Today, YOU are going to draw Kobe Bryant. It doesn't matter if you have prior art training or not. This video will break the process down in to simple steps so that anyone can do it. Grab a pencil and paper and let me show you what I mean. Remember to pause the video when you need to. Here we go.
Step 1: Draw an oval shape for Kobe's head. Notice that the bottom of the oval looks like an upside down trapezoid while the top of the oval shape is rounded.
Step 2: Make four horizontal lines. The top line MUST intersect the midway point of the oval shape. The lowest line should be placed at the bottom of the chin. After drawing the top and bottom lines, add two EVENLY SPACED lines between the top and bottom line. At the end of step two, you should have THREE evenly spaced segments between the top and bottom lines (refer to the picture).
Step 3: Observe the six dots that I added. The top four map out the corners of Kobe's eyes, while the bottom two map out the corners of his mouth. Lets look at their relationship. Notice that these dots are leaning towards the right side of the oval. This is due to the fact that Kobe's head is slightly turned. Also, take a second to notice the distance in between the two eyes is equal to one eye length. Finally, notice that the middle part of the space designated for each eye, will line up with the outer corners of the mouth. Now, draw in the six dots.
Step 4: Draw in the eyes....The upper eyelid as a rainbow shape and the bottom lid is close to a straight line. Notice that the iris is partially blocked by the upper eyelid.
Step 5: Encapsulate the eye in the oval shape that I just added.
Step 6: In this step, make the bottom of the nose by drawing three connected, upside down arches. Do not worry about the bridge of the nose yet. After you make the bottom of the nose, draw the shape for the upper lip...... The upper lip looks like a squished McDonalds logo (picture the golden arches squished).
Step 7: Add the bottom lip. It is similar to a banana shape. Notice that the bottom lip is thicker than the top lip. Now that we have the eyes and part of the mouth done, take a second to notice the perfect square that is formed when you connect the points from the middle of the eye and the corners of the mouth. Make adjustments if you do not have this perfect square.
Step 8: Draw in the two shapes between the eyes and nose. Like the bottom lip, these shapes are very similar to banana shapes. They will help us shade the nose later.
Step 9: Now add in the ears. Due to the fact that Kobe's head is turned; it appears that his left ear is smaller than his right. This, of course is not the case, but draw what you see.
Step 10: Draw in the lines, stemming from the chin, as well as Kobe's dimple lines.
Step 11: Draw in Kobe's hairline. Again, due to the turn of his head, you will see more hair on the right side.
Step 12: Erase the construction lines
Now, I will show you how to shade your drawing. Don't worry, this too, will be easy! You have three options to learn shading. Option one- click the link in the video description to go to a webpage that I made for this video..... on my website, merrillk.com. You will see a series of 17 steps with picture references and words. You will also see a free downloadable resource that you can print. Option two is to watch a shading demonstration in the second part of this video; and option three is a separate video; where I will demonstrate how I shaded Kobe at a slower pace. Please take advantage of all of these options. I am confident that they will help. Special thanks to Rico Shen for use of his photograph via Creative Commons. http://commons.wikimedia.org/w....iki/File:NikeTaipeiF

Subscribe to kazanjianm (Don't miss any new videos that I make)- http://www.youtube.com/subscri....ption_center?add_use
Facebook: Like me on Facebook to find out about live hangouts or to post your work!- http://facebook.com/kazanjianm
Twitter: I tweet! Do you? http://twitter.com/kazanjianm
My Website: http://merrillk.com
Art Supplies I Use in my Art Work- http://merrillk.com/?sid=135&idpage=supplies_i_use
YouTube Visual Arts Category Petition: http://www.change.org/petition....s/create-a-visual-ar
Step by Step Drawing Playlist: http://www.youtube.com/playlis....t?list=PLD6E34C7CD58
Intro (CC)- http://www.youtube.com/watch?v=Ov0A7dJmQ1E

Как покраситься самой. Окрашивание волос БЛОНД как у Ким Кардашьян!
Продолжаем изучать колористику! Показываю на себе, как надо окрашивать волосы блондинкам, после того, как месяц назад покрасили волосы в холодный, пепельный блонд! Я для примера привожу окрашивание волос Ким Кардашьян - у нее темные корни, плавно переходящие в чистый пепельный блонд. Чтоб добиться такого окрашивания, которое называется»Балаяж». Итак, корни отрасли и уже хорошо видна темная полоска отросших своих волос. Многие парикмахеры и просто «юзеры»:) (не профессионалы, окрашиваиющие себя сами) берут опять блонд порошок и начинают осветлять волосы, потом опять тонировать:( Но это не правильно, так как порошком злоупотреблять нельзя! Через месяц, после окрашивания порошком, надо наносить на отросшие корни ИМЕННО краску. При чем не осветляющую, а максимально схожую с уровнем тона своих волос. Я взяла 7.1 + 3% оксид 1:1. Свой уровень тона у меня 5.0. Мой выбор на 7.1 и 3% оксид пал не зря. Этот цвет называется пепельный русый. То есть он не осветляет, а немного поднимет мой уровень тона до 6, в результате чего мои отросшие корни будут не осветлены до коричневого. Если б я взяла 7.1 и 6% оксид, 6 б мои корни осветлила в любом случае, но это осветление было бы мне не к месту - на 6 я бы получила рыжие корни. Беее! Думаю, многие с этим сталкиваются и не понимают, почему так все происходит! А потому, что 6 осветляет волосы и получается рыжий! Не важно какая краска, главное 6! Поэтому в данном Балаяже не используется 6. Надеюсь, объяснила!:) После нанесения краски, в срочном порядке делаем растяжку расческой с редкими зубьями в течении 10 - 15 минут и быстро смываем под большим напором воды, чтоб не затемнить светлые волосы! Далее, сушим и укладываем волосы! И вуаля, окрашивание, как у Ким Кардашьян готово!
Если Вам понравилось видео ставьте лаки 👍, задавайте вопросы, пишите комментарии.
Подписывайтесь на мои каналы
Ресницы, брови, ногти, депиляция https://www.youtube.com/c/EvaLorman
Уроки парикмахеров https://www.youtube.com/c/EVALORMANTUTORIALS
#окращивание #блонд #evalorman

Капустный Пирог с Перепелиными Яйцами - ОЧЕНЬ ВКУСНЫЙ КАПУСТНЫЙ ПИРОГ (Cabbage Pie)
Новый для нас рецепт капустного пирога! Очень вкусное рассыпчатое тесто с любимой капустной начинкой!
Готовиться очень легко, пробуйте на здоровье!
Рецепт Ниже под Видео!!!
А Также Плейлисты с Другими Рецептами на Другой Кухне!
НА НАШЕМ КАНАЛЕ ЕСТЬ ЕЩЕ МНОГО ВКУСНЫХ РЕЦЕПТОВ. ПОДПИСЫВАЙТЕСЬ НА НАШ КАНАЛ!
https://www.youtube.com/channe....l/UC_lFSf37jhFtGYAeo
****************************************
Очень Рады Новым Зрителям! Подписывайтесь!!!
https://www.youtube.com/channe....l/UC_lFSf37jhFtGYAeo
*************************************************
Рецепт:
тесто :
мука 220 гр
сливочное масло 110 гр
соль щепотка
сметана 1-2 ч.лож
начинка:
капуста 800-900 гр
лук 1-2 шт
сыр (натертый) 100 гр
перепелиные яйца 10 шт
яйца 2 шт
сметана 150 гр
укроп
соль
черный перец
растительное масло 30 мл
************************************
Recipe:
dough:
flour 220 gr
butter 110 g
salt pinch
sour cream 1-2 tspolozh
filling:
cabbage 800-900 gr
onions 1-2 pcs.
cheese (grated) 100 gr
quail eggs 10 pcs
eggs 2 pieces
sour cream 150 gr
dill
salt
black pepper
vegetable oil 30 ml
ON OUR CHANNEL, THERE ARE STILL MUCH TASTY RECIPES. SUBSCRIBE TO OUR CHANNEL!
https://www.youtube.com/channe....l/UC_lFSf37jhFtGYAeo
Very Happy New Spectators! Subscribe !!!
https://www.youtube.com/channe....l/UC_lFSf37jhFtGYAeo
*******************************************
********************** НАШИ ПЛЕЙЛИСТЫ:
1) Готовим в первый раз! Готовим вместе!
https://www.youtube.com/playli....st?list=PL75EMnrcHAI
2) Готовим Тыкву!
https://www.youtube.com/playli....st?list=PL75EMnrcHAI
3) Постные и Вегетарианские блюда!
https://www.youtube.com/playli....st?list=PL75EMnrcHAI
4) Быстро, Просто и очень Вкусно!
https://www.youtube.com/playli....st?list=PL75EMnrcHAI
5) Очень сладко! Наши десерты и выпечка!
https://www.youtube.com/playli....st?list=PL75EMnrcHAI
6) Хлеб всему голова! Пробуем новые рецепты!
https://www.youtube.com/playli....st?list=PL75EMnrcHAI
7) Вкусные обзоры. Распаковка посылок!
https://www.youtube.com/playli....st?list=PL75EMnrcHAI
8) Коллекция праздничных салатов!
https://www.youtube.com/playli....st?list=PL75EMnrcHAI
9) Салаты без майонеза!
https://www.youtube.com/playli....st?list=PL75EMnrcHAI
10) Масленичная неделя! Лучшее!
https://www.youtube.com/playli....st?list=PL75EMnrcHAI
11) Бабушкины рецепты. Старорусские блюда на нашем столе!
https://www.youtube.com/playli....st?list=PL75EMnrcHAI
12) Консервация. Заготовки на зиму!
https://www.youtube.com/playli....st?list=PL75EMnrcHAI
13) Картофельная неделя!
https://www.youtube.com/playli....st?list=PL75EMnrcHAI
14) Очень вкусное мясо!
https://www.youtube.com/playli....st?list=PL75EMnrcHAI
15) Наше любимое! Разное.
https://www.youtube.com/playli....st?list=PL75EMnrcHAI
16) Пасхальные рецепты. Лучшее https://www.youtube.com/watch?v=wZUor4aULeM&list=PL75EMnrcHAI5u-VgO8EPhq5gYjuX2r1xM
17) Все Плейлисты: https://www.youtube.com/channe....l/UC_lFSf37jhFtGYAeo/playlists
***************************************
************** ПРИСОЕДИНЯЙТЕСЬ В СОЦ СЕТЯХ
Наша группа ВКонтакте: https://vk.com/other_kitchen
Наша страница в Facebook: https://www.facebook.com/profi....le.php?id=1000066779
Страничка в LiveInternet http://www.liveinternet.ru/use....rs/another_kitchen_l
Наша группа в Одноклассниках : https://ok.ru/drugaya.kuhnya
Twitter: https://twitter.com/Y_H_Life
Instagram: https://www.instagram.com/another_kitchen_/
**********************************************
По поводу Рекламы и Сотрудничества пишите на почту:
isaev.kitchen@gmail.com
Спасибо всем большое! Приятного аппетита! Следите за каналом!
Thank you all very much! Bon Appetit! Watch the channel!

Гидравлический пресс состоит из двух цилиндров A и B, соответственно с большим и малым поршнями C и D.
Поршень D цилиндре B, приводится в движение рукояткой e.
При движении поршня D вверх, открывается клапан 2 и в цилиндре B входит масло из сосуда F.
При движении поршня вниз клапан 2 закрывается и открывается клапан 1, и масло из цилиндра B перетекает в цилиндр A.
Большей поршень C поднимаясь вверх, перемещает прикрепленную к нему платформу K, на которую помещают обрабатываемый материал.
Материал при этом сдавливается между платформой K и неподвижной платформой G.
Урок на тему "Принцип работы гидравлического пресса":
https://wkojla.com/princip-rab....oty-gidravlicheskogo

БРОВИ! ИДЕАЛЬНАЯ ФОРМА БРОВЕЙ! ОКРАШИВАНИЕ БРОВЕЙ ХНОЙ!
Как создать идеальную форму бровей? Конечно же только в технике Граней! При коррекции бровей в технике граней "Бриллиант" любые брови можно подвести под правильную форму бровей. Техника Граней универсальна и является самой точной техникой коррекции бровей! В домашних условиях самому себе не так легко ее сделать, но если поставить перед собой цель, то можно добиться хорошего результата! Я когда делаю себе сама коррекцию бровей, то обязательно пользуюсь именно техникой граней! Так же в этом ролике я показываю окрашивание бровей хной!
Если Вам понравилось видео ставьте лайки 👍, задавайте вопросы, делитесь с друзьями!.
Подписывайтесь на мои каналы
Ресницы, Брови, Ногти, Депиляция https://www.youtube.com/c/EvaLorman
Уроки парикмахеров https://www.youtube.com/c/EVALORMANTUTORIALS
ПОЛЕЗНЫЕ ВИДЕО
Прически. Идеи причесок. - https://www.youtube.com/playli....st?list=PLOFI1Q2RpVU
Волосы. Парикмахер - https://www.youtube.com/playli....st?list=PLOFI1Q2RpVU
Женские стрижки https://www.youtube.com/playli....st?list=PLOFI1Q2RpVU
Мужские стрижки. https://www.youtube.com/playli....st?list=PLOFI1Q2RpVU
Как покрасить волосы. Окрашивание волос. https://www.youtube.com/playli....st?list=PLOFI1Q2RpVU
Плетение кос https://www.youtube.com/playli....st?list=PLOFI1Q2RpVU
Наращивание ногтей - https://www.youtube.com/playli....st?list=PLdg2yJWxy1x
Ктийская роспись ногтей - https://www.youtube.com/playli....st?list=PLdg2yJWxy1x
Декоративная роспись ногтей - https://www.youtube.com/playli....st?list=PLOFI1Q2RpVU
Дизайн ногтей https://www.youtube.com/playli....st?list=PLdg2yJWxy1x
Как сделать ногти. https://www.youtube.com/playli....st?list=PLOFI1Q2RpVU
Наращивание ресниц. Ламинирование ресниц - https://www.youtube.com/playli....st?list=PLdg2yJWxy1x
Брови. Архитектура бровей. Окрашивание бровей. https://www.youtube.com/playli....st?list=PLOFI1Q2RpVU
Депиляция воском. Шугаринг. https://www.youtube.com/playli....st?list=PLdg2yJWxy1x
#брови #ева_лорман #формабровей

Link- http://merrillk.com/?part=fineart&articles_id=11538&act=artist1&artist=69&collection=461
WE NEED A VISUAL ARTS CATEGORY ON YOUTUBE THREAD-http://www.google.com/support/forum/p/youtube/thread?tid=2a9806f929074cbd&hl=en&fid=2a9806f929074cbd0004b630ad37cc3e
Facebook- http://facebook.com/kazanjianm
Twitter- http://twitter.com/kazanjianm
Website- http://merrillk.com
(Merrill) Supplies I Use- http://www.jdoqocy.com/click-4....247664-805536?url=ht
This video will show you how to draw Amare Stoudemire's body. It is part 2 of 3.
How to draw Amare Stoudemire step by step knicks suns all star. How to draw basketball player amazing art drawing

This video is going to teach you how to draw a portrait of NBA All Star, Chris Paul Step by Step.
WE NEED A VISUAL ARTS CATEGORY ON YOUTUBE THREAD-http://www.google.com/support/forum/p/youtube/thread?tid=2a9806f929074cbd&hl=en&fid=2a9806f929074cbd0004b630ad37cc3e
Facebook- http://facebook.com/kazanjianm
Twitter- http://twitter.com/kazanjianm
Website- http://merrillk.com
(Merrill) Supplies I Use- http://www.jdoqocy.com/click-4....247664-805536?url=ht
And I promise that I am going to make this VERY EASY for you. What? You dont believe me? Well fine! I guess that you are one of those people that need proof. Click the Little Old Man on the screen to go to a playlist of peoples drawings made from my videos. Oh, so you're back.....And you believe me now. Good! Now you can grab a pencil and some drawing paper. You are about to draw Chris Paul. But first, a quick word from our channel mascot......
Step 1: Draw the shape that you see. Take some extra time to compare the height versus the width.
Step 2: Add the two ovals. Notice their overall size compared to the shape from step 1.
Step 3: Add the nose shape. Notice that it is triangular and the line on the bottom resembles a bird in flight.
Step 4: This step is small, but tricky. It is the upper lip and the moustache. Notice how close the moustache is to the nose and draw both shapes.
Step 5: I just added two shapes, but for now ignore the line in the middle and see the two shapes as one larger shape. The larger shape resembles an ear of corn. After you add the large shape, add the squiggly line in the middle. This line has 8 points pointing downwards.
Step 6: Now add the bottom lip and the soul patch below it. Notice the size difference compared to the top lip.
Step 7: Add the U shape for the bottom of the face.
Step 8: Add the ears and the hair. A tip for the ears is to notice their placement compared to other features of the face.
Step 9: Add the eyebrows. CP3 isnt quite Drake, but his eyebrows are thick.
Step 10: Add the two rainbow shapes under the eyebrows.
Step 11: This is the hardest step. A trick to make it easier is to observe that there is one eye length between each eye. Overall the shape of the eye is almond like and the top of the iris is blocked by the upper eye lid.
Step 12: Add the lines that you see in the ears.
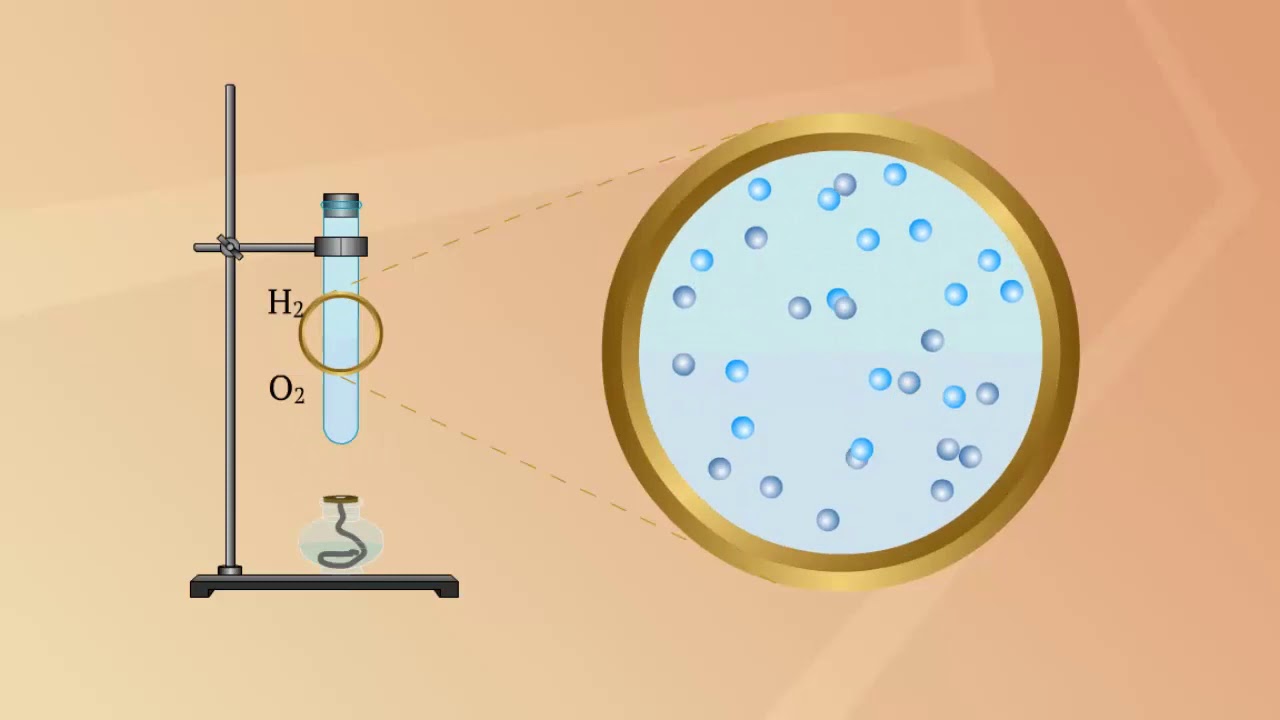
Диффузия в газах

Пирожки с сочной начинкой. Pies with fillings. Готовим на Другой Кухне https://www.youtube.com/channe....l/UC_lFSf37jhFtGYAeo пирожки с сочной начинкой! Оригинальная тема для утреннего завтрака или перекуса в течении дня. Да и вечернее чаепитие в кругу семьи и друзей с этими пирожками , будет просто на УРА! Готовить легко, повторить не сложно! подпишитесь на наш канал https://www.youtube.com/channe....l/UC_lFSf37jhFtGYAeo и будем готовить вместе! Новые видео 5-6 раз в неделю!
Ждем всех в гости!
Наша группа в ВКонтакте https://vk.com/other_kitchen
Наша группа в Одноклассниках https://ok.ru/drugaya.kuhnya
Мы в Инстаграм https://www.instagram.com/another_kitchen_/
Каталог коллекционных семян томатов и перцев https://vk.com/doc270601604_438264056?hash=575a540e71984c655a&dl=969091ba39b6d6e632
Для пирожков с сочной начинкой нам понадобится:
тесто;
мука 3 стакана
молоко (теплое) 1 стакан
дрожжи сух. 2 ч. лож
соль 1\2 ч. лож
масло растит. 2 ст. лож
паприка 1\2 ч. лож
сочная начинка;
куриная грудка 1 шт
лук 1 шт
сыр 40-50 гр
болгарский перец 1-2 шт
острый перец (халапеньо) 1 шт
соус томат 2 ч. лож
шашлычный соус 2 ч. лож
паприка, соль, перец по вкусу
масло растит. 2 ст. лож
яйцо для смазки
кунжут для украшения
Спасибо всем большое! Приятного аппетита! Следите за каналом!

Булочки с сыром и чесноком (быстрый рецепт) Другая Кухня https://www.youtube.com/channe....l/UC_lFSf37jhFtGYAeo пробует новые рецепты и делится со своими зрителями! Сегодня на очереди очень интересные и вкусные булочки с сыром и чесноком! Это быстрый рецепт, для быстрого хлеба! Приглашаем всех зрителей собрать коллекцию рецептов хлеба, пишите в комментариях! На нашем канале новые видео 5-6 раз в неделю! Подпишись https://www.youtube.com/channe....l/UC_lFSf37jhFtGYAeo и будем готовить вместе!
Ждем всех в гости! К чаю и праздничному столу!
Наша группа в Вконтакте https://vk.com/other_kitchen
Наша группа в Одноклассниках https://ok.ru/drugaya.kuhnya
Фото со съемок в Инстаграм https://www.instagram.com/another_kitchen_/
Каталог семян томатов и острых перцев https://vk.com/doc270601604_438264056?hash=575a540e71984c655a&dl=969091ba39b6d6e632
Оригинальный рецепт:
не большая опара
дрожжи 1 стол. ложка
сахар 1/2 чай. ложки
1/4 стакана теплой воды
тесто
мука 3 стакана (600 гр)
горячая вода 1 стакан
сахар 1 стол. лож.
соль 1/2 чай. лож.
начинка (помазка)
масло сливоч. 50 гр
чеснок 2 зубчика
сыр 150 гр
Спасибо всем большое! Приятного аппетита! Следите за каналом!

Обладает потенциальной энергией и любое деформированное тело.
Так растянутая дверная пружина сжимаясь приводит в движение дверь.
Деформированные тетива лука для стрельбы совершает работу, сообщает скорость стреле.
Следовательно, при деформации тетива также как и дверная пружина, запасает потенциальную энергию.
Урок физики 7 класс из темы ""Кинетическая и потенциальная энергия"
За учебником Физика 7 класс Перышкин А. В.