Лучшие

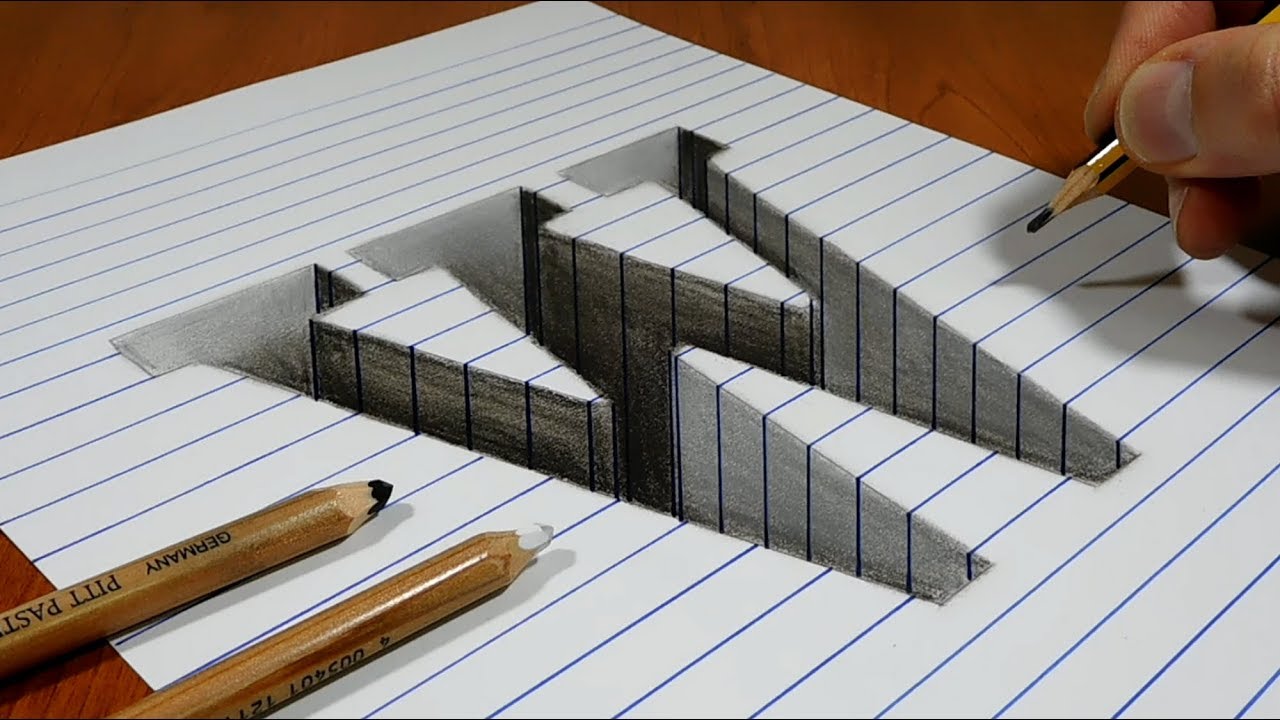
Cool Trick Art Drawing 3D on paper - Anamorphic illusion - Draw step by step.
Please Like and Subscribe to follow my work.
Follow me on Instagram: sonhoscomdimensao (https://www.instagram.com/sonh....oscomdimensao/?hl=pt
Truque Arte Desenho 3D em papel- Ilusão Ótica - Desenho passo a passo.
Não te esqueças do "Like" e subscreve o canal para seguires o meu trabalho.
Material used:
Paper A4 180g
Graphit and dry pastel pencil
Markers
Eraser
Materiais usados:
Papel A4 180g
Lápis de carvão e de pastel seco
Marcadores
Borracha

Cool Art Drawing on paper - Draw step by step.
Please Like and Subscribe to follow my work.
Follow me on Instagram: sonhoscomdimensao (https://www.instagram.com/sonh....oscomdimensao/?hl=pt
Arte Desenho em papel - Desenho passo a passo.
Não te esqueças do "Like" e subscreve o canal para seguires o meu trabalho.
Material used:
Paper A4 180g
Graphit and dry pastel pencil
Markers
Eraser
Materiais usados:
Papel A4 180g
Lápis de carvão e de pastel seco
Marcadores
Borracha

Cool Trick Art Drawing 3D on paper - Anamorphic illusion - Draw step by step.
Please Like and Subscribe to follow my work.
Truque Arte Desenho 3D em papel- Ilusão Ótica - Desenho passo a passo.
Não te esqueças do "Like" e subscreve o canal para seguires o meu trabalho.
Material used:
Paper A4 180g
Graphit and dry pastel pencil
Black markers
Eraser
Materiais usados:
Papel A4 180g
Lápis de carvão e de pastel seco
Marcadores pretos
Borracha

Cool Trick Art Drawing 3D on paper - Anamorphic illusion - Draw step by step.
Please Like and Subscribe to follow my work.
Truque Arte Desenho 3D em papel- Ilusão Ótica - Desenho passo a passo.
Não te esqueças do "Like" e subscreve o canal para seguires o meu trabalho.
Material used:
Paper A4 180g
Graphit and dry pastel pencil
Markers
Eraser
Materiais usados:
Papel A4 180g
Lápis de carvão e de pastel seco
Marcadores
Borracha

Cool Trick Art Drawing 3D on paper - Anamorphic illusion - Draw step by step.
Please Like and Subscribe to follow my work.
Follow me on Instagram: sonhoscomdimensao (https://www.instagram.com/sonh....oscomdimensao/?hl=pt
Truque Arte Desenho 3D em papel- Ilusão Ótica - Desenho passo a passo.
Não te esqueças do "Like" e subscreve o canal para seguires o meu trabalho.
Material used:
Paper A4 180g
Graphit and dry pastel pencil
Markers
Eraser
Materiais usados:
Papel A4 180g
Lápis de carvão e de pastel seco
Marcadores
Borracha

Cool Art Drawing on paper - Draw step by step.
Please Like and Subscribe to follow my work.
Follow me on Instagram: sonhoscomdimensao (https://www.instagram.com/sonh....oscomdimensao/?hl=pt
Arte Desenho em papel - Desenho passo a passo.
Não te esqueças do "Like" e subscreve o canal para seguires o meu trabalho.
Material used:
Paper A4 180g
Graphit and dry pastel pencil
Markers
Eraser
Materiais usados:
Papel A4 180g
Lápis de carvão e de pastel seco
Marcadores
Borracha

Cool Trick Art Drawing 3D on paper - Anamorphic illusion - Draw step by step.
Please Like and Subscribe to follow my work.
Truque Arte Desenho 3D em papel- Ilusão Ótica - Desenho passo a passo.
Não te esqueças do "Like" e subscreve o canal para seguires o meu trabalho.
Material used:
Paper A4 180g
Graphit and dry pastel pencil
Markers
Eraser
Materiais usados:
Papel A4 180g
Lápis de carvão e de pastel seco
Marcadores
Borracha

Cool Trick Art Drawing 3D on paper - Anamorphic illusion - Draw step by step.
Please Like and Subscribe to follow my work.
Follow me on Instagram: sonhoscomdimensao (https://www.instagram.com/sonh....oscomdimensao/?hl=pt
Truque Arte Desenho 3D em papel- Ilusão Ótica - Desenho passo a passo.
Não te esqueças do "Like" e subscreve o canal para seguires o meu trabalho.
Material used:
Paper A4 180g
Graphit and dry pastel pencil
Markers
Eraser
Materiais usados:
Papel A4 180g
Lápis de carvão e de pastel seco
Marcadores
Borracha

I get back Into OIL PASTELS!! This is what I am really known for on YouTube. In this video I show you how to draw a simple landscape scene using a simple sketch then going over it with oil pastel to add color and vibrance to the piece.
=========================================================
Follow me!
Facebook: http://www.facebook.com/tylersartshack
Twitter: https://twitter.com/#!/TylersArtShack
Google+: https://plus.google.com/115405....344518849808905/post
=======================================================
In this drawing, I started off with a very rough pencil sketch using an HB pencil. I roughly sketched out everything that I wanted in the picture with minimal detail. So for the mountains the the background, I just drew simple outlines for them showing very small details that I would fill in later with oil pastel. The beach line was similar to this as well, I only scribbled in a few lines showing the movement and flow.
Once I had a very basic sketch placing all the objects to my liking I then broke out the oil pastel. When it comes to landscapes, I almost always start with the sky because it is the furthest object in the background and all other objects are usually placed over it. I started with the bottom of the sky nearest the mountains and made the sky with a very light blue color and made it darker as it went up. I also left space open for clouds. I added in white oil pastel even though the paper was white because it still makes a difference and makes them look more puffy. I then added some blue and tan into the clouds to add a bit of warmth and definition to them.
Moving down the landscape the next object that was worked on was the mountains. I wanted them to really feel like they were being pushed into the background so I added a lot of blue with them. Like I was saying the video, blue helps to add atmospheric perspective into the drawing helping to push them back and add depth to the picture.
After this I added a little bit of every color I used for the sky into the water. I wanted to keep the water very light in color as well. I did not want to have a very strong blue. I kept it light by adding in a lot of white and blending it horizontally with a blending stump.
After I got a lot of the water finished, I started to add in the foreground details. I added in some of the rocks that went into the water and the trees on the banks. I used a few shades of yellows and greens for the trees and just used a tapping movement with the oil pastel to make the leaves on the trees. This helped to add depth and show form.
all that was left was adding some minimal details to the rocks and adding in a tan color for the sand. After blending in the tan color, I took a warm brown and put that down where the water met the sand to give it a "wet" look. that brought the whole thing together.
This was a simple landscape drawing I did that hopefully a lot of you viewers can follow along with. If any of you plan to make a replication of this please be sure to share it with me by adding it as a video response to this video or by sharing on my facebook page.
I hope you all enjoyed this drawing as much as I did. Have a wonderful day!!!
Please leave some feedback! I will always respond!
Music I got form CC Mixters Website. It is a search engine for creative commons music.
The song in this video is called Time by Darkroom
Here is the Info!
"Time" by Darkroom (feat. SackJo22)
http://ccmixter.org/files/mactonite/29957
is licensed under a Creative Commons license:
http://creativecommons.org/licenses/by/3.0/

Facebook Fan Page Link http://www.facebook.com/pages/....Tylers-Art-Shack/181
Welcome back everybody. This is part 2 to how to draw a tree tutorial. Last video was the tree anatomy and the basics on just how to draw one. This video is going to focus on the detail process including the shading and form.
The sketch started out by just using cylinders and manipulating the shape of it. The shading process of the tree will be using some charcoal. The name of the charcoal is Generals. And ill be using hard medium and extra soft.
You need to establish where the light will be coming from to enable you to understand where the highlights and shadows will be on the tree. Where the light hits the tree will be very light and where the light doesn't hit the tree will be very dark.
The cylinders are only there to help you understand the basic shape of the tree. You leave the cylinder shape on the page and just shade over everything.
The branches and twigs takes some practice. You almost need to twist the pencil in your hand as you are drawing.
With the last parts of the drawing, you want to keep it irregular and unique to help to replicate what a realistic tree would look like in the real world. It really helps to go out and take some reference images or go on google to find images. It is always a plus to have an image next to you to always look back to when you are stuck or dont know where to draw in something.
This whole drawing took me just over 20 minutes or so.

Welcome back everyone to the start of my series on how to draw the mountains in the mist!
If you need a reference photo, try this one! http://sphotos-c.ak.fbcdn.net/....hphotos-ak-snc7/4793
Other Places to Find my Art
Facebook: http://www.facebook.com/tylersartshack
Twitter: https://twitter.com/#!/TylersArtShack
Google+: https://plus.google.com/115405....344518849808905/post
Deviant: http://tylersartshack.deviantart.com/
How to Draw Clouds:
In the video, I begin to show you my technique of how to draw clouds. This is something that I have come up with during my own struggles with drawing clouds. After a lot of practice, this is what the result of my cloud drawings have become. Now I can enjoy it even more because I can share it with everyone else. My method starts with just lightly sketching out where I want the clouds to be. After which I shade in with a 4B pencil in and around the areas making sure not to fill in the areas where I want the clouds to be.
Next step is to take a blending stump and blend out the whole shaded part of the sky to make it nice and smooth. Also use that blending stump to start to carry some of that shading into the bottoms of the clouds and fill in the greater part of them as well with shading.
Then take a kneaded eraser and press down with it and give it a bit of a twist on the tops of the clouds. It helps to give it that "wispy" look which helps to give it that illusion of depth. Keep doing this until all of your clouds have a nice overall appeal to them. After which all you really need to do is add in details inside the clouds which can also be done with a kneaded eraser in the same way the edges of the clouds were done.
Then all you need to do is take a fine tipped eraser and just add in some very small details here and there just to give it a bit more visual interest and then you are all set.
I hope you all enjoyed the video and thank you all for watching!
Music Info:
Artist: BOCrew
Song: Soul control
Music can be found on cc.mixter.org
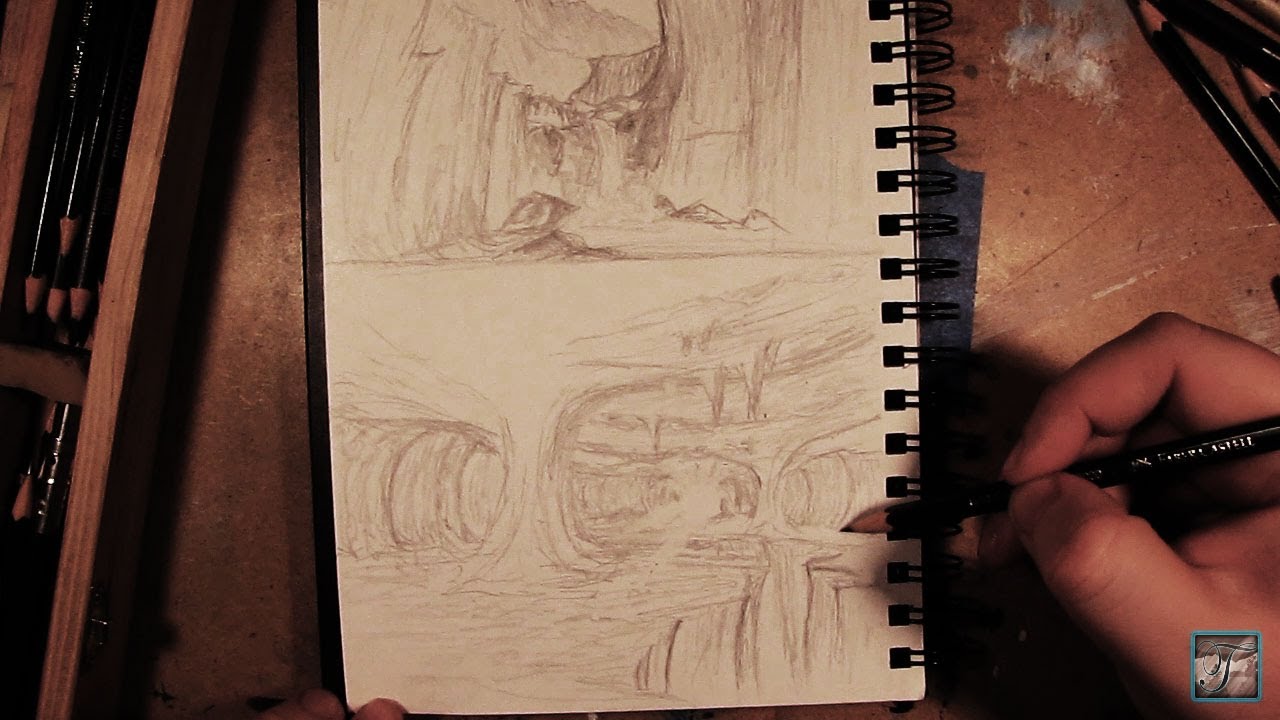
In this video, I show you how to make basic sketches for concept art. I go through all the steps that I would normally do to create different landscape scenes. These drawings that I do in the video are only done to a rough stage just to show the basics of creating form, composition, and tone values so that it can be used at a later date for reference. These types of sketches can also be done in a variety of different ways to come up with a final composition for the completed image.Enjoy!
Follow me!
Facebook: http://www.facebook.com/tylersartshack
Twitter: https://twitter.com/#!/TylersArtShack
Google+: https://plus.google.com/115405....344518849808905/post
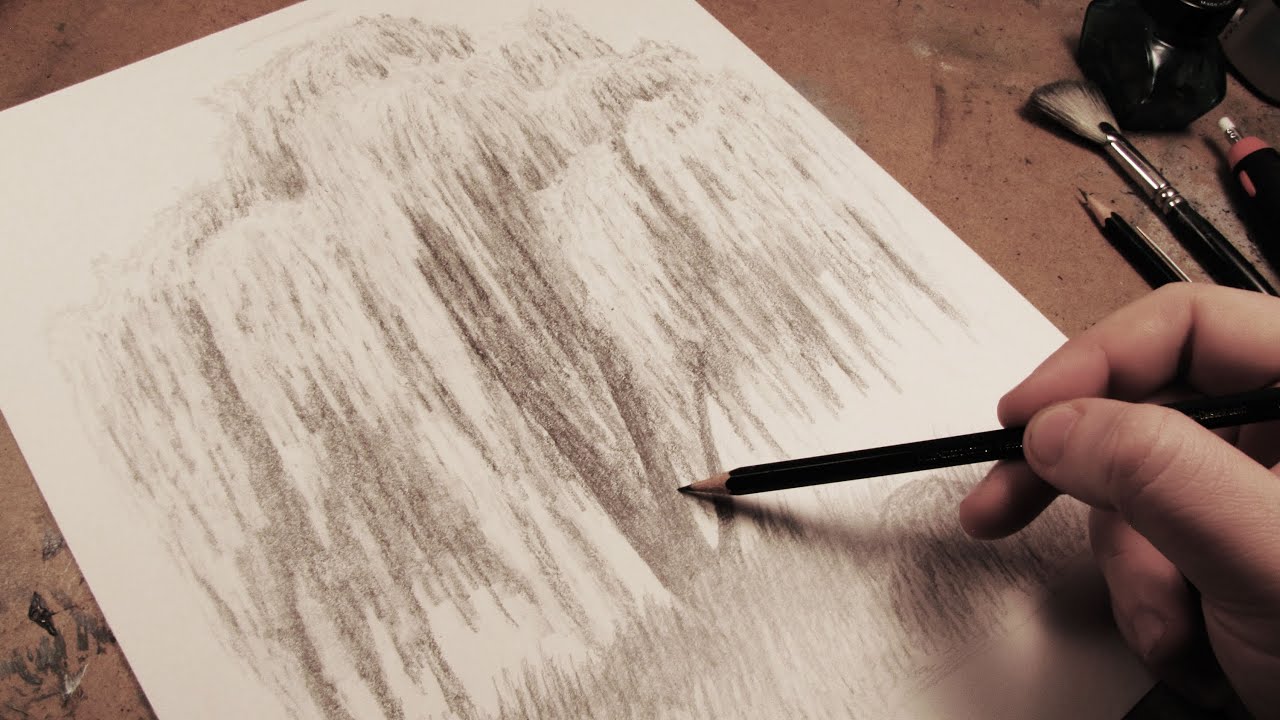
In this video, I show you the steps that I took to draw a complete weeping willow tree from start to finish.
Other Places to Find my Art
Facebook: http://www.facebook.com/tylersartshack
Twitter: https://twitter.com/#!/TylersArtShack
Google+: https://plus.google.com/115405....344518849808905/post
Deviant: http://tylersartshack.deviantart.com/
Welcome back everyone to another drawing tutorial! This time I took on the challenge of drawing a weeping willow tree after it has been heavily requested by my audience. So I was happy to give it a shot! I have to say though, that this was one of the more complicated drawings that I have done just because of the repetitive details. But I really did enjoy doing this one especially in the end result. I thought It came out well. So I hope you all enjoy this one as well!
Music Info:
Artist: DoKashiteru
Song:Echo
Music can be found on cc.mixter.org
