Лучшие

MORE EARLY ARTWORK! http://www.youtube.com/watch?v=yjVkBzKYQy4
SUBSCRIBE: http://bit.ly/markcrilleySUBSCRIBE
All 4 "Brody's Ghost" books at Amazon: http://bit.ly/BRODYSGHOSTbooks
"Mastering Manga" book at Amazon: http://bit.ly/MASTERINGMANGA
All 4 "Miki Falls" books at Amazon: http://bit.ly/MIKIFALLSbooks
Brody 1-Shot Comic at TFAW: http://bit.ly/BRODYoneshot
OFFICIAL CRILLEY PLAYLIST: http://bit.ly/CRILLEYPLAYLIST
All of my books are available through your local bookstore-- Ask them to special order if they don't have my books on the shelf. Thanks for your support!! ~Mark
FACEBOOK: http://www.facebook.com/markcrilleyOFFICIAL
TWITTER: http://www.twitter.com/markcrilley
All music created in GarageBand
Visit my channel for YouTube's #1 most-viewed drawing videos!

This video will teach you how to draw a realistic looking face with a happy (smile) expression. The "calm" eye is almond shaped but when a person is smiling, squeeze the two eyelids together. The "calm" eye is almond shaped but when a person is smiling, squeeze the two eyelids together.Notice that you can see the fold of the upper eyelid a little bit more. The eyebrows and forehead are in a relaxed position. To draw a smiling face successfully, you need to be able to make the cheeks seem more rounded....especially with the shadow below the cheek! Right now, I am adding a construction line for where the shading will go.( I am working from a reference picture, BTW.) To draw a smiling face successfully, you need to be able to make the cheeks seem more rounded....especially with the shadow below the cheek! Right now, I am adding a construction line for where the shading will go.( I am working from a reference picture, BTW.) SLOWLY build up the shading and be very patient! CONFESSION: I used non drawing paper for this drawing! Watch and see what it does when I erase! ARGH!!!! Yes there is a difference!OK couldn't wait! "Drawing paper" is more textured....or as artists say...."has more tooth"....watch the shading VANISH when I erase because the surface is as slippery as ICE! ARGH!!!! The eyebrows are NOT one solid tone. Try to observe the eyebrows of whoever you are drawing before shading them. The only exception is when heavy make up is applied.....Maybe its Maybelline! Shading is ALWAYS dependant upon LIGHT! There are no universal rules to applying tones to drawing.....because lighting conditions vary so much! REMEMBER THAT! In this case, the light came from above. This is most often the case. Notice the shadow that I am adding between the brow and eye. When drawing a smiling face, the area UNDER the eye is very important! The orbicularis oculi muscle (muscle around eye) contracts...The eye is ball shaped.....thus "eyeball"....our shading has to show that it is ROUNDED!The brush is a BIG help. It allows me to shade something delicately....which is needed, when drawing skin.....I use bristle AND soft tipped brushes.... both give slightly different effects. REMEMBER, when a person is smiling, you will (usually) only see their top row of teeth. ALSO, notice the corners of the mouth. Notice that the two sides of the mouth are shaded dark (because the teeth wrap around in a horseshoe shape).REMEMBER, when a person is smiling, you will (usually) only see their top row of teeth. Everyones smile (the shape of their mouth during a smile) is unique! OBSERVE OBSERVE OBSERVE! Draw in the lashes as triangular masses. Notice that the top eyelashes are a LOT longer and fuller than the bottom lashes. This is the case for everybody. Males, in general have shorter lashes than females...Maybe he's born with it...Maybe its TESTOSTERONE! If you are GOOD at line drawings and want to work on shading, make photocopies of your work so that you can make multiple attempts at shading....you will learn FAST! TRUST ME! CLICK HERE to go to my shading tutorial.....It gives you a link to a print out worksheet (so that you could shade along with me.) Remember SHADING is all about RELATIVITY! So compare the tones of different areas of your reference image or sitter. Be sure NOT to make the "smile line" look too much like a "line".....just like the eyebrows, it is NOT a solid shape! Right now I am using a tortillion (blending stump). It moves the graphite from the pencil more quickly and efficiently than the paint brush. Tortillions are also very good at making lines. They are simply stumps of paper shapes like pencils. The edges of the face are TRICKY.......YES, they need to be darker in tone to seem rounded but they cannot appear as a solid line, or else your drawing will not seem believable. NOTICE that I am using the technique of cross hatching (line next to line) to apply the tones....then I am smudging it....followed by another layer of hatching...or I could then create a highlight with the eraser. Be careful with the hairline. It is always a gradual transition of tone....Believe it or not, even if a person is BALD, the top of the head is rounded and requires a gradual gradation of tone! The areas around the eyes seemed dark before.....right?....See what happens when you add darker tones? Shading is ALL ABOUT RELATIVITY! I did the hair with a 9B graphite stick BTW! Try to notice the subtle shading that I am doing to round the forehead.....Remember that I want to make it seem serene, since the facial expression is a smile. I am going to darken the corners to make it seem rounded. QUICK! DONT LOOK AT THE SCREEN! Merrill is using his fingers! Tsk Tsk! I am only using them because of the "skating rink" that I am drawing on (I am using non drawing paper which does not have a textured surface
Canon Performed by Kevin Macleod (http://incompetech.com) ISRC: USUAN1100301

Want to learn to shade a drawing? This video will make it easy! I usually focus on breaking down images in to simple shapes, but this video is different. We chose a simple object (a seashell) and the focus of this video is learning to shade, step by step. Music by Kevin McLeod: Song- Local Forecast - Elevator http://incompetech.com/music/r....oyalty-free/index.ht
Subscribe to kazanjianm (Don't miss any new videos that I make)- http://www.youtube.com/subscri....ption_center?add_use
Facebook: Like me on Facebook to find out about live hangouts or to post your work!- http://facebook.com/kazanjianm
Twitter: I tweet! Do you? http://twitter.com/kazanjianm
My Website: http://merrillk.com
Art Supplies I Use in my Art Work- http://merrillk.com/?sid=135&idpage=supplies_i_use
YouTube Visual Arts Category Petition: http://www.change.org/petition....s/create-a-visual-ar
Step by Step Drawing Playlist: http://www.youtube.com/playlis....t?list=PLD6E34C7CD58

Welcome to part two of my triple tutorial, which will show you how to draw the ear at the three most common angles. Part two will specifically show you how to draw the ear at the side profile angle. I recommend that you pause the video at the end of each step and listen to the instructions. Lets begin.
Step 1- Make a closed C shape. The placement of the ear falls between the bottom of the eyebrows and the bottom of the nose. Be sure to notice that the angle of the ear follows the jawline. It is not straight up and down.
Step 2- Make the candy cane shape. Notice that the candy cane closely resembles a smaller C shape.
Step 3- Make a bubble letter C shape. Notice that the bottom of this shape is a triangle. How to draw ears. Drawing the ear made easy. classroom demonstration of how to draw the ear. parts of the ear shapes of the ear. earring draw wear earrings ears cool trick shading tones smudging drawing tips blending

Step by Step drawing instruction. Learn to draw John Lennon from the Beatles.
Link- http://merrillk.com/?part=fineart&articles_id=13483&act=artist1&artist=69&collection=461
WE NEED A VISUAL ARTS CATEGORY ON YOUTUBE THREAD-http://www.google.com/support/forum/p/youtube/thread?tid=2a9806f929074cbd&hl=en&fid=2a9806f929074cbd0004b630ad37cc3e
Facebook- http://facebook.com/kazanjianm
Twitter- http://twitter.com/kazanjianm
Website- http://merrillk.com
(Merrill) Supplies I Use- http://www.jdoqocy.com/click-4....247664-805536?url=ht
The Long and Winding Road of YouTube searches has brought you here and today, YOU are going to draw an excellent portrait of John Lennon with a little help from your friend Merrill of course. Under ideal circumstances I would want to hold your hand to directly assist you with this portrait; but since im a real Nowhere Man; your high speed internet connection and this step by step tutorial will have to do.
But Rest assured,we can work it out since this video is available to you on YouTube eight days a week! All that You will need ......Is Love, a pencil and workable listening skills. Ill take care of the rest. I recommend that you pause the video at the end of each step and hit the link in the video description to go to my cheat sheet for this video. It will definitely help you. Lets get started
Step 1: Draw the three shapes that you see. Notice that the three shapes resemble a childs drawing of a car.
Step 2: Make the two crescent moon shapes that I just added.
Step 3: Make the nose shape. Notice that the length of the nose is equal with the height of the forehead. Here is a close up
Step 4: Make the moustache and the mouth.
Step 5: Add the details that I just added to the eyes. Be sure to notice their placement within the frames of the glasses. Here is a close up.
Step 6: Observe and add the outline of John Lennon's face. Stop at the chin.
Step 7: Add the other side of John Lennon's face and then add the "P" shape.
Step 8: Add John's hair. But dont stress out if it's not perfect. Just let it be.

WE NEED A VISUAL ARTS CATEGORY ON YOUTUBE THREAD-http://www.google.com/support/forum/p/youtube/thread?tid=2a9806f929074cbd&hl=en&fid=2a9806f929074cbd0004b630ad37cc3e
Face Proportions For Portrait Drawing- Formula Hey welcome back everybody....Its Merrill, I recommend that you watch part 1 before you see part 2. Just click on the image if you havent seen part 1 yet.
This is a very important video for anyone who wants to learn portraiture. In this video, I will model the formula taught in part 1 to teach you how to draw a face from your memory. In order to make things easy to remember, I will demonstrate my process step by step. People who memorize these steps will be able to draw a human face from memory without a reference image. Lets get started.
Step 1: Draw an oval. Next put a horizontal line through the oval, slightly higher than the half way point. Then add four evenly spaced dots. These four dots will mark the inner and outer corners of each eye. Remember that there is one eye length in between the two eyes. It is imperative that the dots are evenly spaced. You will also need two bigger dots to mark the center of each eye.
Step 2: Now add a rectangular shape. The rectangle should be taller than it is wide. The corners of the rectangle should line up with the two dots that mark the center of each eye.
Step 3: Add the ears and eyebrows. The ears most often line up with the top of the eye and the bottom of the nose.
Step 4: Add the eye shape. Generalized eyes are almond shaped. You will see the bottom of the iris but not the top. Most eyes also have a second line for the eyelid above the eye.
Step 5: Add the nose. Notice that I did not add lines for the bridge of the nose. The only lines that exist on a nose are towards the bottom.
Step 6: Add the lips. Generally, the top lip is M shaped and smaller than the bottom one, which is bowl shaped. When the face is calm, the corners of the mouth usually does not line up with the middle of the eye.
Step 7: Add hair. Be creative.In this experiment, I have taken the most common formulas for facial proportion and tested them on a group of people in a similar pose. I used a computer program to help me take accurate measurements. I made sure that my control group was comprised of both males and females and were of many different races.
So lets get started with a very common proportion rule. The question is- Is it one eye length between each eye? The answer, as you can see, is yes. But this was the only rule that I found to be universally correct.
Lets stick with the eyes for question 2. It is often stated that it is five eye lengths across the face. It turns out that for 9 of the 10 people that I tested, that rule is incorrect. I found that if you included the width of the ear on to the face, then that rule would be closer to true, but definitely not universal. Of the control group, only one person, had a fit, so we can conclude that this proportion does exist, but it does not fit the majority of people and thus, shouldn't be part of a drawing formula.
I recently saw on the internet that the outer corners of the nose, should line up with the inner corners of the eye. Only one of 10 people that I tested proved that proportion to be true. There were also two people who came close. Once again, we can conclude that this proportion does exist, but it does not fit the majority of people and thus, shouldn't be part of a drawing formula. Most often, the outer nose lined up where the tear ducts met the white of the eye. For the record, I hope that the lady in the bottom left never catches a cold.
Question four asks: Does the pupil and iris line up with the corners of the mouth when the face is calm? I will warn you that this was the most difficult to answer, because the mouth is the most variable feature of the face. The shape slightly differs from person to person and it moves a lot. I found that only two people had eyes and mouths which lined up, but, everybody except the gentleman on the top left was extremely close. So, despite the results, I would include this measurement for a general face proportion formula, but I would also be sure to observe the person who I am drawing to get my answer. It is also important to note that 8 of the 10 peoples mouths fit between the lines drawn down from the middle of each eye.
Since question five is related to the placement of the ears, I changed a few of the photos in the control group. In order to gauge this, I had to be able to see the ears clearly. Most portrait formulas state that the ears go from the top of the eye to the bottom of the nose. This turned out to be a pretty accurate statement. Question six is directly related to question five and asks whether the nose and the ears are generally the same size. Although there were only two exact measurements, every other person was very close in measurement. So we can conclude that it is Accurate to say that the ear generally

Gelatine Pink Rabbit: 44°14'38.11"N 7°46'9.40"E https://www.youtube.com/watch?v=QXv8xRqoZbc
Rachel Nevada KFC- 37°38'47.03"N 115°45'0.72"W
https://www.youtube.com/watch?v=fsH4gws35ro
Spiral Jetty, Great Salt Lake Utah
https://www.youtube.com/watch?v=vCfm95GyZt4
World Islands Dubai, United Arab Emirates
https://www.youtube.com/watch?v=7eUcRjo9Yv4
Roden Crater (James Turrell)
https://www.youtube.com/watch?v=nPI65cEXbXI
Blog post- http://www.damncoolpictures.co....m/2010/07/40-most-bi
Do you know what there is a pink bunny visible from outer space? Well I did! Let me show you what I mean. After I read about this pink bunny and started navigating Google Earth, I began to wonder.........What else is visible in the Google Earth Art Gallery? In this video you will find some of the coolest artwork, visible from outer space. Some of these artworks have videos made about them already, and I will put the links in the upper right hand corner of the video player. I have barely scratched the surface of what is out there, so if you know of something cool. Put its Geo tag in the comments so others can find it. The geo tags of everything mentioned in this video are in the video description.

A very bi-partisan artwork. Put your political differences aside and watch artist Merrill Kazanjian merge the faces of our last four Presidents (Barack Obama, George W. Bush, Bill Clinton, George H.W. Bush. A presidential portrait this is not- it sets the precedent for merging presidents- not ideologically- but aesthetically. I started out by creating a collage / photomontage with digital cut outs and combining them with Photoshop CS3 and Paint Shop Pro 8. Next, I printed on a medium format printer (13 x 17 inches). Next I added a layer of color pencils (prismacolor) and markers (AD and prisma) to fill in the gaps and tie everything together. Finally, I added a layer of oil paint to make it look life like. I added the body of Richard Nixon in his iconic peace pose and ironically the face wound up looking a little bit like a young Nixon (I did not intend this). I call the method that I use, tradigital art. It merges traditional art (2D drawing and painting) with digital possibilities (computer art and digital photography). My website is http://merrillk.com

FB Page- http://facebook.com/kazanjianm
Twitter- http://twitter.com/kazanjianm
Supplies I Use- http://merrillk.com/?sid=135&idpage=supplies_i_use
This video will teach you how to draw Batman from the popular Dark Knight series. This video is made for beginner to intermediate artists who wish to hone their skills in creating pencil drawings from direct observation. After watching this video, you will be able to understand how to break images down in to shapes. The techniques that I use here will work for any DC superhero. I focus on the portrait (Batman's face) in this video.
We NEED a Visual Arts Category on YouTube! SIGN OUR PETITION HERE- http://www.change.org/petition....s/create-a-visual-ar
Please contribute a video to our playlist HERE- http://www.youtube.com/playlis....t?list=PLEA626A08B26

WE NEED A VISUAL ARTS CATEGORY ON YOUTUBE THREAD-http://www.google.com/support/forum/p/youtube/thread?tid=2a9806f929074cbd&hl=en&fid=2a9806f929074cbd0004b630ad37cc3e
Facebook- http://facebook.com/kazanjianm
Twitter- http://twitter.com/kazanjianm
Website- http://merrillk.com
(Merrill) Supplies I Use- http://www.jdoqocy.com/click-4....247664-805536?url=ht
Today, I am going to give you step by step instruction to help you draw the male upper body. All you will need are drawing tools and some tenacity. Be sure to pause the video at the end of each step and observe each reference image that I give you. After we get through the steps, I will guide you through the shading process. Many people who have never drawn before have had a lot of success with my step by step videos.....and you will too. Lets begin.
Step 1.) Draw the shape that you see. Notice that it is curved at the bottom. Also be sure to notice the W shape at the top. Make sure that you notice that the left part of the W is smaller than the part on the right.
Step 2.) Lengthen the W to form the chest muscles. Also add the shadow lines below each chest muscle.
Step 3.) Step three is a tricky step. Add the line to complete the shape for the arm and shoulders. Take extra time to observe during this step.
Step 4.) Complete the arms. Notice that each upper arm is wider than the lower arm but both parts are rounded in shape.
Steps 5,6,7,8 are all smaller details that I added for shadows. Do not stress out over these steps. Expect your placement to be close rather than perfect. In other words, try to place them as accurately as possible but know that they do not have to be placed perfectly for you to have a successful drawing.

Hint number 1 is to see things as shapes. I like to analogize drawing with assembling a jigsaw puzzle because in both you look for shapes to fit together Hint number 2 is to pay close attention to the edges of what you are drawing. Light and shadows can do funny things and in almost anything that you draw you will see a disparity between the qualities of each edge. Hint number three is to develop your drawing like a Polaroid photograph. Polaroid was the company that innovated instant photography. After pushing the shutter button the photograph would come out of the camera and develop before your eyes. What I want you to know about this is that every part of the photo would develop at the same rate and that is how I want you to try to draw next time. In other words, move the drawing tool around, dont get stuck in a favorite spot. Alright, lets slow it down. What you are seeing me do here is pay close attention to the form and the proportions. In other words, I am comparing the sizes of the different shapes and making sure that the placement of each line is correct. I am using vine charcoal a HB pencil and an eraser. I started out with the vine charcoal because it is easy to erase and move around. You will see later in this video that after I am satisfied with the placement of the charcoal, I will hatch over it with a pencil to keep it undisturbed. I am also trying to be aware of the edges of my shapes and I am especially cognizant of the highlight on the top because that will require me shading the areas around it and using the white of the page as a representation of the strong light. Now when I look back at my reference, I notice that the tone of the background is much darker than the white of the page. I use the side of the charcoal to darken the mid tone of my drawing. This step will make it easy to draw in the highlights with an eraser a little bit later. Now I am folding a piece of paper towel to smudge in the charcoal. You will get a very similar result with a blending stump (also known as a tortillion) but the towel will smudge the charcoal more quickly. To be perfectly honest, many teachers that I have had have told me not to use a blending stump, fingers or anything that comes in to contact with the surface of the paper. I partially agree. Oil from fingers when combined with pencil or charcoal leaves a stain that is tough to work around. Notice that my hand is resting on a sheet of paper. Artists call these slip sheets, but it is just a sheet of computer paper. I like working with the blending stump and the paper and this process works for my needs. It would be dishonest if I changed my process for the sake of making a video. Before, I mentioned the term hatching. Hatching is the short name for the drawing technique of cross hatching. It is simply putting a series of lines next to one another with a drawing tool. These lines usually follow the shape of the object that is being drawn. Once I am done adding pencil marks, I take the blending stub to burnish over my hatch marks. This gives my drawing a more smudged look and possibly my former art teachers a heart attack. I like to smudge the pencil and charcoal because it also gives me a surface that is smooth in tone. Hatching can be layered and I usually stop using the blending stump after the second layer. I once did ten layers of hatching in a pencil drawing. Lets recap and take this to the end of part 1. My focus, over the course of any drawing that I do from observation, is to see a simple pattern of shapes on my reference and to accurately render these shapes, on to the piece of paper that I am drawing. After I get the shapes aligned correctly, I attempt to build up tones with charcoal and pencil. When I am building the tones, I am very aware of the nuances of the edges of each shape, because they are usually different. My focus is also on building the tones of my drawing in a similar manner to how a Polaroid photograph develops.
In part 2, I will teach you a way to add color to any pencil drawing. Thanks for watching the video and please let me know if this helped.
Link- http://merrillk.com/?part=fineart&articles_id=6935&act=artist1&artist=69&collection=114
Illustration markers are incredible tools for artists! They add color quickly and accurately without a time consuming set up or a messy clean up. They can be used alone or in combination with other artistic media. This tutorial will teach you what you need to know about illustration markers. You will learn how to use them as I demonstrate by drawing a basketball player. Lets Get Started with thos tutorial!
Lets start by giving you some background knowledge.
1a.) Brands- The most popular brands are Prismacolor, Copic , Ad Chartpak and Pantone. I will do a drawing demonstration of Ad Chartpak in this video.
1.) Markers- When you use illustration markers, think of yourself as a watercolor artist. Watercolor artists create their work with beautiful transparent colors. If you choose to try illustration markers, you will definitely be able to apply and make multiple layers of transparent color. But there is a difference......the ability to mix. The colors are pre mixed and they do not blend together like wet paint as you can see in this demonstration.
2.) Special Markers- There are two different types of special illustration markers; Blender markers and gray markers for tones. The blender marker is a little deceptive. It is simply a marker without color in it. It is comprised of the fluid that the marker is mixed in. When it is applied on paper, the colors will bleed together. Notice how the line in between the two colors has disappeared. You will see more examples of how to use the blender in my demonstration. The gray markers are used to build tones. They come is Warm and Cool chromas. The warm gray markers lean towards the warm orange half of the color wheel and the cool ones lean towards the cool blue half. As you saw in the previous section, we cant mix marker colors on a palette like paint, so these gray markers become extremely important. These markers give an illustrator the ability to add tones......and tones make an artwork interesting by giving it depth. As you can see, these markers have a range of tones from one to ten. Ten is the darkest tone and one is the lightest.
3.) Paper- In order to use Illustration Markers to their full capacity, you will need Bleedproof paper. It is specifically made for markers, and it prevents markers from running. Notice the difference in the amount of bleeding of the printer paper on the left, compared to the Bleedproof paper on the right.
4.) As a final point before you see the demonstration, I wanted to make you aware of an article that I wrote that goes in to depth about the nuances of illustration markers. I will recommend color palettes, compare brands and describe techniques for illustrators. It is a good resource for people who wish to learn about illustration or for any person who is in the market for illustration markers. I will leave a link in the video description.

WE NEED A VISUAL ARTS CATEGORY ON YOUTUBE THREAD-http://www.google.com/support/forum/p/youtube/thread?tid=2a9806f929074cbd&hl=en&fid=2a9806f929074cbd0004b630ad37cc3e
Facebook- http://facebook.com/kazanjianm
Twitter- http://twitter.com/kazanjianm
Website- http://merrillk.com
(Merrill) Supplies I Use- http://www.jdoqocy.com/click-4....247664-805536?url=ht
Today, you are going to learn how to draw a 250,000 dollar sports car that goes 0-60 faster than Fred Flintstone on Red Bull.......Wait a second....it has power windows....make that 260,000 dollars. All you have to do is follow my step my step instructions and watch the shading tutorial and youll be able to draw the Lamborghini Gallardo. Lets get started/
Step 1: Draw the three trapezoids that you see. Take extra time to observe their placement. Due to the rules of perspective the large trapezoid at the top is rounded at its top.
Step 2: Dont Freak out! Look closely, all I added was a half circle with other shapes inside. Notice that the half circle is slightly smaller than the large trapezoid shape from step 1.
Step 3: Now here is the hard one! First, notice that I closed the shape on the right side. Second, notice that I added a rectangular shape directly below the smaller trapezoids from step one. Take time to notice the placement of the shapes within the rectangle. Finally, notice the horseshoe shape in between and below the shapes added from steps 1 and 2.
Step 4: Add the front tires and the fancy thingey on the door. If you made it through step 3, step 4 will be a breeze.
Step 5: Complete the back end of the car from observation. Take some extra time to notice the details of the rims and wheels.

I am going to be using illustration markers, color pencils and oil paint. Just drop me a line if you have any questions
In step 1 I scanned and reprinted my original drawing- I do this for 2 reasons- 1.) If I mess up, I could just reprint it and 2.) marker and color pencil coexist better with printer ink than with graphite from a pencil.
Next I add a layer of the illustration markers. These markers are totally transparent and they enable me to add a layer of color and still be able to see the lines from my pencil drawing. These markers give the artist a similar effect to watercolor paint, but without the messy setup and clean up.. I am still following the Polaroid picture development analogy from the first video- in that I am adding color to all areas at an even pace and slowly building up the darker tones on the sides and bottom of the glass.
The color pencil is great at this point of the drawing, because it adds a translucent layer of color above the marker. In addition to that, color pencils are mixed with wax. The wax will be very handy in the next step when I add oil paint on top of the marker and color pencil. Working with color pencil also allows me to be very precise with my marks on the page. It can be very challenging to be as accurate with a paint brush. This step allows me to make my drawing more accurate and these clarifications will eventually be absorbed by the oil paint.
Now you are going to see me add three layers of oil paint to finish my drawing. I am using oil paint because I want to edit the colors of this composition and it is much easier to mix and match color with oil paint than it is with color pencil. It is also easier to apply large areas of color with a paintbrush rather than the tiny tip of a pencil. I did all of my editing in the last step and now I am just applying color, trying to notice the nuances of the edges of each shape on my reference. If I need to soften an edge I use a dry, soft brush and I pull the paint with that. The color pencil from the layer below is blending nicely with the paint.

Quick! Look in the mirror! I am hoping that you are smiling. If you are, you are seeing the Zygomaticus major, Zygomaticus minor and Risorius muscles working together to retract the corners of the mouth upwards and towards the back of your head. But, smiles are not just limited to the mouth. Your orbicularis oculi muscle has raised your cheeks and compressed your eyes.
Face proportions face anatomy head
Lets look at a smiling face and compare it with a straight face. Here are a few tips to remember. The forehead is very relaxed during a smile. The two eyelids get closer together and the top lid forms a less curved rainbow shape. The cheeks become pushed up like a mountain growing in height due to the movement of continental plates. In other words, the cheeks are literally pinched between the eye and the mouth, and this pushes the cheeks flesh away from the skull. There is little change to the nose.
There are common features to smiles. Notice how straight the top lip becomes and notice the trapezoid shape that forms above it. The corners of the mouth usually extend past the mid point of the eye. The eyebrows of most people remain neutral during a smile. Notice the symmetrical arcs that form which seem to connect the eyebrows to the folds in the cheek. Finally, notice that when people smile, the top row of teeth are often the only teeth, which are visible.
Now lets learn how to draw a smiling face. Please note that this is only the first of two videos which I plan to release on the topic. In this video, I will make eight cartoon like sketches. In video two will do a realistic two hour drawing. I hope that you will watch both videos, because they will give you a solid understanding of how to draw a smile. But, before the demo, we have an incoming message from the moon. Aw thanks, Little Old Man. It is OK to leave the whites of the eyes a little darker when drawing a smile! Trapezoid shape between the nose and upper lip. Slightly darker shadows around the eyes...especially if you are drawing an older person. This figure has eyes which seem totally shut (which is OK). Notice the strong line (arc) from the eyebrows to the folds in the cheek. Everything on the face can be a bit tighter. A smile tightens the skin like a face lift (with the exception of the neck). If the lighting calls for it, you can be more distinct with lines on the face. Notice the dark edges at the side of the mouth. These occur due to the rounded shape of the gums and teeth. Notice this in all of the figures so far. Drawing the head from three quarters (3/4) view.....General Tip: The eyes get foreshortened and the inner corners are slightly closer together. The trapezoid becomes more triangular. The rule about the mouth reaching past the middle of the eye becomes skewed. A more subtle smile. If the smile was more intense, his facial muscles would be more taut. Crows FeetT happen to older people when the eyes are taut!!!! CAW! The raising of the cheeks can affect the appearance of the jaw bone. (Mandible)
The song is called "Alien Restaurant" from Kevin MacLeod of Incompetech.com- a site recommended to youtube partners in the partner tutorial. The audio at the beginning is from Creative Commons Search and is listed in the public domain- http://blip.tv/file/2363588/. Some images are from creative commons search. For example the image of George Clooney- http://upload.wikimedia.org/wi....kipedia/commons/e/e9 The image of Beyonce- www.army.mil/.../army.mil-2007-08-30-154516.jpg "free online art lessons"

Really random??? YES! I was curious if I could turn chicklets gum from a stop motion object into a sculptural object. My last video was a tutorial on traditional painting....This one was as far from traditional painting as you could get. But I learned a lot doing it. For instance, you can layer gum like you layer paint and interestingly enough, gum gives an artist a medium that 1.) dries and solidifies 2.) can be used translucently or applied opaque (different thicknesses) 3.) can be layered 4.) GIVES ME A WICKED SUGAR RUSH!
Believe it or not, I want to experiment more with this medium. If you think about it, chewing gum's artistic possibilities lie somewhere between painting and sculpture. I had fun.....Now I have to burn the 1200 calories that I ingested!!!!! LOL -Merrill Kazanjian
anasazi armature sets set digital studio software clay star wars flash movies tips windows tools examples learn japanese paper puppet lighting cameras final cut frames per second stop frame animation claymation stop motion pro susannah shaw character 3d animation schools chewing gum clove jolt sugarless bubble yum gum dentyne gum beeman's gum wrigleys double bubble hubba bubba spearmint chicklets dentyne black jack orbit gum base how to make flavor thomas glee natural 5 big league chew clorets chewer chewing freshen up teaberry history bubblicious gum buster beechnut gum air waves gum blow gum freedent gum blowing gum peppermint gum cinnamon gum juicy fruit gum spruce gum bazooka bubble gum chicklets commercial cadbury gum nerds gum super bubble chewing gum removal
Realmente aleatorios??? ¡SÍ! Tenía curiosidad por si podría Chicklets goma de un objeto de stop motion en un objeto escultórico. Mi último video fue un tutorial sobre la pintura tradicional .... Esta fue tan lejos de la pintura tradicional, como usted puede obtener. Pero aprendí un montón haciéndolo. Por ejemplo, puede capa de goma como si la capa de pintura y, curiosamente, la goma le da a un artista de un medio que: 1.) Se seca y se solidifica 2.) Puede ser utilizado o aplicado translúcida, opaca (diferentes espesores) 3.) Puede ser capas 4. ) me da un WICKED SUGAR RUSH!
Lo creas o no, quiero experimentar más con este medio. Si lo piensas, masticar goma de mascar posibilidades artísticas de estar en algún lugar entre la pintura y la escultura. Me divertí mucho ..... Ahora tengo que grabar el 1200 calorías que ingiere !!!!! LOL-Merrill Kazanjian
órbita base del gato negro goma cómo hacer Thomas sabor alegría natural 5 grandes ligas mascar Clorets masticador masticar refrescar la historia Teaberry Bubblicious goma Buster Beechnut goma ondas goma goma golpe Freedent goma soplando goma goma de mascar de menta canela goma de mascar goma de mascar jugosa fruta abeto goma de chicle bazooka Chicklets comercial de Cadbury nerds Super Bubble Gum goma de mascar goma de mascar eliminación
Vraiment aléatoire??? OUI! J'étais curieux de savoir si je pouvais tourner chicklets la gomme d'un objet de stop motion dans un objet sculptural. Ma dernière vidéo est un tutoriel sur la peinture traditionnelle .... Celle-ci était aussi loin de la peinture classique comme vous avez pu obtenir. Mais j'ai beaucoup appris faire. Par exemple, vous pouvez la gomme sur les couches comme tu peins couche et chose intéressante, la gomme donne un artiste un support qui 1.) Dessèche et se solidifie 2.) Peut être utilisée ou appliquée translucently épaisseurs (opaque différentes) 3.) Peuvent être superposés 4. ) me donne un WICKED Sugar Rush!
Croyez-le ou non, je veux expérimenter plus avec ce médium. Si vous pensez cela, le chewing-gum possibilités artistiques se situent quelque part entre la peinture et la sculpture. J'ai eu du plaisir ..... Maintenant, je dois brûler les 1200 calories que j'ai ingéré !!!!! LOL-Merrill Kazanjian
Anasazi armature fixe ensemble de logiciels studio numérique star wars argile flash conseils films outils Windows exemples Apprendre le japonais caméras éclairage papier marionnette final cut frames par seconde frame stop motion animation claymation caractère de fin Susannah Shaw Pro 3D écoles d'animation du chewing-gum sans sucre gousse secousse bulle yum Gomme Dentyne gomme Beeman's Wrigleys Double Bubble Hubba Bubba chicklets menthe Dentyne Black Jack base orbite gomme comment faire thomas ligue saveur jubilation 5 naturels gros mâcher Clorets mâcheur de chewing rafraîchir Teaberry histoire gomme Bubblicious Buster faines gomme ondes Gomme coup gum Freedent soufflant gomme gomme à la menthe à la cannelle Juicy Fruit Gum gum gomme d'épinette bazooka bubble gum chicklets commercial de Cadbury nerds bubble gum gomme à mâcher le déménagement super-gum
Link- http://merrillk.com/?part=fineart&articles_id=13277&act=artist1&artist=69&collection=462
WE NEED A VISUAL ARTS CATEGORY ON YOUTUBE THREAD-http://www.google.com/support/forum/p/youtube/thread?tid=2a9806f929074cbd&hl=en&fid=2a9806f929074cbd0004b630ad37cc3e
Facebook- http://facebook.com/kazanjianm
Twitter- http://twitter.com/kazanjianm
Website- http://merrillk.com
(Merrill) Supplies I Use- http://www.jdoqocy.com/click-4....247664-805536?url=ht
It seems like just yesterday that the devilish and charming Captain Jack Sparrow and his merry band of misfits were wreaking havoc upon the open seas in "Pirates of the Caribbean: At World's End." Lucky for fans of the hugely successful franchise, Johnny Depp is back in Sparrow's pirate garb this weekend in "Pirates of the Caribbean: On Stranger Tides."
When MTV News caught up with Depp recently, we got to talking about one element missing from Captain Jack's unique existence: long-term relationships with any of the bevy of beautiful women that seem to constantly surround him, like "Stranger Tides" leading lady Penélope Cruz.
"I think if we did a scenario where it was Captain Jack really falling in love, it would most likely be a silent film. I think he would go completely catatonic and be unable to speak," Depp said. "He would probably sit there and quiver for an hour and a half."
Depp said a real relationship would "mess up the myth" of Jack Sparrow. "It would mess up the legend," he said. "Which I think is always working for it, to leave the legend behind."
Sparrow's apparent commitment phobia and other unexplained issues aside, Depp said having Cruz as his onscreen love interest/ sparring partner was a gift.
"[She's] one of the greatest gifts you could get," he said of Cruz. "She's so fiery and has such spirit and such talent. Also, besides that, she's a great friend," he added. "She's so funny and so capable of anything. You toss her a curve ball, or she tosses you one, she's ready for anything, and that's a really great and inspiring experience."

Link- http://merrillk.com/?part=fineart&articles_id=8446&act=artist1&artist=69&collection=114 George W. Bush.........Some people love him............(Applause) And others hate him......Kunst (Hipster Character)- "George Effing Bush I despise you"..." No child left behind took all of the art teaching jobs away and has adversely affected my hipster lifestyle." And the two sides seem to hate each other..........General Character: "Stealth Bomber, Put that hipster out of his misery". (Stealth Bomber flies over Williamsburg, Brooklyn) Kunst (Hipster)- I cant even afford to be a vegan anymore....(Boom)
George W. Bush: Thank you for the introduction-.....You're welcome George! Strong opinions can inspire powerful works of art, so for the remainder of this video, I am going to help you draw a portrait of the most controversial man in the world. I promise to leave my personal politics aside so that I can help you create a great drawing. It doesn't matter if you have ever studied art before. If you to follow the instructions, and take your time, you'll be amazed at the quality of your work.
Before we start, I recommend that you hit the link in the video description to download a step by step cheat sheet with pictures and text that will accompany the narration of this video.
Also, please subscribe to my channel if you haven't done so already. Just click on the Little Old Man in front of the Stealth Bomber..... Lets Begin.
Step 1.) Observe, then draw the shape that you see. This will be President Bush's forehead. Notice that the eyebrow region is similar to how a child draws a bird.
Step 2.) Observe, then put in the two shapes for Dubya's hair. Take your time and compare the size of each shape.
Step 3.) Its time to put in Dubya's peepers. Instead of just focusing on the eye, I put in the entire eye region.
Step 4.) In step four, I added the bottom of the nose. Take your time to notice the spacing between the eye shapes and the line for the nose.
Step 5.) Add the wrinkle lines to the side of the nose and President Bush's mouth. Notice that the region between the top lip and the bottom of the nose is trapezoidal. Also notice that the former President's top lip is extremely thin and that the bottom lip is only slightly thicker than the center part, where his teeth are.
Step 6.) Add the chin to your drawing. Also, notice the extra shadow line that I added.
Step 7.) Add the neck shape and the two ears. Don't stress too much about the shape of the neck, but know that most caricatures of the former President, portray him with big ears. Democrats and Republicans can both agree that Dubya has some prominent cartilage on the side of his head.
Step 8.) Add the teeth. Be sure to notice the strong shadow on the sides of the mouth but resist the urge to go too dark between each tooth.
Step 9.) Spend some extra time on step 9. Add in President Bush's eyes and eyebrows. His eyes seem smaller than the average person and there is slightly less space between them than most people. Also, be sure to notice that there is only a small amount of space between the eyes and eyebrows. Finally, add more detail than usual to the region under each eye.
The shading part covers proper ways to erase with a kneaded eraser and covers strategies for shading President Bush's face. President Bush was in his early sixties when the reference image was shot. Coincidentally, he has more wrinkles and areas of tone and gradation on his face (when compared to a person who is younger.....or injected with plastic LOL). He still has a lot of hair, but it is thinner and greyer than somebody who is younger. The hairline should be shaded as a gradual transition between the forehead and the hair. Darkest areas of his hair are the part, the upper temple region and the area above the ear. The President's Eyes are lighter in color, but still remain one of the darker tones on the face. His eyebrows are low and there is barely any space between the top of the eyes and the eyebrows. To add the actual tones, I use cross hatching and smudging with a tortillion and paintbrush (use a q-tip if you dont have either). To achieve the darker tones, I use a 4B and a 7B pencil. Most of the shading was done with a #2 (HB) Pencil. Use a slip sheet to prevent the oils from your hand from reaching the surface of the paper. how to drawn a man step by step
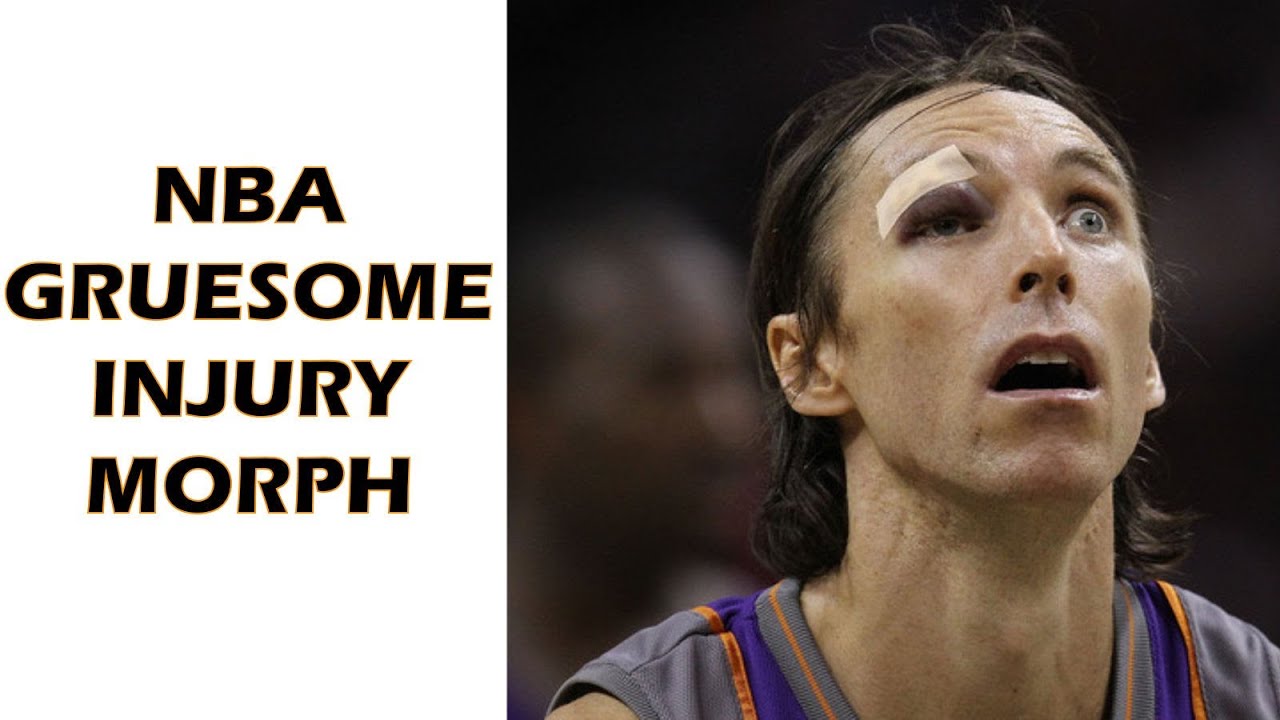
Manu Ginobilli breaks nose and wears crazy bandage- http://www.youtube.com/watch?v=NY3XmVsCJ44
Steve Nash snaps his nose back in to place and HORRIFIES Grant Hill- http://www.youtube.com/watch?v=o9-RaMsKH_Q
Subscribe to kazanjianm (Don't miss any new videos that I make)- http://www.youtube.com/subscri....ption_center?add_use
Andrew Bogut breaks his arms- http://www.youtube.com/watch?v=zRyU9HPjxlQ
Baron Davis injures knee- http://www.youtube.com/watch?v=vZc8811gpLk
Shaun Livingston tears his knee- http://www.dailymotion.com/vid....eo/x1hffs_shaun-livi
Allen Ray's eye pops out- http://www.youtube.com/watch?v=1GV34UbjFMY
Music- http://youtube.com/watch?v=WTWUh2yulbM
Facebook: Like me on Facebook to find out about live hangouts or to post your work!- http://facebook.com/kazanjianm
Twitter: I tweet! Do you? http://twitter.com/kazanjianm
My Website: http://merrillk.com
Art Supplies I Use in my Art Work- http://merrillk.com/?sid=135&idpage=supplies_i_use
YouTube Visual Arts Category Petition: http://www.change.org/petition....s/create-a-visual-ar
Step by Step Drawing Playlist: http://www.youtube.com/playlis....t?list=PLD6E34C7CD58
All music by Kevin MacLeod (Eastern Thought) http://incompetech.com
This is a very slow version of the shading that I did while drawing Bruce Lee. Be sure to watch parts one and two first. I will place annotated links in the video.Welcome to the Extended Shading Video...This is the third and final part of "How to Draw Bruce Lee Step by Step" The inner parts of eyebrows always point downwards, regardless of the type of emotion...Since Bruce is always punching people..lets just assume that he's angry....but the inner edge of the eyebrows should always point downwards.
Part of what you are seeing is the eyebrow, and part is shadow.The shading method that I use to create tones is called Cross Hatching...I made a tutorial on it- CLICK HERE if you wish to see the tutorial.....but come back b/c I plan to teach you a lot here too.Dont make a unibrow! Just darken the area between the eyes!.....He'll KICK YOU!!!Using a paint brush will allow you to delicately spread the graphite from the pencil. Softer pencils like 7B will spread more easily. NOTE: this will not move the tones as quickly as a tortillion (blending stump)
Whether you are a Bruce Lee/ Martial arts fan or not, this video will teach you a lot about shading your drawings. I used a set of drawing pencils to build tones (HB, 2B, 4B, 6B, 9B Graphite). I used a tortillion (blending paper stump to smudge the cross hatching and then I would build another layer on top. When I did the delicate shading, I would use a paint brush.Be careful not to go too dark on the bridge of the nose....but remember there are NO LINES on the bridge of the nose! Just smudged tones!...The only area of the nose that has a line is the bottom!Due to the contrast in the photo references, you do not need to worry about drawing and shading in nostrils,......just shade in the shape that you see me shading in.Bruce is on the edge of Emo-ism. Usually hairlines are gradual transitions....but Bruce Entered the Dragon rather than the barber shop......We will make an exception for shading this hairline. Strong edge...strong contrast from the forehead. Notice the highlights....they will be partially covered soon, but they will remain one of the lighter areas of the face. The mouth is just a dark trapezoid due to his facial expression. The neck is darker in tone than most of the face (With the exception of the pupil and iris, eyebrows, bottom of nose, and mouth. Watch your edges. Make sure that they DONT look like outlines....BUT also, make sure that they make the figure look rounded. Remember that most lighting comes from above....so hair at the bottom of the head will SEEM darker. Another darker layer with the 4B pencil. It helps to buy a kneaded eraser....you can shape it any way you like.THATS what I mean by ROUNDING the figure (putting tones on the edges without them being OUTLINES) Just watch.....there are several subtle shadows in the torso region.Be very delicate with the ribs...it is not dark in tone....it is a darker area within a highlight (hope that makes sense)