Лучшие
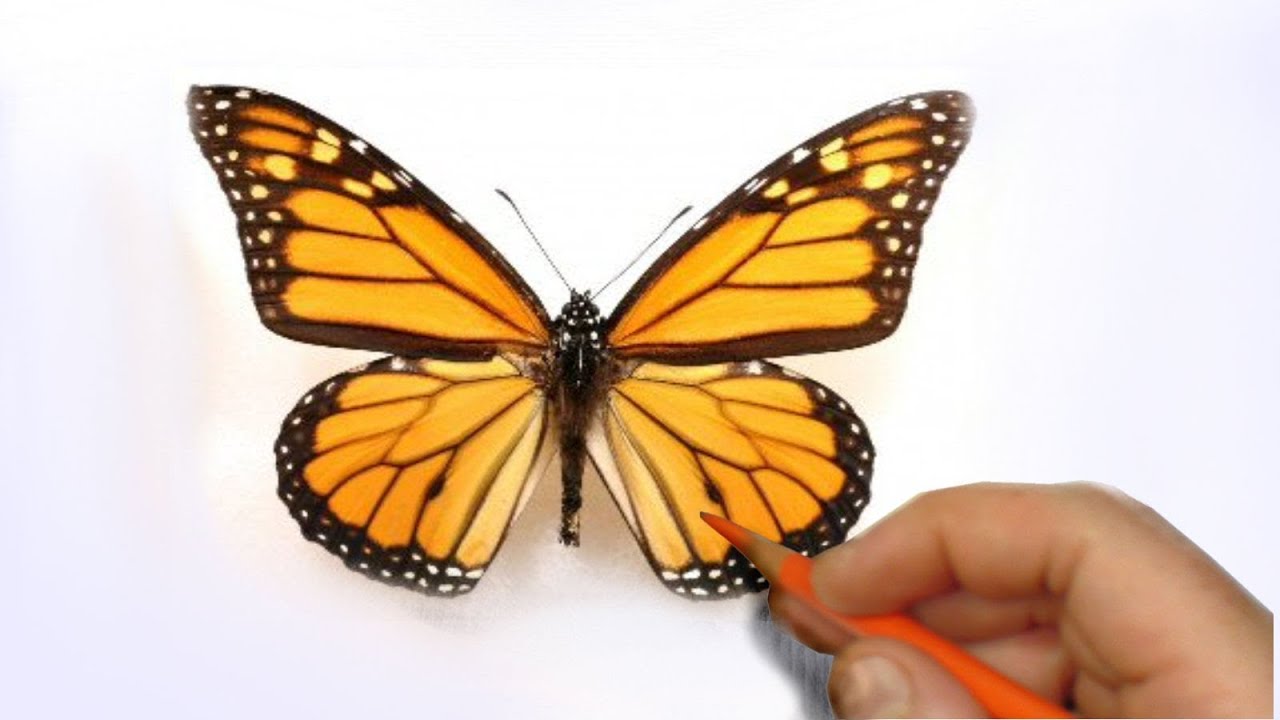
Learn a really cool illustration technique to achieve a realistic likeness! I mixed pencil, illustration marker, colored pencil and oil paint to illustrate a butterfly.
Subscribe to kazanjianm (Don't miss any new videos that I make)- http://www.youtube.com/subscri....ption_center?add_use
Facebook: Like me on Facebook to find out about live hangouts or to post your work!- http://facebook.com/kazanjianm
Twitter: I tweet! Do you? http://twitter.com/kazanjianm
My Website: http://merrillk.com
Art Supplies I Use in my Art Work- http://merrillk.com/?sid=135&idpage=supplies_i_use
YouTube Visual Arts Category Petition: http://www.change.org/petition....s/create-a-visual-ar
Step by Step Drawing Playlist: http://www.youtube.com/playlis....t?list=PLD6E34C7CD58

Even if you are new to art, YOU will be able to draw Wiz Khalifa with a pencil. I break the drawing process down in to simple steps that anybody can understand. This video is also translated in to 15 different languages.
Subscribe to kazanjianm (Don't miss any new videos that I make)- http://www.youtube.com/subscri....ption_center?add_use
Facebook: Like me on Facebook to find out about live hangouts or to post your work!- http://facebook.com/kazanjianm
Twitter: I tweet! Do you? http://twitter.com/kazanjianm
My Website: http://merrillk.com
Art Supplies I Use in my Art Work- http://merrillk.com/?sid=135&idpage=supplies_i_use
YouTube Visual Arts Category Petition: http://www.change.org/petition....s/create-a-visual-ar
Step by Step Drawing Playlist: http://www.youtube.com/playlis....t?list=PLD6E34C7CD58
As we go through the steps, I will teach you how to shade your drawing to make yours look like a realistic portrait of Wiz Khalifa.

http://merrillk.com/index.php?part=fineart&articles_id=5376&collection=114 Today, you are going to draw Lebron James...Never draw before? Thats OK! I broke this process down in to simple steps for you. Miami Heat. I recommend that you pause the video at the end of each step and get in the habit of looking at the reference image on the screen at least once every five seconds. To make this as easy as possible, I uploaded a print version of this lesson to my website. Go to http://merrillk.com and type in LeBron in the search box. Or, if you are watching on youtube, click the link to the right. All that you will need is a pencil and some paper to draw and a q tip or a blending tool to do the shading in the second part of this video. Good luck! Here we go!
This part has 24 steps and it will be followed by a Lebron shading tutorial.
Step 1- Make a rainbow shape
Step 2- Make another rainbow shape above the first, with a slightly higher arc. This will be LeBron's headband. At the end of this step, it should resemble a banana shape.
Step 3- Make one more rainbow shape slightly above the top of the headband this will be Lebrons hair.
Step 4- Is a little tricky. Add the 2 shapes that you see. Notice that the one on (your) left is slightly larger than the one on (your) right.
Step 5- Add the backward L shape that you see.
Step 6- Add the shape that looks like the "little dipper" (pot shape).
Step 7- Add the next 2 lines. Notice that these two lines connect with the bottom of the shape from step 4.
Step 8- Add the 2 small rainbow shapes for the tops of Lebrons Eyes, and take an extra second to notice how each end connects to form a new shape above the eye.
Step 9- Add 2 U shapes under each eye lid. Dont make circles though, leave the top blocked by the upper eyelid.
Step 10- Take a second to observe the gross outline of the nose. Notice that the shape is about the same height as the forehead.
Step 11- The next lines that you see are the outline of Lebrons moustache. Notice that the 2 vertical lines go DIRECTLY below the mid part of Lebrons eyes.
Step 12- Next, put in Lebrons upper lip. Notice that it looks like a flattened letter M.
Step 13- Now put in his bottom lip. It is shaped like a boat. The shape in between the 2 lips looks like the roof of a Pizza Hut.
Step 14- Now, do your best to put in the ear shapes. Notice that his head is turned slightly, so the ear on your right will be a little smaller.
Step 15- Try to observe the line for his chin and jaw and then draw it.
Step 16- Observe and add these lines for the neck.
Step 17- Add the shoulders
Step 18- This v shape will be an important shadow on the neck.
Step 19- Add the W shape between the chin and lower lip.
Step 20- Connect the W shape with the bottom of each ear.
Step 21- Add the nostrils
Step 22- Add the bottom line for the eye.
Step 23- Add two V shapes under the eyes
Step 24- For the final step before we shade, notice the three shapes that are being added on each ear.

Gelatine Pink Rabbit: 44°14'38.11"N 7°46'9.40"E https://www.youtube.com/watch?v=QXv8xRqoZbc
Rachel Nevada KFC- 37°38'47.03"N 115°45'0.72"W
https://www.youtube.com/watch?v=fsH4gws35ro
Spiral Jetty, Great Salt Lake Utah
https://www.youtube.com/watch?v=vCfm95GyZt4
World Islands Dubai, United Arab Emirates
https://www.youtube.com/watch?v=7eUcRjo9Yv4
Roden Crater (James Turrell)
https://www.youtube.com/watch?v=nPI65cEXbXI
Blog post- http://www.damncoolpictures.co....m/2010/07/40-most-bi
Do you know what there is a pink bunny visible from outer space? Well I did! Let me show you what I mean. After I read about this pink bunny and started navigating Google Earth, I began to wonder.........What else is visible in the Google Earth Art Gallery? In this video you will find some of the coolest artwork, visible from outer space. Some of these artworks have videos made about them already, and I will put the links in the upper right hand corner of the video player. I have barely scratched the surface of what is out there, so if you know of something cool. Put its Geo tag in the comments so others can find it. The geo tags of everything mentioned in this video are in the video description.

LINK- http://merrillk.com/?part=fineart&articles_id=11223&act=artist1&artist=69&collection=188
WE NEED A VISUAL ARTS CATEGORY ON YOUTUBE THREAD-http://www.google.com/support/forum/p/youtube/thread?tid=2a9806f929074cbd&hl=en&fid=2a9806f929074cbd0004b630ad37cc3e
Facebook- http://facebook.com/kazanjianm
Twitter- http://twitter.com/kazanjianm
Website- http://merrillk.com
(Merrill) Supplies I Use- http://www.jdoqocy.com/click-4....247664-805536?url=ht
This video will give you step by step instruction on how to draw hands folded in prayer.......But we are not going to draw just any pair of praying hands, we are going to recreate Albrecht Durer's study of praying hands, in pencil. If you are nervous to attempt one of the most spectacular drawings of the Northern Renaissance and one of the most famous drawings of all time, have no fear, you will not need to rely on divine intervention.....
As I was saying.....I got your back. Just hit the link in the video description and you will be taken to a page with text and photo resources to help you along. Are you ready? Lets do this!
Step 1: Draw the three shapes that you see. The bottom shape resembles a bowl, the middle shape is trapezoidal and the top shape is triangular. Together, these shapes resemble a Christmas tree.
Step 2: Add the double shape for the thumbs. Notice that the closer thumb is the exact height of the trapezoid.
Step 3: Add the palm of the right hand.
Step 4: Add the fingers of the right hand.
Step 5: Add the shapes at the bottom.
Step 6: This is a tricky and important step. We are carving out fingers. Use the lines left from previous steps as comparison points. Notice that the fingertips go above and outside of the triangle shape. Also notice where the lines that separate the fingers, end in the trapezoid shape. Here is a close up.
Step 7: Add the details on the right hand. Here is a close up.
Step 8: Now, we are going to put in the shapes for shading. DO NOT feel the pressure to be exact. If its slightly different than mine, IT IS OK!!!!.....Lets start with the thumb. Add the shadow shapes that you see. DO NOT press too hard on the pencil.
Step 9: Add the shading to the lower part of the left hand.
Step 10: Shade the middle of the left hand.
Step 11: Shade lightly between the fingers.
Step 12: Add the fingernails and the oval shapes at mid finger. Notice that the oval shapes are not parallel with each other.
Step 13 Add the shading to the palm and wrist of the right hand.
Step 14: Add the shading to the top of the right hand.
Step 15 Shade the fingers of the right hand.
Step 16: Use the blending stump (tortillion) to smudge the edges of the shapes (see the process in the video above)
Step 17: Fingers are rounded shapes. Use the blending stump to smudge the lines between the fingers. Leave some space for a highlight towards the left (your left); where the light is coming from.
Step 18: The shading should get darker as you move from left to right. Press a little harder and use the higher number B pencils. I used a 2B and 6B pencil as I progressed.
Step 19: By now, your drawing should look similar to this. The bony structure of the back of the hand is starting to get "defined". Use your eraser and HB pencil to draw what you see here. Do your best, this is a DIFFICULT task; but it gets easier if you look back at your reference image often.
Step 20: Now, Start pressing a little bit harder with your B pencils (2B.3B,4B,5B,6B,7B,8B). Focus on the edges.
Step 21: NOTICE the DIFFERENCE of EDGES. They are NOT all the same!!!!!! Some are hard, some are soft, some are dark, some are light.
Step 22: USE THE ERASER! It is a fantastic drawing tool. In the video you will see me use a kneaded eraser as well as the one on the back of a pencil.
Step 23 is optional. I decided to shade the background to bring the highlights out on the hand. WHITE highlights on WHITE background does not work!!!!!!
Step 24: Its OK to use your fingers..........Sometimes......but especially at the end of a drawing rather than the beginning (the oils in your hand will affect the paper at the beginning of a drawing).
I also dedided (very late) to add the shirt sleeve. MY BAD!!! See the video (above) for tips on this.

You requested it and I listened. This video will teach you how to draw Drake. What's that you say, you failed art class? You have a low frustration tolerance and you have a fear of pencils. No problem! Check out the gallery on my website or my facebook like page and you'll see that thousands of people successfully completed my tutorials. And many had no previous art training. So even if you've had all of your fingers amputated and a nervous twitch, I got you covered. If you can draw shapes, you can successfully draw Drake. So hit the subscribe button, grab your pencil and paper and lets begin.
WE NEED A VISUAL ARTS CATEGORY ON YOUTUBE THREAD-http://www.google.com/support/forum/p/youtube/thread?tid=2a9806f929074cbd&hl=en&fid=2a9806f929074cbd0004b630ad37cc3e
Facebook- http://facebook.com/kazanjianm
Twitter- http://twitter.com/kazanjianm
Website- http://merrillk.com
(Merrill) Supplies I Use- http://www.jdoqocy.com/click-4....247664-805536?url=ht
Step 1: Make the shape that you see.
Step 2: Make the second shape, notice that it is about the same height as the first shape.
Step 3:Round out the shape for Drake's hair. Notice that it is slightly wider on your right side.
Step 4: Make the two egg shapes.
Step 5: Make the shape that you see, notice that it is the same height as the forehead shape and the hair shape.
Step 6: Make the lines for the nose. Notice the placement of these lines, compared to the egg shapes for the eyes.
Step 7: Drake needs ears. Dont stress out about the minor details. Notice that these shapes line up with the nose shape.
Step 8: Make the bowl shape for the chin. Notice that it is slightly taller than the main shapes above it.
Step 9: Make the neck and the body. Do it fast and save all of your concentration for the proper placement of the face shapes.
Step 10: Add the two shapes for Drake's lips.
Step 11: Add Drakes super thick eyebrows to the tops of the egg shapes from step four.
Step 12: Add the upper eye lines. Notice the shapes that are created in between the eyebrow shapes and the upper eyes. This will help you get the placement correct. Also, as a general rule, there is one eye length in between each eye. This is not the case for Drake. There is slightly more space between the eyes.
Step 13: Make the U shapes for the pupil and iris and close the eye shapes.
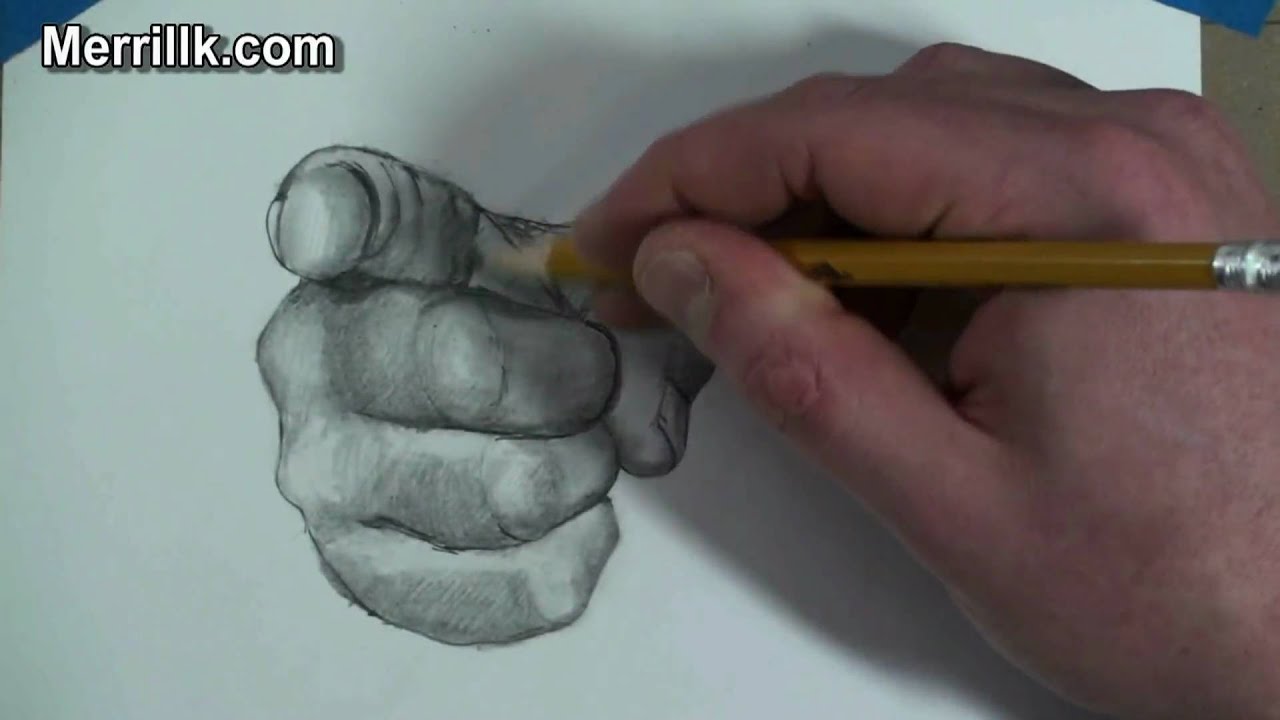
Link-http://merrillk.com/index.php?part=fineart&articles_id=6414&act=artist1&artist=69&collection=188 How to draw the Uncle Sam pointing hand pose. This is the first in a series of videos that I will make on drawing the hand. In this video, I am going to teach you how to draw a pointing hand step by step. I have gone out of my way to make this as easy as possible and I made three resources to help you. The first resource is this video, where I will demonstrate the process for you. The second is a link to step by step directions on my website. The third resource is a printable PDF file with big pictures and text. Also, check http:merrillk.com in the coming weeks for printable PDF's for all of my videos. Alright, lets get started!
Be sure to pause the video at the end of each step and look at your reference image as much as possible.
Step 1: Make three ovals that get slightly smaller (from top to bottom).
Step 2: Put in the three connected shapes that I just added. Notice the angle that the top and bottom lines create as they slope inward towards each other.
Step 3: Observe the picture (above) and put in the four lines. Notice the direction of each of their curves.
Step 4: Put in the shape for the pointer finger. The small banana shape that you see to the left is the fingernail. Do not close the top!
Step 5: Close the shape to create the knuckles.
Step 6: Put in the triangle shape above the pointer finger.
Step 7: Close the shape at the top by connecting the top of the banana shape with the top of the triangle. Notice the creases of skin on the foreshortened finger.
Step 8: Put in the shape that sort of looks like a birds head from the side.
Step 9: Make a kite shape below the beak of the bird head shape.
Step 10: Close the shape
Now its time to shade. You will need a q-tip or blending stump for this part.
Learn to draw Rihanna step by step (easy). Instruction by Merrill Kazanjian (kazanjianm).
Supplies I Use- http://www.jdoqocy.com/click-4....247664-805536?url=ht
You found art. But you are not in a hopeless place ........I heard your "S.O.S" through a lot of requests and today, I am going to be your artistic "Umbrella"........I am going to give you simple, easy to follow Step by Step instructions on how to draw Rihanna. My steps will be so descriptive, someone with limited artistic experience can create a successful drawing. In other words, its not going to be "Hard".
You will also learn about S&M in this video. S stands for SHADING and M stands for MODELING and the proper use of both will allow you to create areas of light and shade, and achieve a likeness of Rihanna.
All you have to do is grab a pencil, some paper.....and ....."Watch n Learn". We are not going to let this "Good Girl go Bad", your drawing is going to be "the hotness". What's that Rude boy? You "love the way I lie"? HUH!.... If you need proof, hit the button that says playlist to look at some amazing video responses from my viewers. But I promise that I don't just "talk that talk" I walk that walk! So don't play Russian Roulette with hit or miss drawing instruction on YouTube, subscribe to kazanjianm for quality art instruction.......And silly introductions like this one.
WE NEED A VISUAL ARTS CATEGORY ON YOUTUBE THREAD-http://www.google.com/support/forum/p/youtube/thread?tid=2a9806f929074cbd&hl=en&fid=2a9806f929074cbd0004b630ad37cc3e
Facebook- http://facebook.com/kazanjianm
Twitter- http://twitter.com/kazanjianm
Website- http://merrillk.com
Step 1: Notice the perfect square that is formed between the center points of Rihanna's eyes and the two corners of her mouth. Start your drawing by making four dots on your paper that form a perfect square.
Step 2: Make the circles exactly as you see them. No, Rihanna doesn't have a floating eye, just trust me.
Step 3: Put in the shapes for Rihanna's eyes. Notice how the new shapes overlap the circle shapes from step 2.
Step 4: Add the eyelids.
Step 5: Rihanna has a contract with Cover Girl so add a lot of mascara to the eyelashes.
Step 6: You need to do two simple things for step six. Center the pupil for the eye on the left and connect the two lines for the mouth.
Step 7: Add the M shape for the upper lip. Notice that it's height is similar to the height of the white part of the eye.
Step 8: Add the banana shape for the bottom lip. Notice that it is about twice the thickness of the upper lip. Also, be sure to notice the shape in between the two lips.
Step 9: Now add Rihanna's nose. Oh relax, this is the hardest thing that I am going to ask you to do. Notice how the septum fits perfectly in to the indentation at the top of the upper lip Also notice that the nostril line is about two thirds down the square shape that we began with.
Step 10: Add the eyebrows.
Step 11: Now its time to add the chin. Here is a tip to make it easy. Measure the distance from the eyebrows to the bottom of the nose. It will be the same distance from the bottom of the nose to the chin and from the hairline to the eyebrows.
Step 12: Give Rihanna her Marge Simpson hair. Hair moves all the time. Do not feel the pressure to copy the hair in my drawing perfectly.
Step 13: Rihanna has an album called "Loud" so I guess that we should give her ears. Notice that the ears line up between the eyebrows and the bottom of the nose.
Step 14: I promised you S&M so now its time to shade and model. Lightly put in these shadow lines around the eyes and the nose.
Facebook: http://facebook.com/kazanjianm
Twitter: http://twitter.com/kazanjianm
I used this image - http://www.flickr.com/photos/5....1051231@N06/47365468 It has a creative commons license
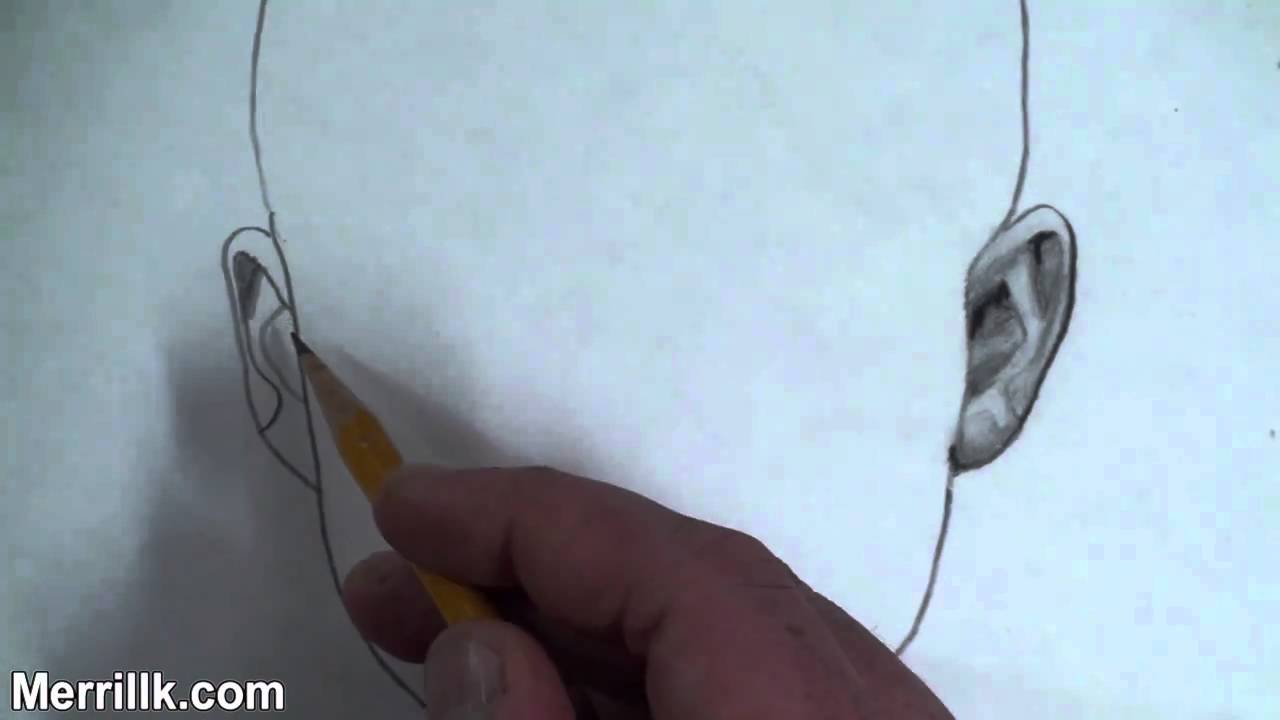
Welcome to the third part of my three video tutorial. These tutorials will show you how to draw the ear at the three most common angles. This video will specifically show you how to draw the ear from the perspective of the front of the face. I recommend that you pause the video at the end of each step and listen to the instructions. Lets begin.
Step 1: Make the two shapes that you see. Notice that the top part of each shape is wider than the bottom.
Step 2: Observe the reference image and then draw in the lines that I just added
Step 3: Step 3 is a little bit confusing, so be sure to take your time. I just added a line to each side and a rainbow shape on the inner part of the ear.
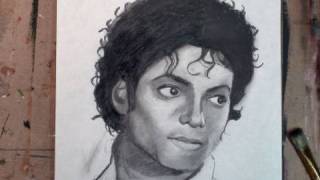
LINK- http://merrillk.com/?part=fineart&articles_id=8423&act=artist1&artist=69&collection=114 Hey, I got a question. Do you "Remember the Time" that you asked me to do a tutorial on how to draw Michael Jackson? Well, this "Smooth Criminal" listened to your requests because i'm not one of those youtubers who says "Leave Me Alone." I like "The Way You Make Me Feel" when you leave comments and give me feedback....so thank you!
This video is going to break the process of drawing Michael Jackson down in to simple steps.... just like "ABC".... which is as easy as 1,2,3. After the easy steps, you are going to learn how to build tones so that you can shade your drawing. But dont stress, because it don't matter to me if your drawing is too "Black or White". If you mess up, just keep it "In the Closet" and hit the link in the video description so that I can really help you. The link will take you to a Michael Jackson drawing cheat sheet with step by step pictures. Its my way of saying "Ill be There", because I dont want your drawing to be "Bad".
Art "Heals the World".... and I "Wanna be Starting Somethin" on my youtube channel. So please click on the little old "Man in the Mirror" to subscribe! I "Want You Back", and not too many people can spell kazanjianm. So Come on.... youll get a free art education, and I "Dont Stop Til You Get Enough". You cant "Beat It".
Note: This drawing is of Michael from early to mid career when he was in his mid to late twenties. I used several reference images from the Thriller Era to make this drawing (although none are shown in this video).
Step 1: Draw the two oval shapes for the area around the eye. Notice that the shape on the right is slightly smaller than the one on the left.
Step 2: Make the shapes for the bottom of the nose and the top lip. Take some extra time to observe and perfect the spacing.
Step 3: Add the contour line to create the shape around Michael's face. Be sure to notice that Michael's head is turned towards his left. Also be sure to notice that the oval shape on the left side of his face, is touching the contour line.
Step 4: Add the shape for Michaels ear and hair. His ear is partially blocked by his hair, but notice that his ear goes from where his eyebrows will be, to almost the bottom of his nose.
Step 5: Add the four shapes that make up the neck and the shirt.
Step 6: Observe the eye region and add the eyes and eyebrows. Notice that the eyebrows are connected to the top of the oval shape from step 1. The eyes are almond shaped and are at the bottom of the oval shape. Be sure to notice the spacing in between the eyes and eyebrows.
Step 7: Add more curls to Michaels hair and details to his ear. Dont waste your time copying from the reference image for this step. Make your own or else you will drive yourself crazy!
The second part of the video will teach you how to shade your drawing of Michael Jackson. I will use a paintbrush to do my blending and shading as well as a set of drawing pencils. I use a HB pencil to start as well as a 4B pencil and a 9B graphite stick to draw the hair. The eyes and the hair are the darkest tones in the drawing and I always start off with the eyes. Regardless of a persons hair color the eyes are the darkest feature of the face. I use a method called cross hatching where lines are drawn one after another and next to each other. After I cross hatch, I blend with a paint brush and then do another layer of hatching on top of the previous layer. This method allows me to build deep, rich tones in my art work. Learn to draw, tutorial man draws perfect face "how to draw famous people step by step"
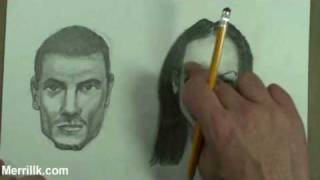
Link- http://merrillk.com/index.php?part=fineart&articles_id=4676&collection=114
This video will illustrate the differences between male and female faces. In part 1 of this video, I will compare male and female facial features, bone structure and musculature. In the in the second part of this video, I will do a demonstration. During this demonstration, I will review what we learned in the first part and teach you how to draw the nuances of the male and female face for artistic (art) purposes. During my demonstration, I use a pencil an eraser and a blending stick (stub) also known as a tortillion.
Lets look at the differences of the male and female skull first and then we will work our way up to the skin. Male and female children have similar skull shapes. But once children hit puberty, the differences start to appear. Testosterone provokes the growth of certain facial features in males, while female faces remain relatively childlike. The presence of higher levels of testosterone give men a thicker bone structure with more prominent bones. Male faces have a wider, more prominent jaw, chin and cheekbones (also known as the zygomatic arch). The physical size of the male skull is usually larger than the female skull. A very distinct characteristic of a male skull, is a protruding supraorbital ridge also known as a brow line.
Female faces are more rounded and tend to have a narrow jaw line. They have a softness that the male face lacks. It carries more fat than the male face, especially in the cheeks. Female faces tend to have thicker lips and a higher arch on the top lip. Female eyebrows generally sit a little higher than male eyebrows and they usually have a thinner and more arched shape, mainly due to plucking. The female nose tends to be smaller, shorter and have a narrower bridge and nostrils than the male one. Also, female noses often have a straighter or more concave profile. Men tend to have thicker and lower eyebrows than women. The male jaw line is wider than the female chin. It is also more muscular and square in shape. The lips are thicker and more full on a female. Also there is less of a distance between the arch of the top lip and the bottom of the nose.
Before we go on to part 2. I want to make this complex subject as simple as possible so I took notes for you! If you are watching this on youtube hit the link. If not, just go to my website Merrillk.com and type skull in the search box and download this cheat sheet for when you draw.
Merrill Kazanjian is a contemporary artist based in New York City. He is also a New York State Certified Art instructor with 8 years of experience. He specializes in drawing, painting and mixed media art.

Lately, I have seen more visual artists posting high quality work on youtube than ever before.
Tonight, my channel hit a milestone. Kazanjianm reached 25,000 subscribers. But to celebrate, I want to ask you a simple question.
What channel do you think is the most underrated visual arts channel on YouTube? In the comments section below, please nominate a channel with less than 10,000 subscribers. If you want to nominate your channel, post your best video as a video response to this video.
One week from today, I am going to tally up all of the comments and up votes, and I am going to do something special for the channel that gets the most votes.
WE NEED A VISUAL ARTS CATEGORY ON YOUTUBE THREAD-http://www.google.com/support/forum/p/youtube/thread?tid=2a9806f929074cbd&hl=en&fid=2a9806f929074cbd0004b630ad37cc3e
Facebook- http://facebook.com/kazanjianm
Twitter- http://twitter.com/kazanjianm
Website- http://merrillk.com
(Merrill) Supplies I Use- http://www.jdoqocy.com/click-4....247664-805536?url=ht

http://merrillk.com/?part=fineart&articles_id=8053&act=artist1&artist=69&collection=114- Today, I am going to give you step by step instruction in order to help you draw a hand holding a pencil. What? Worried that you cant draw? Check the comments posted on my previous videos. Many people who have never drawn before have successfully completed other challenging drawings with the help of my step by step videos and you will have the same success if you follow the steps in this video. I recommend that you download the free PDF print resource by hitting the link in the video description. This resource will give you 12 steps with pictures to help you follow along as I narrate. Be sure to pause the video and observe the reference image at the end of each step. Good Luck.
Step 1: Draw the three shapes that you see. The one on the left will be the tip of
the pencil and the two on the right will be fingertips.
Step 2: Observe, then draw the thumb shape. Notice that it seems slightly thinner at
the fingertip.
Step 3: Draw the K shape above the thumb
Step 4: Use a ruler to draw the top of the pencil. It should measure just less that three thumb
lengths.
Step 5: Observe and draw the line to complete the finger over the K shape
Step 6: Finish the hand shape by drawing in the heel of the palm and the wrist.

Welcome to 「PIN KORO - YouTube」♪
Thank you for the visit.
Today's video is 「Very Easy ! How to draw alphabet doodle "Dog" step by step for beginners - PINKORO style doodle drawing」
This is handwriting tutorial for beginners.
Let's learn "how to draw doodle trick art on paper" with me.

Welcome to 「PIN KORO - YouTube」♪
Thank you for the visit.
Today's video is 「Very Easy ! How to draw turn word DRAGON(HOW TO TRAIN YOUR DRAGON 3 Trailer (2019))step by step into a Cartoon - Learning Cute transformation doodle trick art on paper for beginners - turning words into pictures」
Let's learn how to drawing Kawaii doodle with me.
Please watching practice scene on Twitter and Instagram.
instagram⇒ https://www.instagram.com/pinkoro_draw
Twitter⇒ https://twitter.com/pinkoro_draw
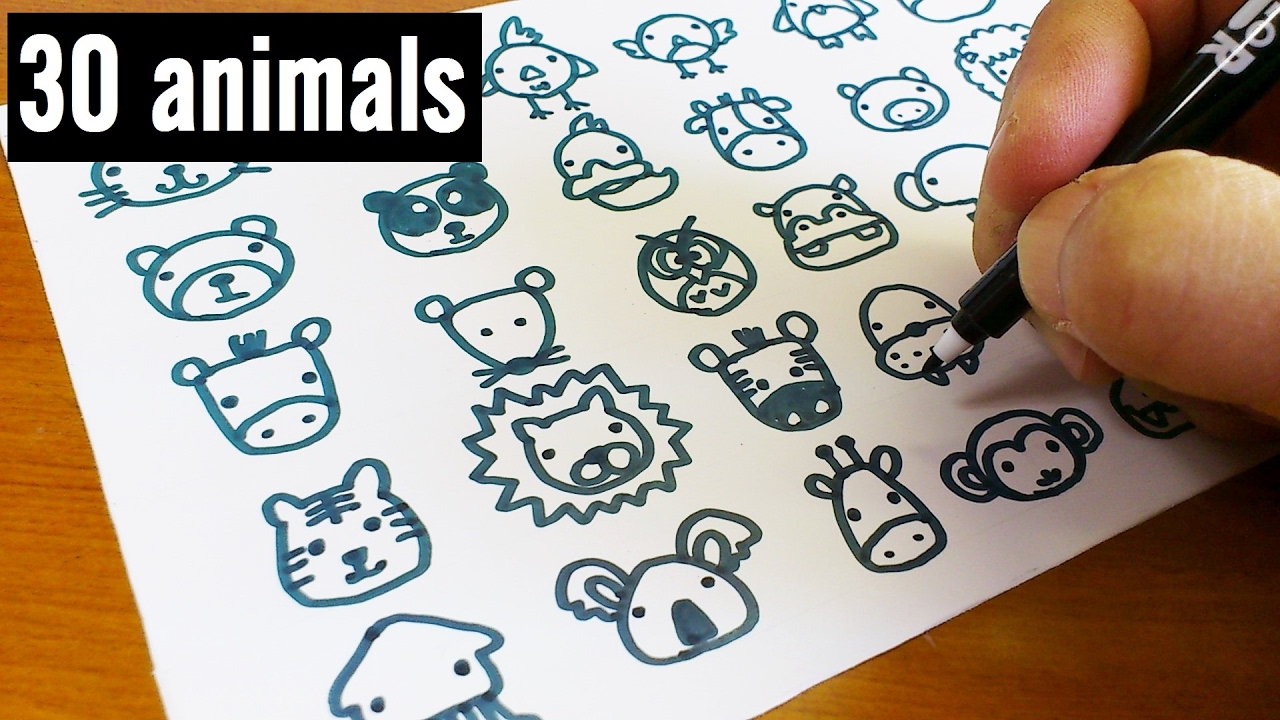
Welcome to 「PIN KORO - YouTube」♪
Thank you for the visit.
Today's drawing learn video is 「How to draw 30 animals cute doodle ! kawaii & easy doodle 」
Let's Learn drawing doodle with me.
COMO DIBUJAR 30 animals cute doodle KAWAII PASO A PASO - Dibujos kawaii faciles

Welcome to 「PIN KORO - YouTube」♪
Thank you for the visit.
Today's video is 「How to turn words EMZ(Brawl Stars character)into a Cartoon - how to draw brawl stars Brawler step by step.」
Let's learn "how to turn words into cartoon", "3D drawing", and so on from this YouTube channel.
Drawing is easy and fun.
With this channel, Everyone can learn how to draw with simple way.
I hope you enjoy this video.
Please SUBSCRIBE for new video. Thanks
▷SUBSCRIBE
https://www.youtube.com/user/pinkorojapan
▷CONTACT
Instagram https://www.instagram.com/pinkoro_draw
Facebook https://www.facebook.com/pinkoro66/

Welcome to 「PIN KORO - YouTube」♪
Thank you for the visit.
Today's video is 「Very Easy ! How to draw turn words PUSH step by step into a Cartoon - Learning Cute Transformation doodling art on paper」
Let's learn drawing with me.
SACAR UN DIBUJO DE LA LETRA "PUSH" - Dibujos faciles paso a paso
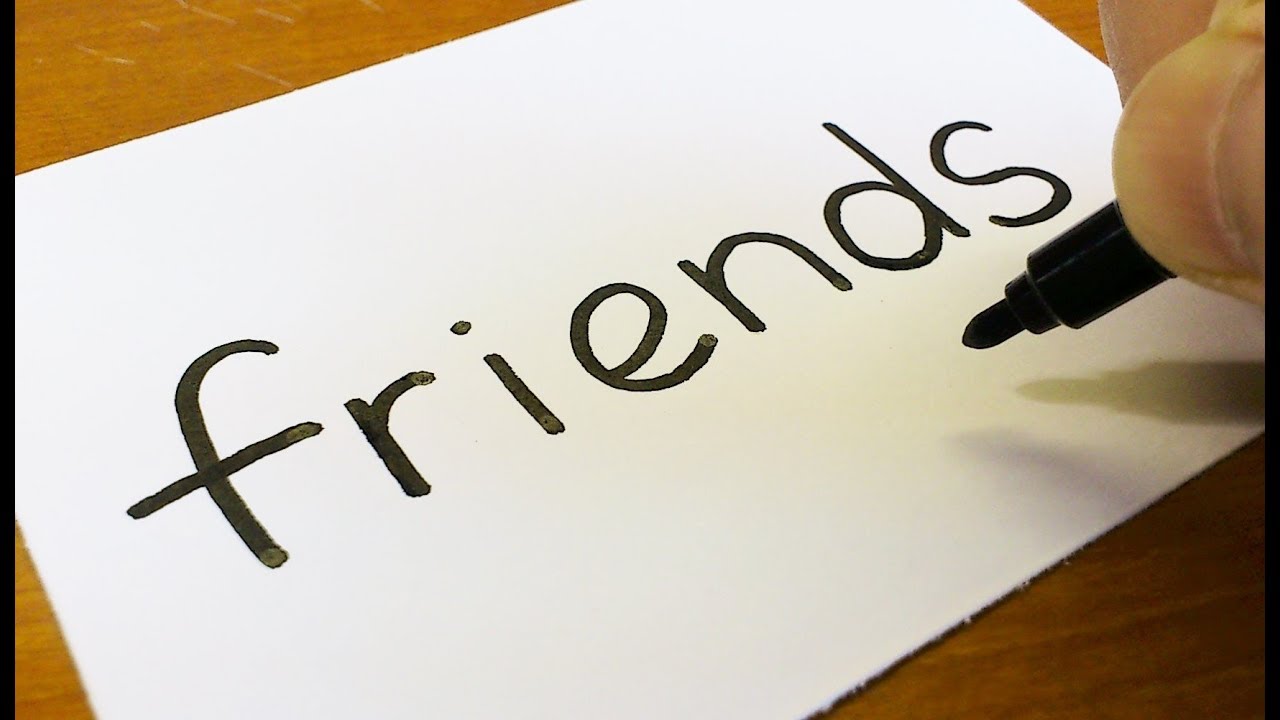
Welcome to 「PIN KORO - YouTube」♪
Thank you for the visit.
Today's video is 「Very Easy ! How to draw turn word FRIENDS step by step into a Cartoon - Learning Cute transformation doodle trick art on paper for beginners」
Let's learn how to drawing Kawaii doodle with me.
In response to many request, I challenged it.

Welcome to 「PIN KORO - YouTube」♪
Thank you for the visit.
Today's video is 「Very Easy ! How to draw turn word GON(HUNTER×HUNTER) step by step into a Cartoon - Learning Cute transformation doodle trick art on paper for beginners - turning words into pictures」
Let's learn how to drawing Kawaii doodle with me.
In response to many request, I challenged it.