סרטונים מובילים
Want to start speaking Swahili? And sharpen your listening so you understand every Swahili word and phrase? If you own an Amazon Echo, download the Daily Dose and start learning Swahili with free daily lessons: https://goo.gl/yUUAfV ↓ Check How Below ↓
Step 1: Go to https://goo.gl/yUUAfV
Step 2: Download the skill on Amazon
Step 3: Learn with the best online resources and quickly become conversational.
Alexa is Amazon’s cloud-based voice service. You can talk to Amazon Alexa on your device. With Alexa, you can ask her to play music, hear the news, check weather, control smart home devices, and yes, you can even learn a language.
To discover more about this Daily Dose skill and how to use it with Amazon Alexa, click here: https://goo.gl/vV5yoC
Finally Get Fluent in Swahili with PERSONALIZED Lessons. Get Your Free Lifetime Account: https://goo.gl/cFCSf9 ↓ Check how below ↓
Step 1: Go to https://goo.gl/cFCSf9
Step 2: Sign up for a Free Lifetime Account - No money, No credit card required
Step 3: Start learning Swahili the fast, fun and easy way!
Save 20% on FULL Access to SwahiliPod101 with your YOUTUBE coupon for All subscriptions https://goo.gl/6qtflO
In this lesson, you will improve your listening comprehension skills from a Swahili conversation about a sightseeing plan.
■ Facebook: https://www.facebook.com/SwahiliPod101
■ Google Plus: https://plus.google.com/+SwahiliPod101
■ Twitter: https://twitter.com/SwahiliPod101
■ Pinterest: https://www.pinterest.com/SwahiliPod101
■ Tumblr: http://SwahiliPod101.tumblr.com
Click here to find out more about this lesson: https://goo.gl/E2cdzV
Also, please LIKE, SHARE and COMMENT on our videos! We really appreciate it. Thanks!

Finally Get Fluent in Swahili with PERSONALIZED Lessons. Get Your Free Lifetime Account: https://bit.ly/2HTUJaD ↓ Check how below ↓
Step 1: Go to https://bit.ly/2HTUJaD
Step 2: Sign up for a Free Lifetime Account - No money, No credit card required
Step 3: Start learning Swahili the fast, fun and easy way!
Save 20% on FULL Access to SwahiliPod101 with your YOUTUBE coupon for All subscriptions https://bit.ly/2HU1qcB
■ Facebook: https://www.facebook.com/SwahiliPod101
■ Twitter: https://twitter.com/SwahiliPod101
Click here to find out more about this lesson: https://bit.ly/2HTYNaQ
Also, please LIKE, SHARE and COMMENT on our videos! We really appreciate it. Thanks!

https://goo.gl/fXPw7F Click here to download TONS of FREE PDF lessons to learn Spanish twice as fast!! ↓ Check How Below ↓
Step 1: Go to https://goo.gl/fXPw7F
Step 2: Sign up for a Free Lifetime Account - No money, No credit card required
Step 3: Learn with the best online resources and quickly become conversational.
In this video we will teach you the most difficult tongue twisters of the Spanish language. Can you pronounce these tongue twisters fast? You’ll be able to improve your pronunciation with this challenge!
If you are an absolute beginner mexican spanish learner, this video is made for you. Our hosts express themselves in simple Mexican Spanish and English. This video will challenge your listening comprehension skills and help you progress in your Spanish language study. This is THE place to start if you want to start learning Mexican Spanish.
Click here to get started with Spanish: https://goo.gl/fXPw7F
■ Facebook: https://www.facebook.com/SpanishPod101
■ Twitter: https://twitter.com/SpanishPod101
■ Tumblr: http://SpanishPod101.tumblr.com
■ Instagram: https://www.instagram.com/spanishpod
Also, please LIKE, SHARE and COMMENT on our videos! We really appreciate it. Thanks!

http://www.SpanishPod101.com/video
Learn Spanish words using the Learn Spanish with Pictures series from SpanishPod101.com.
Beautiful images clearly show Spanish vocabulary divided into units by topic.
Each word is introduced in English and Spanish. It's a great way to study new vocabulary words that will build up your proficiency in Spanish and lead you on your way to mastering this beautiful language!
Interested in the world of witches and wizards, dwarfs and giants? This is the lesson for you. In this lesson, you learn the Spanish words for some of the most famous fairy tale characters, so you can talk to your Spanish friends about the world of fairy tales.
If you liked this video, stop by our Spanish language learning website and get other language learning content including other great videos like this one, audio podcasts, review materials, blogs, iPhone apps, and more.
Join the friendly community of learners at SpanishPod101.com, and start mastering Spanish today!
http://www.SpanishPod101.com/video
Click here to get our FREE App & More Free Lessons at SpanishPod101: http://www.SpanishPod101.com/video
Get Rosa's Word List for FREE
Here: http://www.spanishpod101.com/s....panish-vocabulary-li
This week Rosa will teach you five food words, only she doesn't know what they are yet!
In this fast-paced weekly series, learn off-the-cuff Spanish with Rosa! She's been given five words and will explain and teach them to you using sample sentences she makes up on the spot.

Finally Get Fluent in Spanish with PERSONALIZED Lessons. Get Your Free Lifetime Account: https://goo.gl/qPLFLP ↓ Check how below ↓
Step 1: Go to https://goo.gl/qPLFLP
Step 2: Sign up for a Free Lifetime Account - No money, No credit card required
Step 3: Start learning Spanish the fast, fun and easy way!
Save 20% on FULL Access to SpanishPod101 with your YOUTUBE coupon for All subscriptions https://goo.gl/RzjktJ
In this lesson, you'll learn the most common words from Mexican fairy tales.
■ Facebook: https://www.facebook.com/SpanishPod101
■ Google Plus: https://plus.google.com/+SpanishPod101
■ Twitter: https://twitter.com/SpanishPod101
■ Pinterest: https://www.pinterest.com/SpanishPod101
■ Tumblr: http://SpanishPod101.tumblr.com
Click here to find out more about this lesson: https://goo.gl/qhp2cJ
Also, please LIKE, SHARE and COMMENT on our videos! We really appreciate it. Thanks!

http://www.SpanishPod101.com/video
Walking into a Mexican Spanish classroom for the first time is a bit scary, especially if you're the teacher and aren't from Mexico! For your job, you have to train some colleagues in Mexican Spanish on what you do best, but it won't be productive if you can't understand their questions. You can only hope you'll be clear in your explanations...or that your Mexican Spanish helps you ace the Q and A session that follows. In this lesson you'll learn more Mexican Spanish expressions and words for the Mexican Spanish classroom. Continue your education in Mexico, no matter what kind of education it is!
This Mexican Spanish video series is a brand new way to learn Mexican Spanish. Learn everyday vocabulary and key verbs in this Mexican Spanish video lesson. Read the Mexican Spanish lesson notes to learn about the Mexican Spanish present tense, present progressive tense, and simple past tense. Join us, and see what you've been missing! Visit us at SpanishPod101.com where you will find many more fantastic Mexican Spanish lessons and learning resources! Leave us a message while you are there!
Find out more, go to: http://www.spanishpod101.com/2....011/09/02/learn-with
http://www.SpanishPod101.com/video

Finally Get Fluent in Spanish with PERSONALIZED Lessons. Get Your Free Lifetime Account: https://goo.gl/4wZCSZ ↓ Check how below ↓
Step 1: Go to https://goo.gl/4wZCSZ
Step 2: Sign up for a Free Lifetime Account - No money, No credit card required
Step 3: Start learning Spanish the fast, fun and easy way!
Save 20% on FULL Access to SpanishPod101 with your YOUTUBE coupon for All subscriptions https://goo.gl/3ksnRa
■ Facebook: https://www.facebook.com/SpanishPod101
■ Twitter: https://twitter.com/SpanishPod101
Click here to find out more about this lesson: https://goo.gl/pEqZ2c
Also, please LIKE, SHARE and COMMENT on our videos! We really appreciate it. Thanks!

"https://bit.ly/2BjBOlu ← If you’re studying Spanish, chances are you’re looking to become fluent and conversational as fast as possible, right? Well then, look no further! Here is your fast track to fluency!
↓ More Details ↓
Step 1: Go to https://bit.ly/2BjBOlu
Step 2: Sign up for a Free Lifetime Account - No money, No credit card required
Step 3: Start speaking Spanish with the best online resources
In this video you'll learn 3 reasons why falling in love with a Spanish girlfriend or boyfriend can help you master the language in a fraction of the time of traditional study.
For most people, falling in love with a Spanish girlfriend or boyfriend will dramatically improve their mastery of the language. But the question becomes: How can you possibly attract or even meet a Spanish boyfriend or girlfriend without first learning the language? Don’t worry, with a little help from SpanishPod101, you can learn the top romantic phrases that will help you attract your soul mate.
SpanishPod101 is the best place to get started with the Spanish language as you will get on your way to Spanish fluency fast. We provide you with everything you need to maser the language.
■ Facebook: https://www.facebook.com/SpanishPod101
■ Twitter: https://twitter.com/SpanishPod101
■ Instagram: https://www.instagram.com/SpanishPod101
Also, please LIKE, SHARE and COMMENT on our videos! We really appreciate it. Thanks!
#Learning #Spanish #SpanishPod101 #LearnSpanish "

https://bit.ly/2Gk1Mao Click here to start learning Spanish with the best free online resources ↓ Check How Below ↓
Step 1: Go to https://bit.ly/2Gk1Mao
Step 2: Sign up for a Free Lifetime Account - No money, No credit card required
Step 3: Learn with the best online resources and quickly become conversational.
In this video we will take you to Mexico City, and introduce 4 places you must absolutely visit in Mexico City. We will give you all the travel tips and cultural insights you need to enjoy your stay in Mexico.
If you are an absolute beginner Spanish learner, this video is made for you. Our host express herself in simple English. This is THE place to start if you want to start learning Mexican Spanish.
Click here to get started with Spanish: https://bit.ly/2Gk1Mao
■ Facebook: https://www.facebook.com/SpanishPod101
■ Twitter: https://twitter.com/SpanishPod101
■ Tumblr: http://SpanishPod101.tumblr.com
■ Instagram: https://www.instagram.com/spanishpod
Also, please LIKE, SHARE and COMMENT on our videos! We really appreciate it. Thanks!
#Mexico #Spanish #LearnSpanish #MexicanSpanish #MexicanSpanish #SpanishPod101

This is your ultimate compilation to learn how to travel in Spain or another Spanish speaking country! And if you want to study more, click here https://goo.gl/XAn8ic and get the best resources to learn Spanish in the most efficient way. ↓ More details below ↓
Step 1: Go tohttps://goo.gl/XAn8ic
Step 2: Sign up for a Free Lifetime Account - No money, No credit card required
Step 3: Start learning Spanish the fast, fun and easy way!
With this video compilation you'll be able to learn survival phrases when traveling in only 8 minutes!
You've decided to start learning Spanish, so let's build up your vocabulary! In this video, you'll learn some of the most important words and phrases in the Spanish language related to travel. If you want to start learning Spanish, this video is made for you. Our host express herself in simple Spanish, with English subtitles. This video will challenge your listening comprehension skills and help you progress in your Spanish study.
Let us help you through this 8-minute Spanish basics compilation! This is the fastest, easiest way to pick up basic Spanish!
Follow and write to us using hashtag #SpanishPod101
- Facebook : https://www.facebook.com/SpanishPod101
- Google Plus : https://plus.google.com/+SpanishPod101
- Twitter : https://twitter.com/SpanishPod101
- Pinterest : https://www.pinterest.com/SpanishPod
Click here to get started with the Spanish language: https://goo.gl/XAn8ic
Also, please LIKE, SHARE and COMMENT on our videos! We really appreciate it. Thanks!

Finally Get Fluent in Spanish with PERSONALIZED Lessons. Get Your Free Lifetime Account: https://goo.gl/M9llVV ↓ Check how below ↓
Step 1: Go to https://goo.gl/M9llVV
Step 2: Sign up for a Free Lifetime Account - No money, No credit card required
Step 3: Start learning Spanish the fast, fun and easy way!
In this lesson, you'll learn 10 Foods That Will Kill You Faster that are used every day in Spain.
Finally Get Fluent in Spanish with PERSONALIZED Lessons. Get Your Free Lifetime Account: https://goo.gl/M9llVV
■ Facebook: https://www.facebook.com/SpanishPod101
■ Google Plus: https://plus.google.com/+SpanishPod101
■ Twitter: https://twitter.com/SpanishPod101
■ Pinterest: https://www.pinterest.com/SpanishPod101
■ Tumblr: http://SpanishPod101.tumblr.com
Click here to find out more about this lesson: https://goo.gl/nd32xv
Also, please LIKE, SHARE and COMMENT on our videos! We really appreciate it. Thanks!
http://www.SpanishPod101.com/video
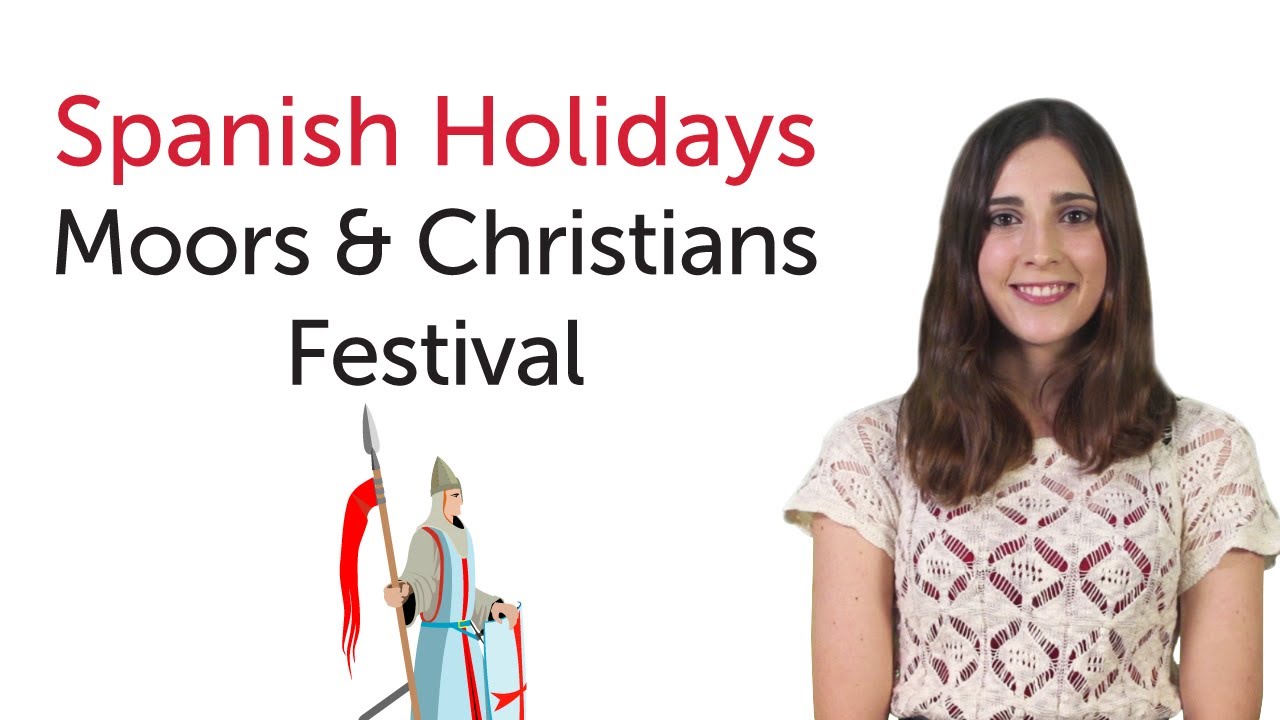
Learn more about Spanish culture with SpanishPod101.com! Ever wondered what the most important Spanish holidays are, and how they are celebrated? Then this 25-lesson video series is for you! With this series, you'll learn the what, why, when and how of 25 well-known holidays in Spain.
In this video, you'll learn all about Moors and Christians Festival in Spanish and how it's celebrated, from food to decorations, while building your Spanish vocabulary. Join Rosa for a dose of Spanish culture! Visit us at SpanishPod101.com, where you will find many more fantastic Spanish audio and video lessons and learning resources! Leave us a message while you're there!
Find out more, go to: http://www.spanishpod101.com/2....014/03/28/video-cult
http://www.SpanishPod101.com/video

https://bit.ly/2Qp3Gv6 Click here to start learning Spanish with the best free online resources ↓ Check How Below ↓
Step 1: Go to https://bit.ly/2Qp3Gv6
Step 2: Sign up for a Free Lifetime Account - No money, No credit card required
Step 3: Learn with the best online resources and quickly become conversational.
In this video you will learn how to use the impersonal forms of the spanish verb haber: hay and no hay.
If you are an absolute beginner Spanish learner, this video is made for you. Our host express herself in simple Spanish and English. This video will challenge your listening comprehension skills and help you progress in your Spanish language study. This is THE place to start if you want to start learning Mexican Spanish.
Click here to get started with Spanish: https://bit.ly/2Qp3Gv6
■ Facebook: https://www.facebook.com/SpanishPod101
■ Twitter: https://twitter.com/SpanishPod101
■ Tumblr: http://SpanishPod101.tumblr.com
■ Instagram: https://www.instagram.com/spanishpod
Also, please LIKE, SHARE and COMMENT on our videos! We really appreciate it. Thanks!
#Spanish #LearnSpanish #SpanishPod101 #MexicanSpanish"

Finally Get Fluent in Spanish with PERSONALIZED Lessons. Get Your Free Lifetime Account: https://goo.gl/niRpuH ↓ Check how below ↓
Step 1: Go to https://goo.gl/niRpuH
Step 2: Sign up for a Free Lifetime Account - No money, No credit card required
Step 3: Start learning Spanish the fast, fun and easy way!
Save 20% on FULL Access to SpanishPod101 with your YOUTUBE coupon for All subscriptions https://goo.gl/oTymlG
In this lesson, you'll learn 10 Things to Do in the Summer in Spain.
■ Facebook: https://www.facebook.com/SpanishPod101
■ Google Plus: https://plus.google.com/+SpanishPod101
■ Twitter: https://twitter.com/SpanishPod101
■ Pinterest: https://www.pinterest.com/SpanishPod101
■ Tumblr: http://SpanishPod101.tumblr.com
Click here to find out more about this lesson: https://goo.gl/dXxthp
Also, please LIKE, SHARE and COMMENT on our videos! We really appreciate it. Thanks!

Click here to get our FREE App & More Free Lessons at SpanishPod101: http://www.SpanishPod101.com/video
Get Alex's Word List for FREE
Here: http://www.spanishpod101.com/s....panish-vocabulary-li
This week Alex will teach you five health conditions, only she doesn't know what they are yet!
In this fast-paced weekly series, learn off-the-cuff Mexican Spanish with Alex! She's been given five words and will explain and teach them to you using sample sentences she makes up on the spot.

????️ https://goo.gl/rGySYM Download TONS of FREE PDF lessons to learn Spanish twice as fast!! ↓ Check How Below ↓
Step 1: Go to https://goo.gl/rGySYM
Step 2: Sign up for free
Step 3: Learn Spanish fast with the best free online resources!
You are a Spanish beginner and want to get started with the Spanish language? This is the perfect place for you! With this Spanish lesson, you will learn all the best pick up lines to use in Spanish! You'll learn how to make a compliment in Spanish. From vocabulary to pronunciation, your Spanish level will never be the same again!
■ Facebook: https://www.facebook.com/spanishpod101
■ Twitter: https://twitter.com/spanishpod101
Also, please LIKE, SHARE and COMMENT on our videos! We really appreciate it. Thanks!

This is the best video to get started with the Spanish language!
https://bit.ly/2MPy56K Click here to learn Spanish twice as fast with FREE PDF!
↓Check how below↓
Step 1: Go to https://bit.ly/2MPy56K
Step 2: Sign up for a Free Lifetime Account - No money, No credit card required
Step 3: Achieve Your Learning Goal and master Spanish the fast, fun and easy way!
In this video, we will teach you the most common 300 Spanish words that you must know to talk about school and work. This is THE place to start if you want to learn Spanish, and improve both your listening and speaking skills.
Get started with Spanish language now! https://bit.ly/2MPy56K
Follow us here:
■ Facebook: https://www.facebook.com/SpanishPod101
■ Instagram: https://www.instagram.com/SpanishPod101
■ Twitter: https://twitter.com/SpanishPod101
Also, please LIKE, SHARE and COMMENT on our videos! We really appreciate it. Thanks!
#Beginners #Vocabulary #Spanish #LearnSpanish #SpanishLanguage #SpanishPod101

https://bit.ly/2JBfXuz Download TONS of FREE PDF lessons to learn Spanish twice as fast! ????️
In this video lesson, you will learn 6 common Spanish expressions for anger and. They will help you express yourself as a native Spanish speaker. This is the best place to start learning the Spanish language!
■ Facebook: https://www.facebook.com/spanishpod101
■ Twitter: https://twitter.com/spanishpod101
■ Instagram: https://www.instagram.com/spanishpod
■ Tumblr: https://spanishpod101.tumblr.com/
Also, please LIKE, SHARE and COMMENT on our videos! We really appreciate it. Thanks!
#Angry #Expressions #Spanish #LearnSpanish #SpanishPod101
