Лучшие

Muhammad Ali was one of the greatest professional boxers of all time. R.I.P 1942 - 2016
Ballpoint pen on 14 x 11 Bristol Paper
Drawing by: Serafin Ureno
Other sites where you can find me!
FACEBOOK: http://www.facebook.com/OrangeMonkey92
DEVIANTART: http://omkdrawings.deviantart.com/
THIS DRAWING ON DA:
INSTAGRAM: http://instagram.com/orangemonkey92
(You Can follow me on Instagram; I'm constantly posting progress pictures and sketches on there.)
(1st Song)
I am using royalty free music by: Topher Mohr and Alex Elena
Music was provided by YouTube Audio Library
Name of track used: Say Yeah
licensed under a Creative Commons license: http://creativecommons.org/licenses/by/3.0/
(2nd Song)
Next to You by jimmysquare https://soundcloud.com/jimmysquare
Creative Commons — Attribution 3.0 Unported— CC BY 3.0
http://creativecommons.org/licenses/b...
Music provided by Audio Library https://youtu.be/gJGoEPryKmI

This is the last video of 2017, but don't worry there will be plenty more in 2018. Happy New Year.
I hope you all like this drawing of Rey from Star Wars The force awakens and The last Jedi.
Medium: pencil, ballpoint pen
Please ????, Comment and Subscribe
???? Drawing by: Serafin Ureno ✏️️
___
➡️ WEBSITE: http://www.serafinureno.com
➡️ FACEBOOK: http://www.facebook.com/OrangeMonkey92
➡️ DEVIANTART: http://omkdrawings.deviantart.com/
➡️ INSTAGRAM: http://instagram.com/orangemonkey92
????MUSIC????
I am using royalty free music by: Teknoaxe
https://www.youtube.com/teknoaxe
Name of tracks used: Royalty Free Music #91(Yoda Doesn't Need a Lightsaber) Drama/Tension Soundtrack
https://youtu.be/paAY0ntftPs
licensed under a Creative Commons license: http://creativecommons.org/licenses/by/4.0/
________________________
Music provided by Argofox:
TheDiabolicalWaffle - Heroes
https://youtu.be/aSfYAMsWAwg
licensed under a Creative Commons license: http://creativecommons.org/licenses/by/4.0/

In the spirit of Halloween here is a drawing of Emily from Tim Burton's Corpse Bride. This drawing was done using only ballpoint pens on Bristol paper board. What is your favorite Tim Burton Movie?
Drawing by: Serafin Ureno
Other sites where you can find me!
FACEBOOK: http://www.facebook.com/OrangeMonkey92
DEVIANTART: http://omkdrawings.deviantart.com/
THIS DRAWING ON DA: http://fav.me/d82fo51
INSTAGRAM: http://instagram.com/orangemonkey92
Follow me on Instagram i'm constantly posting new drawings sketches :)
I am using royalty free music by: Kevin Macleod
http://incompetech.com/music/royalty-free/
Name of tracks used: The Path of the Goblin King & Long Note Four
licensed under a Creative Commons license: http://creativecommons.org/licenses/by/3.0/
Royalty Free Music By: Argofox Creative Commons
https://www.youtube.com/mmmontagemusic
End Track:
Artist: High Scarlet
Track Used: All This Time [House]
Link to licence terms
http://creativecommons.org/licenses/by/3.0/

Team.........You played a good game today and you should be proud. But, next week, we play the Fashion Institute of Technology. In order to beat them, we need to think like them. We usually work out like trained testosterone induced Hamsters. But this week, were going to prepare by learning to draw. Youre not going to have a problem with that are you? ............................No Coach............................Good.
When I got a full scholarship to play football at Notre Dame, I needed to study something......so I studied art. This video is going to teach you how to draw a football player step by step. All you need to do is follow the instructions. Even Field Goal Kickers like Andreas over there will be able to successfully complete this.....PAUSE.....SHUT UP. If you get stuck, never surrender.....just hit the link in the video description to go to a printable step by step resource, which will make this process, even easier. One last thing, before we begin....click on the picture on Little Old Knute Rockney to subscribe to this channel so that you can see more fun and informative videos like this........Yes Coach.....Alright, hands in.....
Were not playing Germantown you tools, were playing FIT! Garl Dang it!
All music is by Kevin MacLeod of Incompetech.com. (Creative Commons License) The songs I used are Bumbly March, Evil March, Hamster March, Waunobe March, Cartoon Battle and The Machine Thinks. I also used a creative commons liscenced clip from this video- http://blip.tv/file/get/Theoh-hamster979.wmv how to draw a football how to draw football players sports artist step by step drawing for beginners step by step drawing lesson draw for kids sports pictures how to draw for free characters to draw

This is my video response to Phil Hansen's (Philinthecircle) interactive toilet paper printing tutorial.
Here is his video- http://www.youtube.com/watch?v=4EudkS-U6QQ
YouTube Visual Arts Category Forum- http://www.google.com/support/forum/p/youtube/thread?tid=2a9806f929074cbd&...
Supplies I Use- http://www.jdoqocy.com/click-4....247664-805536?url=ht
Facebook Page- http://facebook.com/kazanjianm
Twitter- http://twitter.com/kazanjianm

Facebook: http://facebook.com/kazanjianm
Twitter: http://twitter.com/kazanjianm
Visual Arts Category Forum: http://www.google.com/support/forum/p/youtube/thread?fid=2a9806f929074cbd0004b8b1b6901a56&hl=en
I am very fortunate to say that I have the most talented audience on YouTube and the last time that we took a vote on my Facebook page, my viewers decided that that they want me to do a tutorial on how to draw Kate Beckinsale. And I listened! So this video will give you step by step instruction on how to draw actress Kate Beckinsale. Even if you are new to drawing, I guarantee that you will surprise yourself if you follow my steps. So grab your pencil and some drawing paper. If you have your doubts or if you need some motivation, hit the button that says "playlist". Millions of people have viewed my videos and thousands have completed them successfully. I have over 10 years of teaching experience and I am someone who didn't start drawing until I was 20 years old, so I have a different perspective on how to train aspiring artists. Lets Begin!
Step 1: Draw the box that you see. Notice that there are three rectangles inside the box. The reason that there are three rectangles is because a face can often be divided in to three equal segments. Hairline to brow line. Brow line to bottom of nose. Bottom of nose to chin. This formula works perfectly on Kate Beckinsale.
Step 2: Make the U shape that you see for the chin.
Step 3: Make the two shapes for the eye region. Notice that her head is slightly turned so these shapes are shifted slightly towards your left.
Step 4: Make the line at the bottom of the nose. Notice that the septum is lower than the two nostrils. Also, be sure to notice the amount of separation from the eye shapes.
Step 5: Add eyebrows at the top of the eye shapes
Step 6: Look at the image of Kate Beckinsale. Notice that there is a perfect square that is made between the pupils of the eye and the corners of the mouth. Add the four dots that you see. Take some extra time for this step. It is very important for the likeness.
Step 7: Kate is looking down in this image, so her eyes should be banana shaped. Use the dots to guide your placement of the banana shapes. Did I just say that?
Step 8: Add the eyelids above the banana shapes and the lines below.
Step 9: Add the hair shape. Notice how this shape intersects the top rectangle. The height of the hair is more than a third of the face because her head is tilted downwards.
Step 10: Add the top lip. Just connect the dots. The top of the upper lip is like a flattened M shape.
Step 11: I am clearly bananas for Kate because her bottom lip is banana shaped .....the area in between? You guessed it....bananas!
Step 12: Now add some teeth. Here is a close up! If you need help drawing teeth, check out this tutorial or make her a vampire!
Step 13: Kate needs ears. Dont sweat it....Just don't make her Dumbo.
Step 14: is optional. Add her earrings. If you expect to draw this perfectly, curb your enthusiasm. All you need to do is add some squiggley shapes and connect them. Add a banana if it floats your boat!
Step 15: Add a neck.
Step 16: Erase all of the guidelines. In other words, erase what is left from the rectangles. Next, take notice of the link that I just added. After this step we will do shading. Just click this link if you feel that you are messing up. The video that I linked to will teach you an easy way to restart from this point.
Step 17: We will start our shading with the eye region. If you have never cross hatched before, you might want to view the video that I just added in the upper right corner. It is

Time Lapse educational video by Merrill Kazanjian
Step 1- Sketch of the structure of the human face.
Step 2- For step two, I am using a computer scissor to cut out the features of the face from various photographs that I have collected. After I cut them out, I digitally juxtapose them over my simple facial sketch. Artists have called this a digital collage or a photo-manipulation, but I like to say that I am Frankensteining the face together.
This process has evolved from a need to work faster. My main area of expertise is oil painting but some of my paintings have taken me over a year to complete. In addition to being an artist, I am also a full time teacher and a new father. So free time is truly a luxury; I had to come up with a creative way to do my work and this is one of several techniques that I use.
In my opinion, there is no artistic medium that can compete with the surface beauty of an oil painting. Hand made items will always be more beautiful than manufactured ones. I have seen a lot of Digital art that is mechanical and inorganic. But making digital art is a much faster process than making traditional art. I have a lot to say as an artist and not a lot of time to say it, so, for this piece, I am using this digital collage as an underpainting for what I will do later.
Step 3- In Step Three, I am lightening the areas that I plan to rework.
Step 4- For step four, print at maximum dpi and on the thickest paper that you can fit through your printer
Step 5- For step five we will cover the traditional part of tradigital- I am using prismacolor (prisma) pencils and illustration markers and decocolor paint markers. Prismacolor sells great colored pencils. Their covering power is very impressive. Their marks lie somewhere between translucent and opaque. They can be used to mimic scumbling and glazing. In order to glaze mix the color pencil with the prisma marker blender. Decocolor markers have a type of paint inside which is very similar to acrylic paint and has a similar covering power to acrylic paint. Whenever I need to make opaque marks, I use the decocolor markers.
Years ago, I would have considered a method such as this, cheating. I no longer feel that way because art is so much more than just drawing. Drawing is a way for an artist to communicate but it is not the only means that an artist could use to communicate. I feel that while this method is unconventional, it has allowed me to work faster and leave a human fingerprint on the artwork that I produce. The digital collage allows me to Frankenstein interesting facial features and come up with new imagery in a manner similar to the cutouts of Pablo Picasso and Romare Bearden.
I have made bodies in a very similar manner. It can be even more fun to digitally collage a body together. After I finish making a character, I like to use the character multiple times. Since I took my break from oil painting, exactly a year ago, in December 2007, I have made over 500 different characters. My characters are saved as digital files and are used multiple times in my artistic compositions. A sample of my latest work is at the end of this video. Thank you so much for watching!

I have been reading your requests and a frequent one was Rick Grimes from The Walking Dead. The best place to put your requests is on my most recent video (I have over 300 now and i cant go through them all). Thanks! MK
My new channel: http://youtube.com/metaldetectingnyc
Subscribe to kazanjianm (Don't miss any new videos that I make)- http://www.youtube.com/subscri....ption_center?add_use
Facebook: Like me on Facebook to find out about live hangouts or to post your work!- http://facebook.com/kazanjianm
Twitter: I tweet! Do you? http://twitter.com/kazanjianm
My Website: http://merrillk.com
Art Supplies I Use in my Art Work- http://merrillk.com/?sid=135&idpage=supplies_i_use
Petition: YouTube NEEDS a Visual Arts Category: http://www.change.org/petition....s/create-a-visual-ar
Step by Step Drawing Playlist: http://www.youtube.com/playlis....t?list=PLD6E34C7CD58

FINALLY....a landscape painting
realistic oil painting oil paintings dogs figure oil painting oil paintings of seascapes oil paintings children oil painting collections oil painting how to oil painting oil painting websites oil painting for children hawaiian art paintings oil painting reproductions
artists oil paints oil & watercolor paintings portrait painting artist dog oil paintings latest oil paintings oil paintings for sale seascapes oil paintings art oil paints nature oil paintings
large oil paintings oil painting images oil paintings figures oil painting of animals paint oil paints oil paintings of animals fall oil paintings oil painting catalog oil paints for beginners nature oil painting portrait painting artists describe oil painting sketching oil painting seascape oil paintings discount oil painting oil painting pics oil painting gallery
paintings hawaii oil painting supplies beach paintings hawaiian art prints hawaii paintings hawaii fine art hawaiian paintings hawaii art galleries hawaii oil paintings tropical paintings tropical flower paintings hibiscus painting hawaiian art galleries hawaii painters hawaii artist portrait oil paintings hawaiian art watercolor landscape paintings oil painting portraits oil paintings portraits oil painting portraits how to maui art antique oil portrait painting fine art oil paintings fine art oil painting landscape oil paintings gallery
still life oil paintings oil paint portraits realism oil painting oil paintings of still life cafieri oil paintings oil paint portrait oil paintings of landscapes oil paintings by famous artists artwork oil paintings portrait paintings by famous artists oil pastel paintings impressionist oil paintings portrait paintings children painting contractors oil paints for artists classical oil paintings landscape paintings famous artists oil paint landscapes oil paintings by landscape oil paintings for sale classical oil painting how to oil paintings nude oil paintings oil painting societies american oil painting oil painting website realistic oil paintings oil paintings of children big island hawaii maui hawaii vacations oahu hawaii vacation packages hawaii cruise vacation honolulu hawaii map of maui hawaii things to do in maui hawaii best island in hawaii hawaii vacation maui island hawaii kona hawaii
cheap flights to honolulu hawaii beach luau

LINK- http://merrillk.com/?part=fineart&articles_id=8462&act=artist1&artist=69&collection=114
Facebook- http://facebook.com/kazanjianm
So. you wish to draw Bruce Lee do you?
Hahahahahaha
Oh you are serious?
Well then?
You must Enter the Dragon with me
I will train you to be deadly with a pencil. This video will teach you how to draw Bruce Lee's Head. Video two will teach you how to draw Bruce Lee's body.
Simply follow my step by step instructions and eat fish heads twice per day and you will have no problems with your drawing.
If you do not like fish heads, I recommend that you hit the link in the video description. You will be taken to a resource with words and pictures. Simply download and print and you will not need the protein content of the fish heads.
One more thing before your training begins. It would be prudent for you to click on Little Old Pai Mei and his Pikachu friend so that you can subscribe to this channel. Because, you will never be able to spell it again!
I will act normal again in three seconds.......
Step 1: Observe then draw the shape that you see. The bottom is a semi circle
and the top is trapezoidal.
Step 2.) Add the two shapes that you see. They will be the area around Bruce
Lee's eyes.
Step 3: Add the shapes which will make up Bruce Lee's nose. Be sure to notice that
the size of these shapes when together is slightly smaller than the eye shapes
from the previous step.
Step 4: Step four is the most complicated step. Be sure to observe it for a few
seconds before you draw it. Notice that the trapezoidal mouth shape is as wide as
the nose shape above. The shadow shape encircles the mouth and then forms a
shape that slightly resembles the State of California to the right of the mouth.
Step 5: Put in the lines which will separate the eyebrows and the area above Bruce
Lee's eyes.
Step 6: Is tricky. Be sure to give it extra time. Add the eyes and be sure to notice
that they lie directly in the middle of the shapes added in step two. Bruce will have
an angry expression in this picture so his eyes will be wide open and his eyebrows
will be pushing downwards.
Step 7: Add Bruce Lee's vintage 70's Emo haircut.
Step 8: Add the two shapes for his neck.
"how to draw famous people step by step"

You requested it and I listened. This video will teach you how to draw Drake. What's that you say, you failed art class? You have a low frustration tolerance and you have a fear of pencils. No problem! Check out the gallery on my website or my facebook like page and you'll see that thousands of people successfully completed my tutorials. And many had no previous art training. So even if you've had all of your fingers amputated and a nervous twitch, I got you covered. If you can draw shapes, you can successfully draw Drake. So hit the subscribe button, grab your pencil and paper and lets begin.
WE NEED A VISUAL ARTS CATEGORY ON YOUTUBE THREAD-http://www.google.com/support/forum/p/youtube/thread?tid=2a9806f929074cbd&hl=en&fid=2a9806f929074cbd0004b630ad37cc3e
Facebook- http://facebook.com/kazanjianm
Twitter- http://twitter.com/kazanjianm
Website- http://merrillk.com
(Merrill) Supplies I Use- http://www.jdoqocy.com/click-4....247664-805536?url=ht
Step 1: Make the shape that you see.
Step 2: Make the second shape, notice that it is about the same height as the first shape.
Step 3:Round out the shape for Drake's hair. Notice that it is slightly wider on your right side.
Step 4: Make the two egg shapes.
Step 5: Make the shape that you see, notice that it is the same height as the forehead shape and the hair shape.
Step 6: Make the lines for the nose. Notice the placement of these lines, compared to the egg shapes for the eyes.
Step 7: Drake needs ears. Dont stress out about the minor details. Notice that these shapes line up with the nose shape.
Step 8: Make the bowl shape for the chin. Notice that it is slightly taller than the main shapes above it.
Step 9: Make the neck and the body. Do it fast and save all of your concentration for the proper placement of the face shapes.
Step 10: Add the two shapes for Drake's lips.
Step 11: Add Drakes super thick eyebrows to the tops of the egg shapes from step four.
Step 12: Add the upper eye lines. Notice the shapes that are created in between the eyebrow shapes and the upper eyes. This will help you get the placement correct. Also, as a general rule, there is one eye length in between each eye. This is not the case for Drake. There is slightly more space between the eyes.
Step 13: Make the U shapes for the pupil and iris and close the eye shapes.

Welcome to part one of my three part tutorial, which will show you how to draw the ear at the three most common angles. Part one will specifically show you how to draw the ear at the three quarters 3/4 angle. I recommend that you pause the video at the end of each step and listen to the instructions. Lets begin.
Step 1: Draw a football shape. When the ear is foreshortened, it slightly resembles a football.
Step 2: Make a candy cane shape. Notice that the candy cane closely resembles a letter C.
Step 3: Make a bubble letter C shape. Notice that the bottom of this shape is a triangle. Notice that this c shape is slightly more narrow than the ear from the side view.

What is Glazing? The technical answer is 1.) multiple thin layers of transparent oil paint (applied at the end of a painting)....but what I want YOU to remember is 2.) Glazing is pure magic 3.) Knowing how to glaze will take your painting abilities to the next level.
1.) Why glazing is an important painting strategy
2.) (We will touch a little bit on) The science of refracted light
3.) Which paints to use. (How can you tell if a paint is a glazing color?)
4.) Which brushes to use for glazing
5.) How to do it! (The technique of glazing oil paint)
Glaze layers happen at the final stages of a painting, so lets take you to the end of the painting that you just saw right now. I am going to keep things concise and to the point. Give me your full attention for the next few minutes and you will acquire a solid understanding of glazing.
1- Why is glazing an important painting strategy?
Think about the last time that you had a sunburn. When sunburns heal, a layer of skin usually peels off your body. Take a second to remember what that skin looks like. The peel of skin is very thin, smooth and it is possible to see light through it.
Our outermost layers of skin, the epidermis, is comprised of multiple layers of skin similar to the peeled layer of skin that you just imagined. Glazing, the application of multiple, thin, transparent to translucent layers, is like the epidermis of a painting and it is important for an artist to know how to glaze so that he or she can get a more life like effect to their work.
2- The Science of Refracted Light
Light refracts through the transparent and translucent layers of a painting. In other words, it penetrates these layers and picks up any color that these layers contain. A good analogy for this concept is a seashell on the beach. Think of how the color of a seashell seems to change when it is covered with ocean water. The shell seems to change color, but in actuality, all physical characteristics of the shell remain the same. The sunlight refracting through the water alters the shells appearance just as glaze layers affect the final appearance of a painting.
3- Which paints to use
Paint colors have different characteristics. For instance, red, is not just red when it comes to painting. Cadmium red, the color on the left, is extremely opaque and has a great covering power. The color on the right, alizarin crimson is extremely transparent with a lesser covering power. Notice how you can see the blue line through the alizarin crimson, but not the cadmium red.
Most paint companies label the outside of their paint tubes to communicate these differences. Usually a box or circle is used to say if a paint is transparent, translucent or opaque. A filled box or circle is a symbol stating that a color is opaque while the opposite is true if a paint is transparent.
When you glaze, you would add painting medium such as liquin to the paint. It is easy to glaze with transparent colors such as alizarin crimson but it is also possible to glaze with the cadmium red. In order to glaze with an opaque color, use a little bit of paint and a lot of painting medium. I would advise any beginner or novice painter to stick with transparent and translucent paints.
4.) Which brushes to use
When you glaze, have multiple soft tipped brushes within reach. A variety of sizes and shapes including round tip and fan brushes are ideal. Now we are ready for the demonstration
I did the glazing in three sittings over 21 days. It is important to let the paint thoroughly dry between glazes. If it doesnt, you will start picing up some of the previous layer. Notice that I am starting off by using two brushes. One to apply paint and the other to move the paint around. This is called dry brush technique and it is your most important glazing strategy. Dry brush gives you a smooth untextured finish......
I wouldnt recommend this for anyone trying glazing for the first time, but I am actually using titanium white when I create a highlight.....that is a white with extreme covering power....equal to what you saw with cadmium red. I use that only in the brighter highlight areas and when I use it, I use a ton of painting medium with it. ........
The shadows get a little tricky, I try to look at my reference photo to match the shape but I am very aware of their edges as well. If there is a soft edge, I soften it with another dry brush....This is VERY IMPORTANT....Do not clean your brush in mineral spirits or turpenoid. Instead, just wipe your brush on a paper towel because those paint thinners will dissolve the entire glaze.....If a brush becomes unworkable, put it aside and use another soft tipped brush.

"Come as You Are", but bring a pencil......because you are going to learn how to draw Kurt Cobain step by step, "On a Plain" piece of paper. "All Apologies" if this intro gives you an "Aneurysm", I just want to state that if you think that your drawing skills have "Plateaued" you should try my step by step videos to get them "In Bloom". My videos wont "Drain you" and you wont think they're "Dumb"....unless if you're a "Negative Creep"......and I have over 100 on my channel so be sure to "milk it"........... So, unless if you have "Something in the Way", please commit a "Sliver" of time to learning how to draw Kurt Cobain. Please don't forget to Subscribe. Just click on my "Scentless Apprentice" who "Smells Like Teen Spirit"..................SUBSCRIBE........................Sorry, I have "Tourettes".........Err "Nevermind.
Step 1: Draw the arch and the two shapes. Notice that the shape on the left is egg shaped and the shape on the right is shaped like home plate in the game of baseball.
Step 2: Add the hair shape on the left side of the page. Dont stress, this shape doesnt have to be perfect but it should be proportionately larger than the shape from step one.
Step 3: Add the hair shape on the right side. Dont stress out on the hair shape, but take extra time on the shape of the face.
Step 4: Add the nose shape. Draw what you see rather than what you know. The nose looks like this because of a strong shadow shape. Just trust me and draw it.
Step 5: Add the mouth shape. The top lip is like a flattened M and the bottom lip is like a cereal bowl. Be sure to notice its placement compared to the other features of the face.
Step 6: Fill in the eye shapes. Take extra time on this step. The eyes are the key to the likeness.
Step 7: Add the shapes to the hair. These do not have to be placed perfectly since hair is a "Radio Friendly Unit Shifter".
Step 8: Add the shapes for the facial hair.
I am combining two methods called 1.) cross hatching and 2.) smudging.....right now. Pause the video at different points and use the image on the screen as your reference image. It doesnt get very dark under the eyes.......however, above the eyes (between the eye and the eyebrow) it gets very dark. Kurt has dark and full eyebrows. Use a #2 (HB) pencil to start. Dont be scared to press hard in the eye region. The nose is tricky. The darkest part is the nostril (not part of the step by step video). But the entire shape of the bottom of the nose gets pretty dark. After, I fill it in, observe it, then draw it. I am using a #7 Bristle Flat brush for the shading. The top lip is dark and solid in shape. The LEFT side of his face (the side on YOUR right) is lighter in tone than the right side. The bottom left corner of the page will get very dark. I "went right in" with a 6B pencil. REMEMBER, shading is all about RELATIVITY, so compare the tones of the different areas of the image, The shape at the bottom of the face will eventually be blended in with other dark tones. In order to make the hair "pop out" you need to darken the background. (Its all about relativity!!!) The hair is a LOT of Adding....then erasing.....adding...then erasing ....Be sure to make your strokes in the same direction at the hair in this reference image.....Notice that I am using the eraser to "draw". Now the "PORTRAIT" begins....Now it looks like a human being......but I have to "wrestle" with it to make it look like Kurt Cobain. Use a slip sheet (look under my hand) when you get this far. The darkest areas have several layers of hatching. (8B pencil).

WE NEED A VISUAL ARTS CATEGORY ON YOUTUBE THREAD-http://www.google.com/support/forum/p/youtube/thread?tid=2a9806f929074cbd&hl=en&fid=2a9806f929074cbd0004b630ad37cc3e
Facebook- http://facebook.com/kazanjianm
Twitter- http://twitter.com/kazanjianm
Website- http://merrillk.com
(Merrill) Supplies I Use- http://www.jdoqocy.com/click-4....247664-805536?url=ht
Every artist goes through growing pains while learning their craft. I recently got an interesting comment from a subscriber who wrote, " Merrill could you please make another video for practicing the shading. I made my drawings good than i screw them up with shading! please help!
Fut Duppe was famous for ruining his portraits, by shading too much. His name has entered the colloquial and artists often express their displeasure while critiquing a work by saying phrases such as, "Wow! Your drawing is Fut Duppe" meaning that it is flawed in the quality of the shading. Here is an example of a Fut Duppe Drawing. Girls dont have moustaches........Thats Fut Duppe.
Step 5: Take out a ballpoint pen in a color that is not similar to the pencil shading of the Fut Dup Drawing. Go over every correct line. Do not touch the Fut Duppe parts. It is imperative that you do not move the paper while doing this to prevent a second Fut Duppe Drawing. Essentially what we are making is a print.
If you follow my steps correctly the graphite on the back will make a print on the paper below, thanks to the pressure from the ball point pen.
Step 6: After you finish retracing the lines that you want with the ballpoint pen, remove the Fut Duppe Drawing from the paper below. You are now be able to restart your shading and there should be no fear of screwing up again because this process can be repeated as many times as you want.
So there you have it. Now the young artists of the world know that can take chances with their shading without worrying that they are going to BLEEP it up. Happy drawing everybody!
Song- Brandenburg No4-1 BWV1049 by Kevin MacLeod of Incompetech.com

LINK- http://merrillk.com/?part=fineart&articles_id=11223&act=artist1&artist=69&collection=188
WE NEED A VISUAL ARTS CATEGORY ON YOUTUBE THREAD-http://www.google.com/support/forum/p/youtube/thread?tid=2a9806f929074cbd&hl=en&fid=2a9806f929074cbd0004b630ad37cc3e
Facebook- http://facebook.com/kazanjianm
Twitter- http://twitter.com/kazanjianm
Website- http://merrillk.com
(Merrill) Supplies I Use- http://www.jdoqocy.com/click-4....247664-805536?url=ht
This video will give you step by step instruction on how to draw hands folded in prayer.......But we are not going to draw just any pair of praying hands, we are going to recreate Albrecht Durer's study of praying hands, in pencil. If you are nervous to attempt one of the most spectacular drawings of the Northern Renaissance and one of the most famous drawings of all time, have no fear, you will not need to rely on divine intervention.....
As I was saying.....I got your back. Just hit the link in the video description and you will be taken to a page with text and photo resources to help you along. Are you ready? Lets do this!
Step 1: Draw the three shapes that you see. The bottom shape resembles a bowl, the middle shape is trapezoidal and the top shape is triangular. Together, these shapes resemble a Christmas tree.
Step 2: Add the double shape for the thumbs. Notice that the closer thumb is the exact height of the trapezoid.
Step 3: Add the palm of the right hand.
Step 4: Add the fingers of the right hand.
Step 5: Add the shapes at the bottom.
Step 6: This is a tricky and important step. We are carving out fingers. Use the lines left from previous steps as comparison points. Notice that the fingertips go above and outside of the triangle shape. Also notice where the lines that separate the fingers, end in the trapezoid shape. Here is a close up.
Step 7: Add the details on the right hand. Here is a close up.
Step 8: Now, we are going to put in the shapes for shading. DO NOT feel the pressure to be exact. If its slightly different than mine, IT IS OK!!!!.....Lets start with the thumb. Add the shadow shapes that you see. DO NOT press too hard on the pencil.
Step 9: Add the shading to the lower part of the left hand.
Step 10: Shade the middle of the left hand.
Step 11: Shade lightly between the fingers.
Step 12: Add the fingernails and the oval shapes at mid finger. Notice that the oval shapes are not parallel with each other.
Step 13 Add the shading to the palm and wrist of the right hand.
Step 14: Add the shading to the top of the right hand.
Step 15 Shade the fingers of the right hand.
Step 16: Use the blending stump (tortillion) to smudge the edges of the shapes (see the process in the video above)
Step 17: Fingers are rounded shapes. Use the blending stump to smudge the lines between the fingers. Leave some space for a highlight towards the left (your left); where the light is coming from.
Step 18: The shading should get darker as you move from left to right. Press a little harder and use the higher number B pencils. I used a 2B and 6B pencil as I progressed.
Step 19: By now, your drawing should look similar to this. The bony structure of the back of the hand is starting to get "defined". Use your eraser and HB pencil to draw what you see here. Do your best, this is a DIFFICULT task; but it gets easier if you look back at your reference image often.
Step 20: Now, Start pressing a little bit harder with your B pencils (2B.3B,4B,5B,6B,7B,8B). Focus on the edges.
Step 21: NOTICE the DIFFERENCE of EDGES. They are NOT all the same!!!!!! Some are hard, some are soft, some are dark, some are light.
Step 22: USE THE ERASER! It is a fantastic drawing tool. In the video you will see me use a kneaded eraser as well as the one on the back of a pencil.
Step 23 is optional. I decided to shade the background to bring the highlights out on the hand. WHITE highlights on WHITE background does not work!!!!!!
Step 24: Its OK to use your fingers..........Sometimes......but especially at the end of a drawing rather than the beginning (the oils in your hand will affect the paper at the beginning of a drawing).
I also dedided (very late) to add the shirt sleeve. MY BAD!!! See the video (above) for tips on this.

Link- http://merrillk.com/?part=fineart&articles_id=13264&act=artist1&artist=69&collection=462
WE NEED A VISUAL ARTS CATEGORY ON YOUTUBE THREAD-http://www.google.com/support/forum/p/youtube/thread?tid=2a9806f929074cbd&hl=en&fid=2a9806f929074cbd0004b630ad37cc3e
Facebook- http://facebook.com/kazanjianm
Twitter- http://twitter.com/kazanjianm
Website- http://merrillk.com
(Merrill) Supplies I Use- http://www.jdoqocy.com/click-4....247664-805536?url=ht
People, get ready. Three Little Birds asked me to do a step by step tutorial on how to draw Bob Marley. So Get up! Stand up. Grab a pencil because today YOU are going to draw one of the greatest musicians that ever lived. What? No art experience? No woman no cry! Don't worry about a thing...... in other words everything is gonna be alright. This train is bound for glory and you are a passenger my friend. Just listen to my step by step instructions and pause the video at the end of each step and I think that you will surprise yourself. Could you be loved? I dont know. Thats a multi faceted question with a lot of factors. Go ask Dr. Phil. Could you make a successful portrait of Bob Marley? I can answer that. Yes you can.
Before we begin, I recommend that you watch this video on my website. I made an additional cheat sheet tutorial with photos and text. There is also a supply list and an extended shading tutorial. Just hit the link in the video description below the video player. Lets get started.
Step 1: Draw the shape that you see. Really it is two shapes, Bob Marley's silhouette and the background. These shapes do not have to be perfect in order for this portrait to be successful.
Step 2: Draw the M shape that I just added, Notice where it intersects with the shape from step one.
Step 3: Add the shapes for the collar on his shirt.
Step 4: Add the shape for the neck. It kind of looks like a cat's head.
Step 5: Add the shape for Bob Marleys face. Notice the tilt of his head and the placement within the hair shape and above the cat's head shape from the previous step.
Step 6: Add in the shapes for the eyes. Here is a close up.
Step 7: Add in the shape for the nose. The other shapes surrounding the nose are shadow lines and facial hair. All together, this shape sort of resembles a crab.
Step 8: Add the four shapes for the mouth. Notice that the top two are slightly bigger than the bottom two.
Step 9: Draw in the shape for the eyes. Take some extra time to observe where each shape falls within the eye shape.
Step 10: Draw in the shape for the teeth. There are 8 teeth visible. Notice the dark values in the corner of the mouth.
Step 11: Add the shapes in to the hair and in to the clothing. Don't stress, these shapes do not have to be super accurate.
Step 12: Partially erase the lines from step 11. We are going to use charcoal and the dry brush technique. Dark pencil lines will show through.
MERRILL'S SUPPLY LIST: BOB MARLEY
- Bristle Brushes
- Mineral Spirits
- Black Oil Paint
- Watercolor Paper
- Charcoal
- Black and White Colored Pencils
- Prismacolor Art Stix Colorless Blender
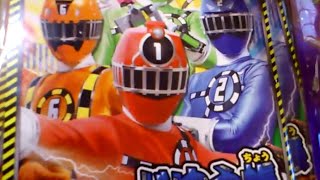
2014年夏に公開の映画「烈車戦隊トッキュウジャー THE MOVIE ギャラクシーラインSOS」のグッズ紹介レビュー動画です。
映画『劇場版 仮面ライダー鎧武 サッカー大決戦!黄金の果実争奪杯!』『烈車戦隊トッキュウジャー THE MOVIE ギャラクシーラインSOS』予告編
⇒https://www.youtube.com/watch?v=1xasv7XRRx8

I've changed to "3D Mt.Fuji" live wallpaper.
Mt.Fuji of winter is so beautiful!
Androidのライブ壁紙を3D"冬の富士山"にしてみました。
富士山もいいけど手前で遊んでいる鶴にも癒されます。
I downloaded here.
⇒https://play.google.com/store/apps/details?id=com.dmf.wall.Wall6Snow03Trial&referrer=utm_source%3Dlive-wallpaper.wkeya.com
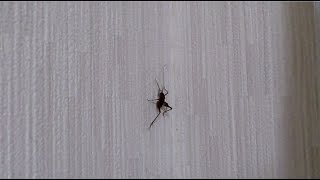
Insect that has a strange shape appeared in front of me suddenly.
This is what we call "Public Restroom cricket" in japan.
便所コオロギがリビングの壁にあらわれた!
