トップ動画

Welcome to 「PIN KORO - YouTube」♪
Thank you for the visit.
Today's video is 「Very Easy ! How to turn words RUN into a Cartoon - doodling art on paper」

How to Drawing a 3D Love Heart
Welcome to 「PIN KORO - YouTube」♪
Thank you for the visit.
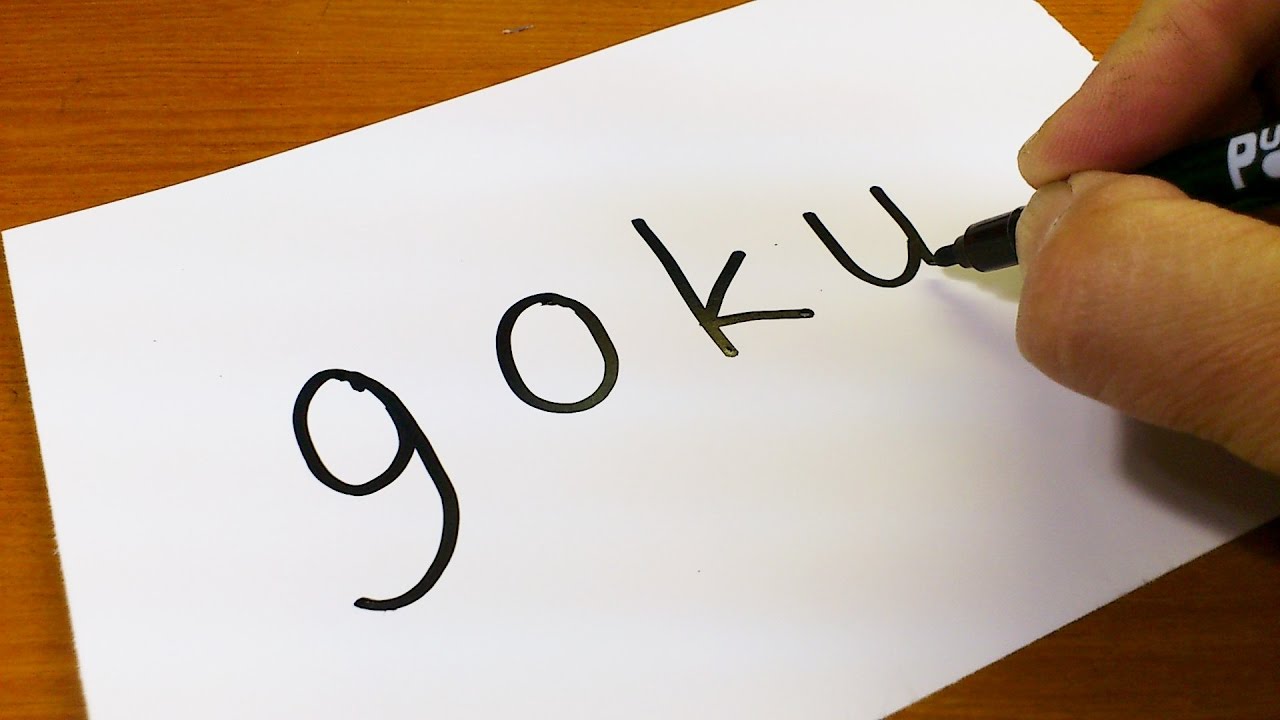
Today's video is 「Very Easy ! How to draw turn word GOKU(DRAGON BALL) step by step into a Cartoon - Learning Cute transformation doodle art on paper for beginners」
Let's learn how to drawing Kawaii doodle with me.
In response to many request, I challenged it.
increible truco con la palabra "GOKU(DRAGON BALL)" - Dibujos faciles paso a paso

Welcome to 「PIN KORO - YouTube」♪
Thank you for the visit.
Today's video is 「Thank you !! 700,000 Subscribers !! 2017~2018 omnibus」

Music has a special relationship with each person's memory. It ages with us. The music that we listen to as our lives elapse, stays with us and leaves an imprint that is unique for each person. Listening to an old song is quite possibly the most powerful way to recall the past. The death of Whitney Houston rocked my generation this week. She contributed to the soundtrack to many of our lives. In this video, I am going to do what I do best. I am going to give you a step by step formula so that you can draw Whitney Houston. While this might sound challenging, I want to reiterate that this is what I do best. So grab a pencil and paper and get ready to surprise yourself. Thousands of people have successfully completed my drawing tutorials and you are the next person to do so.
Step 1: Make the five dots that you see. While this step appears to be easy, the relationship between the dots is crucial so pause the video and take your time. Notice that if you connect the dots, we will have two triangles. Notice that the top triangle is larger than the bottom one.
Step 2: Add the nostrils and the line that connects them.
Step 3: Add circles around the top row of dots. This will eventually be the irises of each eye.
Step 4: Complete the eye shapes.
Step 5: Add the rainbow shapes for the eyelids.
Step 6: Add eyebrows
Step 7: Add the very soft line on your left and the backwards C shape on your right.
Step 8: Add the flattened M shape for the upper lip.
Step 9: Add teeth.
Step 10: Add the bottom lip.
Step 11: Add the oval shape for the face
Step 12: Add the shapes for the neck.
Step 13: Add the lines for the blouse.
Step 14: Add the shape for the hair. Just generalize it. It doesnt have to be perfect.
Step 15: Add the stray ends to the hair and the bangs. It was the 80's.
Step 16: Now its time to shade. If you feel that you made an unfixable mistake after you start shading, hit the first link in the upper right corner. This will give you an easy way to start over from this point rather than from the beginning. The method of shading that I am using is called cross hatching. To see my tutorial on cross hatching hit the second link in the upper right corner.
Start off by darkening the eye area. Whitney is wearing mascara in this picture so you can darken the lashes above and below the eye. The upper set of lashes will be thicker than the bottom set. The area between the eyebrows and the upper eyelid will be hatched to a tone that is almost as dark as the eyebrows. Notice that there are highlight areas though. Do not make a solid line for the bridge of the nose. That will remain as a smudge. You can use a paintbrush, a blending stump or a q-tip to soften it. Notice the difference in tone between the left side and the right. The white stick that you see me using is called a tortillion or a blending stump. Do some light hatching over the cheeks and the nose and some extra hatching to round the face by where the hair is on each side of the face.
Step 17: Its time to shade the forehead. be sure to continue the tones that exist from the previous step. The center of the forehead will be in highlight and the hair will be darkened relatively dark. Make the temple area almost as dark as the hair. Use a paintbrush, blending stump or Q-Tip if you wish to smooth the transition from dark to light.
Step 18: The top lip will be darker than the bottom lip and the top lip will be at its darkest point as it moves towards the opening for the mouth. Shade around the bright highlight on the bottom lip. It should be similar in tone to the teeth. The tones on the bottom of the face are tricky. You will have to round the face at the jaw line without making her look like she has a beard. There is a solid line at the jaw line and the area below the chin will be in heavy shadow, as you will see in our next step.

Link- http://merrillk.com/?part=fineart&articles_id=13881&act=artist1&artist=69&collection=464
WE NEED A VISUAL ARTS CATEGORY ON YOUTUBE THREAD-http://www.google.com/support/forum/p/youtube/thread?tid=2a9806f929074cbd&hl=en&fid=2a9806f929074cbd0004b630ad37cc3e
Facebook- http://facebook.com/kazanjianm
Twitter- http://twitter.com/kazanjianm
Website- http://merrillk.com
(Merrill) Supplies I Use- http://www.jdoqocy.com/click-4....247664-805536?url=ht
Hey Everybody its Merrill. Today we are going to do something different. I made this video for my viewers who feel that they have graduated from my step by step videos and need another challenge. As usual we will be using paper and pencil and a blending tool of some sort. In other words a blending stump....and or a paintbrush. If you dont have either of those use a q tip. Now for the first time, I am going to give you some required viewing. A while back I made a very good human proportion tutorial and knowing human proportion will help you while doing this drawing. If you wish, hit the link in the video description to download this image to print so that you have a paper reference image while you draw. The image will also be posted on the screen.
Your first job is to see two shapes. The figure and the background. I want you to lightly scribble in the general shape of the figure. Start to notice the relationship between the head and the hips. The head is almost directly over her left leg and her hip is sticking out to the right. Notice the width of the arms compared to the torso. Notice where the finger tips end. It might be helpful to know that when our arms are fully extended to the side like when we give somebody a hug, the measurement from fingertip to fingertip is very close to our height. Be sure to notice the shape made by the negative space under her left arm.
Once you get the general shape of the figure sketched in, you can start breaking the figure down in to smaller shapes. Notice that I am not just outlining the mass that I am creating, I am editing it. I am carving out the placement of the shapes just like I would for one of my step by step videos. The shirt was an easy place to start because it is central to this drawing. I followed it with the belt and the pants.
Im developing the shading a little earlier than I would with my step by step videos. The shading actually helps me with future placements. A shadow forms a shape and I use these shadow shapes to help me place highlights and other shadows. When you are developing the left arm be sure to notice the shape that is formed in between.
At this point. It is all about edges. Great artists make their original lines invisible. I have not managed that level of skill yet but I am getting better at it because im aware of the importance of edges.

This video will teach you how to draw NBA superstar, Kevin Durant of the Oklahoma City Thunder (formerly Seattle Supersonics).
Narration: That was me before I became a serious artist ..... While my jumping skills have regressed, my video making skills have improved. You dont need to tilt your head to the left anymore. Now that you have seen my very mediocre Sportscenter highlight, I am going to teach you about highlighting and shading in a drawing video. This video will teach you how to draw the top player on team USA, Mr. Kevin Durant. All you have to do is follow the step by step instructions and pause the video at the end of each step while you draw. Im going to make it easy, so I hope that you give it a try. Lets get started.
Step one- Observe, then draw the two shapes that you see. The top shape is similar to a crescent moon. The bottom shape is trapezoidal and the base of the bottom shape is similar to a childs drawing of a bird in flight.
Step two- Add the four oval shapes for the eyes and ears. Be sure to notice that the left ear is much thinner because the head is turned.
Step three- The double shape that I just added is the edge of the bottom of the nose and a parallel line for a shadow. Be sure to notice the symmetrical smile lines on both sides of the nose as well. Here is a close up.
Step four is a tricky step. Start with completing the oval for the chin. Next, create the symmetrical lines for the moustache. Durant also has sparse facial hair below his bottom lip and at his chin.
Step five is the most difficult step. I added the mouth and I will give you a close up in a second. Notice the shape of the teeth and the shadow below the teeth. Take some extra time to observe the teeth are slightly taller than the shadow below. Also, notice that the top lip gets darker as it turns towards the teeth.
Step six- add the eyebrows to the top of the oval shapes from step one and the eyes towards the bottom. Also, observe and add the details to the ears.
Step seven. add the jersey.

LINK- http://merrillk.com/?part=fineart&articles_id=8462&act=artist1&artist=69&collection=114
Facebook- http://facebook.com/kazanjianm
So. you wish to draw Bruce Lee do you?
Hahahahahaha
Oh you are serious?
Well then?
You must Enter the Dragon with me
I will train you to be deadly with a pencil. This video will teach you how to draw Bruce Lee's Head. Video two will teach you how to draw Bruce Lee's body.
Simply follow my step by step instructions and eat fish heads twice per day and you will have no problems with your drawing.
If you do not like fish heads, I recommend that you hit the link in the video description. You will be taken to a resource with words and pictures. Simply download and print and you will not need the protein content of the fish heads.
One more thing before your training begins. It would be prudent for you to click on Little Old Pai Mei and his Pikachu friend so that you can subscribe to this channel. Because, you will never be able to spell it again!
I will act normal again in three seconds.......
Step 1: Observe then draw the shape that you see. The bottom is a semi circle
and the top is trapezoidal.
Step 2.) Add the two shapes that you see. They will be the area around Bruce
Lee's eyes.
Step 3: Add the shapes which will make up Bruce Lee's nose. Be sure to notice that
the size of these shapes when together is slightly smaller than the eye shapes
from the previous step.
Step 4: Step four is the most complicated step. Be sure to observe it for a few
seconds before you draw it. Notice that the trapezoidal mouth shape is as wide as
the nose shape above. The shadow shape encircles the mouth and then forms a
shape that slightly resembles the State of California to the right of the mouth.
Step 5: Put in the lines which will separate the eyebrows and the area above Bruce
Lee's eyes.
Step 6: Is tricky. Be sure to give it extra time. Add the eyes and be sure to notice
that they lie directly in the middle of the shapes added in step two. Bruce will have
an angry expression in this picture so his eyes will be wide open and his eyebrows
will be pushing downwards.
Step 7: Add Bruce Lee's vintage 70's Emo haircut.
Step 8: Add the two shapes for his neck.
"how to draw famous people step by step"

http://merrillk.com/index.php?part=fineart&articles_id=5337&collection=114 This is a continuation of my series on how to draw facial expressions with drawing pencils. Today, We are going to concentrate on the expressions of shock and fear. I video taped the creation of 14 sketches, to give you a lot of chances to learn. You will see profile, 3/4 and frontal views and both male and female faces. But, before we begin, take a second to glance at the major differences. This information will be discussed in the video and you can download on my website Merrillk.com. Just type the words shock and fear in the search box to download this resource. Or, if you are watching on my youtube channel, hit the link to the right to view this resource. I hope that you learn a lot. Here we go.
Character 1- In the first character, I want to highlight the gaping mouth. Notice that the top teeth are exposed. When you draw this expression, the top lip is pulled up, which shortens the distance between the lip and the nose
Character 2- For this character, I want to highlight that the eyebrows usually separate and the forehead flattens for this expression. This is the opposite of the expression of anger where the eyebrows are pulled closer to each other.
Character 3- For this sketch I want you to notice the separation of the iris from the bottom eyelid as well as the perfect C shape that the mouth is in when it is in profile.
Character 4- For this character, take note of the separation between the iris and the top eyelid and the amount of space between the eyebrows- Both very common in a fearful expression.
Character 5- For this character, I want to highlight the lines on either side of the nose. For this expression you can make these lines more visible.
Character 6- This character has his eyes shut tight and his mouth open wider than any other character in the picture. To draw a scream, make the area between the eyelids as dark as the lashes and darken the area around the eye. Make the mouth extra wide.
Character 7- This character seems more startled than scared because her mouth is less open and there is relatively little shading around the eye.
Character 8- In this character, I wish that I left the mouth in the classic C shape for drawing this expression in profile view.
Character 9- Notice the dark rings under the eyes of this character. That and the separation between the iris and the upper eyelid makes him look distraught. Also notice that the mouth doesn't always have to be gaped open to convey fear. Instead, I filled the gap with teeth.
Character 10- This character has a lot of facial commonalities with the other characters that have been drawn so far. I added a still pose with a pointing finger to supplement the facial expression.
Character 11- A very common pose to convey shock and fear is to place both hands on either side of the face- Also known as the OMG pose.
Character 12- Notice that this character has separation on both sides of her iris. A great way to make someone look terrified.
Character 13- Since this character wears glasses, I made each eye seem magnified. I wish that I added a separation between the iris and the eyelid.
Character 14- I should have stopped at 13!. I made his head too small for his position in the picture. I know this because the people in the row behind him were significantly bigger- a mistake in perspective drawing.

WE NEED A VISUAL ARTS CATEGORY ON YOUTUBE THREAD-http://www.google.com/support/forum/p/youtube/thread?tid=2a9806f929074cbd&hl=en&fid=2a9806f929074cbd0004b630ad37cc3e
Facebook- http://facebook.com/kazanjianm
Twitter- http://twitter.com/kazanjianm
Website- http://merrillk.com
(Merrill) Supplies I Use- http://www.jdoqocy.com/click-4....247664-805536?url=ht
How to draw the WTF expression step by step. How to draw a shocked face. how to draw a surprised person. How to draw a surprised man. How to draw somebody shocked. How to draw a person with gaping mouth. Draw a surprised expression. Pencil Drawing tutorial. Shading with drawing pencils. How to shade with pencil. How to draw a face. How to draw step by step. How to draw huh wtf. Misery. Pencil drawing tips. How to use a Tortillion. How to use a blending stump. How to shade with a paint brush. How to cross hatch. How to smudge. How to build tones in a drawing. How to draw a mourning person. How to draw a person in rapture. Click on any of the pictures to go to my other facial expression videos, or hit the subscribe button. There will be lots more coming soon.
This video will give you step by step instruction on how to draw the huh facial expression........Just pause the video at the end of each step and follow the instruction and you will master the huh facial expression. Lets begin.
Step 1: Draw the two circular shapes and the rainbow shape for the forehead. Be sure to notice the size of the rainbow shape compared to the circular shapes.
Step 2: Draw in the nose shape. Notice that it is perfectly symmetrical. Also notice that it resembles a long winged bird in flight.
Step 3: Draw in the mouth. Notice that it is comprised of four distinct shapes- the upper lip, the upper teeth, the inner mouth and the bottom lip. Notice that the bottom teeth are not shown.
Step 4: Complete the outline of the face. Be sure to add the double chin.
Step 5: Add the eyebrows and the ears. Be sure to notice that the eyebrow shapes are at the top of the circle shapes from step one. If you need more help with the ears, check out this ear tutorial.
Step 6: Add the eyes. Notice that the eyes are almond shaped. For this facial expression, notice that the pupil and iris is separated from the eyelids. If you need more help with the eye, check out this eye tutorial.
Step 7: Draw in the hair. You are probably saying WTF. Just trust me and draw what you see.

Follow my instructions and You will be able to draw the Rapper Pitbull.
Subscribe to kazanjianm (Don't miss any new videos that I make)- http://www.youtube.com/subscri....ption_center?add_use
Facebook: Like me on Facebook to find out about live hangouts or to post your work!- http://facebook.com/kazanjianm
Twitter: I tweet! Do you? http://twitter.com/kazanjianm
My Website: http://merrillk.com
Art Supplies I Use in my Art Work- http://merrillk.com/?sid=135&idpage=supplies_i_use
YouTube Visual Arts Category Petition: http://www.change.org/petition....s/create-a-visual-ar
Step by Step Drawing Playlist: http://www.youtube.com/playlis....t?list=PLD6E34C7CD58
You will need: A pencil, some drawing paper (ideally not printer paper)
Optional: Bristle Paint Brush, Blending Stump (Use Q-Tip if you dont have a blending stump.
I remixed this video- http://www.youtube.com/watch?v=CgvXGs-ZItc Thank you laserjim!

How to draw the Bugatti Veyron Step by Step
bugatti veyron + bugatti veyron top speed - bugatti veyron top speed 434 km h top gear - bugatti veyron vs mclaren f1 - bugatti veyron vs jet + bugatti veyron vs koenigsegg agera r + bugatti veyron vs f1 formula + bugatti veyron crash + bugatti veyron in india + bugatti veyron prank bugatti veyron burnout + bugatti veyron build + bugatti veyron brake test + bugatti veyron black bess + bugatti veyron black +
bugatti veyron blue + bugatti veyron beaten + bugatti veyron birthday present + bugatti veyron birdman + bugatti veyron brakingbugatti veyron crash + bugatti veyron crash test + bugatti veyron crash in water + bugatti veyron commercial + bugatti veyron convertible +bugatti veyron custom + bugatti veyron crash caught on tape +
bugatti veyron convertible roof + bugatti veyron cristiano ronaldo +
bugatti veyron commercial 2014 bugatti veyron quarter mile +
bugatti veyron quicksilver exhaust + bugatti veyron quad turbo bugatti veyron supersport + bugatti veyron sound + bugatti veyron startup +
bugatti veyron singapore + bugatti veyron supersport vs koenigsegg agera r + bugatti veyron speed bugatti veyron super sport vs hennessey venom gt bugatti veyron sound exhaust bugatti veyron super sport acceleration bugatti veyron ss vs hennessey venom gt
asphalt 8 bugatti veyron bugatti veyron 0-60 +bugatti veyron 0-400 km h + bugatti veyron 0-100 km/h + bugatti veyron 0 to 60 +
bugatti veyron 0- + bugatti veyron 0-200 mph + bugatti veyron 0-400 + bugatti veyron 0-100 mph + bugatti veyron 0-200 + bugatti veyron 0-250
Subscribe to kazanjianm (Don't miss any new videos that I make)- http://www.youtube.com/subscri....ption_center?add_use
asphalt 7 bugatti veyron
Facebook: Like me on Facebook to find out about live hangouts or to post your work!- http://facebook.com/kazanjianm
Twitter: I tweet! Do you? http://twitter.com/kazanjianm
My Website: http://merrillk.com
Art Supplies I Use in my Art Work- http://merrillk.com/?sid=135&idpage=supplies_i_use
Petition: YouTube NEEDS a Visual Arts Category: http://www.change.org/petition....s/create-a-visual-ar
Step by Step Drawing Playlist: http://www.youtube.com/playlis....t?list=PLD6E34C7CD58
Link- http://merrillk.com/?part=fineart&articles_id=8315&act=artist1&artist=69&collection=0
Ah paintings, there is nothing like staring at a painting all day and night.....its quite riveting .....Dont you think?
Riveting? Well, yes and no. While I appreciate painting and enjoy visiting museums. Every artist making work today has to acknowledge that art has changed with the times, and perhaps a canvas is not the best place to display your artwork. Think about it. 2D works painted on canvas are competing for wall space with flat screen televisions. Even if you dont have it, imagine yourself with ADHD.....what would you choose?.....exactly my point.
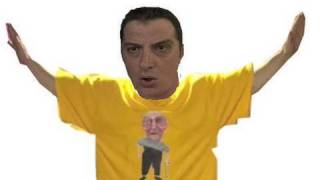
This tutorial is going to give you an alternative to the gallery wall. A T-Shirt. If you want publicity for your art, dont stick it in a local library exhibition, wear it proudly on your chest.
Here is what you will need: 1.) Scanner 2.) Ink Jet Printer 3.) Iron 4.) Fabric Transfer paper. What is Fabric Transfer Paper you ask? All it is, is a special type of paper that gets ironed on to a shirt, after a design is printed on it, from an inkjet printer. (I use Avery Dark Fabric Transfers for the shirts I make).
1.) The first thing that you will need to do is to scan or photograph your favorite artwork and save it as a JPEG file on your computer.
2.) After that, open up the scanned file in any photo editing program and crop your image. Please note that if you use Avery dark transfer paper, you will not need to flip the image. If you use another brand, be sure to read the directions carefully, because most brands of transfer paper require you to flip the image during this step.
3.) Next, place the paper white side down in the printer and press print. You should get close to a perfect copy of your original artwork
4.) After you print, grab a scissor, its time to trim your image. Cutting is an art form so be sure to be neat when you cut. If you use the dark fabric transfers, any area that you do not cut out will be white. Usually I leave an eighth of an inch border around my artwork, but I did not for this image. Cutting is usually the longest and most annoying step of the process, but be sure not to rush yourself.
5.) After you cut, peel the paper off of the back of the image like you are seeing me do here. The image part is flexible and very difficult to rip so dont worry about that. It helped me to fold a corner before I peeled.
6.) For the final step, use the collar tag to center your image on the front or the back of a shirt. Make sure that neither the fabric of the shirt or the image is wrinkled. Avery supplies you with special heat resistant paper to place over the image and the t-shirt while ironing. After the iron is heated to a high setting, and the special paper is placed, press down firmly with the iron as you are seeing me do here.
Now lift up the paper and viola! you can now mass produce and wear your drawing. For information on where to buy the paper that I used in this video, hit the link in the video description. Thanks for watching!
Note, Vincent Van Gogh's Starry Night was shown at the beginning of the video. This artwork has entered the public domain. The musical track at the beginning was supplied by Kevin MacLeod of Incompetech,com. It is called "Ghost Dance" Thank you Kevin!!! creating photocopy art transfers on fabric, using fabric transfer t-shirt, best iron on paper for dark shirts, how can print a photo on t shirt by transfer paper, flip a picture backwards for iron ons, avery transfer printing
"blank t shirts" "t shirt quotes" "t shirt screen printing" "t shirts for sale""art gallery" "hoodies" "fine art" "pop art" "arts and crafts" "tee shirts" "wall art" "sweatshirts" "print screen" "modern art" "shirt printing" "contemporary art" "embroidery designs" "art prints" "mens clothing" "shirt design" "funny t shirts" "t shirt designs" "own t shirt" "art paintings" "shirts online" "graphic art" "hip hop clothing" "t shirts uk" "band t shirts" "art posters" "graphic artist" "graphic tees" "white t shirt"
Link- http://merrillk.com/index.php?part=fineart&articles_id=6509&collection=114
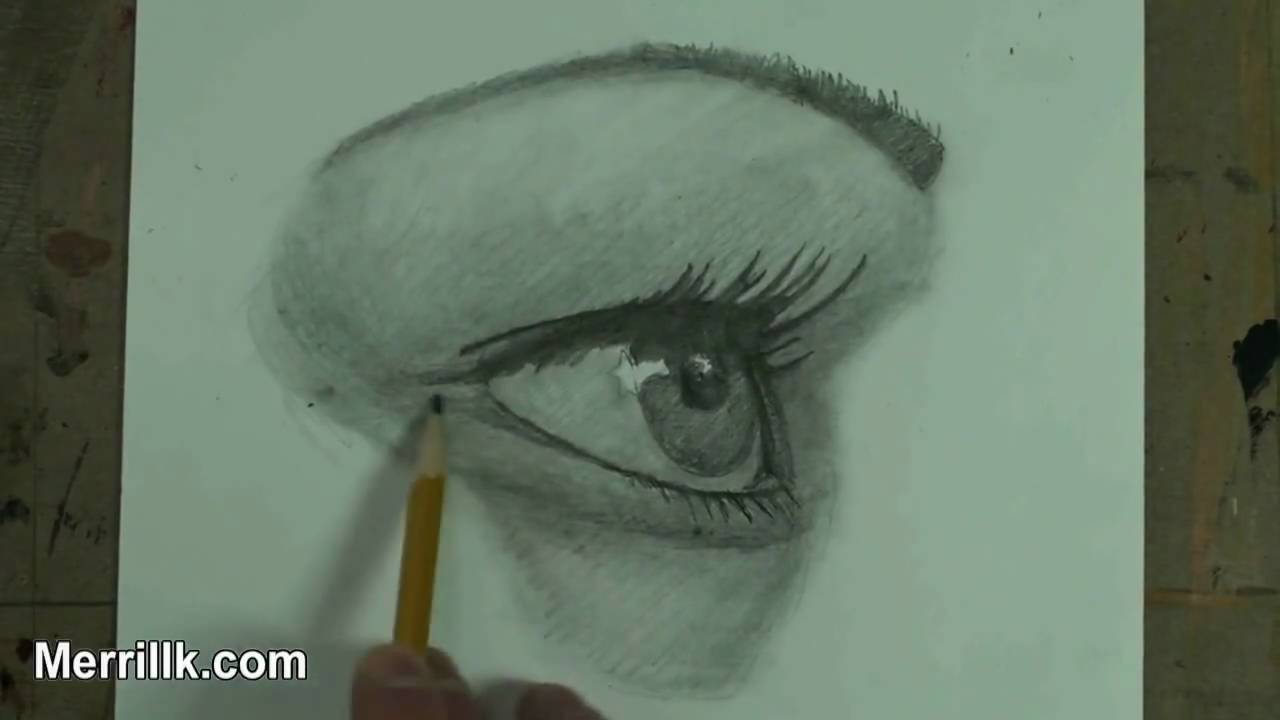
Today you are going to learn to draw the female eye from profile view. I went the extra mile to make this easy for you! Click the link in the videos description to download a printable PDF to assist you while you draw. The PDF has pictures and text and it is sequenced identically to the video. Use both resources to master the skills that I am trying to teach you in this lesson.....Grab your pencils and paper and lets get ready to draw.
Step 1: Draw the shape that you see. It looks like a heart shape turned to the side.
Step 2: Create the shape for the eyebrow at the top of the heart shape.
Step 3: Create the small bowl shape at the bottom. Notice that it overlaps the heart shape. Also notice how small it is compared to the heart shape.
Step 4: Create the shape that was just added. It looks like a sideways triangle with rounded sides. Notice its placement within the heart shape and its proximity to the bowl shape.
Step 5: Add the U shape for the iris. Notice that you can see the bottom of the iris, but not the top. Also notice that the iris is more oval like, rather than circular, since the head is turned.
Step 6: Add the shape to the inner corner of the eye.
Step 7: Add the crown like shape for the upper eye lashes. Notice that the longest ones seem to be on the inner corner of the eye. (This is actually not the case, the other lashes are foreshortened)
Step 8: Add the lashes on the inner corner of the eye.
Step 9: Add the bottom eye lashes. Notice that they are much shorter than the top lashes.
Step 10: Add the Pupil. Since the head is turned, the pupil is oval like.
Step 11: Add the highlight shapes that I just added
SHADING:
Step 12: Start shading the darkest areas first. The upper lashes and the pupil will be the darkest areas. Build it up slowly in "cross hatched" layers (the video will demonstrate). Dont do it all at once.
Step 13: Shade in the Iris. Notice that it is not as dark as the pupil. The shape added in step 6 is part if the eyelid. Shade it alightly lighter than the iris.
Step 14: Shade in the eyebrow. This can vary in tone depending upon hair color and make up. In this case, I left it lighter in tone than the eyelashes.
Step 15: Fill in the areas around the eye with hatching. Refer to the photo (above) as a reference. Use up to a 4B pencil at this stage.
Step 16: LIGHTLY shade in the white part of the eye (with the exception of the highlight areas drawin in before). Hint: The two lightest tones will be the highlight in the eye, followed by the bony area directly under the eyebrow. By this point, feel free to use up to a 6B pencil to help with the darker tones.
Step 17: Use the blending stump (tortillion) to smudge and spread your hatching.
Step 18: Develop the tones more by hatching over the smudges (from the tortillion). If you wish, smudge some more.
Step 19: Put on the finishing touches.
Step 20: Finished
Available in Closed captioning
Link- http://merrillk.com/?part=fineart&articles_id=13272&act=artist1&artist=69&collection=461#
WE NEED A VISUAL ARTS CATEGORY ON YOUTUBE THREAD-http://www.google.com/support/forum/p/youtube/thread?tid=2a9806f929074cbd&hl=en&fid=2a9806f929074cbd0004b630ad37cc3e
Facebook- http://facebook.com/kazanjianm
Twitter- http://twitter.com/kazanjianm
Website- http://merrillk.com
(Merrill) Supplies I Use- http://www.jdoqocy.com/click-4....247664-805536?url=ht
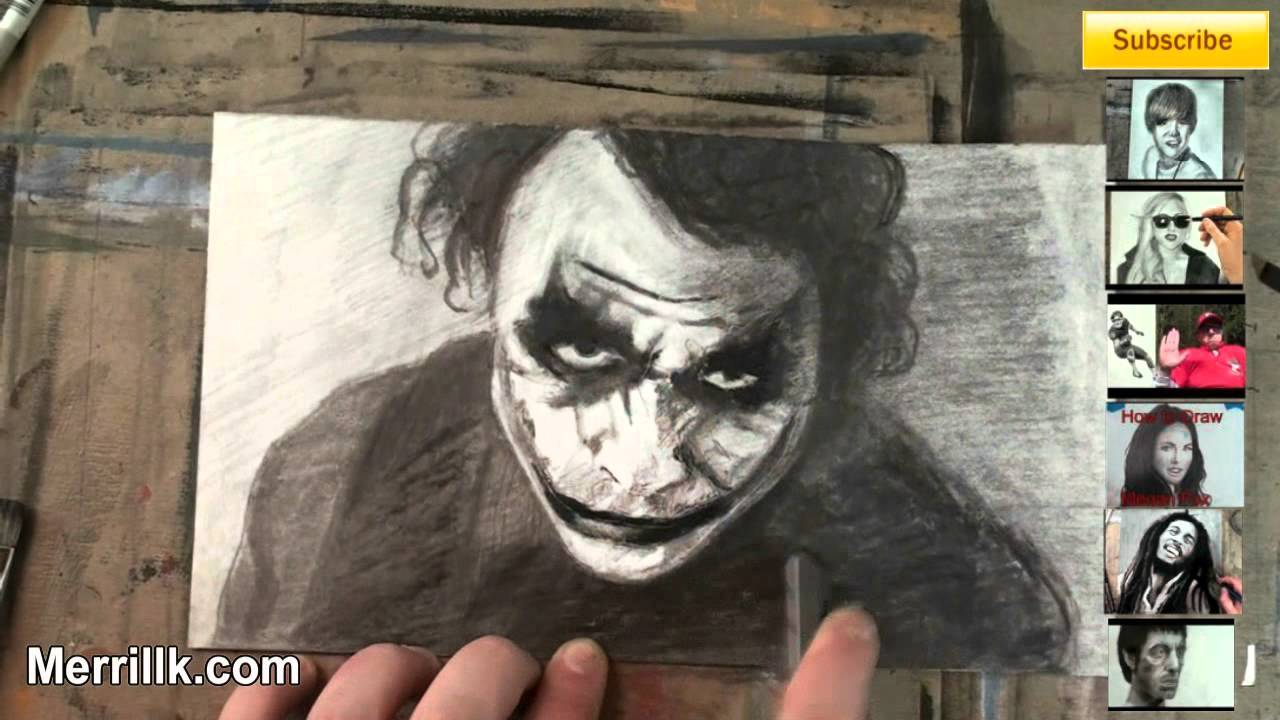
Do you want to know how Little Old Man got these scars? He kissed a pencil sharpener.......with his tongue. And while that was a big mistake I am going to prevent you from making drawing mistakes on your portrait of Heath Ledger as the Joker. Just follow my step by step instructions, pause the video at the end of each step and don't Christian Bale on me and you will surprise yourself on this drawing.
Do I sound like a man with a plan? Well I have one. Hit the link in the video description to go to my Joker cheat sheet on my website. It has photos and text and it will supplement the instruction that you receive in this video. Go grab your pencils and paper. Lets begin.

Learn to draw Yoda step by Step
Subscribe to kazanjianm (Don't miss any new videos that I make)- http://www.youtube.com/subscri....ption_center?add_use
Facebook: Like me on Facebook to find out about live hangouts or to post your work!- http://facebook.com/kazanjianm
Twitter: I tweet! Do you? http://twitter.com/kazanjianm
My Website: http://merrillk.com
Art Supplies I Use in my Art Work- http://merrillk.com/?sid=135&idpage=supplies_i_use
YouTube Visual Arts Category Petition: http://www.change.org/petition....s/create-a-visual-ar
Step by Step Drawing Playlist: http://www.youtube.com/playlis....t?list=PLD6E34C7CD58

???? https://goo.gl/WXHqT5 Download your FREE TOEIC cheat sheet including 10 strategies to pass the exam!! ↓ Check How Below ↓
Step 1: Go to https://goo.gl/WXHqT5
Step 2: Sign up for free
Step 3: Learn English with the best free online resources and master English fast!
You are an English beginner and want to get started with English language? This is the perfect place for you! With this English lesson, you will learn what to say during a job interview in English. From English vocabulary to pronunciation, your English level will never be the same again!
■ Facebook: https://www.facebook.com/ENGLISHCLASS101
■ Twitter: https://twitter.com/EnglishClass101
Also, please LIKE, SHARE and COMMENT on our videos! We really appreciate it. Thanks!
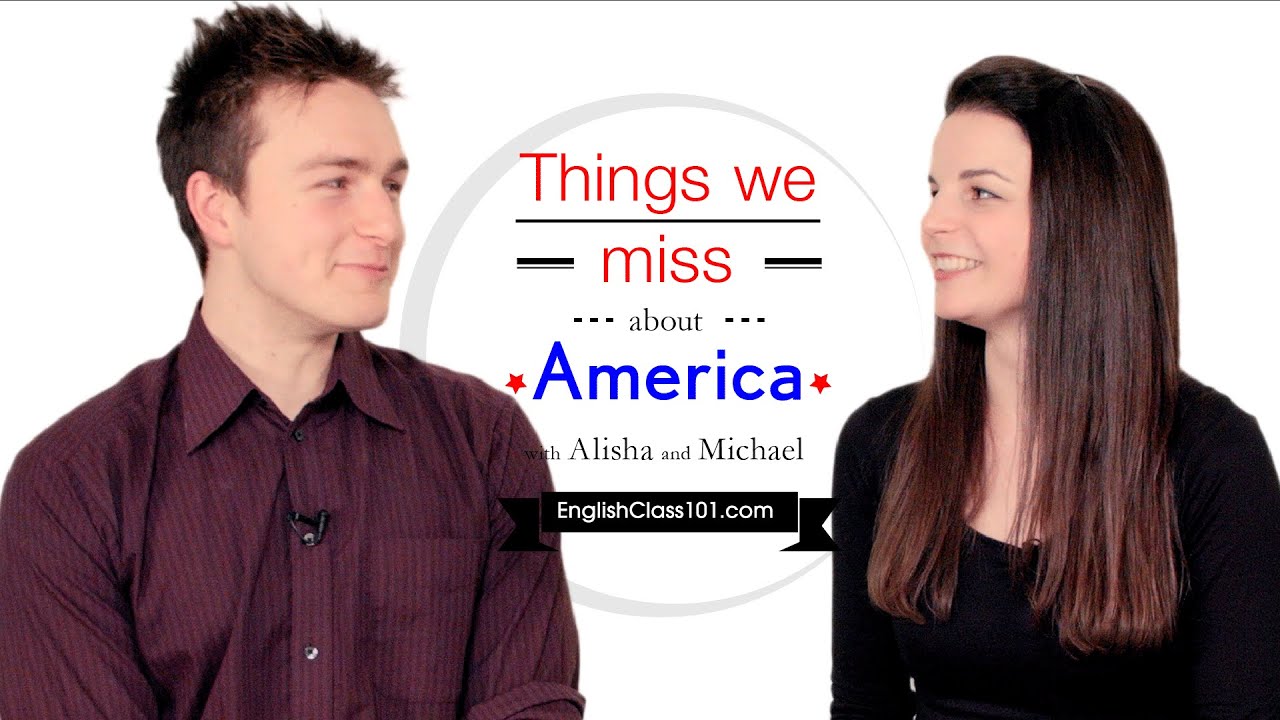
Sometimes you need to leave a place to know what you liked about it.
In this video, find out what things Alisha and Michael miss about America when they're out of the country.
If you like these videos, let us know! And visit us on http://www.EnglishClas101.com for more audio and video lessons!

???? BLACK FRIDAY! Get 51% OFF today only!! Click Here: https://goo.gl/uSrt1i
This is the Best Deal of the Year!
You are an English beginner and want to get started with the English language? This is the perfect place for you! With this English lesson, you will learn Emergencies-related words and phrases to be able to survive any difficult situations in an English speaking country! From vocabulary to pronunciation, your English level will never be the same again.
■ Facebook: https://www.facebook.com/ENGLISHCLASS101
■ Twitter: https://twitter.com/EnglishClass101
Also, please LIKE, SHARE and COMMENT on our videos! We really appreciate it. Thanks!

Get Free Cantonese Lessons on your Android, iPhone, iPad or Kindle Fire! Click here to get the App: http://www.cantoneseclass101.com/ill-app/
Mistakes to Avoid. Subscribe for more videos: http://j.mp/CantoneseClass101
Find out more, go to: http://www.cantoneseclass101.c....om/2015/08/28/ultima
Please LIKE, SHARE and COMMENT on our videos! We really appreciate it. Thanks!
Want more Cantonese learning videos? Click here: https://www.youtube.com/playli....st?list=PLOhqSjC_Nvn
- Facebook : https://www.facebook.com/CantoneseClass101
- Google Plus : https://plus.google.com/+CantoneseClass101
- Twitter : https://twitter.com/CantoneseClass101
- Pinterest : https://www.pinterest.com/CantoneseClass101/
Learn Cantonese with real lessons by real teachers. Get your FREE Lifetime Account at http://www.CantoneseClass101.com/video