Лучшие

My process 1.) Sketch 2.) Illustration Markers 3.) Color Pencils and 4.) Oil paint. Sometimes I add even more steps with Photoshop, but I didnt for this portrait. I wanted to see how far I could push oil paint as a medium. I prefer painterly realism to photorealism (photo realistic stuff gets boring.....whats the point of simply reproducing a picture?). I was satisfied with the results, despite my unorthodox approach to making this....(painting? work of art? mixed media?....I dont know what to call it.) The markers were Prismacolor and Chartpak Ad. The color pencils were Prisma and the oil paint was Old Holland, Maimeri, Vasari, Bloxx, Grumbacher and Holbein Colors. I used Liquin as a paint medium. I used Flat, Round and Filbert Brushes and occasionally a fan brush (for delicate blending). This time lapse speed portrait consolidated four hours in to less than four minutes.
Prior to 2008, I had never ventured outside of the medium of oil paint. Life got HECTIC and I was forced to reconsider my approach. Here (below) is the story.
For the past eight years, I have taught art in schools in Harlem and the South Bronx and my technique was created out of a need that arose in my classroom. Forty five minute periods is not enough time to teach painting. So I switched my painting supplies from traditional supplies, to paint markers to eliminate the set up and clean up. After witnessing the success that my students were having, I decided to push the technique even further, while working in my studio. I learned that mixing color pencils with a "blender" (on top of the opaque layers of the paint markers) marker allows an artist to mimic the effects of glazed oil paint. I incorporated media "cut outs" and printed images in my work. And I found that paint markers were ideal to tie everything together. Finally I learned that scanning my images on to a computer will allow me to edit my "characters" and add crazy effects such as juxtaposing images on top of my creations. The computer also enables me to use the medium that I am most familiar with; oil paint. I usually print my compositions on canvas ( I order an non varnished giclee print) and lay down the finishing touches in oil paint.
Antes de 2008, nunca había aventurado fuera de la media de aceite de la pintura. Tiene vida agitada y me vi obligado a reconsiderar mi enfoque. Aquí (abajo) es la historia. Durante los últimos ocho años, me han enseñado en las escuelas de arte en Harlem y el sur del Bronx y mi técnica fue creada por la necesidad que surgió en mi aula. Períodos de cuarenta y cinco minutos no es tiempo suficiente para enseñar a pintar. Así pasé mi pintura tradicionales suministros de suministros, a la pintura para eliminar los marcadores de la creación y la limpieza. Después de ver el éxito que están teniendo mis estudiantes, decidí impulsar aún más la técnica, mientras trabajaba en mi estudio. Me enteré de que la mezcla de lápices de color con una "licuadora" (en la parte superior de la opacidad de las capas de pintura marcadores) marcador permite a un artista para imitar los efectos de cristal de aceite de la pintura. He incorporado los medios de comunicación "recortes" y las imágenes impresas en mi trabajo. Y he encontrado que los marcadores de la pintura eran ideales para atar todo junto. Finalmente me enteré de que mis imágenes de escaneado en un equipo que me permita editar mis "personajes" y añadir efectos como loco yuxtaponiendo imágenes en la parte superior de mis creaciones. La computadora también me permite utilizar el medio que estoy más familiarizado con; de pintura de aceite. Por lo general mi impresión composiciones sobre lienzo (que no una orden de impresión Giclee barnizada) y establecer los últimos retoques de pintura en aceite.
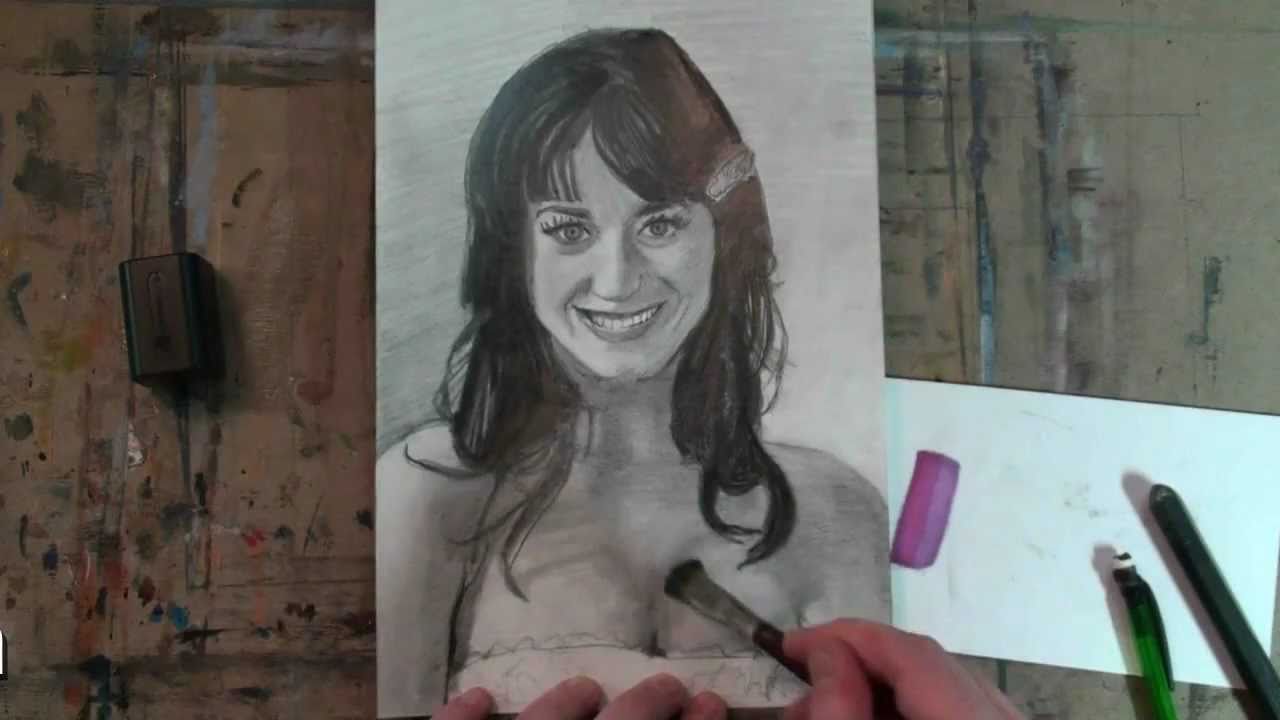
How to Draw Katy Perry- Extended Shading Tutorial. Music by Kevin MacLeod Incompetech.com
0:11- Notice that I am using a mechanical pencil. It has thinner graphite and it helps me create subtle tones for the features of the face.
0:21 Notice the difference between the upper eyelashes and the lower ones. The upper eyelashes are much darker. Use a 4B to 6B pencil on the eyelashes right away.
0:30 The pupil of the eye is darker in tone than the iris. You will see that I shade the "white" of the eye with the paintbrush. I pull some of the graphite over from the iris and the eyelashes. Do not go too dark though.
0:35 Watch how I use the paper stump to do the eyelashes. I "cross hatch" some lines, and then I spread the lines (graphite) with the stump. If you do not have a paper stump, use a Q-Tip.........And if you dont have Q-Tips, how the hell do you clean your ears????
0:45-- Do not go too dark under her eyes. Our skin thins and becomes more transparent as we age. Let Katy Perry keep her "Teenage Dream" and don't give her bags under her eyes......yet. It is OK to darken the area a bit because the eye protrudes from the eye socket (feel your eyeball NOW) and the area around the eyeball is almost always in shadow.
1:05 The darkest part of the mouth is the two corners.
1:26- "Float like a butterfly and shade like a bee"....In other words, move around. Do not get stuck in one place. Develop your drawing evenly.
2:00- Learning shading is like learning another language. You are translating tones. Get in the habit of looking at my reference image once for every five seconds.
2:10- At this point of the drawing and shading process, your goal should be to eliminate "lines" and notice the nuances of "edges". In other words, some shapes have solid edges, while others have softer edges. There is often a tonal difference as well.
2:34- Watch how I use the blending (paper) stump to soften an edge......Suggestion: Look in the mirror (right now) and notice the tonal and physical (hardness softness) differences of your face.
3:18- Every drawing has an "awkward" stage. This is the awkward stage for this drawing.
3:39- Notice that I am making points at the bottom of the teeth, between each tooth.
3:39- Teeth are tricky. Try not to keep the dark lines between each tooth. Generally, the upper teeth are more defined at the bottom, when a person smiles because they overlap the tops of the bottom teeth. Katy Perry's bottom teeth are not visible in this picture.
4:59- Hair has a lot of tones. I am going to start out with a 5B pencil and press hard to create solid straight lines in areas where there are a variety of "tones"- aka- light and dark "values". In generally darker areas such as the upper left, I am hatching in a neutral (half) tone, followed by darker values. Notice that this is the total opposite method of what I did for the skin of the face.
5:46- Hot tip- Use the kneaded eraser and the pencils eraser to create highlights.
5:46- Hot tip #2- Invest in graphite sticks (think really think pencils). You will see me use one in a moment.
7:27- Now, Watch me use all of my "tools" (brush, blending stump, graphite stick, eraser, finger) to get the effects that I want. Try not to use the fingers though because the oils in the hand will be absorbed in to the paper and the shading will be inconsistent.
9:28- It is important to darken (neutralize) the background of a portrait on white paper if you want the highlights to fully develop.
10:14- If the hair in your drawing looks like a "block" consider retouching the edges of the hair shape (as I am doing now).
10:31- I am making highlights with the eraser in the hair
11:21- I am starting to shade the body. Follow the same shading pattern as the face. The left is in highlight, the right is in slight shadow.
11:58- There are several slight shadows in the upper chest area between the two shapes for the hair. Take note of that as you watch me develop them.
12:33- The arm on the right (her left arm) will be about as dark as the shading on the neck.
12:55- It is common in portraiture for the background of an image to be the opposite as the foreground. For instance, notice that the highlight is on her right cheek and the background is dark. It switches on the other side. This is an old artists trick which works because the variance in tones moves the viewers eye around.
13:58- The last thing to do is to "soften" everything. Notice that I use the brush and the eraser a lot.
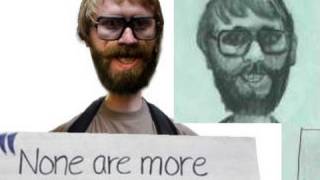
This video is going to give you step by step instruction on how to draw an Occupy Wall Street protestor. All you will need is a pencil, some paper, a global recession and some corporate anger and you'll be able to draw this handsome fellow. Pause the video at the end of each step. Lets begin.
WE NEED A VISUAL ARTS CATEGORY ON YOUTUBE THREAD-http://www.google.com/support/forum/p/youtube/thread?tid=2a9806f929074cbd&hl=en&fid=2a9806f929074cbd0004b630ad37cc3e
Facebook- http://facebook.com/kazanjianm
Twitter- http://twitter.com/kazanjianm
Website- http://merrillk.com
(Merrill) Supplies I Use- http://www.jdoqocy.com/click-4....247664-805536?url=ht
Step 1: Draw a rectangle for a sign.
Step 2: Draw a trapezoid shape above the sign
Step 3: Draw these shapes inside the trapezoid shape.
Step 4: Draw the arch shape for the pants. Be sure to make the pants really tight. Protesting in baggy clothing was so last year.
Step 5: Now I am going to challenge you a little. Draw this crown shape for the beard above the trapezoid shape. Also, be sure to notice the placement for the oval.
Step 6: Draw the upside down rainbow shape for the bottom lip.
Step 7: It was learned in a recent Quinnipiac poll that 94% of Occupy Wall Street protestors wear artsy Buddy Holly glasses. It is our job as artists to observe the world around us so add the nose and the glasses.
Step 8: Having Bieber Hair is the new comb over. Add the shape for the hair.
Step 9: Add the eyes. If you want to make someone look angry, leave some space between the Iris and the upper eye lid.
Step 10: Add these hot dog shapes for the fingers.

Поддержать донатом: https://donate.stream/ilyaleontyevpro1s
Продолжаем разговор про обновление типовых конфигураций 1С.
В этом видео поговорим о том, каким образом можно завершить все пользовательские сеансы в программе вне зависимости от режима ее работы (файловый / клиент-серверный) и запретить вход пользователей в базу до тех пор, пока не будет завершено обновление.
Благодарю за поддержку: лайки, репосты и прочую дребедень.
Желаю вам приятного просмотра!
#обновлениетиповыхконфигураций #уроки1с #ильялеонтьеврф
Мои контакты:
ВКонтакте: vk.com/ilyaleontyev
Фэйсбук: facebook.com/illeontev
С удовольствием добавлю вас в друзья при условии, что вы не будете меня грузить своими рабочими вопросами :)

Our FB Page- http://facebook.com/youtubeartnews
YouTube Art News is a collaboration with:
http://youtube.com/thadtaylorart
http://youtube.com/yozcreative
http://youtube.com/matthewkeeney
http://youtube.com/joshwaddey16
http://youtube.com/tylersartshack
http://youtube.com/orangemonkey92
http://youtube.com/kazanjianm
Featured Channels:
http://youtube.com/startwister
http://youtube.com/bubzbeauty
http://youtube.com/gagnonstudio
http://youtube.com/redlung
Video used from this Creative Commons Videos:
Intro: http://www.youtube.com/watch?v=FG0fTKAqZ5g
Sheep: https://www.youtube.com/watch?v=1gCkq8SDiSQ
Audio used from this video: http://www.youtube.com/watch?v=h2TmUaOHnVY
Songs Used-
http://www.danosongs.com/music..../danosongs.com-dubli
http://danosongs.com/http://www.danosongs.com
( the streatham hill gods) Artist: Dan-O
Direct URL of the track: http://www.danosongs.com/blog/....music-for-media-the- Link to the license terms: http://creativecommons.org/licenses/by/3.0/
Here are some Frequently Asked Questions from Danosongs.com- http://community.danosongs.com..../page/music-license-
Permissions were granted from RedLung and Startwister were to show clips of their work in this video since the purpose of this show is to highlight the talent of the art community on YouTube.
Intro to 3d segment music by Kevin MacLeod http://incompetech.com Thank you Kevin!
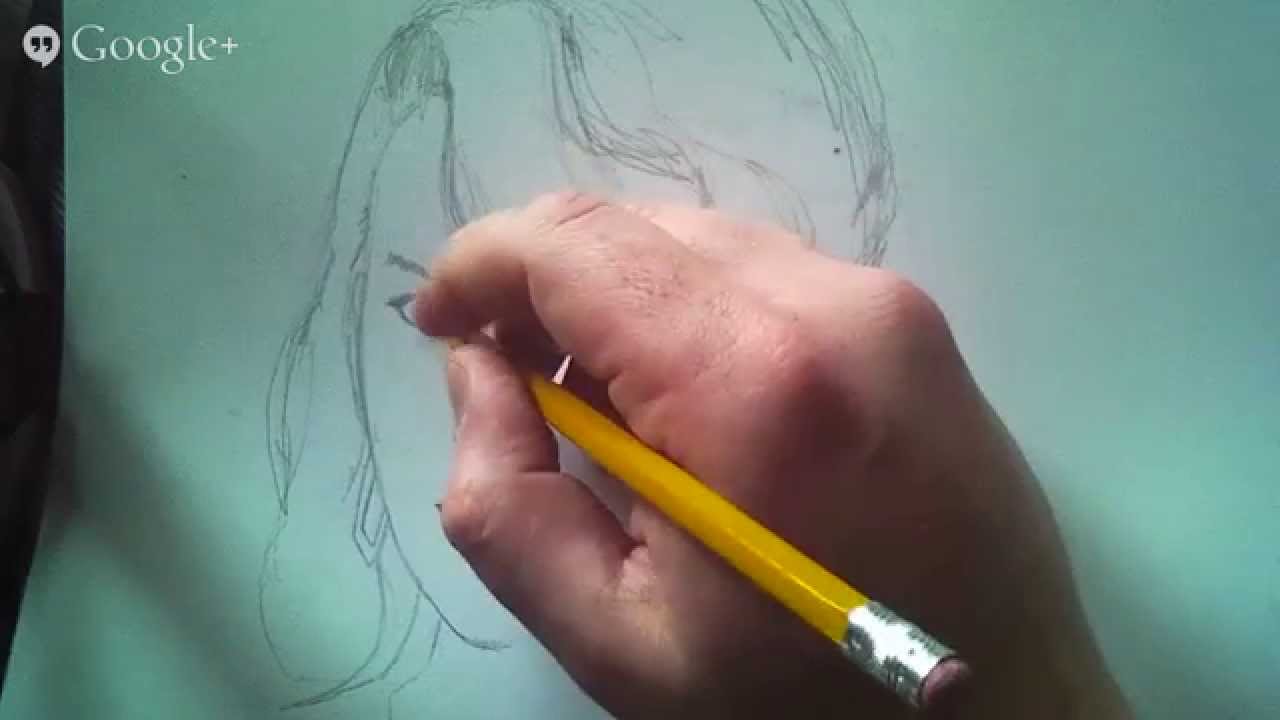
Watch me draw Taylor Swift with colored pencils. Subscribe to kazanjianm (Don't miss any new videos that I make)- http://www.youtube.com/subscri....ption_center?add_use
Facebook: Like me on F

Subscribe to kazanjianm (Don't miss any new videos that I make)- http://www.youtube.com/subscri....ption_center?add_use
Facebook: Like me on Facebook to find out about live hangouts or to post your work!- http://facebook.com/kazanjianm
Twitter: I tweet! Do you? http://twitter.com/kazanjianm
My Website: http://merrillk.com
Art Supplies I Use in my Art Work- http://merrillk.com/?sid=135&idpage=supplies_i_use
Petition: YouTube NEEDS a Visual Arts Category: http://www.change.org/petition....s/create-a-visual-ar
Step by Step Drawing Playlist: http://www.youtube.com/playlis....t?list=PLD6E34C7CD58
Обязательно посмотрите продолжение: https://youtu.be/lPGU4HGIeM4
Поддержать донатом: https://donate.stream/ilyaleontyevpro1s
Всем привет, меня зовут Леонтьев Илья, и в этом видео я расскажу, чем мне не нравятся экзамены 1С:Специалист по БП/ЗУП/УТ и почему я считаю подготовку к ним не самым удачным вложением вашего времени.
ОБЕЩАННЫЕ ССЫЛКИ НА КУРСЫ ПО ДОРАБОТКЕ ТИПОВЫХ:
Лучший курс по доработке типовых конфигураций (УЦ3, А.Габец):
https://cutt.ly/3ewcKHb
Курс по настройке прав доступа (можно сказать, что это логическое продолжение предыдущего курса):
https://cutt.ly/4ewvrjq
Курс по технологиям доработки типовых и разработке расширений:
https://xn----1-bedvffifm4g.xn....--p1ai/courses/1c-sm
Курс "Профессиональная разработка интерфейсов и форм":
https://xn----1-bedvffifm4g.xn....--p1ai/1c-v8/interfa
Не самый удачный курс по доработке типовых, но для полноты картины также укажу его здесь:
https://xn----1-bedvffifm4g.xn....--p1ai/ut11/trade-co
Если вам известны какие-либо курсы по доработке типовых, которых нет в этом списке, напишите о них, пожалуйста, в комментариях к этому видео.
#ильялеонтьев #1с
Мои контакты:
ВКонтакте: vk.com/ilyaleontyev
Фэйсбук: facebook.com/illeontev
С удовольствием добавлю вас в друзья при условии, что вы не будете меня грузить своими рабочими вопросами :)

Are you an artist on YouTube? If so join us!
I have dabbled with Paint Shop Pro before, but I have always combined my traditional artwork with my digital art until this video. Sycra was kind enough to help me get started with Photoshop and with
WE NEED A VISUAL ARTS CATEGORY ON YOUTUBE THREAD-http://www.google.com/support/forum/p/youtube/thread?tid=2a9806f929074cbd&hl=en&fid=2a9806f929074cbd0004b630ad37cc3e
Facebook- http://facebook.com/kazanjianm
Twitter- http://twitter.com/kazanjianm
Website- http://merrillk.com
(Merrill) Supplies I Use- http://www.jdoqocy.com/click-4....247664-805536?url=ht
This artwork is a mixed media painting that merges the most famous substance abusers of this generation. Please note that I did this a YEAR BEFORE Amy Winehouse passed away. And I feel terrible about her passing. But this Art was an honest creation.
If you are expecting to see a painted still life, or some flowers, or a drawing of a deer frolicking through a field, your watching the wrong video. I actually might do a tutorial on one of those someday, but today, im going to have some fun. I am going to merge the likenesses of, The Cookie Monster, The Trix Rabbit, Gollum, Lindsay Lohan and Amy Winehouse and that Cracked out Bird from Cocoa Puffs in to a painting......I don't exactly expect anyone to throw this artwork over their couch, but thats OK because the creative process is my addiction. The printer that I used was the HP Designjet 1500.
Music by Kevin Macleod- http://incompetech.com Rules- http://incompetech.com/m/c/royalty-free/faq.html Thank you Kevin!
1- http://www.flickr.com/photos/c....jsorg/2355833811/siz
2- http://www.flickr.com/photos/m....yklroventine/4933045
3- http://www.flickr.com/photos/n....ickstone333/31353201
4- http://www.flickr.com/photos/f....yunkie/2669386838/si
5- http://www.flickr.com/photos/a....zrainman/5062992482/
6- http://commons.wikimedia.org/w....iki/File:Gollum_wax_
All music is by Kevin MacLeod of Incompetech.com. Songs were- Spazzmatica Polka, Scheming Weasel Faster and Heavy Interlude

Решение задания
Презентации по математике (UA):
https://teachua.com/add/matematyka

Top 3 creepy Portuguese urban legends that might be true! https://goo.gl/Tkp1w4 Download TONS of FREE PDF lessons to learn Portuguese twice as fast! ↓ Check How Below ↓
Step 1: Go to https://goo.gl/Tkp1w4
Step 2: Sign up for a Free Lifetime Account - No money, No credit card required
Step 3: Learn with the best online resources and quickly become conversational.
In this video you’ll meet some of the scariest monsters you'll ever see that could haunt your nightmares. There is a lot of creatures, demons, ghosts but for you we picked the most terrifying. Happy Halloween!
Click here to get started with Portuguese: https://goo.gl/Tkp1w4
■ Facebook: https://www.facebook.com/PortuguesePod101
■ Twitter: https://twitter.com/PortuguesePod101
Also, please LIKE, SHARE and COMMENT on our videos! We really appreciate it. Thanks!

Поддержать донатом: https://donate.stream/ilyaleontyevpro1s
В этом видео мы рассматриваем альтернативный, более продвинутый вариант переноса актуального состояния из регистра сведений в базу-приемник.
Здесь мы создадим правило выгрузки данных через произвольный запрос к базе-источнику, а конвертацию будем выполнять с помощью специального служебного ПКО.
Приятного просмотра!
Базы для работы можете скачать по ссылке: https://yadi.sk/d/pcG-lSIpFyUdHA.
Мои контакты:
ВКонтакте: vk.com/ilyaleontyev
Фэйсбук: facebook.com/illeontev
С удовольствием добавлю вас в друзья при условии, что вы не будете меня грузить своими рабочими вопросами :)
#видео #бесплатно #инструкция #мануал #конвертацияданных #учеба #курс #видеокурс #созданиеправилобмена #правилаобмена#учебник #примеры #леонтьевилья #ильялеонтьев #ильялеонтьеврф #илья1с #видеоуроки #занятия #кд #1с #запросы #запросывобработчиках #параметры #параметрыконвертации #произвольныйзапрос

Поддержать донатом: https://donate.stream/ilyaleontyevpro1s
В этом видео по Конвертации данных 2.1 разбираемся, каким образом можно организовать проведение документов после загрузки в конечную базу.
Базы для работы можете скачать по ссылке: https://yadi.sk/d/pcG-lSIpFyUdHA.
Мои контакты:
ВКонтакте: vk.com/ilyaleontyev
Фэйсбук: facebook.com/illeontev
С удовольствием добавлю вас в друзья при условии, что вы не будете меня грузить своими рабочими вопросами :)
#видео #бесплатно #инструкция #мануал #конвертацияданных #учеба #курс #видеокурс #созданиеправилобмена #правилаобмена#учебник #примеры #леонтьевилья #ильялеонтьев #ильялеонтьеврф #илья1с #видеоуроки #занятия #кд #1с #переносдокументов #конвертациядокументов #проведениедокументов
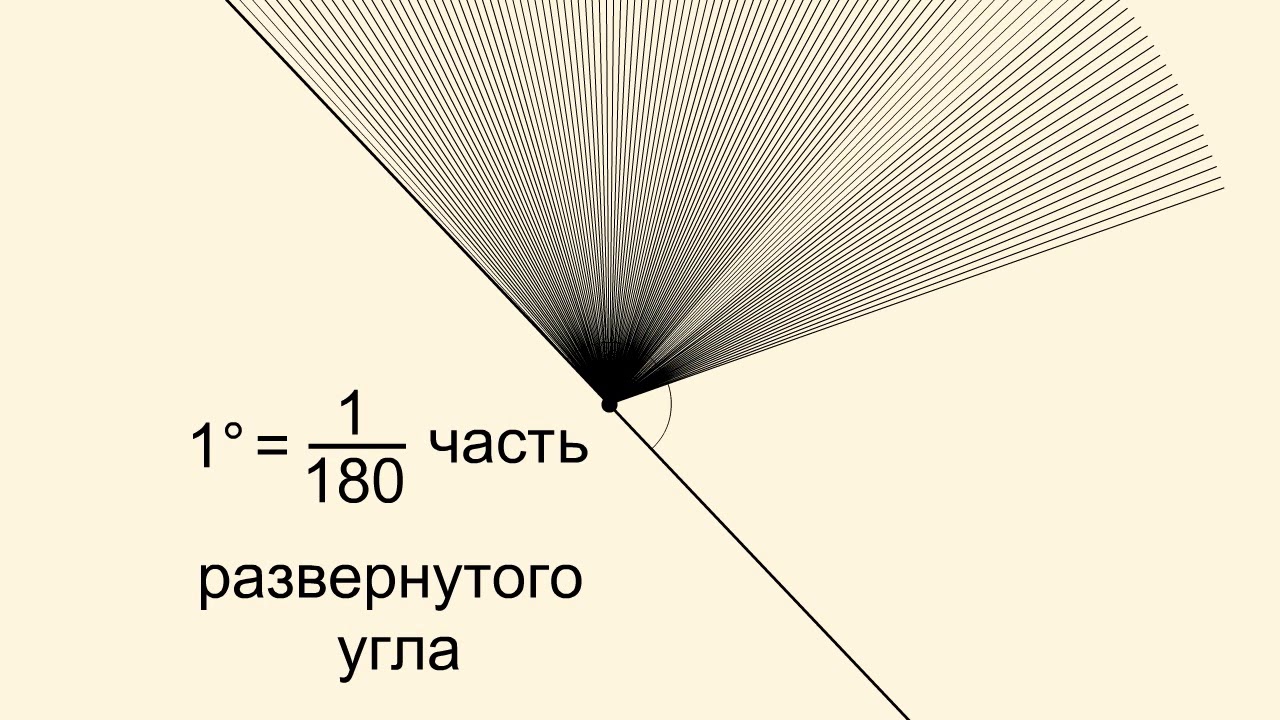
Наиболее распространенной мерой углов является градусная мера. С этой мерой вы уже знакомы, поэтому лишь коротко напомним о ней. Величина развернутого угла равна 180 градусам.
Угол в 1 градус (обозначается 1°) есть 1/180 развернутого угла. Это означает, что если мы приложим друг к другу, как на рисунке, 180 углов по 1° каждый, то в результате получим развернутый угол.
Рассмотрим какой-нибудь угол. Пусть одна его сторона неподвижна, а другая вращается вокруг вершины. Будем считать, что в начальном положении стороны угла совпадают, что соответствует углу 0°, а в конечном положении стороны образуют развернутый угол, величина которого равна 180°. Тогда любой угол, величина которого равна заданному числу градусов, при этом вращении появится лишь однажды.

Поддержать донатом: https://donate.stream/ilyaleontyevpro1s
Необходимость изменить макет какой-либо печатной формы в 1С возникает достаточно часто.
Тем замечательна возможность редактировать эти макеты в управляемом приложении 1С прямо в пользовательском режиме, без необходимости задействовать программиста 1С.
Сайт проекта: ИльяЛеонтьев.РФ
Профиль VK: https://vk.com/ilyaleontyev
Профиль FB: https://www.facebook.com/illeontev
Instagram: ilyaleontyev
Добавляйтесь! Будем дружить.

Поддержать донатом: https://donate.stream/ilyaleontyevpro1s
Продолжаем изучать обновление нетиповых конфигураций 1С. В этом видео будем расставлять флажки и режимы объединения.
Рассмотрим обновление подсистем, ролей, определяемых типов, макетов, модулей.
#ильялеонтьев #1с
Мои контакты:
ВКонтакте: vk.com/ilyaleontyev
Фэйсбук: facebook.com/illeontev
С удовольствием добавлю вас в друзья при условии, что вы не будете меня грузить своими рабочими вопросами :)

Луч с началом в вершине данного угла, лежащий внутри этого угла и делящий его на два равных угла, называется биссектрисой этого угла.
Из определения биссектрисы следует, что прямая, на которой лежит биссектриса, является осью симметрии угла.