أهم مقاطع الفيديو

3D PAW PRINT TRICK ART
Drawing paw print on hand. 3D trick art on hand mind trick surprise illusion art.
Watch more videos here! https://goo.gl/56JqfN
Materials used: Make-up pencils
----------------------------------------------------------------------------------
My Optical Illusion Book on Amazon:
----------------------------------------------------------------------------------
► My Book on Amazon (USA)
https://www.amazon.com/dp/1633223558
► My Book on Amazon (UK)
https://www.amazon.co.uk/dp/1633223558
-----------------------------------------------------------------------------------
You can follow me on facebook, instagram and society6 (links below)
WEBSITE: http://www.jonathanstephenharris.com
FACEBOOK: https://www.facebook.com/Jonathan.Stephen.Harris
INSTAGRAM: http://instagram.com/jonathanstephenharris
ETSY: https://www.etsy.com/shop/JSHcreates

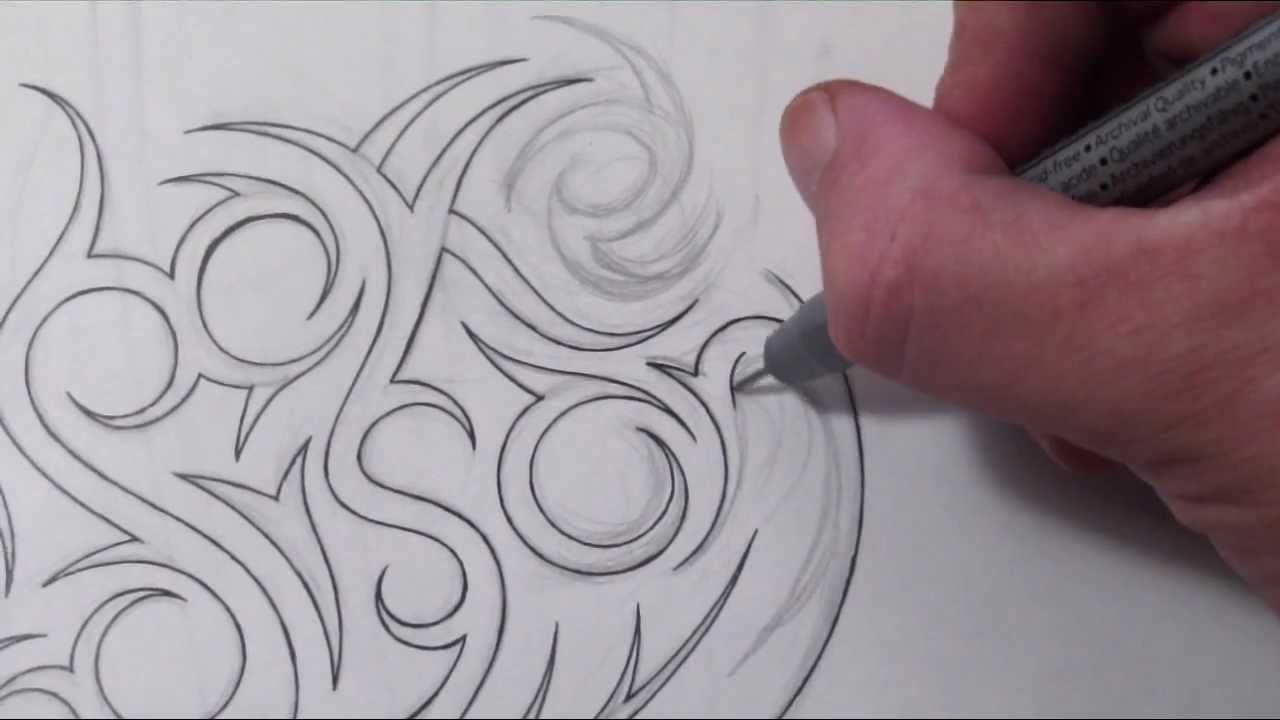
Creating a Cool girly feminine butterfly tattoo design with a swirly tribal stem.
Materials used: Fine line pen (brand Kuretake) a sharpie, HB pencil, putty eraser, 110 lb card stock
Thank you for watching and Subscribe!
You can follow me on facebook, instagram and society6 (links below)
FACEBOOK: https://www.facebook.com/Jonathan.Stephen.Harris
INSTAGRAM: http://instagram.com/jonathanstephenharris
SOCIETY6: http://society6.com/JSHarts
MUSIC: "Can't_Change_His_Mind" by YouTube Audio Library
https://www.youtube.com/audiolibrary/music
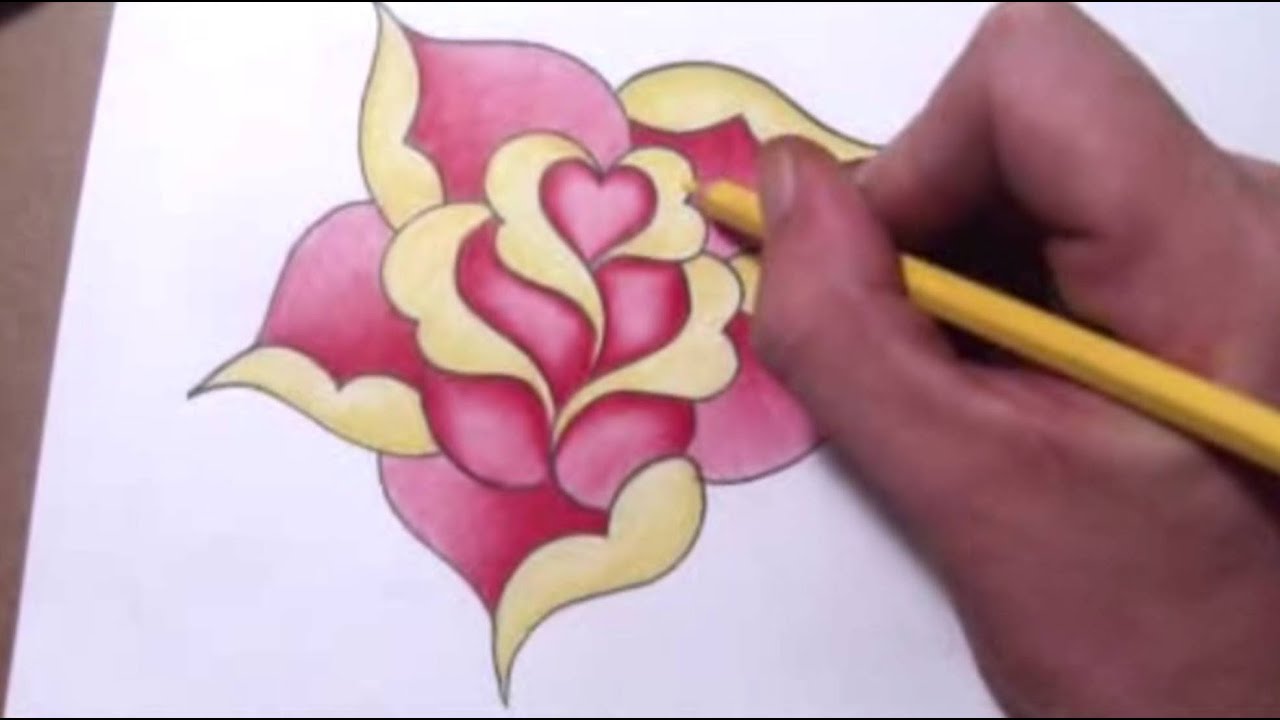
How to draw a simple rose design with a heart.
Thank you for watching and Subscribe!
You can follow me on facebook, instagram and society6 (links below)
FACEBOOK: https://www.facebook.com/Jonathan.Stephen.Harris
FACEBOOK: https://www.facebook.com/JSHStudioGallery
INSTAGRAM: http://instagram.com/jonathanstephenharris
SOCIETY6: http://society6.com/JSHarts
Music details below:
'Cipher2' Kevin MacLeod (incompetech.com)
Licensed under Creative Commons: By Attribution 3.0
http://creativecommons.org/licenses/by/3.0/

Acrylic and Tempera abstract painting. Peace symbol swipe technique. The purple at the beginning is acrylic and the rest of the colors are Tempera paint.
Materials used: 16 x 20 stretched canvas, tempera paint, acrylic paint, 3 inch wide steel ruler
Thank you for watching and Subscribe!
You can follow me on facebook, instagram and society6 (links below)
FACEBOOK: https://www.facebook.com/Jonathan.Stephen.Harris
FACEBOOK: https://www.facebook.com/JSHStudioGallery
INSTAGRAM: http://instagram.com/jonathanstephenharris
SaatchiArt: http://www.saatchiart.com/jsh
Amazon: ► My Optical Illusion Drawing Book
https://www.amazon.com/dp/1633223558

RIP David Bowie!!
https://www.etsy.com/listing/2....58097075/david-bowie
This is a sped up version of the original sped up video I uploaded early last year.
I painted this almost one year ago for an 80s themed night at my gallery. The link to the video I originally uploaded is below.
https://youtu.be/e2M0vmN05b4
Painting a portrait of David Bowie with acrylic paints on stretched canvas. Contemporary modern art style.
Materials used: Stretched canvas, (16 x 20 inches) acrylic paint
Total Time: 1 hour 16 minutes
Thank you for watching and Subscribe!
You can follow me on facebook, instagram and society6 (links below)
FACEBOOK: https://www.facebook.com/Jonathan.Stephen.Harris
FACEBOOK: https://www.facebook.com/JSHStudioGallery
INSTAGRAM: http://instagram.com/jonathanstephenharris
SOCIETY6: http://society6.com/JSHarts
MUSIC: "Friction_Looks" by YouTube Audio Library
https://www.youtube.com/audiolibrary/music

Acrylic abstract painting with a palette knife and masking tape.
Materials used: 9 x 12 stretched canvas, acrylic paint, palette knife, masking tape, computer paper
Thank you for watching and Subscribe!
Connect with me on social networks:
FACEBOOK: https://www.facebook.com/Jonathan.Stephen.Harris
FACEBOOK: https://www.facebook.com/JSHStudioGallery
INSTAGRAM: http://instagram.com/jonathanstephenharris
SaatchiArt: http://www.saatchiart.com/jsh
Amazon: ► My Optical Illusion Drawing Book
https://www.amazon.com/dp/1633223558
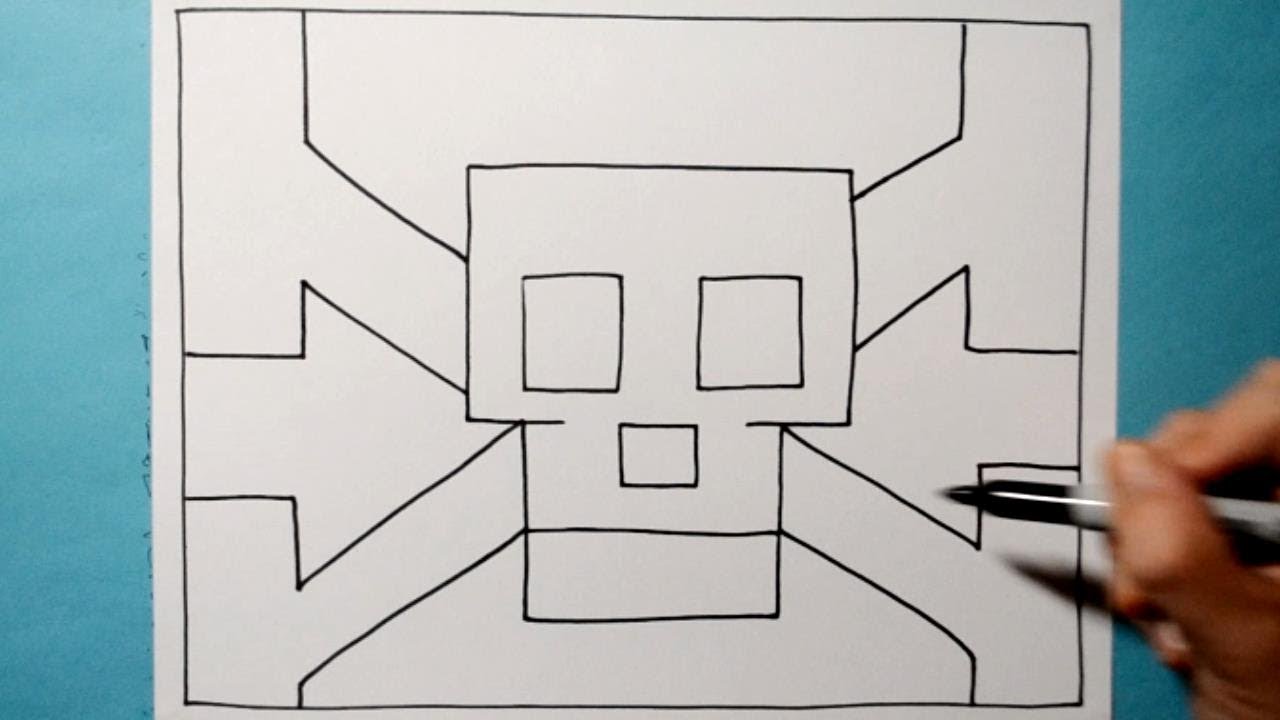
Cool skull and crossbones pattern with a Sharpie. Fun line illusion drawing from "Daily Art Therapy" (my new series) Day 146
-----------------------------------------------------------------------------------------------------------
GET MY NEW BOOK!!
***** The Art of Spiral Drawing *****
https://www.quartoknows.com/bo....oks/9781633228221/Th
-----------------------------------------------------------------------------------------------------------
As always thank you for watching and make sure you are notified for future updates by ringing that bell next to the subscribe button! :)
You can follow me on facebook, instagram and etsy (links below)
WEBSITE: http://www.jshcreates.com
FACEBOOK: https://www.facebook.com/Jonathan.Stephen.Harris
INSTAGRAM: http://instagram.com/jonathanstephenharris
ETSY: https://www.etsy.com/shop/JSHcreates
#SpiralDrawing #3Ddrawing #JonathanStephenHarris
Designing a tribal design for the name Brooke and Madison. This is a custom hidden tribal name tattoo design and you can get yours by going to http://www.tattoosbycustom.com and fill in a request form.
It's quite difficult to combine two names into a tribal design.. In this video you will see me erase numerous times at the beginning of the video when sketching out the design.. Before I create anything like this I spend a good 10 minutes or so thinking about the image and then once I can see it in my head I will then draw it out.. Anyways if you like the vid, please give it a thumbs up, comment and make sure your SUBSCRIBED..

How to draw a deep dug out hole in line paper. Trick art optical illusion drawing with graphite pencils.
Get My First Optical Illusion Book! (step by step guide on how to draw mind bending optical illusions)
https://www.quartoknows.com/bo....oks/9781633223554/Th
Materials used: 110lb cardstock, HB pencil, 2B pencil, 4B pencil, kneaded eraser, tissue paper (for smudging) blue biro, ruler
WEBSITE: http://www.jonathanstephenharris.com
FACEBOOK: https://www.facebook.com/Jonathan.Stephen.Harris
INSTAGRAM: http://instagram.com/jonathanstephenharris
SOCIETY6: http://society6.com/JSHarts
SAATCHIART: http://www.saatchiart.com/jsh
PATREON: https://www.patreon.com/JSH
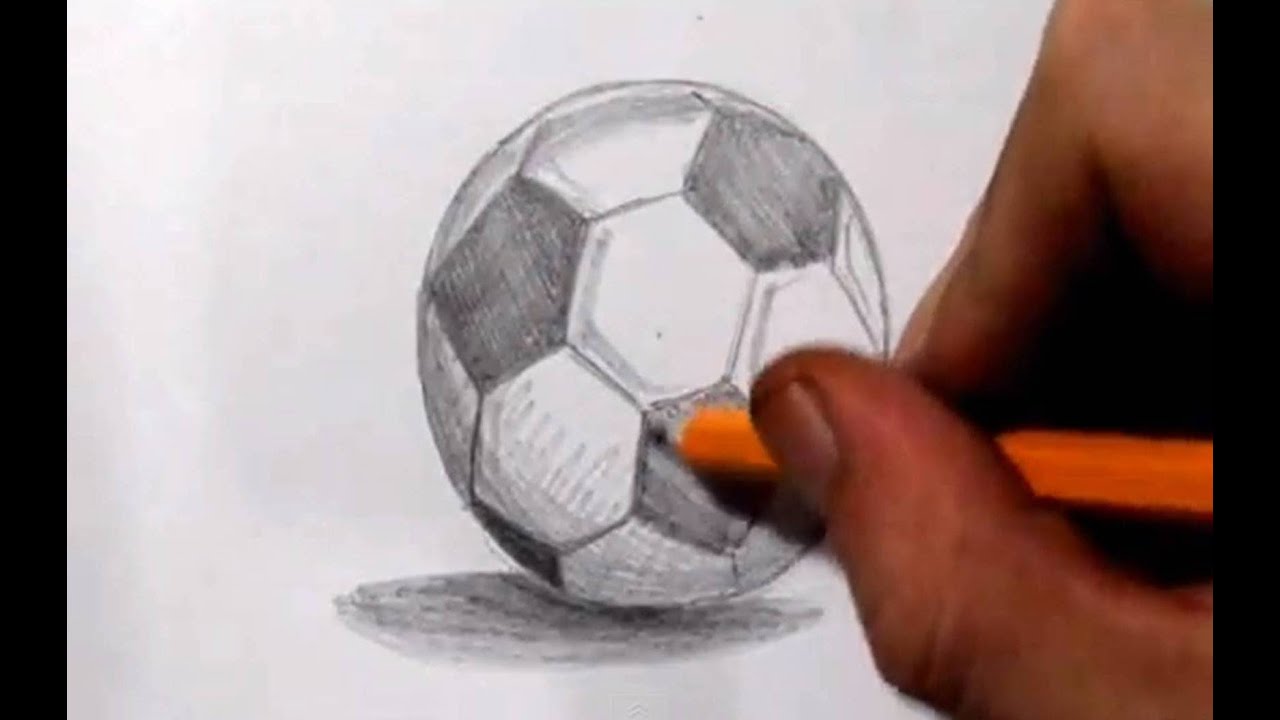
Quick drawing sketch of a soccer ball or football depending on which part of the world you are.. In the US its a soccer ball and in the UK its a football.. Anyhow, hope you like this vid, and if so please consider subscribing to my channel and comment below.
As always thank you for watching and make sure you are notified for future updates by ringing that bell next to the subscribe button! :)
----------------------------------------------------------------------------------
My Optical Illusion Book on Amazon:
----------------------------------------------------------------------------------
► My Book on Amazon (USA)
https://www.amazon.com/dp/1633223558
► My Book on Amazon (UK)
https://www.amazon.co.uk/dp/1633223558
You can follow me on facebook, instagram and etsy (links below)
WEBSITE: http://www.jonathanstephenharris.com
FACEBOOK: https://www.facebook.com/Jonathan.Stephen.Harris
INSTAGRAM: http://instagram.com/jonathanstephenharris
ETSY: https://www.etsy.com/shop/JSHcreates

If you would like me to draw you a custom design, please click on the link below and fill in a request form. I will get back to you within 24 hours.
http://tattoosbycustom.com/index.php?option=com_forme&Itemid=57
This was not easy to do with the camera in the way.. You will see my drawing hand in some awkward positions..
Just like in my other video guide showing how to draw out a triquetra.. In this one after I've mapped out the layout I add a double line and create a knotwork effect, just like the typical Irish celtic triquetra. Also, added a little shading to give it some depth.

See the link below for the sped up version!
https://youtu.be/gRRUilPCmuM
Follow a long and learn how to draw this easy cool line paper folds trick art. This is a narrated/spoken drawing tutorial.
If you like the vid please give it a thumbs up and leave a comment below!
Materials used: 110lb cardstock, HB pencil, 4B pencil, blue bic pen, kneaded eraser, putty rubber/eraser, ruler
Real Time: 16 minutes
Thank you for watching and Subscribe!
You can follow me on facebook, instagram and society6 (links below)
FACEBOOK: https://www.facebook.com/Jonathan.Stephen.Harris
FACEBOOK: https://www.facebook.com/JSHStudioGallery
INSTAGRAM: http://instagram.com/jonathanstephenharris
SOCIETY6: http://society6.com/JSHarts
SAATCHIART: http://www.saatchiart.com/jsh
MUSIC: "Trancer" by YouTube Audio Library
https://www.youtube.com/audiolibrary/music

INITIALS AND HEART DESIGN
Design can be purchased here: https://goo.gl/ntvzeZ
Watch how I combine initials N and A with a heart tattoo design in a cool simplistic tribal style. I start out by lightly sketching out a heart and then the initials either side. Once I'm happy, I outline the drawing with a fine line pen before filling the whole design with a sharpie.
Thank you for watching and make sure you are notified for future updates by ringing that bell next to the subscribe button! :)
----------------------------------------------------------------------------------
My Optical Illusion Book on Amazon:
----------------------------------------------------------------------------------
► My Book on Amazon (USA)
https://www.amazon.com/dp/1633223558
► My Book on Amazon (UK)
https://www.amazon.co.uk/dp/1633223558
-----------------------------------------------------------------------------------
You can follow me on facebook, instagram and society6 (links below)
WEBSITE: http://www.jonathanstephenharris.com
FACEBOOK: https://www.facebook.com/Jonathan.Stephen.Harris
INSTAGRAM: http://instagram.com/jonathanstephenharris
ETSY: https://www.etsy.com/shop/JSHcreates
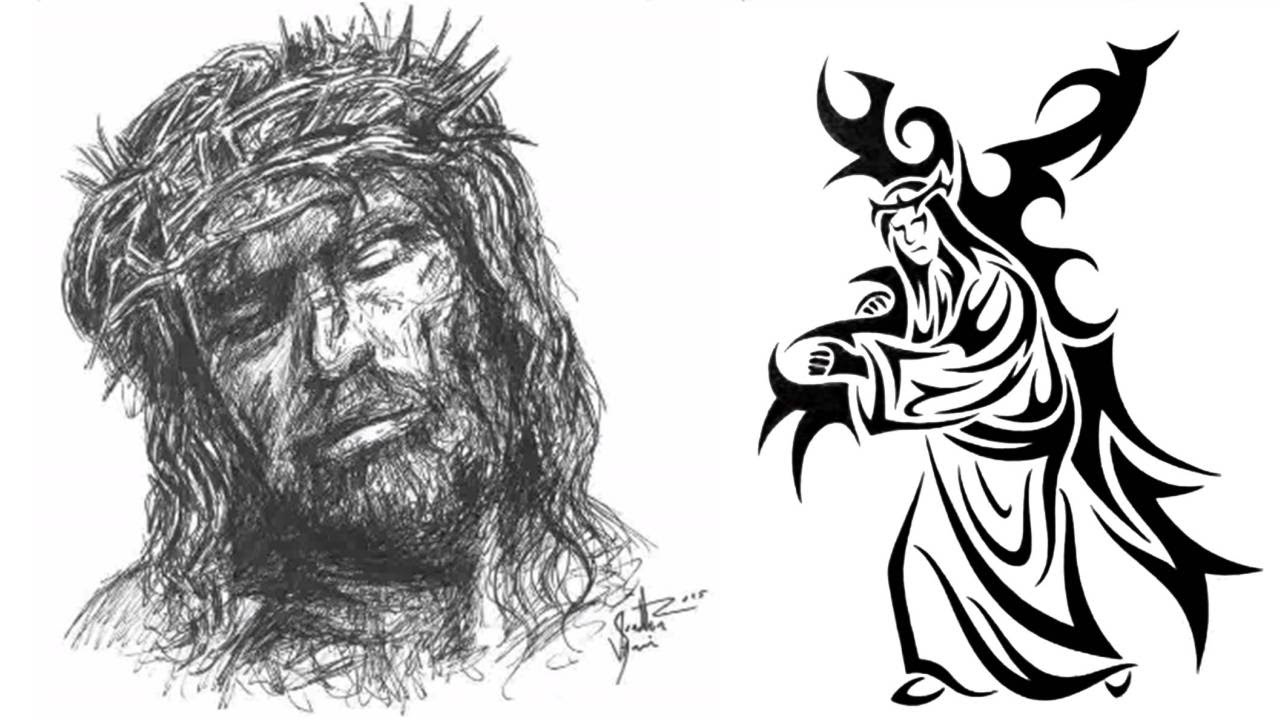
Pen sketch and tribal design drawing of Jesus crucifixion. Good Friday special!! Hope you enjoy and I'm sorry for the bad lighting!! I did these a couple of years ago and my set up back then was a bit shabby!!
Materials used: 110lb cardstock, HB pencil, Fine line pen, sharpie, kneaded eraser
Thank you for watching!
You can follow me on facebook, instagram and society6 (links below)
WEBSITE: http://www.jonathanstephenharris.com
FACEBOOK: https://www.facebook.com/Jonathan.Stephen.Harris
FACEBOOK: https://www.facebook.com/JSHStudioGallery
INSTAGRAM: http://instagram.com/jonathanstephenharris
SOCIETY6: http://society6.com/JSHarts
SAATCHIART: http://www.saatchiart.com/jsh
MUSIC: "Cold_Rise" by YouTube Audio Library
https://www.youtube.com/audiolibrary/music

Sharing the process of my new oil painting that I have titled "The Sleepwalker." This painting is 18x24in, oil on canvas.
http://Patreon.com/LenaDanya
Art Store: http://lenadanyastore.com
twitter: http://twitter.com/LenaDanya
facebook: http://www.facebook.com/LenaDanyaPage
instagram: http://instagram.com/lenadanya
tumblr: http://lenadanya.tumblr.com
Music: • Swellow - Satellites
https://soundcloud.com/iamswellow/
https://twitter.com/iamswellow
https://www.facebook.com/iamswellow
heroboard: »
Twitter: https://twitter.com/heroboard
» Spotify: http://sptfy.com/Wdk

this is how my night went -_-
art store: http://lenadanyastore.com
http://twitter.com/lenadanya
My latest watercolor painting! Lots of you asked for another watercolor piece, hope you like! I tried to make it easier for you to watch by editing out the parts where my arm reaches for colors and dipping the brush because it was extremely distracting and annoying for even me to watch my hand shoot back and fourth. I also didn't speed this one up as much. It think it's only sped up 900x while my other videos are either 2000 or even 4000, so hopefully this makes it easier! Thank you! Hopefully you weren't too grossed out by the cut on my hand :P
Art Store: http://lenadanyastore.com
twitter: http://twitter.com/LenaDanya
facebook: http://www.facebook.com/LenaDanyaPage
instagram: http://instagram.com/lenadanya
tumblr: http://lenadanya.tumblr.com
Music: "even while" - approaching nirvana http://approachingnirvana.com

My newest watercolor, "sunset" a colorful saturated portrait and fun practice with light.
Art Store: http://lenadanyastore.com
twitter: http://twitter.com/LenaDanya
facebook: http://www.facebook.com/LenaDanyaPage
instagram: http://instagram.com/lenadanya
tumblr: http://lenadanya.tumblr.com
Music:

A fun and easy painting exercise I decided to share with you guys, I encourage you to try it out! I'd love to see it, tag #lenadanya on instagram if you do :)
instagram: @lenadanya
official art store: http://lenadanyastore.com
website: http://lenadanya.com
Facebook: http://www.facebook.com/LenaDanyaPage
Tumblr: http://lenadanya.tumblr.com
Twitter: http://twitter.com/lenadanya
Music credits:
song: nanox
artist: singularity
Licence: http://goo.gl/rm5N8
please like singularity on facebook: https://www.facebook.com/singularitymusic

This is what happens when I have too much caffeine.
http://twitter.com/lenadanya
