Лучшие

Here is a drawing of Tom Holland as Spider-Man from the Movie Spider-Man Homecoming.
What did you all think of the movie?
Medium: Ballpoint pen on 11 x 14 Bristol Paper
Please ????, Comment and Subscribe
???? Drawing by: Serafin Ureno ✏️️
___
YOU DECIDE WHAT I DRAW NEXT! COMMENT OR TAKE THE POLL HERE: ➡️ goo.gl/icwQTM
➡️ WEBSITE: http://www.serafinureno.com
➡️ FACEBOOK: http://www.facebook.com/OrangeMonkey92
➡️ DEVIANTART: http://omkdrawings.deviantart.com/
➡️ INSTAGRAM: http://instagram.com/orangemonkey92
????MUSIC????
I am using royalty free music by: Jingle Punks
The music is from YouTube's Audio Library
Name of track: The Driving Force
licensed under a Creative Commons license: http://creativecommons.org/licenses/by/4.0/

It's a Monster Mashup! This is a mixed media drawing. I decided to experiment a bit with this one. I used ballpoint pen, colored pencils, a gel pen, and also markers. I hope you like it.
Happy October!
Please ????, Comment and Subscribe
???? Drawing by: Serafin Ureno ✏️️
___
➡️ WEBSITE: http://www.serafinureno.com
➡️ FACEBOOK: http://www.facebook.com/OrangeMonkey92
➡️ DEVIANTART: http://omkdrawings.deviantart.com/
➡️ INSTAGRAM: http://instagram.com/orangemonkey92
????MUSIC????
I am using royalty free music by: Kevin Macleod
http://incompetech.com/music/royalty-free/
Name of tracks used: Attack of the Mole Men
licensed under a Creative Commons license: http://creativecommons.org/licenses/by/4.0/
----------------------------------
I am using royalty free music by: TeknoAXE
http://teknoaxe.com
Name of tracks used: Hanging with Frank
http://teknoaxe.com/Link_Code_3.php?q=928
licensed under a Creative Commons license: http://creativecommons.org/licenses/by/4.0/
-------------------------------
I am using royalty free music by: TeknoAXE
http://teknoaxe.com
Name of tracks used: Vampire Underground Drum and Bass Remix
http://teknoaxe.com/Link_Code_3.php?q=1121
licensed under a Creative Commons license: http://creativecommons.org/licenses/by/4.0/

Happy Thanksgiving Everyone!! The Good Dinosaur drawn using Prismacolor color pencils on black Strathmore Artagain papar.
Have you seen the movie?
Drawing by: Serafin Ureno
Other sites where you can find me!
FACEBOOK: http://www.facebook.com/OrangeMonkey92
DEVIANTART: http://omkdrawings.deviantart.com/
THIS DRAWING ON DA: http://fav.me/d9i3xuv
INSTAGRAM: http://instagram.com/orangemonkey92
(You Can follow me on Instagram. I'm constantly posting progress pictures and sketches on there.)
I am using royalty free music by: Argofox Creative Commons
https://www.youtube.com/channe....l/UC56Qctnsu8wAyvzf4
Name of tracks used: Noxive - Resilience: http://youtu.be/RrnR4Jq0wXg
licensed under a Creative Commons license: http://creativecommons.org/licenses/by/3.0/

What happens when the faces of art icons Bob Ross, Pablo Picasso and Chuck Close are morphed together. Watch the video to find out. Tradigital artwork by Merrill Kazanjian http://merrillk.com . I used Paint Shop Pro 8, Photoshop CS3, a printer, color pencils and oil paint to make this artwork.

WE NEED A VISUAL ARTS CATEGORY ON YOUTUBE THREAD-http://www.google.com/support/forum/p/youtube/thread?tid=2a9806f929074cbd&hl=en&fid=2a9806f929074cbd0004b630ad37cc3e
Facebook- http://facebook.com/kazanjianm
Twitter- http://twitter.com/kazanjianm
Website- http://merrillk.com
(Merrill) Supplies I Use- http://www.jdoqocy.com/click-4....247664-805536?url=ht
Ladies and Gentlemen, think about it. Santa Claus is a thug.
1.) Santa "Breaks and enters" illegally over a billion times each year........ on Jesus' birth day.
2.) Santa uses exploitative labor...... And the people who he exploits are shorter than three feet tall.
3.) Santa flies without a license and at his own leisure.....while the rest of us get molested at the airport.
4.) Santa wears red.......because he's a Socialist......just like Papa Smurf,
4.) Santa started a fistfight with a penguin........ just to prove that he is bipolar.
5.) While Eminem gets a lot of criticism about his lyrics towards women........Every other word out of Santa Claus' mouth is HO.
As a child, I was taught to leave Santa Claus cookies......But as an adult I know better. The following artwork will give a more accurate portrayal of Santa Claus.

Hint number 1 is to see things as shapes. I like to analogize drawing with assembling a jigsaw puzzle because in both you look for shapes to fit together Hint number 2 is to pay close attention to the edges of what you are drawing. Light and shadows can do funny things and in almost anything that you draw you will see a disparity between the qualities of each edge. Hint number three is to develop your drawing like a Polaroid photograph. Polaroid was the company that innovated instant photography. After pushing the shutter button the photograph would come out of the camera and develop before your eyes. What I want you to know about this is that every part of the photo would develop at the same rate and that is how I want you to try to draw next time. In other words, move the drawing tool around, dont get stuck in a favorite spot. Alright, lets slow it down. What you are seeing me do here is pay close attention to the form and the proportions. In other words, I am comparing the sizes of the different shapes and making sure that the placement of each line is correct. I am using vine charcoal a HB pencil and an eraser. I started out with the vine charcoal because it is easy to erase and move around. You will see later in this video that after I am satisfied with the placement of the charcoal, I will hatch over it with a pencil to keep it undisturbed. I am also trying to be aware of the edges of my shapes and I am especially cognizant of the highlight on the top because that will require me shading the areas around it and using the white of the page as a representation of the strong light. Now when I look back at my reference, I notice that the tone of the background is much darker than the white of the page. I use the side of the charcoal to darken the mid tone of my drawing. This step will make it easy to draw in the highlights with an eraser a little bit later. Now I am folding a piece of paper towel to smudge in the charcoal. You will get a very similar result with a blending stump (also known as a tortillion) but the towel will smudge the charcoal more quickly. To be perfectly honest, many teachers that I have had have told me not to use a blending stump, fingers or anything that comes in to contact with the surface of the paper. I partially agree. Oil from fingers when combined with pencil or charcoal leaves a stain that is tough to work around. Notice that my hand is resting on a sheet of paper. Artists call these slip sheets, but it is just a sheet of computer paper. I like working with the blending stump and the paper and this process works for my needs. It would be dishonest if I changed my process for the sake of making a video. Before, I mentioned the term hatching. Hatching is the short name for the drawing technique of cross hatching. It is simply putting a series of lines next to one another with a drawing tool. These lines usually follow the shape of the object that is being drawn. Once I am done adding pencil marks, I take the blending stub to burnish over my hatch marks. This gives my drawing a more smudged look and possibly my former art teachers a heart attack. I like to smudge the pencil and charcoal because it also gives me a surface that is smooth in tone. Hatching can be layered and I usually stop using the blending stump after the second layer. I once did ten layers of hatching in a pencil drawing. Lets recap and take this to the end of part 1. My focus, over the course of any drawing that I do from observation, is to see a simple pattern of shapes on my reference and to accurately render these shapes, on to the piece of paper that I am drawing. After I get the shapes aligned correctly, I attempt to build up tones with charcoal and pencil. When I am building the tones, I am very aware of the nuances of the edges of each shape, because they are usually different. My focus is also on building the tones of my drawing in a similar manner to how a Polaroid photograph develops.
In part 2, I will teach you a way to add color to any pencil drawing. Thanks for watching the video and please let me know if this helped.

I am going to be using illustration markers, color pencils and oil paint. Just drop me a line if you have any questions
In step 1 I scanned and reprinted my original drawing- I do this for 2 reasons- 1.) If I mess up, I could just reprint it and 2.) marker and color pencil coexist better with printer ink than with graphite from a pencil.
Next I add a layer of the illustration markers. These markers are totally transparent and they enable me to add a layer of color and still be able to see the lines from my pencil drawing. These markers give the artist a similar effect to watercolor paint, but without the messy setup and clean up.. I am still following the Polaroid picture development analogy from the first video- in that I am adding color to all areas at an even pace and slowly building up the darker tones on the sides and bottom of the glass.
The color pencil is great at this point of the drawing, because it adds a translucent layer of color above the marker. In addition to that, color pencils are mixed with wax. The wax will be very handy in the next step when I add oil paint on top of the marker and color pencil. Working with color pencil also allows me to be very precise with my marks on the page. It can be very challenging to be as accurate with a paint brush. This step allows me to make my drawing more accurate and these clarifications will eventually be absorbed by the oil paint.
Now you are going to see me add three layers of oil paint to finish my drawing. I am using oil paint because I want to edit the colors of this composition and it is much easier to mix and match color with oil paint than it is with color pencil. It is also easier to apply large areas of color with a paintbrush rather than the tiny tip of a pencil. I did all of my editing in the last step and now I am just applying color, trying to notice the nuances of the edges of each shape on my reference. If I need to soften an edge I use a dry, soft brush and I pull the paint with that. The color pencil from the layer below is blending nicely with the paint.

MORE EARLY ARTWORK! http://www.youtube.com/watch?v=yjVkBzKYQy4
SUBSCRIBE: http://bit.ly/markcrilleySUBSCRIBE
All 4 "Brody's Ghost" books at Amazon: http://bit.ly/BRODYSGHOSTbooks
"Mastering Manga" book at Amazon: http://bit.ly/MASTERINGMANGA
All 4 "Miki Falls" books at Amazon: http://bit.ly/MIKIFALLSbooks
Brody 1-Shot Comic at TFAW: http://bit.ly/BRODYoneshot
OFFICIAL CRILLEY PLAYLIST: http://bit.ly/CRILLEYPLAYLIST
All of my books are available through your local bookstore-- Ask them to special order if they don't have my books on the shelf. Thanks for your support!! ~Mark
FACEBOOK: http://www.facebook.com/markcrilleyOFFICIAL
TWITTER: http://www.twitter.com/markcrilley
All music created in GarageBand
Visit my channel for YouTube's #1 most-viewed drawing videos!

Listen carefully and do everything I say and what you are about to see....is going to blow your mind.
There are three simple steps in this process.
Step one: Press the full screen button at the bottom of this video player.
Step two: will take 30 seconds of your undivided attention. I want you to stare at the red dot in the middle of the Little Old Man's nose. But not yet. Wait for the music to start.
Step three: As soon as the music stops, Turn your eyes towards the wall or ceiling or somewhere else with a plain surface.
Immediately, start blinking your eyes quickly!
Are you ready to begin? Remember, just stare at the red dot and try not to blink. Then, when the music stops, turn your eyes to a plain surface and blink your eyes quickly. Ready? Go!
Now find a plain surface and blink your eyes as fast as you can!
WE NEED A VISUAL ARTS CATEGORY ON YOUTUBE THREAD-http://www.google.com/support/forum/p/youtube/thread?tid=2a9806f929074cbd&hl=en&fid=2a9806f929074cbd0004b630ad37cc3e
Facebook- http://facebook.com/kazanjianm
Twitter- http://twitter.com/kazanjianm
Website- http://merrillk.com
All music by Kevin MacLeod http://incompetech.com Thank you Kevin!
Subscribe to kazanjianm (Don't miss any new videos that I make)- http://www.youtube.com/subscri....ption_center?add_use
Facebook: Like me on Facebook to find out about live hangouts or to post your work!- http://facebook.com/kazanjianm
Twitter: I tweet! Do you? http://twitter.com/kazanjianm
My Website: http://merrillk.com
Art Supplies I Use in my Art Work- http://merrillk.com/?sid=135&idpage=supplies_i_use
YouTube Visual Arts Category Petition: http://www.change.org/petition....s/create-a-visual-ar
Step by Step Drawing Playlist: http://www.youtube.com/playlis....t?list=PLD6E34C7CD58
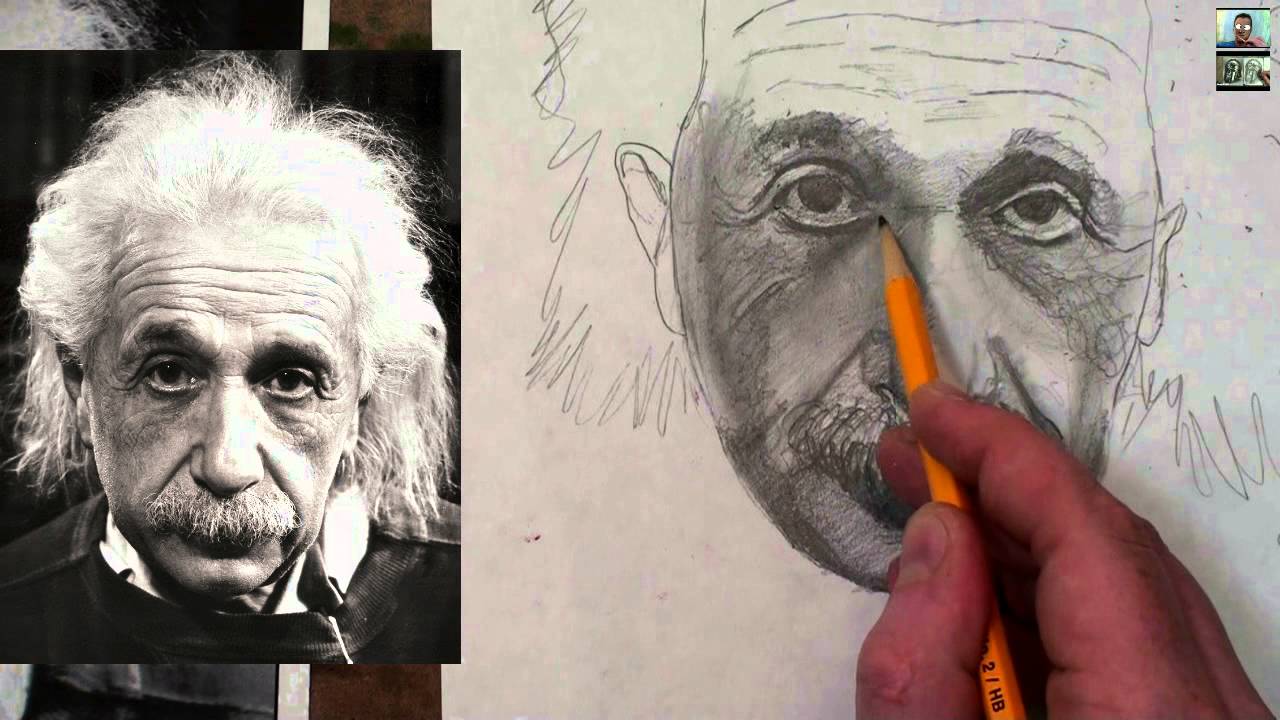
This video will teach anyone, regardless of artistic ability, how to draw Albert Einstein Step by Step.

SUBSCRIBE: http://bit.ly/markcrilleySUBSCRIBE
All 3 "Brody's Ghost" books at Amazon: http://bit.ly/BRODYSGHOSTbooks
All 4 "Miki Falls" books at Amazon: http://bit.ly/MIKIFALLSbooks
"Mastering Manga" book at Amazon: http://bit.ly/MASTERINGMANGA
Brody 1-Shot Comic at TFAW: http://bit.ly/BRODYoneshot
OFFICIAL CRILLEY PLAYLIST: http://bit.ly/CRILLEYPLAYLIST
All of my books are available through your local bookstore-- Ask them to special order if they don't have my books on the shelf. Thanks for your support!! ~Mark
FACEBOOK: http://www.facebook.com/markcrilleyOFFICIAL
TWITTER: http://www.twitter.com/markcrilley

WE NEED A VISUAL ARTS CATEGORY ON YOUTUBE THREAD-http://www.google.com/support/forum/p/youtube/thread?tid=2a9806f929074cbd&hl=en&fid=2a9806f929074cbd0004b630ad37cc3e
Facebook- http://facebook.com/kazanjianm
Twitter- http://twitter.com/kazanjianm
Website- http://merrillk.com
(Merrill) Supplies I Use- http://www.jdoqocy.com/click-4....247664-805536?url=ht
Search the internet or your library for information on the proportions of the human face. You will find a ton of information, but each source seems to say something different. This is video 1 in a series of videos which will make you less confused about the proportions of the human face. You will be less confused, because I will give you proof that a lot of the formulas that you learned for portrait drawing were wrong. At the end of this video, I will give you a new formula to help you draw the human face from memory.
In this experiment, I have taken the most common formulas for facial proportion and tested them on a group of people in a similar pose. I used a computer program to help me take accurate measurements. I made sure that my control group was comprised of both males and females and were of many different races.
So lets get started with a very common proportion rule. The question is- Is it one eye length between each eye? The answer, as you can see, is yes. But this was the only rule that I found to be universally correct.
Lets stick with the eyes for question 2. It is often stated that it is five eye lengths across the face. It turns out that for 9 of the 10 people that I tested, that rule is incorrect. I found that if you included the width of the ear on to the face, then that rule would be closer to true, but definitely not universal. Of the control group, only one person, had a fit, so we can conclude that this proportion does exist, but it does not fit the majority of people and thus, shouldn't be part of a drawing formula.
I recently saw on the internet that the outer corners of the nose, should line up with the inner corners of the eye. Only one of 10 people that I tested proved that proportion to be true. There were also two people who came close. Once again, we can conclude that this proportion does exist, but it does not fit the majority of people and thus, shouldn't be part of a drawing formula. Most often, the outer nose lined up where the tear ducts met the white of the eye. For the record, I hope that the lady in the bottom left never catches a cold.
Question four asks: Does the pupil and iris line up with the corners of the mouth when the face is calm? I will warn you that this was the most difficult to answer, because the mouth is the most variable feature of the face. The shape slightly differs from person to person and it moves a lot. I found that only two people had eyes and mouths which lined up, but, everybody except the gentleman on the top left was extremely close. So, despite the results, I would include this measurement for a general face proportion formula, but I would also be sure to observe the person who I am drawing to get my answer. It is also important to note that 8 of the 10 peoples mouths fit between the lines drawn down from the middle of each eye.
Since question five is related to the placement of the ears, I changed a few of the photos in the control group. In order to gauge this, I had to be able to see the ears clearly. Most portrait formulas state that the ears go from the top of the eye to the bottom of the nose. This turned out to be a pretty accurate statement. Question six is directly related to question five and asks whether the nose and the ears are generally the same size. Although there were only two exact measurements, every other person was very close in measurement. So we can conclude that it is Accurate to say that the ear generally goes between the upper eye and the bottom of the nose and is very close in height to the nose.
Now lets test the most common and controversial face proportion question.....Are the eyes at the exact half way point of the head? You will find top results on the search engines stating that this is the case. I once had a teacher who insisted this and took off points on any student who disagreed with him.....If he only did his homework! The eyes are NOT at the center of the head. The actual middle of the head is just below the orbits of each eye. There was only one person whose eyes were measured as the center of their head, and of course it was MacAulay Culkin.

NARRATED VERSION: https://youtu.be/BHScClfSaO8
REALISM CHALLENGE BOOK: http://amzn.com/0385346298
SUBSCRIBE: http://bit.ly/markcrilleySUBSCRIBE
All 6 "Brody's Ghost" books at Amazon: http://bit.ly/BRODYSGHOSTbooks
"Mastering Manga" books at Amazon: http://bit.ly/MASTERINGMANGA
All 4 “Miki Falls” books at Amazon: http://bit.ly/MIKIFALLSbooks
Brody 1-Shot Comic at TFAW: http://bit.ly/BRODYoneshot
OFFICIAL CRILLEY PLAYLIST: http://bit.ly/CRILLEYPLAYLIST
All of my books are available through your local bookstore-- Ask them to special order if they don't have my books on the shelf. Thanks for your support!! ~Mark
FACEBOOK: http://www.facebook.com/markcrilleyOFFICIAL
TWITTER: http://www.twitter.com/markcrilley
INSTAGRAM: http://instagram.com/markcrilleyreal/
All music created in GarageBand
Visit my channel for YouTube’s #1 most-viewed drawing videos!

Welcome to 「PIN KORO - YouTube」♪
Today's drawing & painting video is「Art Challenge!Turn my subscriber's doodle into an Anime original character」
I hope this "how to draw" video will help.
I hope to turn your drawing into your Anime OCs next time.
Please send me a picture with Instagram Direct.
My Instagram URL
⇒ https://www.instagram.com/pinkoro_draw
I'll be waiting for your picture (^_^)
How to Direct Message with Pictures on Instagram
①Open the Instagram app.
If you aren't logged into Instagram, tap Login.
②Tap the paper plane icon.(It's in the top right corner of your screen.)
Doing so will open Instagram Direct.
③Select people you'd like to send a message to.
④Tap the "Write a message" field, and type in a message.
If you want to send a photo instead, you can tap the icon to the side of the text field and tap a photo to select it.
⑤Tap the Send.
Video for reference
⇒https://www.youtube.com/watch?v=YvlyYQpHoqA

The Japanese beer, giveaway is attached frequently

Welcome to 「PIN KORO - YouTube」♪
Today's drawing & painting video is「Art Challenge!Turn my subscriber's doodle into an Anime original character」
I hope this "how to draw" video will help.
I hope to turn your drawing into your Anime OCs next time.
Please send me a picture with Instagram Direct.
My Instagram URL
⇒ https://www.instagram.com/pinkoro_draw
I'll be waiting for your picture (^_^)
How to Direct Message with Pictures on Instagram
①Open the Instagram app.
If you aren't logged into Instagram, tap Login.
②Tap the paper plane icon.(It's in the top right corner of your screen.)
Doing so will open Instagram Direct.
③Select people you'd like to send a message to.
④Tap the "Write a message" field, and type in a message.
If you want to send a photo instead, you can tap the icon to the side of the text field and tap a photo to select it.
⑤Tap the Send.
Video for reference
⇒https://www.youtube.com/watch?v=YvlyYQpHoqA

Welcome to 「PIN KORO - YouTube」♪
Today's drawing & painting video is「Art Challenge!Turn my subscriber's doodle into an Anime original character」
I hope this "how to draw" video will help.
I hope to turn your drawing into your Anime OCs next time.
Please send me a picture with Instagram Direct.
My Instagram URL
⇒ https://www.instagram.com/pinkoro_draw
I'll be waiting for your picture (^_^)
How to Direct Message with Pictures on Instagram
①Open the Instagram app.
If you aren't logged into Instagram, tap Login.
②Tap the paper plane icon.(It's in the top right corner of your screen.)
Doing so will open Instagram Direct.
③Select people you'd like to send a message to.
④Tap the "Write a message" field, and type in a message.
If you want to send a photo instead, you can tap the icon to the side of the text field and tap a photo to select it.
⑤Tap the Send.
Video for reference
⇒https://www.youtube.com/watch?v=YvlyYQpHoqA

Welcome to 「PIN KORO - YouTube」♪
Today's drawing & painting video is「Art Challenge!Turn my subscriber's doodle into an Anime original character」
I hope this "how to draw" video will help.
I hope to turn your drawing into your Anime OCs next time.
Please send me a picture with Instagram Direct.
My Instagram URL
⇒ https://www.instagram.com/pinkoro_draw
I'll be waiting for your picture (^_^)
How to Direct Message with Pictures on Instagram
①Open the Instagram app.
If you aren't logged into Instagram, tap Login.
②Tap the paper plane icon.(It's in the top right corner of your screen.)
Doing so will open Instagram Direct.
③Select people you'd like to send a message to.
④Tap the "Write a message" field, and type in a message.
If you want to send a photo instead, you can tap the icon to the side of the text field and tap a photo to select it.
⑤Tap the Send.
Video for reference
⇒https://www.youtube.com/watch?v=YvlyYQpHoqA

Welcome to 「PIN KORO - YouTube」♪
Today's drawing & painting video is「Art Challenge!Turn my subscriber's doodle into an Anime original character」
I hope this "how to draw" video will help.
I hope to turn your drawing into your Anime OCs next time.
Please send me a picture with Instagram Direct.
My Instagram URL
⇒ https://www.instagram.com/pinkoro_draw
I'll be waiting for your picture (^_^)
How to Direct Message with Pictures on Instagram
①Open the Instagram app.
If you aren't logged into Instagram, tap Login.
②Tap the paper plane icon.(It's in the top right corner of your screen.)
Doing so will open Instagram Direct.
③Select people you'd like to send a message to.
④Tap the "Write a message" field, and type in a message.
If you want to send a photo instead, you can tap the icon to the side of the text field and tap a photo to select it.
⑤Tap the Send.
Video for reference
⇒https://www.youtube.com/watch?v=YvlyYQpHoqA

Réaliser 100 minis dessins,
Un défi pour entraîner son imagination!
Pensez à mettre un petit LIKE si vous avez aimé la vidéo, un geste simple qui nous aide dans notre travail :)
Avec quelques réponses à vos questions pendant la vidéo :)
Les liens importants sont plus bas ici ! :D
--------------------------------------------------
Musiques:
https://www.youtube.com/watch?v=G77OhBja2Mg
--------------------------------------------------
Liens importants :
Tuto dégradé au Promarker :
https://www.youtube.com/watch?v=OhycfcDcrxI&t=1s
Promarkers : STOP aux traces :
https://www.youtube.com/watch?v=60OfBqipKOY&t=1s
Ma FAQ :
https://www.youtube.com/watch?v=rDTohoD1Q6Q
La Team Draw : @_teamdraw
https://www.instagram.com/_teamdraw/?hl=fr
Mon Instagram : @marine_le_dolphin
https://www.instagram.com/marine_le_dolphin/
Mon FaceBook : Pixy Art
https://www.facebook.com/pixyartyoutube/
Ciné Raté :
https://www.youtube.com/channe....l/UC8CehJsMLNjGPNwiq
DrawMarket :
https://www.drawmarket.fr/
Merci :D
