Образование
Подкатегория

http://merrillk.com/index.php?part=fineart&articles_id=5376&collection=114 Today, you are going to draw Lebron James...Never draw before? Thats OK! I broke this process down in to simple steps for you. Miami Heat. I recommend that you pause the video at the end of each step and get in the habit of looking at the reference image on the screen at least once every five seconds. To make this as easy as possible, I uploaded a print version of this lesson to my website. Go to http://merrillk.com and type in LeBron in the search box. Or, if you are watching on youtube, click the link to the right. All that you will need is a pencil and some paper to draw and a q tip or a blending tool to do the shading in the second part of this video. Good luck! Here we go!
This part has 24 steps and it will be followed by a Lebron shading tutorial.
Step 1- Make a rainbow shape
Step 2- Make another rainbow shape above the first, with a slightly higher arc. This will be LeBron's headband. At the end of this step, it should resemble a banana shape.
Step 3- Make one more rainbow shape slightly above the top of the headband this will be Lebrons hair.
Step 4- Is a little tricky. Add the 2 shapes that you see. Notice that the one on (your) left is slightly larger than the one on (your) right.
Step 5- Add the backward L shape that you see.
Step 6- Add the shape that looks like the "little dipper" (pot shape).
Step 7- Add the next 2 lines. Notice that these two lines connect with the bottom of the shape from step 4.
Step 8- Add the 2 small rainbow shapes for the tops of Lebrons Eyes, and take an extra second to notice how each end connects to form a new shape above the eye.
Step 9- Add 2 U shapes under each eye lid. Dont make circles though, leave the top blocked by the upper eyelid.
Step 10- Take a second to observe the gross outline of the nose. Notice that the shape is about the same height as the forehead.
Step 11- The next lines that you see are the outline of Lebrons moustache. Notice that the 2 vertical lines go DIRECTLY below the mid part of Lebrons eyes.
Step 12- Next, put in Lebrons upper lip. Notice that it looks like a flattened letter M.
Step 13- Now put in his bottom lip. It is shaped like a boat. The shape in between the 2 lips looks like the roof of a Pizza Hut.
Step 14- Now, do your best to put in the ear shapes. Notice that his head is turned slightly, so the ear on your right will be a little smaller.
Step 15- Try to observe the line for his chin and jaw and then draw it.
Step 16- Observe and add these lines for the neck.
Step 17- Add the shoulders
Step 18- This v shape will be an important shadow on the neck.
Step 19- Add the W shape between the chin and lower lip.
Step 20- Connect the W shape with the bottom of each ear.
Step 21- Add the nostrils
Step 22- Add the bottom line for the eye.
Step 23- Add two V shapes under the eyes
Step 24- For the final step before we shade, notice the three shapes that are being added on each ear.
Link- http://merrillk.com/index.php?part=fineart&articles_id=6509&collection=114
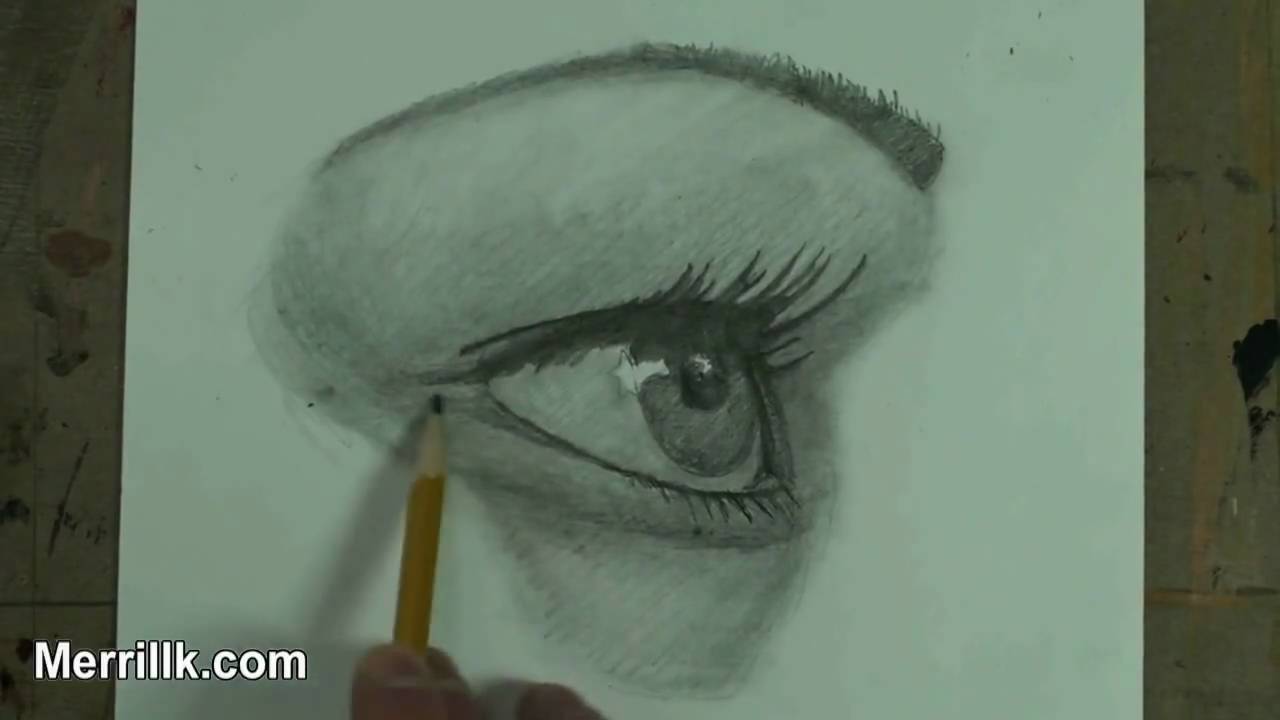
Today you are going to learn to draw the female eye from profile view. I went the extra mile to make this easy for you! Click the link in the videos description to download a printable PDF to assist you while you draw. The PDF has pictures and text and it is sequenced identically to the video. Use both resources to master the skills that I am trying to teach you in this lesson.....Grab your pencils and paper and lets get ready to draw.
Step 1: Draw the shape that you see. It looks like a heart shape turned to the side.
Step 2: Create the shape for the eyebrow at the top of the heart shape.
Step 3: Create the small bowl shape at the bottom. Notice that it overlaps the heart shape. Also notice how small it is compared to the heart shape.
Step 4: Create the shape that was just added. It looks like a sideways triangle with rounded sides. Notice its placement within the heart shape and its proximity to the bowl shape.
Step 5: Add the U shape for the iris. Notice that you can see the bottom of the iris, but not the top. Also notice that the iris is more oval like, rather than circular, since the head is turned.
Step 6: Add the shape to the inner corner of the eye.
Step 7: Add the crown like shape for the upper eye lashes. Notice that the longest ones seem to be on the inner corner of the eye. (This is actually not the case, the other lashes are foreshortened)
Step 8: Add the lashes on the inner corner of the eye.
Step 9: Add the bottom eye lashes. Notice that they are much shorter than the top lashes.
Step 10: Add the Pupil. Since the head is turned, the pupil is oval like.
Step 11: Add the highlight shapes that I just added
SHADING:
Step 12: Start shading the darkest areas first. The upper lashes and the pupil will be the darkest areas. Build it up slowly in "cross hatched" layers (the video will demonstrate). Dont do it all at once.
Step 13: Shade in the Iris. Notice that it is not as dark as the pupil. The shape added in step 6 is part if the eyelid. Shade it alightly lighter than the iris.
Step 14: Shade in the eyebrow. This can vary in tone depending upon hair color and make up. In this case, I left it lighter in tone than the eyelashes.
Step 15: Fill in the areas around the eye with hatching. Refer to the photo (above) as a reference. Use up to a 4B pencil at this stage.
Step 16: LIGHTLY shade in the white part of the eye (with the exception of the highlight areas drawin in before). Hint: The two lightest tones will be the highlight in the eye, followed by the bony area directly under the eyebrow. By this point, feel free to use up to a 6B pencil to help with the darker tones.
Step 17: Use the blending stump (tortillion) to smudge and spread your hatching.
Step 18: Develop the tones more by hatching over the smudges (from the tortillion). If you wish, smudge some more.
Step 19: Put on the finishing touches.
Step 20: Finished
Available in Closed captioning
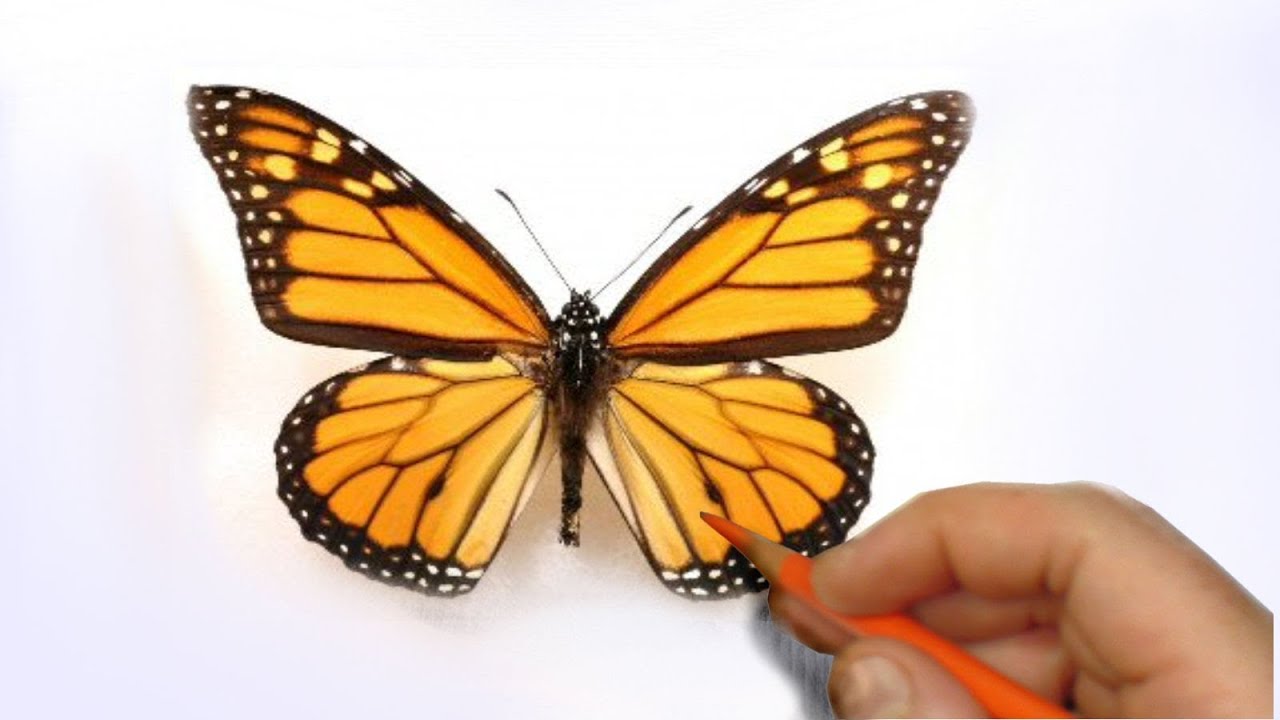
Learn a really cool illustration technique to achieve a realistic likeness! I mixed pencil, illustration marker, colored pencil and oil paint to illustrate a butterfly.
Subscribe to kazanjianm (Don't miss any new videos that I make)- http://www.youtube.com/subscri....ption_center?add_use
Facebook: Like me on Facebook to find out about live hangouts or to post your work!- http://facebook.com/kazanjianm
Twitter: I tweet! Do you? http://twitter.com/kazanjianm
My Website: http://merrillk.com
Art Supplies I Use in my Art Work- http://merrillk.com/?sid=135&idpage=supplies_i_use
YouTube Visual Arts Category Petition: http://www.change.org/petition....s/create-a-visual-ar
Step by Step Drawing Playlist: http://www.youtube.com/playlis....t?list=PLD6E34C7CD58

My Facebook- http://facebook.com/kazanjianm
YouTube Topics Search- http://youtube.com/topics
We NEED a Visual Arts Category Forum Thread (please advocate)- http://www.google.com/support/forum/p/youtube/thread?fid=2a9806f929074cbd0004ba24bfbc3fc4&hl=en
Visual Arts Category Playlist- http://www.youtube.com/playlis....t?list=PLEA626A08B26
Lets celebrate our progress in working towards a visual arts category on YouTube with a new contest. My goal whenever I hold a contest is to bring the art community together and highlight all of the insanely amazing art work that is on YouTube. I want to give talented artists the exposure that they deserve.
Last December, I held a contest called "Who is the most underrated artist on YouTube"? For that contest, I asked people to vote in the comments section of the video for who they consider to be the most underrated artist on YouTube. This contest got over 1000 comments and the winner of that contest, BarryPFinnegan2 got hooked up. The subscribership on his channel doubled from 500 to 1000 in less than a month.
I am still getting requests to repeat that contest so we are going to do it again. So welcome to Who is the most underrated artist on YouTube 2. Here are the very simple rules.
Question: What channel do you think is the most underrated visual arts channel on YouTube?
(We will define underrated as having less than 10,000 subscribers.)
To vote, simply write that channels name in the comments section of this video. That is all that you have to do. One week from today, I am going to tally up all of the comments and up votes, and I am going to do something special for the channel that gets the most votes.
Remember the whole point of this contest is for youtube artists to become more aware of each other. I recommend that you use the AWESOME new tool that youtube gave us called topic search. I will link to it in the video description. Try putting your favorite keywords in here. I guarantee that you will find some new and cool stuff.
If you want to showcase your work to recruit people to vote for you, please feel free to:
1.) post your best video as a video response to this video.
2.) post your best video to my facebook page. http://facebook.com/kazanjianm
So YouTube gave us a new toy called Topics. I am linking to it in the video description because is a great resource to navigate the many genres of art uploaded to YouTube. Im going to use topics to prove a point. There are a LOT of artists on YouTube.
So this is our new toy, Youtube topics, we are going to do a search for art. And then we will learn that there are amount one million art videos on YouTube and these videos have a viewership in the billions. Lets compare the art results from YouTube topics and compare it with some other popular keywords. Art beats sports, basketball, education and even cosmetics in the total number of videos. Please note that two of these topics are specific categories already and I know that I speak for a LOT of people when I say that art should be next.
It makes me mad when I see a great artist with a small following. Contests like this one are designed to change things fast.
Visit http://youtube.com/September11 to watch more perspectives on the 10th Anniversary of September 11 and to submit your own.
WE NEED A VISUAL ARTS CATEGORY ON YOUTUBE THREAD-http://www.google.com/support/forum/p/youtube/thread?tid=2a9806f929074cbd&hl=en&fid=2a9806f929074cbd0004b630ad37cc3e
Facebook- http://facebook.com/kazanjianm
Twitter- http://twitter.com/kazanjianm
Website- http://merrillk.com
(Merrill) Supplies I Use- http://www.jdoqocy.com/click-4....247664-805536?url=ht
Reflections on 9-11 .....Merrill Kazanjian's 9-11 story.
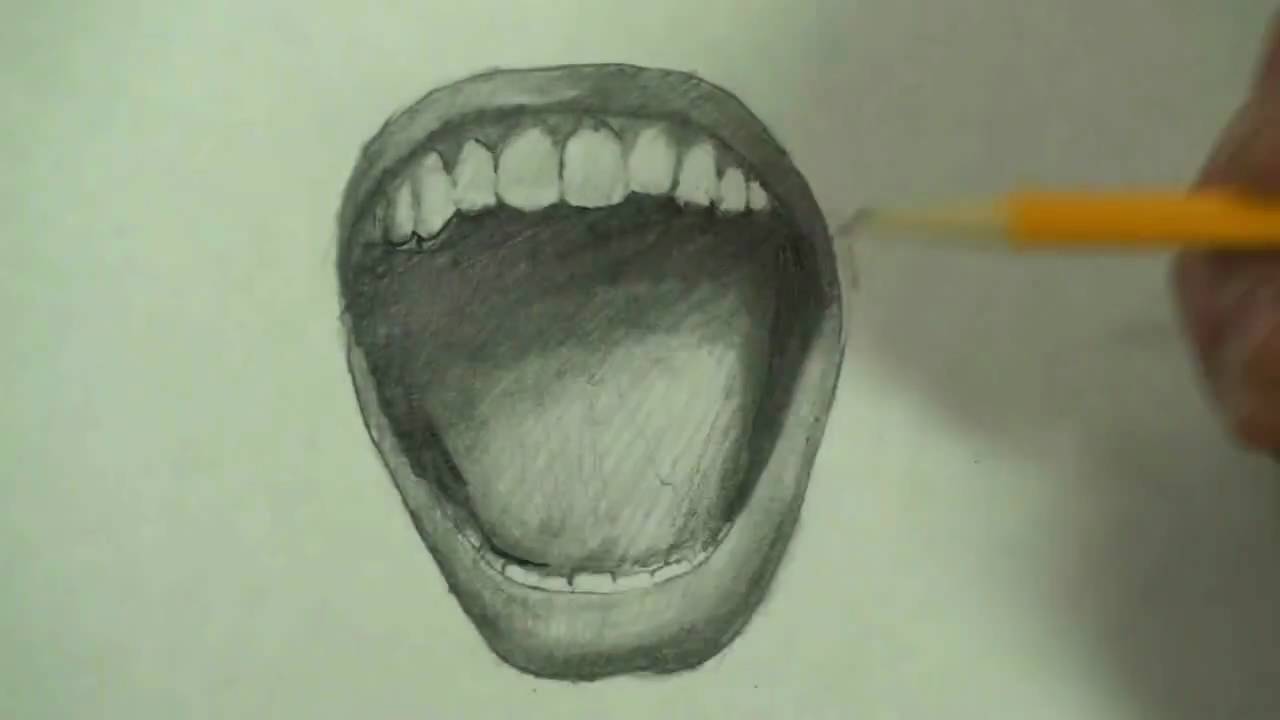
LINK- http://merrillk.com Today, I am going to show you, step by step, how to draw an angry mouth. Pause the video at the end of each step and be sure to look at the screen every few seconds while you draw. I am confident that you will surprise yourself if you take your time and listen carefully. Here we go.
Step 1- Draw a big U shape but make the two lines at the top of the U point slightly outwards and away from each other. Pause the video now and remember to look at the reference picture on your computer screen.
Step 2- Draw a second U shape above the first and close the lines to form a crescent moon shape. Notice that the widest point of this shape is the middle and that the shape gets narrow and pointy at the top where the edges of both lines meet.
Step 3- When a person screams, the bottom lip presses firmly against the bottom set of teeth. Only the tooth tops are visible. The shape of these tooth tops is somewhere between a square and circle. Make 8 to 10 and stay light with the lines in between the teeth. Pause the video now and don't forget to look every few seconds.
Step 4- Now we draw the tongue. It is a rounded shape that is wider at the top than the bottom. It is kind of like drawing a heart shape without a pointed bottom or an indentation at the top. Pause the video now and be sure to look every few seconds while you draw.
Step 5- Add a rainbow shape at the top. Be sure to notice the amount of space between the top of the tongue and the rainbow shape. Pause the video now.
Step 6- Add a second rainbow shape above the first. Like the bottom lip, the top lip gets more narrow at the edges and wider in the middle. Be sure to notice that the bottom lip is thicker than the top lip. This is true for every person. Pause the video now and be sure to look at the screen every few seconds.
Step 7- Now make a half circle shape beneath the top lip. Notice that the edges at the bottom protrude slightly. Pause the video now and remember to look.
Step 8- When a person screams, the top teeth are exposed because the top lip goes upwards. Your task is to draw 12 teeth. Notice that the front four face the viewer but the others start to turn away. Notice that as the teeth go further back in to the mouth, they get smaller. I know that molars and wisdom teeth are much larger in real life than a front teeth, but please trust me and pause the video and draw what you see. I will explain why this happens in the next part.
Ideally, you should have three things to do the shading. At the top is a blending stub. In the middle is a 2B pencil and at the bottom is a HB pencil.
When I shade, I:
- Use a method called cross hatcing
- Develop the shading evenly (I move the pencil around to the different parts of the drawing. step by step drawing lesson

This video will show you how to draw the hand, step by step (Thumbs up pose). Link- http://merrillk.com/?part=fineart&articles_id=6974&act=artist1&artist=69&collection=114 The link will take you to a page with print resources, including a printable PDF. The video makes it possible for anybody to draw the hand. It is simplified with the 1.) Step by step instruction of the video 2.) Website resource 3.) Print resource. It doesnt matter how much experience you have with art, you will be able to do this. This process makes it easy as possible. You dont have to pray that your drawing turns out OK...Thumbs up!!!!- Merrill Kazanjian
Este video te mostrará cómo sacar la mano, paso a paso (Thumbs up plantean). Link-http://merrillk.com/?part=fineart&articles_id=6974&act=artist1&artist=69&collection=114 El enlace te llevará a una página con los recursos de impresión, incluyendo un PDF imprimible. El vídeo hace posible que a nadie a sacar la mano. Se simplifica con el 1.) Instrucciones paso a paso de las 2 de vídeo.) Sitio Web de recursos 3.) De los recursos de impresión. Se doesnt importa cuánto usted tiene experiencia con el arte, usted será capaz de hacer esto. Este proceso hace que sea más fácil posible. Usted no tiene que rezar para que el dibujo resulta bien ... Thumbs up!!! Este vídeo vai mostrar como a chamar a mão, passo a passo (thumbs up pose). Link-http://merrillk.com/?part=fineart&articles_id=6974&act=artist1&artist=69&collection=114 O link levará você a uma página com recursos de impressão, incluindo um PDF para impressão. O vídeo possibilita que qualquer pessoa a desenhar a mão. É simplificado com o 1.) Instruções passo a passo do vídeo 2.) Website recurso 3.) Recurso de impressão. Não importa o quanto você tem experiência com a arte, você será capaz de fazer isso. Este processo faz com que seja mais fácil possível. Você não tem que rezar para que o desenho acaba bem ... Thumbs up!! Cette vidéo va vous montrer comment dessiner la main, étape par étape (Thumbs posent up). Link-http://merrillk.com/?part=fineart&articles_id=6974&act=artist1&artist=69&collection=114 Le lien vous amène sur une page avec des ressources d'impression, y compris un PDF imprimable. La vidéo permet à quiconque de tirer la main. Il est simplifié avec le 1.) Instructions étape par étape de la vidéo 2.) Site de ressources 3.) Ressources d'impression. It doesnt importe l'expérience que vous avez avec l'art, vous serez en mesure de le faire. Ce processus rend facile que possible. Vous n'avez pas de prier pour que votre dessin se révèle OK ... Thumbs up!! 此影片将告诉你如何绘制手,一步(竖起大拇指构成步骤)。链路http://merrillk.com/?part=fineart&articles_id=6974&act=artist1& amp;artist=69&collection=114的链接将带您到一个网页上打印资源,包括一个可打印的PDF。视频可让任何人利用手。它简化了1。)一步的视频2指令步。)网站资源3。)打印资源。它doesn't不管有多少经验,你对艺术有,你将能够做到这一点。这一过程可以很容易进行。您不应该祈祷您的绘图原来行...竖起大拇指!!इस वीडियो को आप कैसे दिखा हाथ खींचने के लिए कदम आगे बढ़ने की अनुमति (उत्तर प्रदेश मुद्रा से कदम,) है. लिंक-http://merrillk.com/?part=fineart&articles_id=6974&act=artist1&artist=69&collection=114 लिंक एक पृष्ठ पर आप एक मुद्रण योग्य PDF सहित प्रिंट संसाधन, साथ ले जाएगा. वीडियो इसके लिए किसी को हाथ खींचने के लिए संभव बनाता है. यह 1 से सरल.) है वीडियो 2 के कदम से कदम अनुदेश.) वेबसाइट संसाधन 3.) प्रिंट संसाधन. यह बात doesn't कितना अनुभव आप कला के साथ है, तुम यह करने में सक्षम होंगे. इस प्रक्रिया के रूप में यह संभव आसान बनाता है. तुम मत से प्रार्थना करती हूँ कि आपका चित्र बाहर ठीक है ... ऊपर अंगूठे! जाता है!!
Link- http://merrillk.com/?part=fineart&articles_id=13272&act=artist1&artist=69&collection=461#
WE NEED A VISUAL ARTS CATEGORY ON YOUTUBE THREAD-http://www.google.com/support/forum/p/youtube/thread?tid=2a9806f929074cbd&hl=en&fid=2a9806f929074cbd0004b630ad37cc3e
Facebook- http://facebook.com/kazanjianm
Twitter- http://twitter.com/kazanjianm
Website- http://merrillk.com
(Merrill) Supplies I Use- http://www.jdoqocy.com/click-4....247664-805536?url=ht
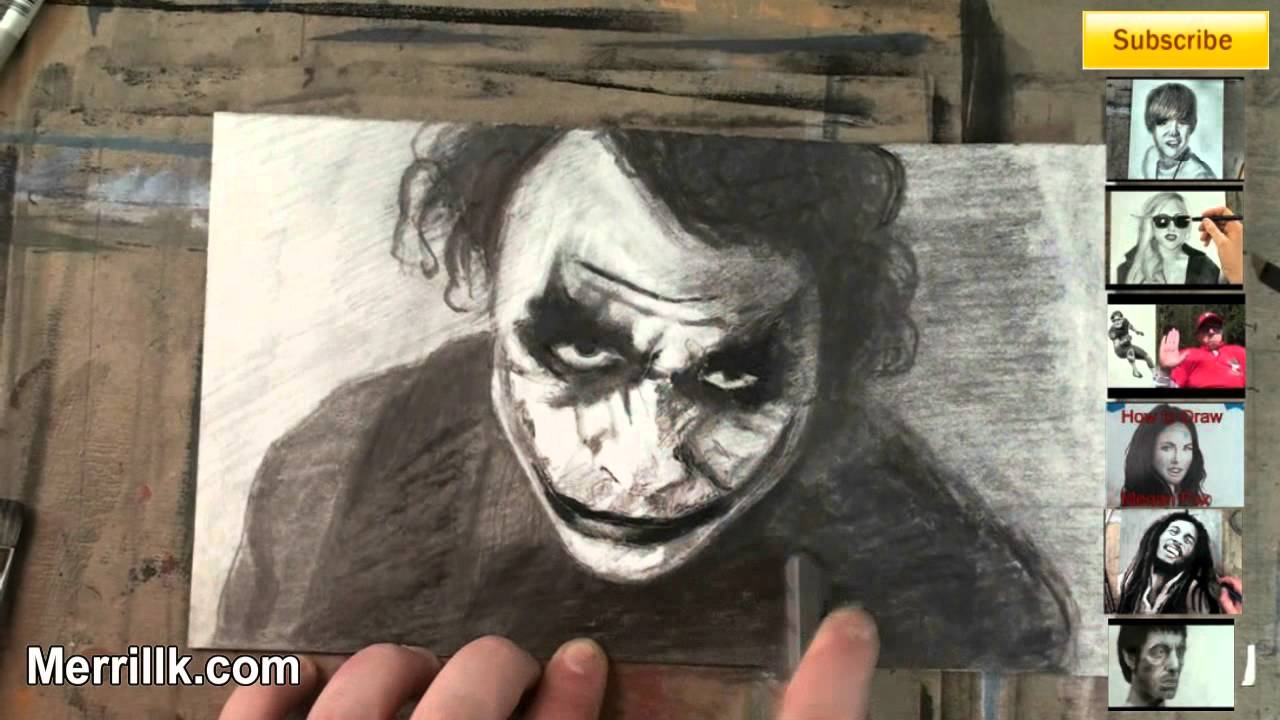
Do you want to know how Little Old Man got these scars? He kissed a pencil sharpener.......with his tongue. And while that was a big mistake I am going to prevent you from making drawing mistakes on your portrait of Heath Ledger as the Joker. Just follow my step by step instructions, pause the video at the end of each step and don't Christian Bale on me and you will surprise yourself on this drawing.
Do I sound like a man with a plan? Well I have one. Hit the link in the video description to go to my Joker cheat sheet on my website. It has photos and text and it will supplement the instruction that you receive in this video. Go grab your pencils and paper. Lets begin.

Hey everybody its Merrill. This video is going to teach you what I consider to be the three most important tips for making a realistic looking drawing or painting. I tell you what, Lets get right to the point. Tip number one is, eliminate lines whenever it is possible. The second rule that I am going to give you is to notice the edges. All edges are not the same. Some are soft, and some are hard and you have to really look to notice the tones and the hardness of the edges. If there is an overarching theme to all three of these points, it is tones. This video teaches you how to smudge pencil lines and blend tones. Its a good tutorial for those of you who want to build your knowledge in that area. Tips for making a realistic looking drawing. Tips for making a realistic looking painting. How to create a realistic drawing. How to create a realistic painting.
Link- http://merrillk.com/?part=fineart&articles_id=5413&act=artist1&artist=69&collection=464
Supplies I Use- http://www.jdoqocy.com/click-4....247664-805536?url=ht
Facebook: http://facebook.com/kazanjianm
Twitter: http://twitter.com/kazanjianm
This video shows my process for making an illustration. I use prismacolor illustration markers for the first layer and color pencils (prisma once again) and a wax blending stick for the second layer. I make my illustrations in two steps. Step 1- I observe my reference drawings or photos and try to see what lies beneath. There is no way to blend markers in the same way that one can blend paint (ironically even with a marker blender) so I lie down the base tones with markers (the first layer). Step 2- Is created with color pencils. Color pencils are mixable / blendable and I mix the color pencils directly above my marker drawing. I use the wax stick to finish the surface and tie everything together. - Merrill Kazanjian
0:13 Take a second to observe the colors lying beneath the surface.
1.)Yellow/green/orange at the top
2.) Orange top/middle
3.) Brownish purple in the shadow on the left.
4.) Strong red on the right side. Everywhere else (but the red) is lower in chroma (intensity of color)
0:20- I start my drawing with the yellowed orange marker from prismacolor. I try to match the undertone.
0:38 I use marker color Apple Green at the top of the apple
0:48 I use the color Mahogany Red to add the general shape and color of the shadows
1:02 I use the marker Poppy Red to create the high chroma red on the area next to the highlight.
1:20 Now I use Tuscan Red to adjust the shadow. This color is a bot deeper than Mahogany Red.
1:28 I add the color Lemon Yellow (for the stem)
1:38 I use the Colored Pencil: French Grey 30% to drop the intensity of the color for the highlight. Highlights are NOT intense in color.
1:45 I use the colored pencil Goldenrod to get the yellow values towards the top of the apple.
2:15 I use the colored pencil White to create the bright highlight.
2:25 I use the color pencil Carmine Red to get the beautiful bright "fire engine red" hue on the side of the apple.
2:37 I alternated between the colors Canary Yellow and White to define the top of the apple.
2:54 Tuscan Red is one of the most important colors that you could get in your palette. It is strong (intense), dark in tone and purplish brown in hue. It is great for portraits as well!
3:06 I am using the colored pencil Carmine Red again. I am using it to start my blending so that my drawing does not look segmented.
3:10 I am using the Tuscan Red again and for the same reason as the previous color. I am trying to blend and make smooth color transitions.
3:20 For the first time in this illustration drawing, I am using the color Olive Green to do the shadow of the stem.
3:26 The colored pencil Magenta is a purplish red which makes a great bridge between the Tuscan Red and the Carmine Red.
3:31 Now, I am using the color Black Cherry which is a bit darker than the Tuscan Red. This color will help me define the edges a bit more.
3:42 The Prismacolor Art Stix Colorless Wax Blender is a very handy tool to finish an illustration. All it is, is the wax (the binder) for the colored pencils without the color. It is an incredible tool for colored pencil artists. Notice that I blend in the opposite direction as my cross hatching.
4:13 I use a variety of color pencils such as Black, White, Goldenrod, Carmine Red and Olive Green to finish my drawing.
I hope that this tutorial helped, if it did, please subscribe to my channel for more quality art instruction.

What is Glazing? The technical answer is 1.) multiple thin layers of transparent oil paint (applied at the end of a painting)....but what I want YOU to remember is 2.) Glazing is pure magic 3.) Knowing how to glaze will take your painting abilities to the next level.
1.) Why glazing is an important painting strategy
2.) (We will touch a little bit on) The science of refracted light
3.) Which paints to use. (How can you tell if a paint is a glazing color?)
4.) Which brushes to use for glazing
5.) How to do it! (The technique of glazing oil paint)
Glaze layers happen at the final stages of a painting, so lets take you to the end of the painting that you just saw right now. I am going to keep things concise and to the point. Give me your full attention for the next few minutes and you will acquire a solid understanding of glazing.
1- Why is glazing an important painting strategy?
Think about the last time that you had a sunburn. When sunburns heal, a layer of skin usually peels off your body. Take a second to remember what that skin looks like. The peel of skin is very thin, smooth and it is possible to see light through it.
Our outermost layers of skin, the epidermis, is comprised of multiple layers of skin similar to the peeled layer of skin that you just imagined. Glazing, the application of multiple, thin, transparent to translucent layers, is like the epidermis of a painting and it is important for an artist to know how to glaze so that he or she can get a more life like effect to their work.
2- The Science of Refracted Light
Light refracts through the transparent and translucent layers of a painting. In other words, it penetrates these layers and picks up any color that these layers contain. A good analogy for this concept is a seashell on the beach. Think of how the color of a seashell seems to change when it is covered with ocean water. The shell seems to change color, but in actuality, all physical characteristics of the shell remain the same. The sunlight refracting through the water alters the shells appearance just as glaze layers affect the final appearance of a painting.
3- Which paints to use
Paint colors have different characteristics. For instance, red, is not just red when it comes to painting. Cadmium red, the color on the left, is extremely opaque and has a great covering power. The color on the right, alizarin crimson is extremely transparent with a lesser covering power. Notice how you can see the blue line through the alizarin crimson, but not the cadmium red.
Most paint companies label the outside of their paint tubes to communicate these differences. Usually a box or circle is used to say if a paint is transparent, translucent or opaque. A filled box or circle is a symbol stating that a color is opaque while the opposite is true if a paint is transparent.
When you glaze, you would add painting medium such as liquin to the paint. It is easy to glaze with transparent colors such as alizarin crimson but it is also possible to glaze with the cadmium red. In order to glaze with an opaque color, use a little bit of paint and a lot of painting medium. I would advise any beginner or novice painter to stick with transparent and translucent paints.
4.) Which brushes to use
When you glaze, have multiple soft tipped brushes within reach. A variety of sizes and shapes including round tip and fan brushes are ideal. Now we are ready for the demonstration
I did the glazing in three sittings over 21 days. It is important to let the paint thoroughly dry between glazes. If it doesnt, you will start picing up some of the previous layer. Notice that I am starting off by using two brushes. One to apply paint and the other to move the paint around. This is called dry brush technique and it is your most important glazing strategy. Dry brush gives you a smooth untextured finish......
I wouldnt recommend this for anyone trying glazing for the first time, but I am actually using titanium white when I create a highlight.....that is a white with extreme covering power....equal to what you saw with cadmium red. I use that only in the brighter highlight areas and when I use it, I use a ton of painting medium with it. ........
The shadows get a little tricky, I try to look at my reference photo to match the shape but I am very aware of their edges as well. If there is a soft edge, I soften it with another dry brush....This is VERY IMPORTANT....Do not clean your brush in mineral spirits or turpenoid. Instead, just wipe your brush on a paper towel because those paint thinners will dissolve the entire glaze.....If a brush becomes unworkable, put it aside and use another soft tipped brush.

Today, I am going to demonstrate a new artistic technique. I am going to merge the best qualities of two artistic mediums; oil painting and color pencil. What you are now watching is a time lapse of me building up layers of illustration marker and color pencil over a pencil drawing. In about a minute, I will slow the video down to show you that color pencils can be blended by using mineral spirits and a paint brush. I am doing this artwork on 110 lb. bond paper and please note that this method will not work as well on simple 20 lb. printer paper. This drawing was done as a tribute to Manhattanville Colleges iconic History Professor- Mr. Lawson Bowling. Professor Bowling is a mentor and friend of mine. He just completed his 25th year of service at Manhattanville College. It is an honor to give him this drawing and possibly turn him in to an internet celebrity.
The best quality of oil painting is that you can 1.) Blend while the paint is wet and 2.) Add multiple layers of new paint after the previous layer dries. The greatest nuance of color pencil drawing is the accuracy that is attained by using the very fine point at the tip of the pencil. I dip the paintbrush in to the mineral spirits and then dab it on a paper towel; then I drag the brush over my drawing. The mineral spirits quickly break down the thick cake of color pencil. The soft tip of the paint brush allows me to move and blend the pigment from the color pencil in a manner that is similar to the process of painting. It takes only a few minutes for the mineral spirits and pencil to dryAfter the mineral spirits dry, you can add more layers of color pencil. I have actually finished an oil painting with color pencil and an oil paint medium called liquin before, but to save time, I built up the flesh tones today with markers and color pencil.
by Merrill Kazanjian http://merrillk.com

Learn to draw Yoda step by Step
Subscribe to kazanjianm (Don't miss any new videos that I make)- http://www.youtube.com/subscri....ption_center?add_use
Facebook: Like me on Facebook to find out about live hangouts or to post your work!- http://facebook.com/kazanjianm
Twitter: I tweet! Do you? http://twitter.com/kazanjianm
My Website: http://merrillk.com
Art Supplies I Use in my Art Work- http://merrillk.com/?sid=135&idpage=supplies_i_use
YouTube Visual Arts Category Petition: http://www.change.org/petition....s/create-a-visual-ar
Step by Step Drawing Playlist: http://www.youtube.com/playlis....t?list=PLD6E34C7CD58

Try to notice that the shape around an angry eye is much more compressed than a calm eye. When a person is enraged, the muscles around the eye tighten and pull the eyelids inward. This creates deeper shadows and uncovers more of the white of the eye. In the angry eye there is a separation between the top of the iris and the eyelid.
Step 1- Draw a circle with a rainbow shape above it. Remember to leave a space about half of the size of the iris in between the upper lid and upper iris.
Step 2- Draw in the shape of the eyebrow. Make sure that it is angled downwards towards the inner corner of the eye. It should actually connect with the eye lashes on the upper eye lid
Step 3- Draw in the pupil and the lower eyelid. Leave a black space in the pupil for a reflection. The lower eyelid should graze the bottom of the iris.
Step 4- The bottom eyelid is literally wrapped around the eyeball. Make a bowl like shape below the eye and add a squiggly line on the inner corner of the eye to hint at the side of the nose.
Step 5- Shade the pupil and iris and the upper eye lashes. Please note that the upper eyelashes are thicker and fuller than the bottom ones.
Step 6- Shade in the eyebrow. Please notice that it is not evenly shaded throughout.
Step 7- Darken the area around the eye but do not touch the white area. The eyes seem to sink in more when a person is angry, creating deeper shadows. Merrill Kazanjian
Trate de notar que la forma alrededor de un ojo enojado comprimido es mucho más tranquilo que un ojo. Cuando una persona se enfureció, los músculos alrededor de los ojos y apretar los párpados tire hacia adentro. Esto crea las sombras más profundas y descubre más de la sustancia blanca del ojo. En el ojo enojado hay una separación entre la parte superior del iris y el párpado. Paso 1 - Dibuja un círculo con forma de un arco iris por encima de ella. Recuerde que debe dejar un espacio alrededor de la mitad del tamaño del iris en la parte superior entre la tapa y la parte superior del iris. Paso 2 - Dibuje en la forma de la ceja. Asegúrese de que está en ángulo hacia abajo hacia la esquina interior del ojo. Debe conectarse realmente con los ojos las pestañas en la parte superior párpado Paso 3 - Dibujar en el alumno y el párpado inferior. Deje un espacio negro en el alumno para una reflexión. El párpado inferior debe rozar la parte inferior del iris. Paso 4 - La parte inferior del párpado es literalmente envuelto en todo el globo ocular. Hacer un plato debajo de la forma como el ojo torcido y añadir una línea en la esquina interior del ojo a la pista a un lado de la nariz. Paso 5 - La sombra de la pupila y el iris del ojo y la parte superior de las pestañas. Tenga en cuenta que la parte superior de las pestañas son más anchas y más completa que la parte inferior queridos. Paso 6 - Sombra en la ceja. Tenga en cuenta que no es uniforme en toda la sombra. Paso 7 - Oscurecer la zona alrededor del ojo, pero no toque el área blanca. Los ojos parecen hundirse en más de una persona cuando está enojado, la creación de las sombras más profundas. Merrill Kazanjian
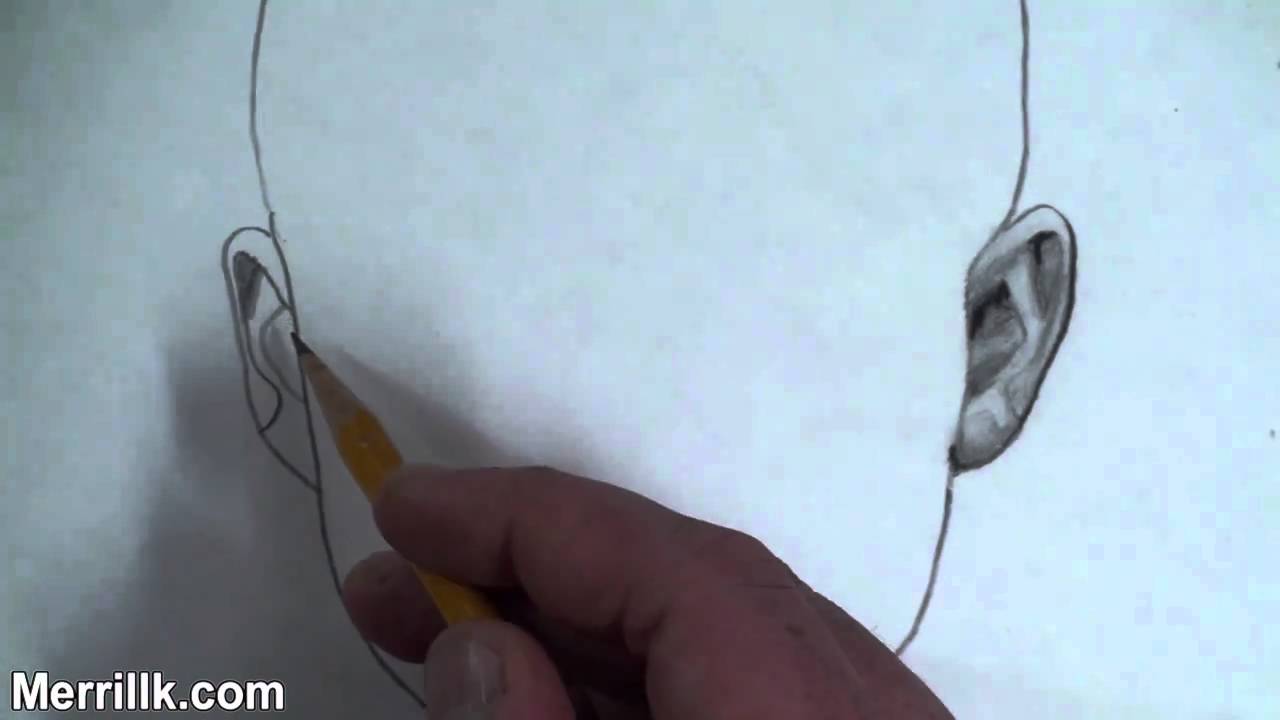
Welcome to the third part of my three video tutorial. These tutorials will show you how to draw the ear at the three most common angles. This video will specifically show you how to draw the ear from the perspective of the front of the face. I recommend that you pause the video at the end of each step and listen to the instructions. Lets begin.
Step 1: Make the two shapes that you see. Notice that the top part of each shape is wider than the bottom.
Step 2: Observe the reference image and then draw in the lines that I just added
Step 3: Step 3 is a little bit confusing, so be sure to take your time. I just added a line to each side and a rainbow shape on the inner part of the ear.
LINK- http://merrillk.com/?part=fineart&articles_id=8423&act=artist1&artist=69&collection=114 Hey, I got a question. Do you "Remember the Time" that you asked me to do a tutorial on how to draw Michael Jackson? Well, this "Smooth Criminal" listened to your requests because i'm not one of those youtubers who says "Leave Me Alone." I like "The Way You Make Me Feel" when you leave comments and give me feedback....so thank you!
This video is going to break the process of drawing Michael Jackson down in to simple steps.... just like "ABC".... which is as easy as 1,2,3. After the easy steps, you are going to learn how to build tones so that you can shade your drawing. But dont stress, because it don't matter to me if your drawing is too "Black or White". If you mess up, just keep it "In the Closet" and hit the link in the video description so that I can really help you. The link will take you to a Michael Jackson drawing cheat sheet with step by step pictures. Its my way of saying "Ill be There", because I dont want your drawing to be "Bad".
Art "Heals the World".... and I "Wanna be Starting Somethin" on my youtube channel. So please click on the little old "Man in the Mirror" to subscribe! I "Want You Back", and not too many people can spell kazanjianm. So Come on.... youll get a free art education, and I "Dont Stop Til You Get Enough". You cant "Beat It".
Note: This drawing is of Michael from early to mid career when he was in his mid to late twenties. I used several reference images from the Thriller Era to make this drawing (although none are shown in this video).
Step 1: Draw the two oval shapes for the area around the eye. Notice that the shape on the right is slightly smaller than the one on the left.
Step 2: Make the shapes for the bottom of the nose and the top lip. Take some extra time to observe and perfect the spacing.
Step 3: Add the contour line to create the shape around Michael's face. Be sure to notice that Michael's head is turned towards his left. Also be sure to notice that the oval shape on the left side of his face, is touching the contour line.
Step 4: Add the shape for Michaels ear and hair. His ear is partially blocked by his hair, but notice that his ear goes from where his eyebrows will be, to almost the bottom of his nose.
Step 5: Add the four shapes that make up the neck and the shirt.
Step 6: Observe the eye region and add the eyes and eyebrows. Notice that the eyebrows are connected to the top of the oval shape from step 1. The eyes are almond shaped and are at the bottom of the oval shape. Be sure to notice the spacing in between the eyes and eyebrows.
Step 7: Add more curls to Michaels hair and details to his ear. Dont waste your time copying from the reference image for this step. Make your own or else you will drive yourself crazy!
The second part of the video will teach you how to shade your drawing of Michael Jackson. I will use a paintbrush to do my blending and shading as well as a set of drawing pencils. I use a HB pencil to start as well as a 4B pencil and a 9B graphite stick to draw the hair. The eyes and the hair are the darkest tones in the drawing and I always start off with the eyes. Regardless of a persons hair color the eyes are the darkest feature of the face. I use a method called cross hatching where lines are drawn one after another and next to each other. After I cross hatch, I blend with a paint brush and then do another layer of hatching on top of the previous layer. This method allows me to build deep, rich tones in my art work. Learn to draw, tutorial man draws perfect face "how to draw famous people step by step"

WE NEED A VISUAL ARTS CATEGORY ON YOUTUBE THREAD-http://www.google.com/support/forum/p/youtube/thread?tid=2a9806f929074cbd&hl=en&fid=2a9806f929074cbd0004b630ad37cc3e
Facebook- http://facebook.com/kazanjianm
Twitter- http://twitter.com/kazanjianm
Website- http://merrillk.com
(Merrill) Supplies I Use- http://www.jdoqocy.com/click-4....247664-805536?url=ht
This video will give you explicit instructions on how to draw the rapper Eminem, step by step. Just follow the instructions on the eight steps that I give you and shade along with me during the shading tutorial at the end of this video .....and I guarantee that you will surprise yourself with your drawing. Lets get started.
Cold Wind Blows, Talkin 2 Myself (ft. Kobe), On Fire , Won't Back Down (ft. Pink) W.T.P. (White Trash Party) Not Afraid Seduction No Love (ft. Lil Wayne) Space Bound Cinderella Man 25 to Life So Bad Almost Famous Love the Way You Lie (ft. Rihanna)You're Never Over Without Me Sing For The MomentLose Yourself Mocking Bird The Real Slim Shady The Way I Am Like Toy Soldiers Stan Superman Beautiful My Name Is White America Just Lose It Going Through Changes Insane Cleanin' Out My Closet When I'm Gone Hello Soldier Seduction Kill You Guilty Conscience Bagpipes from Baghdad Hailie's Song Square Dance Stay Wide Awake Role Model Criminal Marshal Mathers Say Goodbye Hollywood Must be the Ganja Who Knew Drug Ballad Till I Collapse Bad Meets Evil American Psycho 2 Armageddon Freestyle Dead Wrong Don't Approach Me Forget About Dre Everything is Shady Brain Damage Bumps Head Crack a Bottle Come on Everybody Curtains Up Come On In Don't Push Me Failed Destiny Go To School If I get Locked Up Tonight Make Some Noise I'm Having a Relapse Just the Two of Us Jimmy Crack Corn My Words are Weapons Nail in the Coffin Off the Wall One Last Time My Fault Never Enough No Apologies Public Service Announcement Rabbit Run Shady Narcotics So What You Say We all Die Someday We As Americans When the Music Stops You Don't Know marshall mathers matters
Step 1: Make a bowl shape. Notice that the left side of the bowl is more vertical than the right side of the bowl, which is more curved. Also, make the other two parallel lines that you see. One is slightly left of the middle of the bowl shape and the other is to the right of the bowl shape.
Step 2: Make Eminem's ear. Notice how it fits perfectly with the lines from step 1. If you need more explanation on how to draw an ear at this angle, click on the image to go to one of my ear tutorials, and then come back.
Step 3: Draw in the mouth shape. The two lips together look like a flattened heart shape. Notice that the bottom lip is slightly thicker than the top lip. Also notice that the top lip slightly resembles a lightning bolt.
Step 4: This is by far the trickiest step. Complete the outline of the face. The only way that you will get this is by observing this reference picture. Notice that the face goes up about three times the height of the original bowl shape. Use the ear and the mouth as reference points or comparison points to where the line goes. If there's vomit on your sweater already, i'm worried......but if you get this step, you will get the entire image, so push it.
Step 5: Make the small line above the mouth.
Step 6: Make the nose shape. It should stem from the line that you made from step five. Eminems head is turned and only one nostril is clearly visible. Notice that there is only a line on the left side of the nose and it leads up to the eyebrow shape on the left. The inner part of the eyebrow on the right lines up perfectly with the right edge of the nostril.
Step 7: Draw in the hair shape. Notice that it gets wider towards your right hand side at the top. Also, notice that the line for the top of the hair meets with Eminem's ear and then continues to his neck.
Step 8: Add the eyes. Notice that there is about one eye length between each eye. Overall, the eye shapes are almond shaped but have other lines around the almond shape on the top and on the bottom.

Facebook- http://facebook.com/kazanjianm
Twitter- http://twitter.com/kazanjianm
Website- http://merrillk.com
(Merrill) Supplies I Use- http://www.jdoqocy.com/click-4....247664-805536?url=ht
Music by Kevin MacLeod- http://incompetech.com Thank you Kevin!
The winner is orangemonkey92! Congratulations to Mr. Serafin Ureno!
About the Contest: (Narration from Video) "You've asked for it, so lets start the new year in a fun way by having an Art Contest! Here is your challenge question: "What did my channel mascot, Little Old Man look like when he was a young man?" To answer this challenge, you can use any media that you want - be creative and have some fun.....etc..... Remember you have over 140 videos to help you with this task on my channel. When I judge the artwork, I will be looking for humor and creativity but your artwork will have to resemble a younger version of Little Old Man. But Merrill, whats the prize? I will make a pencil portrait and a step by step video of the winner so that the world can draw YOU! I will also feature the winning artwork and the winners youtube channel in an upcoming video. Now for the rules so listen carefully. You will need to follow all three of these rules to win. 1.) Post the words "Im in" in the comments section of this video. 2.) You have to be a subscriber to kazanjianm to be entered, so hit the subscribe button in the video if you haven't subscribed yet. 3.) You can post your entries in one of two places. Your first option is to take a video of your entry and post it as a video response to this video. Your second option is to post your entry to my facebook like page- If you do that, make sure to submit your entry with your channel name. Just hit the link in the video description or visit my channel page to get to my facebook like page. The deadline for entries is January 15, 2011! I cant wait to see the artwork and I will respond to every single entry. Happy new year everybody!"
Link- http://merrillk.com/index.php?part=fineart&articles_id=4676&collection=114
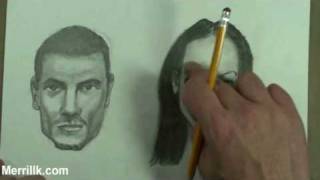
This video will illustrate the differences between male and female faces. In part 1 of this video, I will compare male and female facial features, bone structure and musculature. In the in the second part of this video, I will do a demonstration. During this demonstration, I will review what we learned in the first part and teach you how to draw the nuances of the male and female face for artistic (art) purposes. During my demonstration, I use a pencil an eraser and a blending stick (stub) also known as a tortillion.
Lets look at the differences of the male and female skull first and then we will work our way up to the skin. Male and female children have similar skull shapes. But once children hit puberty, the differences start to appear. Testosterone provokes the growth of certain facial features in males, while female faces remain relatively childlike. The presence of higher levels of testosterone give men a thicker bone structure with more prominent bones. Male faces have a wider, more prominent jaw, chin and cheekbones (also known as the zygomatic arch). The physical size of the male skull is usually larger than the female skull. A very distinct characteristic of a male skull, is a protruding supraorbital ridge also known as a brow line.
Female faces are more rounded and tend to have a narrow jaw line. They have a softness that the male face lacks. It carries more fat than the male face, especially in the cheeks. Female faces tend to have thicker lips and a higher arch on the top lip. Female eyebrows generally sit a little higher than male eyebrows and they usually have a thinner and more arched shape, mainly due to plucking. The female nose tends to be smaller, shorter and have a narrower bridge and nostrils than the male one. Also, female noses often have a straighter or more concave profile. Men tend to have thicker and lower eyebrows than women. The male jaw line is wider than the female chin. It is also more muscular and square in shape. The lips are thicker and more full on a female. Also there is less of a distance between the arch of the top lip and the bottom of the nose.
Before we go on to part 2. I want to make this complex subject as simple as possible so I took notes for you! If you are watching this on youtube hit the link. If not, just go to my website Merrillk.com and type skull in the search box and download this cheat sheet for when you draw.
Merrill Kazanjian is a contemporary artist based in New York City. He is also a New York State Certified Art instructor with 8 years of experience. He specializes in drawing, painting and mixed media art.

WE NEED A VISUAL ARTS CATEGORY ON YOUTUBE THREAD-http://www.google.com/support/forum/p/youtube/thread?tid=2a9806f929074cbd&hl=en&fid=2a9806f929074cbd0004b630ad37cc3e
Facebook- http://facebook.com/kazanjianm
Twitter- http://twitter.com/kazanjianm
Website- http://merrillk.com
(Merrill) Supplies I Use- http://www.jdoqocy.com/click-4....247664-805536?url=ht
Every artist goes through growing pains while learning their craft. I recently got an interesting comment from a subscriber who wrote, " Merrill could you please make another video for practicing the shading. I made my drawings good than i screw them up with shading! please help!
Fut Duppe was famous for ruining his portraits, by shading too much. His name has entered the colloquial and artists often express their displeasure while critiquing a work by saying phrases such as, "Wow! Your drawing is Fut Duppe" meaning that it is flawed in the quality of the shading. Here is an example of a Fut Duppe Drawing. Girls dont have moustaches........Thats Fut Duppe.
Step 5: Take out a ballpoint pen in a color that is not similar to the pencil shading of the Fut Dup Drawing. Go over every correct line. Do not touch the Fut Duppe parts. It is imperative that you do not move the paper while doing this to prevent a second Fut Duppe Drawing. Essentially what we are making is a print.
If you follow my steps correctly the graphite on the back will make a print on the paper below, thanks to the pressure from the ball point pen.
Step 6: After you finish retracing the lines that you want with the ballpoint pen, remove the Fut Duppe Drawing from the paper below. You are now be able to restart your shading and there should be no fear of screwing up again because this process can be repeated as many times as you want.
So there you have it. Now the young artists of the world know that can take chances with their shading without worrying that they are going to BLEEP it up. Happy drawing everybody!
Song- Brandenburg No4-1 BWV1049 by Kevin MacLeod of Incompetech.com
