Образование
Подкатегория
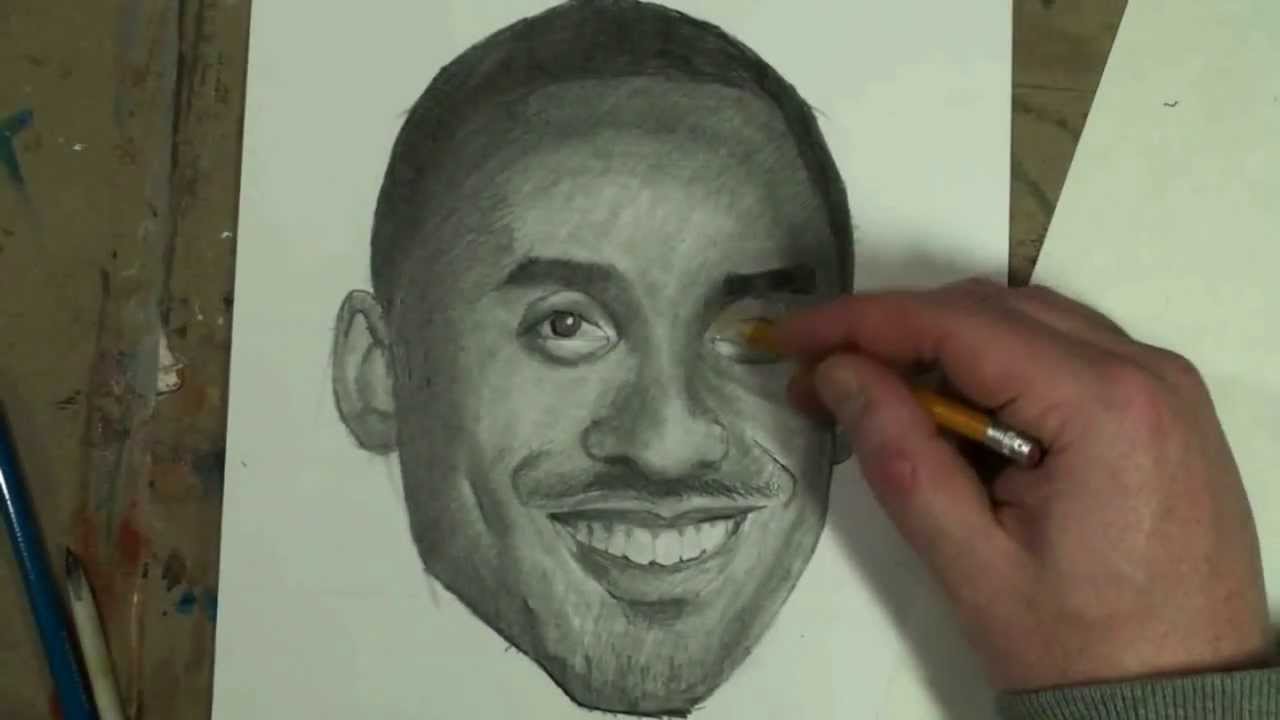
This is a slower version of the shading that I did in, "How to Draw Kobe Bryant Step by Step (YOUDRAW) Special thanks to Rico Shen for use of his photograph via Creative Commons.

I was reflecting upon a recurring question from the hangout (How can an artist transition from drawing from reference images to drawing from memory?) This video should help.
Subscribe to kazanjianm (Don't miss any new videos that I make)- http://www.youtube.com/subscri....ption_center?add_use
Facebook: Like me on Facebook to find out about live hangouts or to post your work!- http://facebook.com/kazanjian
Twitter: I tweet! Do you? http://twitter.com/kazanjianm
My Website: http://merrillk.com
YouTube Visual Arts Category Petition: http://www.change.org/petition....s/create-a-visual-ar
Step by Step Drawing Playlist: http://www.youtube.com/playlis....t?list=PLD6E34C7CD58
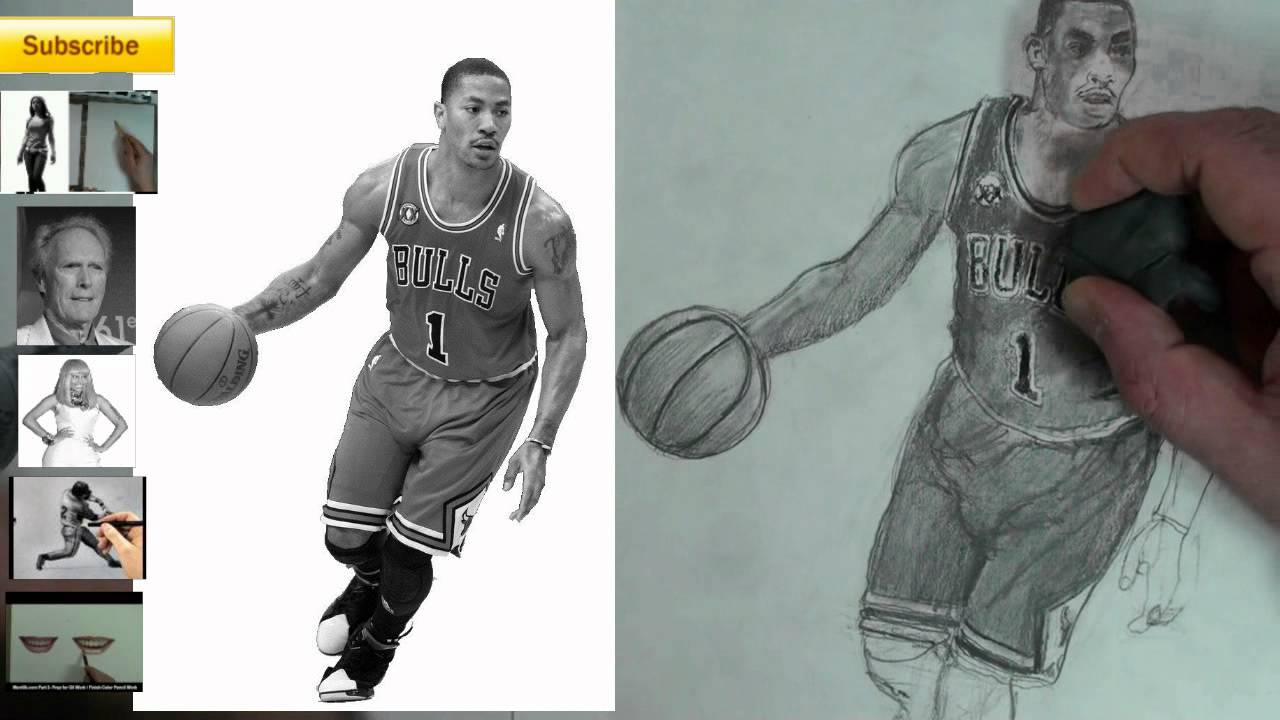
Learn to draw Chicago Bulls star Derrick Rose with pencil. Instruction by Merrill Kazanjian (kazanjianm)
Link- http://merrillk.com/?part=fineart&articles_id=14077&act=artist1&artist=69&collection=464
(Merrill) Supplies I Use- http://www.jdoqocy.com/click-4....247664-805536?url=ht
WE NEED A VISUAL ARTS CATEGORY ON YOUTUBE THREAD-http://www.google.com/support/forum/p/youtube/thread?tid=2a9806f929074cbd&hl=en&fid=2a9806f929074cbd0004b630ad37cc3e
Facebook- http://facebook.com/kazanjianm
Twitter- http://twitter.com/kazanjianm
Website- http://merrillk.com
Hello everybody it's Merrill. Welcome to the
fourth installment of you draw. Last time
Last time, we drew pink haired Nicki Minaj. This time we are going to be drawing the NBA's Most Valuble Player Derrick Rose. He has been one of my top requests. You might be asking, what is YOUDRAW?
You draw is an interactive figure
drawing series that you get a chance
to draw along with me.This series is made for graduates of my step-by-step videos. I am probably known best on YouTube for that series.
Many of my viewers have gotten too good for that approach. And
They need a new challenge. So this is the next step. If you wish, you can hit the link in the video description and you could print out the reference image.
You don't have to do that though. The image is on the screen.
let's get started. One order of business before I start talking about mister Derrick Rose. A lot of people that make the extra
effort to post video responses to my videos and i greatly appreciate that.
I really enjoy seeing your work.
It helps me see that I am helping people.
The column on the left of the screen are some of my favorite video responses. I encourage you to post yours. I will put your responses in a playlist that others can see and you will get hits.
Please keep posting those video responses.
I am starting out my drawing by scribbling in the shape.
Scribble lightly and dont worry about making mistakes.
Keep your lines light enough to erase with the pencil. Look for the overall shape. Don't worry about the outlines yet. Focus on drawing in the overall shape of Derrick Rose. You will definitely make changes to this as we progress with the drawing.
In a moment, pause the video and look!
Quickly scribble in what you see and then pause the video. Pause the video right now. There will be four of these breaks in this video.
There is no substitute for the real thing. Life Drawing. This is the internet version of life drawing. We will do our best. It will teach you what to look for when you draw from life in the future. This video series is the only interactive life drawing series on the internet.
I am teaching you from across the country or across the world.
2:04 Pause the video for a few minutes during each break and scribble out the "gesture". Dont look at my work, look at the reference image.
2:04 Try not to notice anything but his silhouette for now. Look for shapes in the negative space (under his arms).
2:22 Now you can "sculpt out" your contour lines.
2:32 Notice the DIFFERENCES! I was WAY OFF with my first guess (Most people are)! We correct our drawing with the contour lines.
4:37 By now, you should have completed the contour of the body. Its a video. Take your time. Go at your own pace.
6:25 Notice that most photo realistic portraits are LARGE in scale. The face will be a struggle.
6:42 Tip: I am using a mechanical pencil because the graphite is thinner. I will teach you how to shade with a pencil.
6:43 TIP: Squint your eyes and exaggurate the shadows on the face
7:53 Ink is absorbed in to the surface of a paper. Graphite slides on the top. The effect will be different.
I used the colored pencil because there is no tonal variation in the lettering of the jersey.
9:39 By now, if you haven't done so already, start your shading.
11:41 To finish a drawing, we must consider the qualities of edges

This video is made for any person who wants to learn oil painting. This video will give you a solid base of knowledge. http://merrillk.com
Today, I am going to show you how to paint a puppy dog. I made this video for beginner to intermediate level artists, who wish to learn about traditional painting...I will try to show you how to paint. step by step. While I can imagine that painting a realistic looking puppy is intimidating for someone new to art, I will try to make my instruction as clear as possible, so that you can get in to great habits for the future. Once you are in good habits, you will progress very quickly.
I split this lesson in to four parts.
1.) Part one will cover what you need to know before you paint.
2.) Part two will give you an effective strategy for painting realistically The mentality of rendering (aka drawing what you see)
3.) Part three will walk you through the process of painting and I will give you tips while I paint. The process of "sculpting" a painting
4.) Part four will actually be a separate video and it will discuss glazing...a great finishing strategy. Glazing: Finishing a painting (Covered in another video)
Part 1.) I have two points to go over in Part 1-
1-1- First, pick a surface to work on. When I was learning painting, I would use cardboard in place of canvas to save money. Ten years later my original oil paintings are still in good shape. However, this would not be the case if I didn't prime the cardboard with layers of Gesso. Without getting over technical, gesso gives your surface a protective layer that will prevent the oil from being over absorbed. Try to remember this silly saying, "Paint with cream, not with butter or milk!" No, im not saying that you should break out the dairy prodicts.....I am referring to the consistency of the paint. Cream is not a solid like butter .....and is not watery like milk. When you apply paint to a surface it should be creamy in texture. You can make the paint creamy by adding about three to four drops of painting medium to the paint that is sitting on your palette. The object in my hand right now is called a palette knife. I used it to mix the paint with the painting medium. For a long time, I considered this step trivial, but it makes a difference!
1-2 Oil Painters use mineral spirits to clean off their brushes and to thin out a paint mixture. Mineral Spirits is also known commercially as paint thinner and sold as an art supply called turpenoid for quadruple the price. You will only need a SMALL amount of Mineral Spirits because its very powerful. Use it sparingly when you wish to thin out your paint; because too much will make the paint runny and "milk-like" in consistency. Here is a great tip to remember when cleaning your brushes.....WIPE-DIP-WIPE. As silly as that sounds, commit it to memory....In other words..... wipe your brush with a paper towel.....Then dip it in to the mineral spirits and swish it around....followed by another wipe with the paper towel to take the extra spirits off your brush. The last wipe is especially important to prevent the excess mineral spirits from thinning out your paint too much
Part 2
Now you will learn a great strategy to help you paint what you see. I call this strategy, "jigsaw puzzle observation" because it is similar to putting a jigsaw puzzle together. Jigsaw puzzles are fun because you fit shapes together to create an image.........I want you to think the same way when you paint. Try to see and identify shapes and then put them together like a puzzle. Painters sculpt and manipulate the paint on the surface of a painting until the shapes fit together as a recognizable image. Here....let me show you what I mean.....When you try this, I recommend that you get in the habit of looking at your reference image at least once for every five seconds; and then paint what you observed. After you get the bigger shapes in.....work your way down to the smaller shapes........ If you feel that you cant work the paint any more. Let it dry and repeat this step on top of the dried paint. You have an advantage by using paint because it is opaque and it can cover over any mistake...... Take your time with this step. Skyscrapers cant be erected without solid supports and good paintings cannot be made without careful placement.
How to begin oil painting vido
Supply List
- Titanium White (paint)
- Raw Sienna (paint)
- Ultramarine Blue (paint)
- Ultramarine Purple (paint)
- Lamp Black (paint)
- Painting Medium (my favorite is called Liquin)
- Palette, Wax Paper or Aluminum foil (to mix the paint on)
- Mineral Spirits
- Canvas or Cardboard
- Gesso (white or clear)
- Paint Brushes (several sizes, tips, and softnesses......based on your preference)
- Cups for Mineral Spirits and Paint Medium

I am going to be using illustration markers, color pencils and oil paint. Just drop me a line if you have any questions
In step 1 I scanned and reprinted my original drawing- I do this for 2 reasons- 1.) If I mess up, I could just reprint it and 2.) marker and color pencil coexist better with printer ink than with graphite from a pencil.
Next I add a layer of the illustration markers. These markers are totally transparent and they enable me to add a layer of color and still be able to see the lines from my pencil drawing. These markers give the artist a similar effect to watercolor paint, but without the messy setup and clean up.. I am still following the Polaroid picture development analogy from the first video- in that I am adding color to all areas at an even pace and slowly building up the darker tones on the sides and bottom of the glass.
The color pencil is great at this point of the drawing, because it adds a translucent layer of color above the marker. In addition to that, color pencils are mixed with wax. The wax will be very handy in the next step when I add oil paint on top of the marker and color pencil. Working with color pencil also allows me to be very precise with my marks on the page. It can be very challenging to be as accurate with a paint brush. This step allows me to make my drawing more accurate and these clarifications will eventually be absorbed by the oil paint.
Now you are going to see me add three layers of oil paint to finish my drawing. I am using oil paint because I want to edit the colors of this composition and it is much easier to mix and match color with oil paint than it is with color pencil. It is also easier to apply large areas of color with a paintbrush rather than the tiny tip of a pencil. I did all of my editing in the last step and now I am just applying color, trying to notice the nuances of the edges of each shape on my reference. If I need to soften an edge I use a dry, soft brush and I pull the paint with that. The color pencil from the layer below is blending nicely with the paint.

Team.........You played a good game today and you should be proud. But, next week, we play the Fashion Institute of Technology. In order to beat them, we need to think like them. We usually work out like trained testosterone induced Hamsters. But this week, were going to prepare by learning to draw. Youre not going to have a problem with that are you? ............................No Coach............................Good.
When I got a full scholarship to play football at Notre Dame, I needed to study something......so I studied art. This video is going to teach you how to draw a football player step by step. All you need to do is follow the instructions. Even Field Goal Kickers like Andreas over there will be able to successfully complete this.....PAUSE.....SHUT UP. If you get stuck, never surrender.....just hit the link in the video description to go to a printable step by step resource, which will make this process, even easier. One last thing, before we begin....click on the picture on Little Old Knute Rockney to subscribe to this channel so that you can see more fun and informative videos like this........Yes Coach.....Alright, hands in.....
Were not playing Germantown you tools, were playing FIT! Garl Dang it!
All music is by Kevin MacLeod of Incompetech.com. (Creative Commons License) The songs I used are Bumbly March, Evil March, Hamster March, Waunobe March, Cartoon Battle and The Machine Thinks. I also used a creative commons liscenced clip from this video- http://blip.tv/file/get/Theoh-hamster979.wmv how to draw a football how to draw football players sports artist step by step drawing for beginners step by step drawing lesson draw for kids sports pictures how to draw for free characters to draw

WE NEED A VISUAL ARTS CATEGORY ON YOUTUBE Petition- http://www.change.org/petition....s/create-a-visual-ar
Facebook- http://facebook.com/kazanjianm
Twitter- http://twitter.com/kazanjianm
Website- http://merrillk.com
(Merrill) Supplies I Use- http://www.jdoqocy.com/click-4....247664-805536?url=ht
Hey Youtube arts community. Its Merrill from kazanjianm. Since Youtube does not have a specific channel type for visual arts, I decided to list the top 25 visual art channels on youtube. I spent the last few days putting in every visual arts related search term and my ranking system is based on the number of subscribers that a channel has. So here is the list. We are going to count down from 25. Click on the channel name to visit the channel.
At number 25 is the youtube channel for Banksy, possibly the most famous visual artist in the world. 18619At number 24 is AirbrushTricks a channel that you could learn airbrush tricks. 20,024At number 23 is Bashirsultani . This dude is a salt artist.And I thought pencil drawing raised your blood pressure! 20,807The number 22 channel is Igor Kazarin's PortraitDrawing. Igor does not instruct but his dry brush portraits are unbelievable. 23,894The number 21 channel is me! Kazanjianm. Im a visual artist and a teacher and I have taught thousands of people how to draw with my step by step videos. Note to the top 20, im coming to get you sucka! 24,701
The number 20 channel is Matthew39Arch. This guy is a professor at a major art school and does some great instruction on his channel.The number 19 channel is PhilintheCircle. This guy makes art with everything. He has ridiculous talent and he makes very engaging videos. He is best known for his Goodbye art series.The number 18 channel is Sycra. He has been posting videos since youtube was a baby channel and he probably doesn't know that he made the prototype for art instruction on Youtube. Before I started posting videos, I used Sycra's channel as a supplement in my own classroom. And after I saw the effect of my students drawing from his videos, I decided to post my own instructional videos. He is also an amazing caricature artist.
At number 17 is Cholowiz13. He has the title as youtubes most famous graffiti artist. This is especially impressive whe n you consider that Banksy comes in at #25. The number 16 art channel is Sophiechan90. She is a manga artist who is a virtuoso with Copic illustration markers.
The number15 channel is called notblu. This channel documents the work of the artist Blu who merges graffiti with stop motion animation. Almost all of the videos on this channel approach over one million views.
The number 14 channel is a channel that I found recently called SoCraftastic. Sarah Takacs instructs on a wide range of art and craft related topics and its always a guess, what is going to be covered next. It's a really fun channel.
The number 13 channel is Idrawgirls. Xia is a retired illustrator who is famous for his digital artwork. He is really generous as a teacher and covers a wide range of topics. The name of the channel is I draw girls but he draws dudes too. Its really great for people who want to learn digital art, portraiture and figure drawing.Coming in at number 12 is Chris Scalf's channel CGSBGS. This guy is a top notch illustrator who is responsible for several viral art videos.Coming in at number 11 is Youtube's fastest growing art channel, CartoonBlock. Evan Burse is a professional cartoonist who has worked on Scooby Doo and Batman. He brings his talents and professional connections to CartoonBlock. On his channel you learn how to draw, as well as gain insights to working in the cartoon industry. Evan is a natural teacher who makes his videos fun.The number 10 channel is spray paint virtuoso Brandon McConnell at spacepainter. He not only documents his amazing spray paint artwork, he can also teach you how to rip a phone book in half.
Val's Art Diary comes in at number 9. It is one of the oldest art channels on youtube and it has vlogs and time lapse artwork from Val. Shes got a really cool accent. Just like me.Macpulenta is the number 8 art channel on Youtube and is number one in the country of Argentina. NICO Di MATTIA is an artist who has captivated the world with his photo realistic digital paintings of celebrities and although he hasn't posted recently, remains one of youtubes top art stars.
"Dvorak Polka Kevin MacLeod (incompetech.com) Licensed under Creative Commons "Attribution 3.0" http://creativecommons.org/licenses/by/3.0/"

Click on the images to go to the other four parts of this series.
Welcome to the fifth and final installment of my series about drawing the human head from memory. This video will give you a dizzying amount of information on how to draw the head at 3/4 view. Lets start out by observing what happens when the head turns. Notice what little space the face takes up when the head is turned in profile view. Notice that the back of the head becomes more rounded as the face seems to shrink. Lets take a closer look at the face. The green shape connects the two outer corners of the eye and the outer corners of the mouth. Observe what happens to this trapezoid shape as the head turns from side to side. Notice that as the green shape gets smaller, the back of the head becomes more rounded. Now lets look at a silhouette of the face. Be sure to observe what happens to the silhouette of the face at 3/4 view- It is no longer an oval shape. There are indentations and protrusions
In the 3/4 view of the head, there is an indentation by the eye and a protrusion at the cheekbone and mouth. This is due to underlying bone and muscle structures.
Now, lets look at the individual features of the face starting with the eyes. Notice that the eye shifts in shape as the head turns. When the head is in profile... the shape of the eye looks like a Hershey's kiss turned to the side.....as the head turns, it morphs to an almond shape. Since I am teaching you how to draw the eye 3/4 view for this video, we will remember that the 3/4 view eye resembles Pac Mans mouth. Notice that the pupil and iris are more oval like and that there is no white on the inner corner of the eye.
Now lets observe the nose. Notice the relationship between the nose and the cheek. In the 3/4 view, the nose is partially covering the cheek and almost to the edge of the face. Notice how the nostrils shift as the head turns. When you draw a head in 3/4 view, you essentially draw 1 1/2 nostrils.
As for the mouth, take a few seconds to notice the changes. The top lip morphs from a flattened M shape from the front....to a lightning bolt shape in 3/4 view. The bottom lip has a squared section and triangles on each side.
The ears move from being close to the center of the head from profile view, to the edge of the head in front view. In 3/4 view, the ears seem to be at the verge of protruding through the back of the head....but they are not there yet.
Now its time for the demonstration. Since we studied a male head in the first part of the video, lets switch it up and draw a female head. Just follow the directions for each step and also on the shading tutorial.
Step 1: Draw the shape that you see. Notice that it is an egg shape with various protrusions and indentations. This is the most difficult step so take some extra time.
Step 2: Notice the rectangular shape. The four dots are the centers of each eye and the corners of each mouth. Place each dot in the appropriate place. Then, about 2/3 of the way down add a line for the bottom of the nose.
Step 3: Add the eyebrows and ears.
Step 4: Fill in the eye shape. Remember the Pac Man rule. Here is a close up.
Step 5: Complete the nose. Notice the solid line leading from the bottom of the nose to the brow. Also, remember the rule about 1 1/2 nostrils. Here is a close up.
Step 6: Complete the mouth. Overall the mouth looks like a flattened heart shape. For now, put in one solid shape and ignore the rules that you learned before. We will make the rectangular shape on the bottom lip and the lightning bolt shape on the top when we shade.
Shape 7 Add the hair. Be creative, you dont have to re create this hairstyle.
The pictures used were from Thirteen of Clubs Photostream on flickr. They are under a Creative Commons License (Attribution). I will credit him in the video description- http://www.flickr.com/photos/t....hirteenofclubs/sets/ All other imagery and audio were made by me (Merrill Kazanjian)

WE NEED A VISUAL ARTS CATEGORY ON YOUTUBE THREAD-http://www.google.com/support/forum/p/youtube/thread?tid=2a9806f929074cbd&hl=en&fid=2a9806f929074cbd0004b630ad37cc3e
Facebook- http://facebook.com/kazanjianm
Twitter- http://twitter.com/kazanjianm
Website- http://merrillk.com
(Merrill) Supplies I Use- http://www.jdoqocy.com/click-4....247664-805536?url=ht
Hey Hey..... Wanna see a really annoying tutorial? Hey ....Yeah me too.....This video is going to give you step by step instruction on how to draw The Annoying Orange. As soon as the helium wears off, lets begin.
Ah much better.... Step 1: Make a circular shape because oranges are circular.....even annoying ones.
Step 2: When you make the eyes, remember that there is one eye length between each eye. The top of the eye shape is rainbow like. The bottom of the eye shape is almost flat, and slightly curves up at each end. Notice that the top of the pupil and iris is hidden behind the upper lid. Unlike human proportions, oranges eyes are closer to the top of his head....I mean .......skin.....ahh whatever.
Step 3: Add the mouth. This is the toughest step but it will be easier if you put it in as a big half circle, then break it up in to six smaller shapes. Here are the smaller shapes from top to bottom- the upper lip, the upper teeth, the mouth, the tongue, the lower teeth and the bottom lip. Pause the video at the end of this step and observe before you go on to the coloring part.

Link- http://merrillk.com/?part=fineart&articles_id=13449&act=artist1&artist=69&collection=455
My new channel: http://youtube.com/metaldetectingnyc
Facebook- http://facebook.com/kazanjianm
Twitter- http://twitter.com/kazanjianm
Website- http://merrillk.com
(Merrill) Supplies I Use- http://www.jdoqocy.com/click-4....247664-805536?url=ht
This is my first step by step colored pencil tutorial. After you watch this video, you will have a solid understanding of how to draw a rose with colored pencil. I have simplified the instructions so that even a beginner could create a successful drawing. I will tell you about the colored pencils later in this video. But, for now, grab a regular pencil and some drawing paper. I have a quick recommendation before we begin. Hit the link in the video description and go to my website to download a printable page with our reference image. Lets begin.
Step 1: Draw a long rectangular shape for the stem.
Step 2: Take a moment to observe the proportions of the new shapes that I added. Notice that the leaf to the right overlaps the stem. The two shapes on top are positioned more to the left hand side.
Step 3: Now add the shapes for the bottom of the petals on the right hand side. Notice the U shape that is formed at the bottom of the rose. Notice that the upper shape on the right is slightly thicker than the upper shape on the left.
Step 4: Use your imagination a bit and notice the slightly skewed egg shape above the shapes from the first three steps. Once you notice how it fits, draw it on your paper.
Step 5: Add the four shapes which I just added around the egg shape.
Step 6: Use your observation skills and add even more shapes to the center of your rose. Do not stress if your drawing does not look exactly like mine. In portraiture, you need a likeness, but you don't need to be as exact when drawing a flower.
Step 7: The same rule applies with step seven. Use your observation skills, but don't stress extreme accuracy.

Yeah, I guess I missed #YouTube during my hiatus because I am making videos at a record pace and all I want to do is make more. This video will teach you about the medium of watercolor pencil. I made the drawing of the plum with a layer of watercolor pencils. This medium is SO COOL because artists can blend on the surface of the paper and then activate the blending properties of the color by using water and a paint brush. After the first layer dried, I did a second with #Prismacolor colored pencils.
watercolor pencils tutorial, watercolor pencils techniques, watercolor pencils portrait, watercolor pencils drawing, watercolor pencils landscape, watercolor pencils speed painting, watercolor pencils flowers watercolor pencils painting, watercolor pencils anime, watercolor pencils for beginners, watercolor pencils flowers, watercolor pencils faber castell, how to use watercolor pencils for beginners, how to draw with watercolor pencils for beginners, watercolor pencils realistic
Subscribe to kazanjianm (Don't miss any new videos that I make)- http://www.youtube.com/subscri....ption_center?add_use
Facebook: Like me on Facebook to find out about live hangouts or to post your work!- http://facebook.com/kazanjianm
Twitter: I tweet! Do you? http://twitter.com/kazanjianm
My Website: http://merrillk.com
Art Supplies I Use in my Art Work- http://merrillk.com/?sid=135&idpage=supplies_i_use
Petition: YouTube NEEDS a Visual Arts Category: http://www.change.org/petition....s/create-a-visual-ar
Step by Step Drawing Playlist: http://www.youtube.com/playlis....t?list=PLD6E34C7CD58

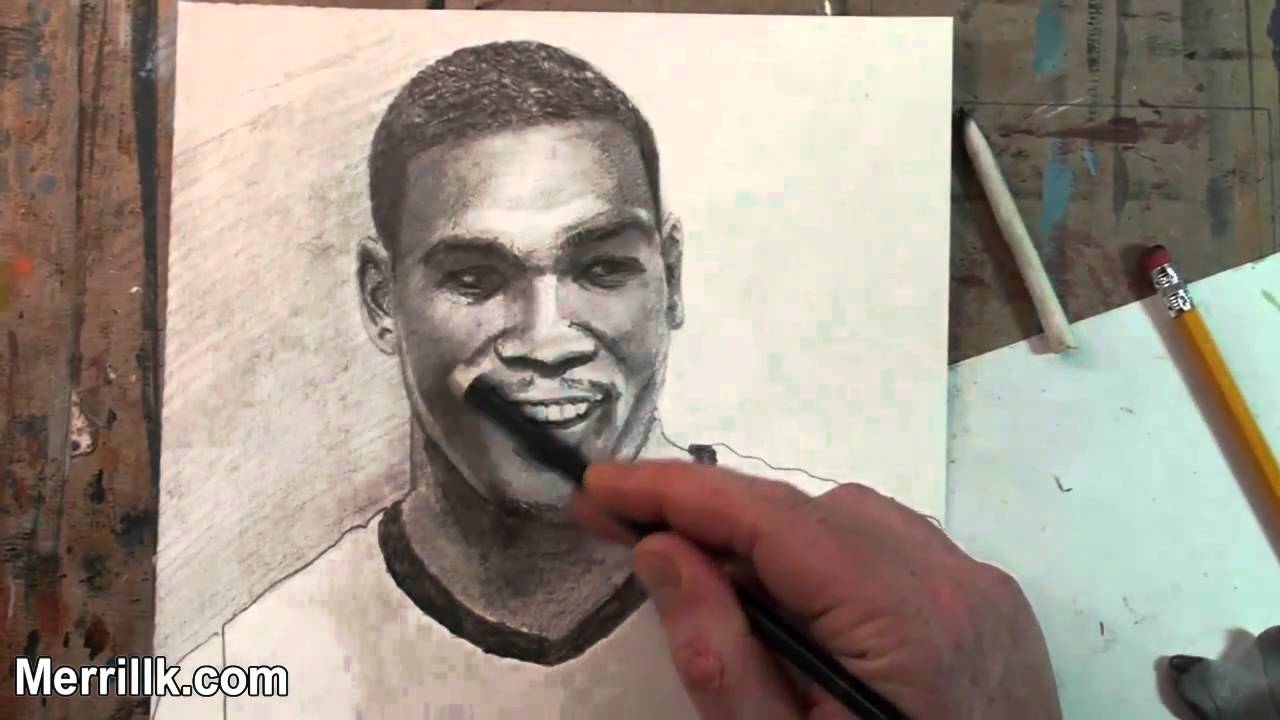
This video will teach you how to draw NBA superstar, Kevin Durant of the Oklahoma City Thunder (formerly Seattle Supersonics).
Narration: That was me before I became a serious artist ..... While my jumping skills have regressed, my video making skills have improved. You dont need to tilt your head to the left anymore. Now that you have seen my very mediocre Sportscenter highlight, I am going to teach you about highlighting and shading in a drawing video. This video will teach you how to draw the top player on team USA, Mr. Kevin Durant. All you have to do is follow the step by step instructions and pause the video at the end of each step while you draw. Im going to make it easy, so I hope that you give it a try. Lets get started.
Step one- Observe, then draw the two shapes that you see. The top shape is similar to a crescent moon. The bottom shape is trapezoidal and the base of the bottom shape is similar to a childs drawing of a bird in flight.
Step two- Add the four oval shapes for the eyes and ears. Be sure to notice that the left ear is much thinner because the head is turned.
Step three- The double shape that I just added is the edge of the bottom of the nose and a parallel line for a shadow. Be sure to notice the symmetrical smile lines on both sides of the nose as well. Here is a close up.
Step four is a tricky step. Start with completing the oval for the chin. Next, create the symmetrical lines for the moustache. Durant also has sparse facial hair below his bottom lip and at his chin.
Step five is the most difficult step. I added the mouth and I will give you a close up in a second. Notice the shape of the teeth and the shadow below the teeth. Take some extra time to observe the teeth are slightly taller than the shadow below. Also, notice that the top lip gets darker as it turns towards the teeth.
Step six- add the eyebrows to the top of the oval shapes from step one and the eyes towards the bottom. Also, observe and add the details to the ears.
Step seven. add the jersey.

What happens when the faces of art icons Bob Ross, Pablo Picasso and Chuck Close are morphed together. Watch the video to find out. Tradigital artwork by Merrill Kazanjian http://merrillk.com . I used Paint Shop Pro 8, Photoshop CS3, a printer, color pencils and oil paint to make this artwork.

FINALLY....a landscape painting
realistic oil painting oil paintings dogs figure oil painting oil paintings of seascapes oil paintings children oil painting collections oil painting how to oil painting oil painting websites oil painting for children hawaiian art paintings oil painting reproductions
artists oil paints oil & watercolor paintings portrait painting artist dog oil paintings latest oil paintings oil paintings for sale seascapes oil paintings art oil paints nature oil paintings
large oil paintings oil painting images oil paintings figures oil painting of animals paint oil paints oil paintings of animals fall oil paintings oil painting catalog oil paints for beginners nature oil painting portrait painting artists describe oil painting sketching oil painting seascape oil paintings discount oil painting oil painting pics oil painting gallery
paintings hawaii oil painting supplies beach paintings hawaiian art prints hawaii paintings hawaii fine art hawaiian paintings hawaii art galleries hawaii oil paintings tropical paintings tropical flower paintings hibiscus painting hawaiian art galleries hawaii painters hawaii artist portrait oil paintings hawaiian art watercolor landscape paintings oil painting portraits oil paintings portraits oil painting portraits how to maui art antique oil portrait painting fine art oil paintings fine art oil painting landscape oil paintings gallery
still life oil paintings oil paint portraits realism oil painting oil paintings of still life cafieri oil paintings oil paint portrait oil paintings of landscapes oil paintings by famous artists artwork oil paintings portrait paintings by famous artists oil pastel paintings impressionist oil paintings portrait paintings children painting contractors oil paints for artists classical oil paintings landscape paintings famous artists oil paint landscapes oil paintings by landscape oil paintings for sale classical oil painting how to oil paintings nude oil paintings oil painting societies american oil painting oil painting website realistic oil paintings oil paintings of children big island hawaii maui hawaii vacations oahu hawaii vacation packages hawaii cruise vacation honolulu hawaii map of maui hawaii things to do in maui hawaii best island in hawaii hawaii vacation maui island hawaii kona hawaii
cheap flights to honolulu hawaii beach luau
WE NEED A VISUAL ARTS CATEGORY ON YOUTUBE THREAD-http://www.google.com/support/forum/p/youtube/thread?tid=2a9806f929074cbd&hl=en&fid=2a9806f929074cbd0004b630ad37cc3e
Facebook- http://facebook.com/kazanjianm
Twitter- http://twitter.com/kazanjianm
Website- http://merrillk.com
(Merrill) Supplies I Use- http://www.jdoqocy.com/click-4....247664-805536?url=ht
This is Part 2 of How to draw Kevin Durant Step by Step
The darkest parts will be the eye region, and the shadow under the nose......followed by the hair. This is usually not the case (The hair almost always has the darkest tones in a drawing, but there was a strong light from above in my reference images. I smudged the brow with the tortillion because I didnt want it to be one solid shape. I will cross hatch over the smudge. The brow is darker (thicker) towards the center of each eyebrow. His hair is both curly and cropped. I started with dark squiggles (Is that a word?)....Then I will cross hatch over the "squiggles". Cross hatch light over the forehead.....then I pressed it down (smoothed it out) with a bristle brush. I found that stiff bristles work better than soft ones. The folds under the eye are important in order for you to capture his likeness.....Also, his eye region is in EXTREME shadow. Do not be scared to go DARK!!!!! I didnt "waste any time" with the shadow under the nose. I usually build things up slowly, but in this case, I just went for it, because it is a simple shape with hard edges....If it was a complex shadow (with several dark tones) I would have done it more slowly. .....NO LINES betwe
All Music is by Kevin Macleod of Incompetech.com. Thank you Kevin for letting me use your wonderful music!

WE NEED A VISUAL ARTS CATEGORY ON YOUTUBE THREAD-http://www.google.com/support/forum/p/youtube/thread?tid=2a9806f929074cbd&hl=en&fid=2a9806f929074cbd0004b630ad37cc3e
Facebook- http://facebook.com/kazanjianm
Twitter- http://twitter.com/kazanjianm
Website- http://merrillk.com
(Merrill) Supplies I Use- http://www.jdoqocy.com/click-4....247664-805536?url=ht
Today, you are going to learn how to draw a 250,000 dollar sports car that goes 0-60 faster than Fred Flintstone on Red Bull.......Wait a second....it has power windows....make that 260,000 dollars. All you have to do is follow my step my step instructions and watch the shading tutorial and youll be able to draw the Lamborghini Gallardo. Lets get started/
Step 1: Draw the three trapezoids that you see. Take extra time to observe their placement. Due to the rules of perspective the large trapezoid at the top is rounded at its top.
Step 2: Dont Freak out! Look closely, all I added was a half circle with other shapes inside. Notice that the half circle is slightly smaller than the large trapezoid shape from step 1.
Step 3: Now here is the hard one! First, notice that I closed the shape on the right side. Second, notice that I added a rectangular shape directly below the smaller trapezoids from step one. Take time to notice the placement of the shapes within the rectangle. Finally, notice the horseshoe shape in between and below the shapes added from steps 1 and 2.
Step 4: Add the front tires and the fancy thingey on the door. If you made it through step 3, step 4 will be a breeze.
Step 5: Complete the back end of the car from observation. Take some extra time to notice the details of the rims and wheels.

Want to draw the beautiful Jennifer Lawrence (Katniss Everdeen from the Hunger Games)? This video will show you step by step how to draw her with just a pencil and paper. I made this drawing tutorial in time for the upcoming Hunger Games Mockingjay Movie. I model he process of drawing by teaching you how to draw step by step.
Subscribe to kazanjianm (Don't miss any new videos that I make)- http://www.youtube.com/subscri....ption_center?add_use
Facebook: Like me on Facebook to find out about live hangouts or to post your work!- http://facebook.com/kazanjianm
Twitter: I tweet! Do you? http://twitter.com/kazanjianm
My Website: http://merrillk.com
Art Supplies I Use in my Art Work- http://merrillk.com/?sid=135&idpage=supplies_i_use
YouTube Visual Arts Category Petition: http://www.change.org/petition....s/create-a-visual-ar
Step by Step Drawing Playlist: http://www.youtube.com/playlis....t?list=PLD6E34C7CD58
Link- http://merrillk.com/?part=fineart&articles_id=6935&act=artist1&artist=69&collection=114
Illustration markers are incredible tools for artists! They add color quickly and accurately without a time consuming set up or a messy clean up. They can be used alone or in combination with other artistic media. This tutorial will teach you what you need to know about illustration markers. You will learn how to use them as I demonstrate by drawing a basketball player. Lets Get Started with thos tutorial!
Lets start by giving you some background knowledge.
1a.) Brands- The most popular brands are Prismacolor, Copic , Ad Chartpak and Pantone. I will do a drawing demonstration of Ad Chartpak in this video.
1.) Markers- When you use illustration markers, think of yourself as a watercolor artist. Watercolor artists create their work with beautiful transparent colors. If you choose to try illustration markers, you will definitely be able to apply and make multiple layers of transparent color. But there is a difference......the ability to mix. The colors are pre mixed and they do not blend together like wet paint as you can see in this demonstration.
2.) Special Markers- There are two different types of special illustration markers; Blender markers and gray markers for tones. The blender marker is a little deceptive. It is simply a marker without color in it. It is comprised of the fluid that the marker is mixed in. When it is applied on paper, the colors will bleed together. Notice how the line in between the two colors has disappeared. You will see more examples of how to use the blender in my demonstration. The gray markers are used to build tones. They come is Warm and Cool chromas. The warm gray markers lean towards the warm orange half of the color wheel and the cool ones lean towards the cool blue half. As you saw in the previous section, we cant mix marker colors on a palette like paint, so these gray markers become extremely important. These markers give an illustrator the ability to add tones......and tones make an artwork interesting by giving it depth. As you can see, these markers have a range of tones from one to ten. Ten is the darkest tone and one is the lightest.
3.) Paper- In order to use Illustration Markers to their full capacity, you will need Bleedproof paper. It is specifically made for markers, and it prevents markers from running. Notice the difference in the amount of bleeding of the printer paper on the left, compared to the Bleedproof paper on the right.
4.) As a final point before you see the demonstration, I wanted to make you aware of an article that I wrote that goes in to depth about the nuances of illustration markers. I will recommend color palettes, compare brands and describe techniques for illustrators. It is a good resource for people who wish to learn about illustration or for any person who is in the market for illustration markers. I will leave a link in the video description.

What happens when you merge the faces of Eliot Spitzer, Mark Sanford, Bill Clinton John Edwards? You get a celibate monk!!!!!
All photos are from Wikipedia.com (under a creative commons license). For example Bill Clinton-http://en.wikipedia.org/wiki/File:Bill_Clinton.jpg (Work of a govt Employee) John Edwards- http://en.wikipedia.org/wiki/F....ile:John_Edwards,_of (Work of a govt Employee) Mark Sanford- http://en.wikipedia.org/wiki/File:MarkSanford.jpg (govt employee) Eliot Spitzer- http://www.flickr.com/photos/d....avidsilver/232947805 (Was posted by David Silver under a Creative Commons license) http://www.flickr.com/photos/kapkap/1335721782/ (Posted by Paul S under a creative commons license).
Music was taken from Incompetech.com - a site recommended by youtube in the partner program tutorial.

Hint number 1 is to see things as shapes. I like to analogize drawing with assembling a jigsaw puzzle because in both you look for shapes to fit together Hint number 2 is to pay close attention to the edges of what you are drawing. Light and shadows can do funny things and in almost anything that you draw you will see a disparity between the qualities of each edge. Hint number three is to develop your drawing like a Polaroid photograph. Polaroid was the company that innovated instant photography. After pushing the shutter button the photograph would come out of the camera and develop before your eyes. What I want you to know about this is that every part of the photo would develop at the same rate and that is how I want you to try to draw next time. In other words, move the drawing tool around, dont get stuck in a favorite spot. Alright, lets slow it down. What you are seeing me do here is pay close attention to the form and the proportions. In other words, I am comparing the sizes of the different shapes and making sure that the placement of each line is correct. I am using vine charcoal a HB pencil and an eraser. I started out with the vine charcoal because it is easy to erase and move around. You will see later in this video that after I am satisfied with the placement of the charcoal, I will hatch over it with a pencil to keep it undisturbed. I am also trying to be aware of the edges of my shapes and I am especially cognizant of the highlight on the top because that will require me shading the areas around it and using the white of the page as a representation of the strong light. Now when I look back at my reference, I notice that the tone of the background is much darker than the white of the page. I use the side of the charcoal to darken the mid tone of my drawing. This step will make it easy to draw in the highlights with an eraser a little bit later. Now I am folding a piece of paper towel to smudge in the charcoal. You will get a very similar result with a blending stump (also known as a tortillion) but the towel will smudge the charcoal more quickly. To be perfectly honest, many teachers that I have had have told me not to use a blending stump, fingers or anything that comes in to contact with the surface of the paper. I partially agree. Oil from fingers when combined with pencil or charcoal leaves a stain that is tough to work around. Notice that my hand is resting on a sheet of paper. Artists call these slip sheets, but it is just a sheet of computer paper. I like working with the blending stump and the paper and this process works for my needs. It would be dishonest if I changed my process for the sake of making a video. Before, I mentioned the term hatching. Hatching is the short name for the drawing technique of cross hatching. It is simply putting a series of lines next to one another with a drawing tool. These lines usually follow the shape of the object that is being drawn. Once I am done adding pencil marks, I take the blending stub to burnish over my hatch marks. This gives my drawing a more smudged look and possibly my former art teachers a heart attack. I like to smudge the pencil and charcoal because it also gives me a surface that is smooth in tone. Hatching can be layered and I usually stop using the blending stump after the second layer. I once did ten layers of hatching in a pencil drawing. Lets recap and take this to the end of part 1. My focus, over the course of any drawing that I do from observation, is to see a simple pattern of shapes on my reference and to accurately render these shapes, on to the piece of paper that I am drawing. After I get the shapes aligned correctly, I attempt to build up tones with charcoal and pencil. When I am building the tones, I am very aware of the nuances of the edges of each shape, because they are usually different. My focus is also on building the tones of my drawing in a similar manner to how a Polaroid photograph develops.
In part 2, I will teach you a way to add color to any pencil drawing. Thanks for watching the video and please let me know if this helped.
