
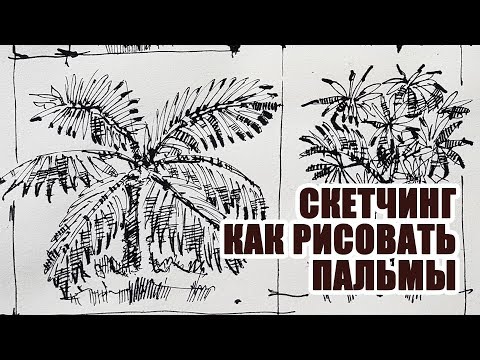

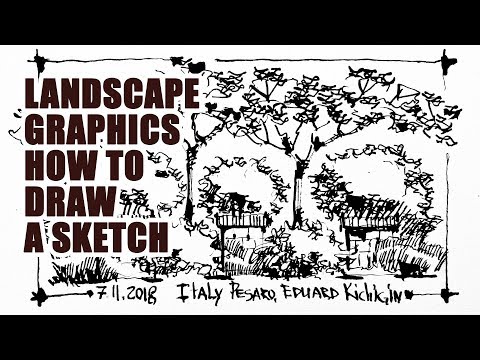


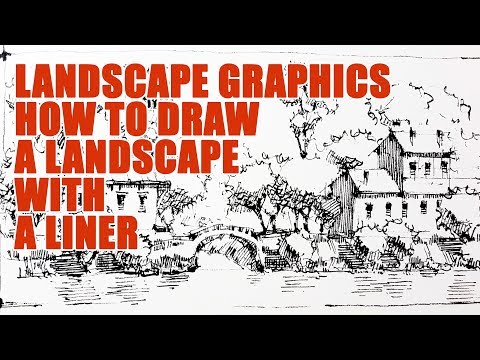


How to Draw Realistic Crashing Waves w/ Commentary

In this video, I will show you the steps needed to draw some realistic crashing waves in the surf using graphite pencils.
Follow me!
Facebook: http://www.facebook.com/tylersartshack
Twitter: https://twitter.com/#!/TylersArtShack
Google+: https://plus.google.com/115405....344518849808905/post
Song is called "Ditto Ditto" from Dokashiteru. He can be found on ccmixter.org
What's going on everybody, welcome back to the Art Shack! This time I have a drawing tutorial on how to draw realistic crashing waves in the ocean. The beach and ocean has always been a big part of my life so I had a great time sharing this experience with all of you.
I started this drawing by using a photo reference to get down the general wave shape and the basic shading of the sky. Once I had this basic detail down, I put the photo away and just took it from there. I always like to do some or most of the drawing from imagination or memory. It helps to add some uniqueness to it as well as my own style.
When I start a new landscape, I will usually sketch out the basic shapes of everything I want to see in a drawing and once that is done, I will usually go in for the sky.
This time I made a lighter sky which I eventually went back into and made darker. I kept it simple. I pretty much shaded the whole thing in and then erased out some clouds. I didn't want to make a detailed cloudy sky because I did not want the clouds to be a major element to this drawing. I decided to have them less detailed than what I would usually do.
When starting the wave, I had an idea of how it was going to look. I knew that there was a part of the wave that was crashing over and mapped that portion out. I also left that area untouched as I was shading in the rest of the wave.
I started the wave with a light pencil. I shaded it in with an HB pencil quite a few times then blending it out. I did this process over and over until I got the wave dark enough. I wanted the large wave to be considerably darker than the sky so that the white foam and mist of the wave would really show up. When adding in details for the wave, I made sure to follow the flow and direction of the wave. Doing this helps to define the movement and shape of the wave. Making lines in a different direction would have taken away from this effect. I went in as dark as a 4B pencil and used that to add in the final detailed line work.
For the mist and foam of the wave. I used the dirty blending stump and went back in with that. I rubbed the excess graphite from that onto the foam section of the wave. I then used an eraser and erased in a motion flowing backwards making the wind look like it was hitting the wave straight on. This helps to create the perfect wave for surfers. I used a few tools to erase out the waves. One was a large white eraser. I also used a mechanical eraser. The final piece that I used was an electric eraser to really get up the darker portions to make them highlights.
Once the main wave was done. the only portion left was the smaller wave that I added in. It took the same steps as the first wave except on a smaller scale.
I hope you all enjoyed this video. Leave drawing suggestions and feedback for future videos!
Laterz!!
