


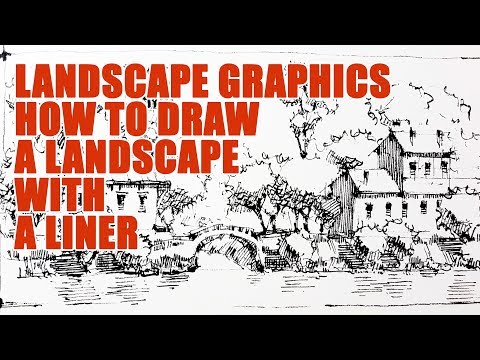

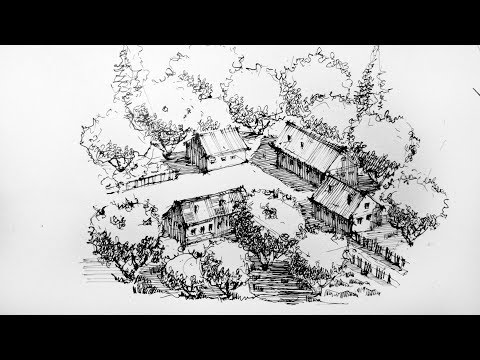


How to Draw Dr. Martin Luther King Jr. Step by Step Portrait
LINK- http://merrillk.com/?part=fineart&articles_id=11123&act=artist1&artist=69&collection=462
WE NEED A VISUAL ARTS CATEGORY ON YOUTUBE THREAD-http://www.google.com/support/forum/p/youtube/thread?tid=2a9806f929074cbd&hl=en&fid=2a9806f929074cbd0004b630ad37cc3e
Facebook- http://facebook.com/kazanjianm
Twitter- http://twitter.com/kazanjianm
Website- http://merrillk.com
(Merrill) Supplies I Use- http://www.jdoqocy.com/click-4....247664-805536?url=ht
We are faced with the fact my friends the tomorrow is today. Procrastination is still the thief of time. Over the bleached bones and jumbled residues of numerous civilizations are written the pathetic words, "too late". There's no gain without struggle but if you're willing to try to draw Dr. King, i'll make sure that you have a good chance of succeeding. But dont just watch this video, participate; because no work is insignificant all labor that uplifts humanity has dignity and importance and should be undertaken with painstaking excellence that excellence is not the end result for the finished work is the growth that is sustained through your effort. If you have a dream and the motivation to improve your drawing abilities, here's your blueprint to success- hit the link video description right now then reopen this video on my webpage. As you scroll down, you will see photo and text resources to accompany this video. The combination of the step-by-step instructions in this video and the text and print resources will give you a great chance to succeed. If you're up to the challenge, let's begin.
Step 1: In step one we are going to make shapes which will eventually become the eye. Both shapes look like a skinny pac man eating an almond. Be sure to notice that there is a slight difference between the two shapes. Use your observation skills because each shape is not symmetrical. Here is a close up.
Step 2: Draw in the pupil and iris. Notice that you can see the bottom of the circle for the pupil and iris but not the top.
Step 3: Draw in the nose shape and the extra shapes for the shadows around it. The height of this shape should be about one third the height of the pac man shapes from step one. The width should be exactly as wide as the pac man/eye shape on your left. Notice that the nose shape does not attach to the eye shape.
Step 4: Add the quadruple shape that you see. The top shape will be Dr. King's moustache which looks like a flattened M shape. The second shape from the top will be a highlight between the moustache and the top lip. The third shape resembles a lightning bolt and will be the top lip. The fourth shape is the bottom lip. Notice that it is bowl shaped and slightly thicker than the top lip.
Step 5: Add the shape of the forehead. This shape is about twice as tall as the pac man shape for the eye to the left.
Step 6: Dont freak out! Calm down! Add the shape for the outline of the head and hair. Focus on the edge of the head. The lines for the shadow on the face DO NOT have to be perfect but the outside has to be close. I repeat, focus your efforts on the outline of the head.
Step 7: Add the ear shape and the outline for the rest of the face.
Step 8: Add the shape for the clothing. It is going to be in heavy shadow so just go for the general shape and dont stress out if its not perfect.
Step 9: Complete the clothing. Again, it will be in heavy shadow so dont become a perfectionist for this step.
Step 10: Fix the ear and the hairline.
